A Step-by-Step Guide to Using iAd Workbench to Promote Your iOS Apps June 11, 2013, Raymond in Badmi
A Step-by-Step Guide to Using iAd Workbench to Promote Your iOS Apps
June 11, 2013, in Badminton, Development, Entrepreneurship 22 Comments
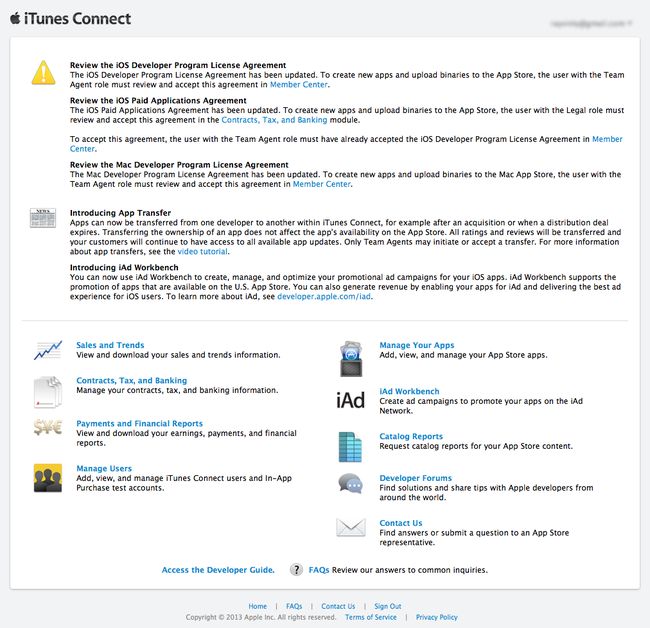
Apple’s WWDC 2013 keynote provides iOS and Mac developers a sneak preview of the next versions of iOS and OS X. While everyone is focused on the latest technologies for these operating systems, I believe the biggest feature of today is not announced in the keynote. The reason why so many of us develop apps for the iOS App Store is that we want to make money. The App Store ecosystem created many ‘overnight’ successes. Tim Cook mentioned Apple has paid developers 10 billion dollars, 5 billion in the last year alone. However, a lot of lesser know apps and developers are finding it hard to make meaningful money by participating late. There is potential good news with the introduction of iAd Workbench today. It was unannounced and I only discovered it by logging into iTunes Connect and noticed there is now a new item in the homepage.
Getting to the iAd Workbench
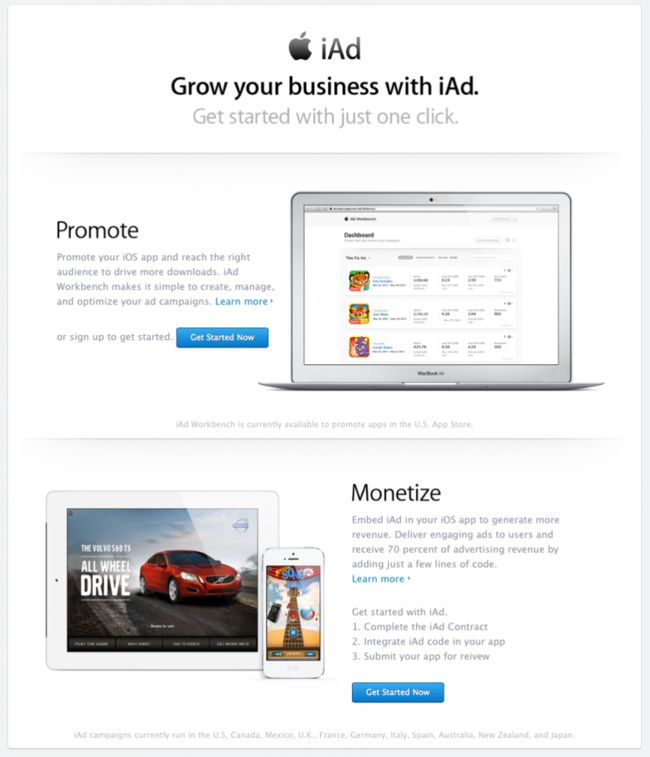
Clicking on the iAd Workbench link in iTunes Connect shows you the new dedicated iAd Workbench page.
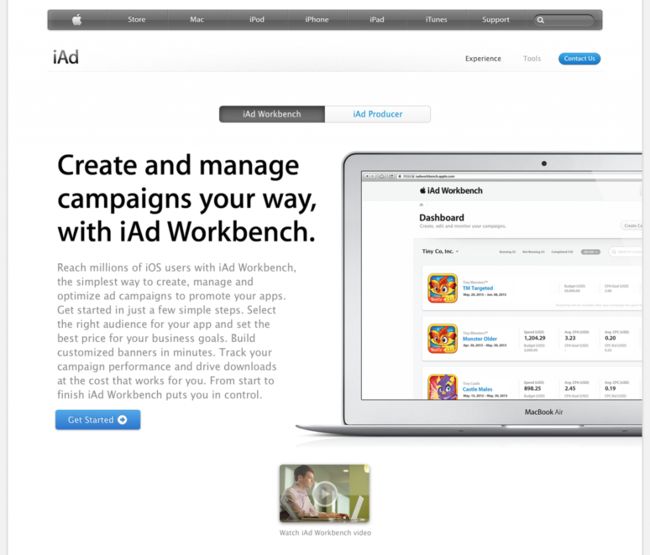
There are two new sections. Monetize is the old iAd – where as developers, we can support the iAd API to show ads in our apps to make money (we get 70% of iAd revenue). Promote is this shiny new thing I am going to talk about. Click the Get Started Now button brings you to another page about iAd Workbench with much more details. There is an intro video that you can watch to get an overview of how it works.
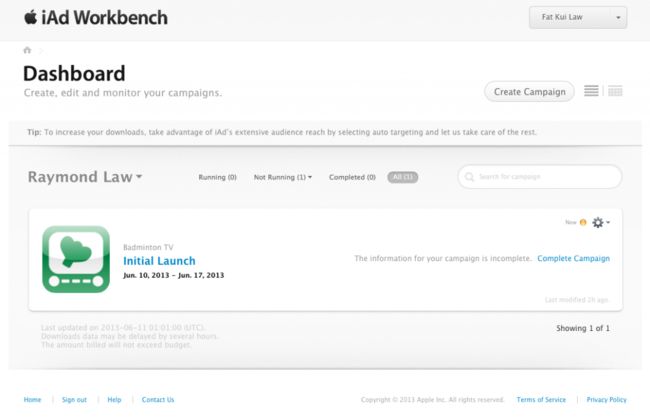
After watching the video and read the details, you can click the Get Started with iAd Workbench button to go to the iAd Workbench Dashboard.
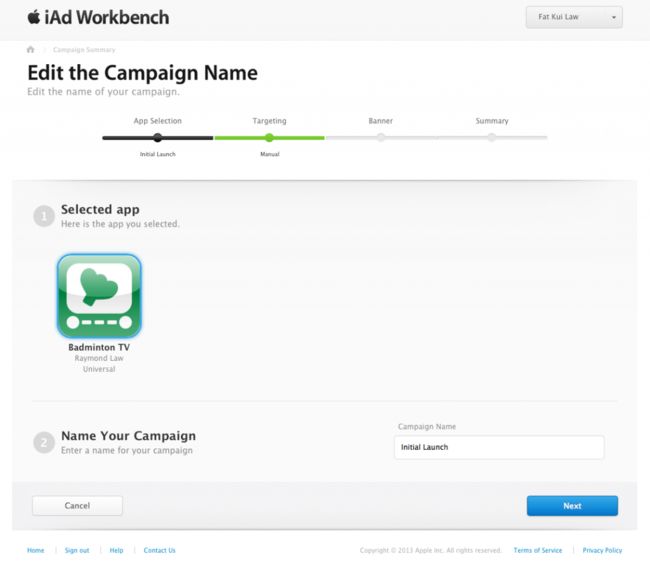
As you can see, I already created a campaign with my Badminton TV app. When you get started, you can click the Create Campaign button to start a new campaign. You do that by selecting the app you want to promote and give a name to your new campaign. I called it Initial Launch.
Note that you can add a Reference Number for your campaign in the Dashboard after you have created your first campaign.
Click Next and you can configure your audience targeting options.
Target your audience
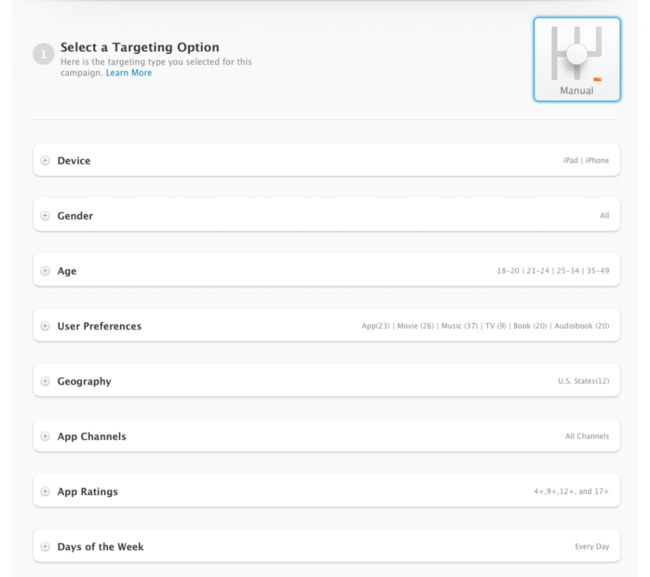
You can just select Automatic or Manual. I am not sure how well Automatic will work. I think most apps will benefit more by narrowing down the target audience and hence maximizing the effectiveness of your advertising budget. I choose Manual, and a lot more options are displayed now. You can select the Device your app runs on, the Gender of your users, the Age of your users, the User Preferences, the Geography of where your users are located, the App Channels, the App Ratings (there is only one option – do you want your iAds to be show in apps rated for 17+), and theDays of the Week your iAd is shown. A few of these options warrant some explanations.
- User Preferences – The interests that users of your app are likely to have (in several categories including apps, audiobooks, movies, and music).
- Geography – Your users’ home (not current) location. You can select locations by state or DMA (designated marketing area).
- App Channels – The type or types of apps in which you want your ad to appear.
After setting your target audience demographics, you need to select the Flight Dates of your campaign, which is the beginning and end dates of your campaign run. Next, and I think this is the most important aspect of campaign configurations, you need to enter a budget for your campaign. The Budget is the maximum amount you will pay for your campaign. Regardless of what you set in other parameters, you will pay no more than this amount. The Daily Spend Goal is somewhat related to the Budget. After you enter the Budget and tap over to Daily Spend Goal, it is pre-filled with a dollar amount calculated by dividing your Budget by the number of days in your Flight Dates. My Flight Dates are from 6/11/2013 to 6/18/2013 (8 days) and my Budget is $100.00. So my Daily Spend Goal is $12.50. You are certainly restricted to spend your advertising budget evenly and set a larger Daily Spend Goal.
Now we are ready to talk about the costs to promote your apps using iAd Workbench. You can choose between CPA(cost per acquisition) and CPC (cost per click). If you’ve run any Google ads, you are probably familiar with these terms, So I am not going to explain them. When you switch between these options, the ad unit cost text field also switches between CPA Goal and CPC Bid.
Playing with your budget
One of the reasons the old iAd was never considered a real marketing option is because the minimum budget Apple requires is in the millions. It has since lowered that budget limit several times, but it is still far out of reach for most app developers. Unless you are an established company with existing revenues in the millions or billions, it is never an option for indie developers. However, that has all changed today, completely.
I am an indie developer with a limited budget. So I am most interested in how much I pay to have maximum effectiveness for my iAds. iAd Workbench has a calculator that can help you estimate the number of Impressions,Taps, and Downloads you can expect to receive as well as an Estimated Audience Reach meter. I don’t know the basis on which Apple comes up with these numbers, but without anything else to help do this work, I experimented quite a bit.
My goal for Badminton TV is to get as many installs as possible. It is a free app at the moment and I intend to add in-app purchase later to recapture my investment into making the app. If it is a paid app and if I am looking to make (not lose) money, I will use CPA and set my CPA Goal to be no more than 70% of how much my app charges. Since Apple takes a 30% cut of app sale revenues, if I want to guarantee I can actually make money even if all my users install my app from tapping and downloading from this iAd, I need to make sure I don’t spend more than 70% of my app price.
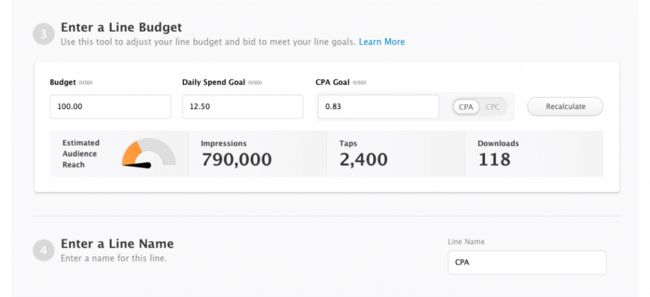
I don’t have much confidence in CPC and I have a small budget, so I will choose CPA in my campaign and see how it goes from there. You can plug different numbers in the calculate and hit Recalculate to see what it comes out. It is worth playing to find the sweet spot. To start, I just set my Budget to $100.00, it automatically set my Daily Spend Goal to $12.50. I then arbitrarily enter a CPA Goal ranging from $0.10 to $8.00. The number of Impressions, Taps, and Downloads vary accordingly. Interestingly, my sweet spot is at $0.83 and it gives me 790,000 Impressions, 2,400 Taps, and 118 Downloads. You should play around the numbers regardless if you choose CPA or CPC for your campaign.
If you choose Manual like I did, you need to enter a Line Name. A Line Name is a particular segment of your campaign. You can create multiple lines in your campaign and adjust your audience targeting options and Flight Dates, and Budget. You can then compare the performances of various lines within your campaigns and then adjust your advertising dollars to the line(s) that get your the highest ROI (return on investment). I may run a CPC campaign later to compare it against CPA, so I simply named this line CPA.
After you’ve set this most important aspect of running a campaign using iAd Workbench, you can move onto actually creating the iAd your audience will see.
Creating the iAd banner
Another reason the old iAd was underutilized is because it takes some skills to create an iAd. You can download the iAd Producer to create an interactive iAd that engages the audience. There is another much easier option now. EnterBanner Template.
First you can choose a different size banner ad for iPhone and iPod touch, or iPad, or Universal.
Apple now provides 5 banner template styles for you to choose from. Each style also has a few different coloring options. You need to provide a Title and Message, as well as a Call to Action for your iAd. For styles 1, 4, and 5, the Title appears first then the Message animates in to replace the Title. The Title and Message never appear at the same time. For style 2, the Title slides down first before the Message appears and they both remain. For style 4, the Title slides down and the Message slides up at the same time, and they both remain. I like that the most. I also like the look and feel of style 4 most out of all the available styles. I choose orange so that my green app icon stands out from the background.
What do you think? You can scroll through all of the styles and coloring options to test with your marketing message. Finally, give your banner a name so that you can reuse them in another line or campaign later. When you are happy with how your iAd look, click Next and choose the line you have created for your new banner.
Some kinks
I sometimes ran into a Creative save error . But if I went through the process again, it eventually was able to save. Apple obviously has some bugs to fix.
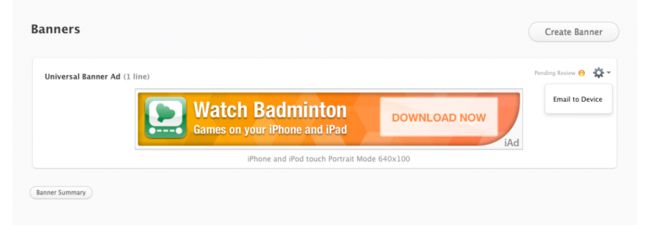
Note that after you’ve created a banner ad, you can go to the Campaign Summary and click on the gear icon under the Banners section, click on the Email to Device action to send an email to yourself. The email contains links to view your iAd on your iOS device using iAd Tester. There is also a private URL for you to install iAd Tester if you haven’t done it already. You can also copy and paste the link to Safari on your iOS Device to view your iAd. However, none of these options work for me at the moment. Apple really needs to fix that. The campaign building page already has a pretty good animating preview of your banner iAd, so it isn’t a deal breaker for me.
Paying for your iAd WorkBench promotion
You need to enter billing information. It doesn’t currently let you reuse your iTunes billing information if you have one set up. You can go to the Account Management page by clicking the Account link in the pull down in the top left corner. Under the Payment tab, you can enter your billing information. You only need to do this once for the first time. For iAds you run later, it will use the same billing info.
Submitting your iAd Workbench campaign
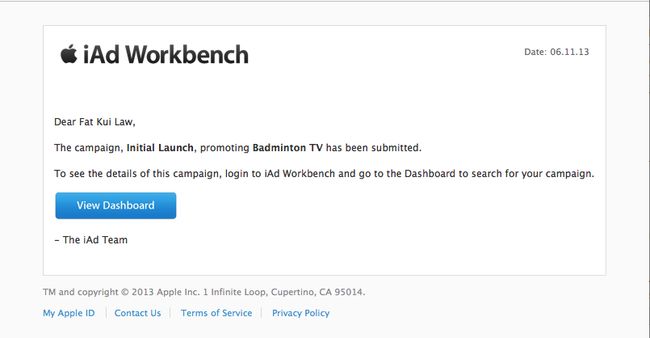
After you’ve entered your billing info, go back to the Campaign Summary from the Campaign Dashboard and click the Submit button. It will go back to your Dashboard with the message: Your campaign, Initial Launch, has been submitted.
You will receive an email telling you that your iAd Workbench campaign has been submitted.
The waiting game
According to Apple’s FAQ on iAd Workbench, the iAd Team needs to review and approve your campaign. It claims it usually doesn’t take longer than 3 business days. I set the start date of my campaign to tomorrow on 06/11/2013 and also will launch Badminton TV for the first time on the same date. So I am unsure if Apple will expedite my approval process (I can only hope), or it will delay starting my campaign until it’s approved, which will affect my Daily Spend Goal and Budget.
Apple has invested heavily into iAd and has revamped the iAd team leadership, so it is highly motivated to make iAd a success. I believe they’ve taken a huge step forward to achieve that by making iAd more accessible to all iOS apps.
Want to follow up on how I do with iAd Workbench?
I intend to write an update to follow up the approval process, the effectiveness of my iAd Workbench campaign with number of impressions, taps, and downloads. I also want to adjust my budget, and CPA cost to see if I can improve my campaign performance. If you want to follow along, you can subscribe to my blog by entering your name and email address in the form below.
Update: 2013-06-11
My iAd Workbench campaign was approved 33 minutes after I submitted. My app launches today and my iAd campaign is running. I will update in a follow up post on how well it does. If you happen to see my iAd, I will be very interested to see a screenshot. You can follow me on Twitter and let me know.
Update: 2013-06-21
My iAd banner started to work in iAd Tester the next day I finished setting up my campaign. It varies in size and looks different between iPhone and iPad, and portrait and landscape:
iPhone Landscape
You can click to see the full-size banner images.
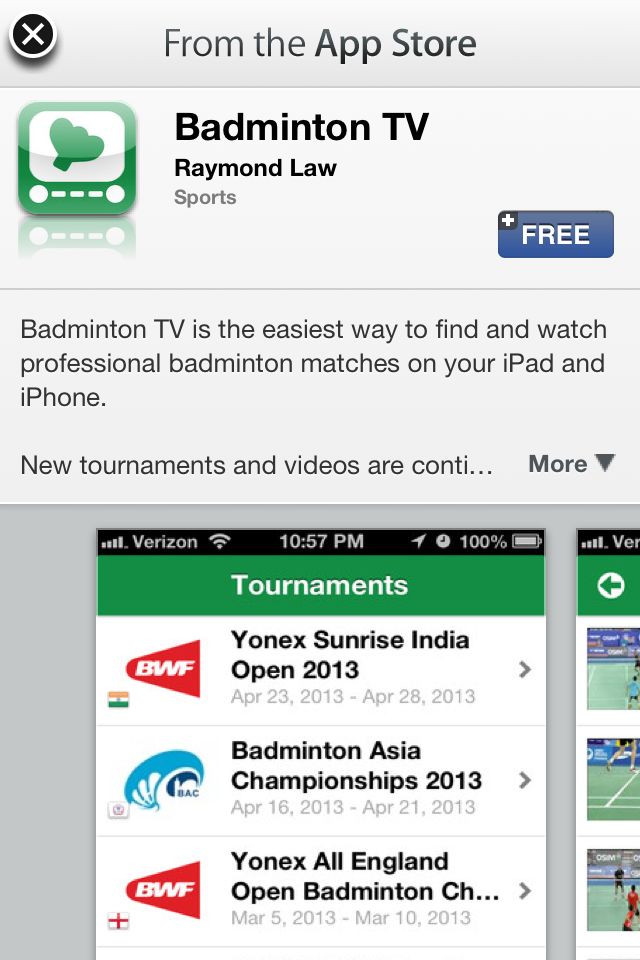
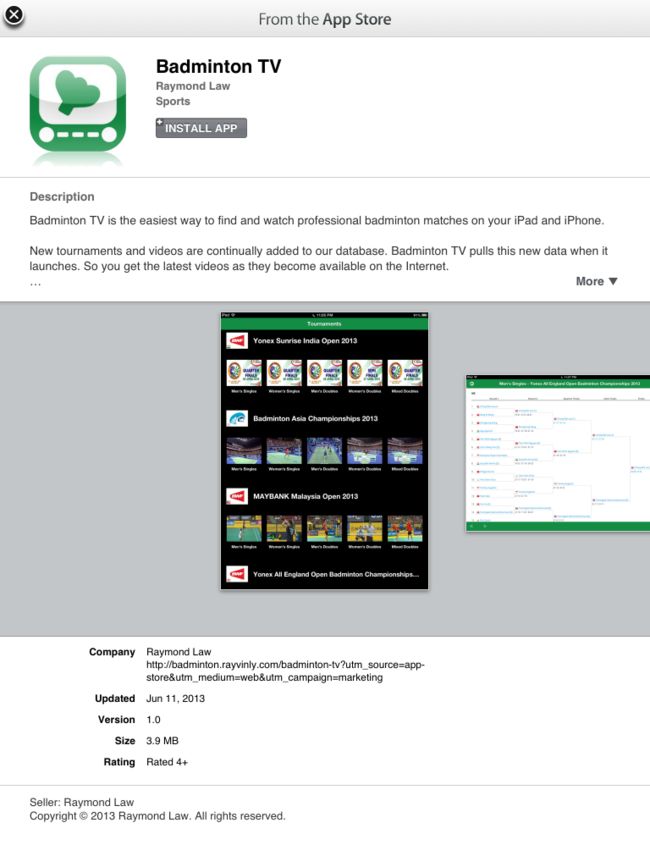
When I tap on my iAd banner, it shows my app similar to when it is presented in the App Store. The user has a chance to download it right there in the hosting app (iAd Tester in this case).
Update: 2013-06-21
My campaign has just finished. You can read about all my numbers and see how iAd Workbench performs in my follow up post.
