WINX64 配置Mysql5.7.12
WIN10 系统64位 安装 MySql5.7.12 x64 数据库 全过程
下载MYSQL5.7.12 压缩包
到目前为止官网MySql5.7.12 x64 只有压缩包 没有安装包。
下载地址:http://www.mysql.com/downloads/
下载好的压缩包地址:http://pan.baidu.com/s/1sl89BFB 下载
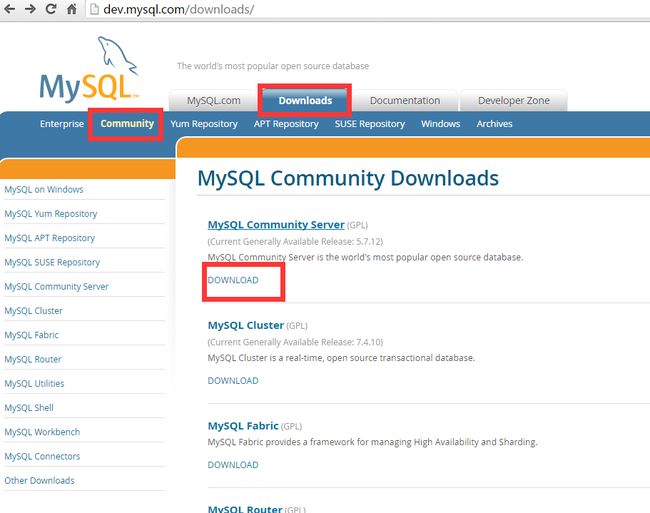
图一详细步骤:Downloads >>>Community>>>DOWNLOAD
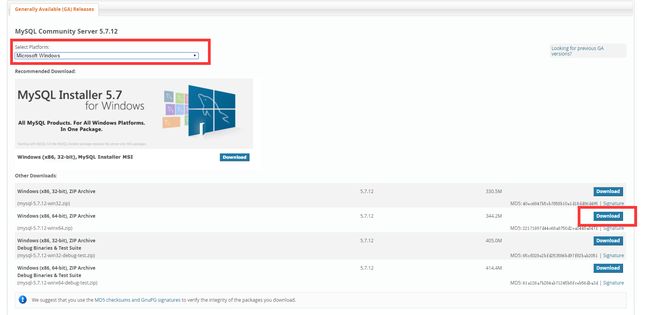
图二详细步骤:此选择系统类型>>>Download
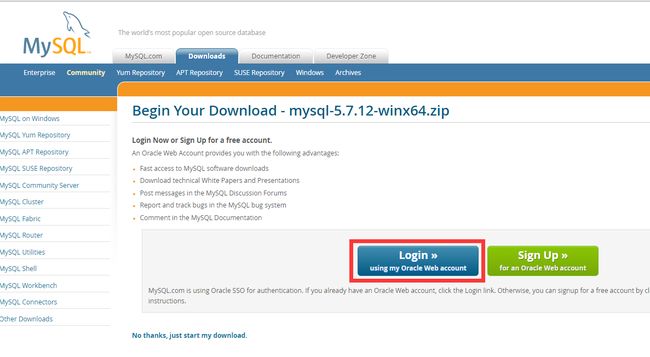
图三详细步骤:登陆已有的Oracle 账户 。如果没有选择后面注册。
也可以去我在百度云盘分享得下载好的压缩包地址:http://pan.baidu.com/s/1sl89BFB 下载
图四登陆页面
图五下载页面
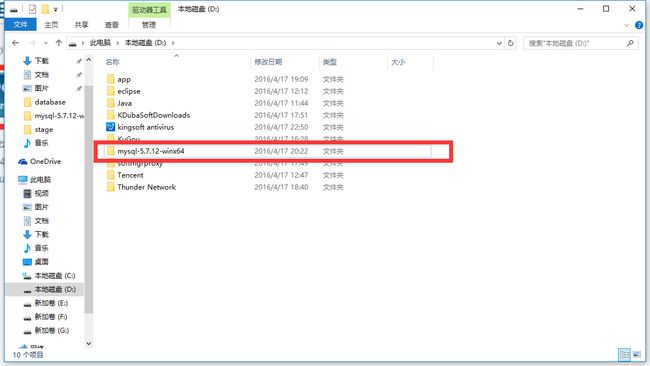
图六:解压MySql-5.7.12 路径 D:\mysql-5.7.12-winx64 (路径可自定,文件名可改。我这里就用解压后的名字)
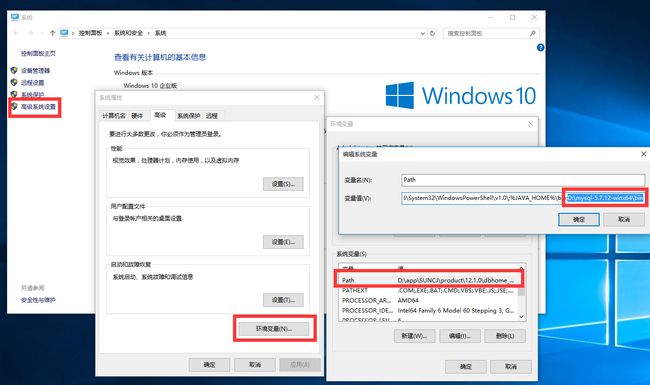
图七步骤详解:右击电脑打开属性>>>选择高级系统设置>>> 高级页中的【环境变量】>>>找到系统变量中的【Path】编辑>>>在后面添加 ;D:\mysql-5.7.12-winx64\bin >>>确定>>>确定。环境变量就配置好了
回到mysql-5.7.12-winx64目录,在下面 复制默认的配置文件改名为my.ini 并粘贴下面内容加入配置参数
----------------------------------my.ini配置文件 开始--------------------------------------------
# For advice on how to change settings please see
# http://dev.mysql.com/doc/refman/5.7/en/server-configuration-defaults.html
# *** DO NOT EDIT THIS FILE. It's a template which will be copied to the
# *** default location during install, and will be replaced if you
# *** upgrade to a newer version of MySQL.
[client]
default-character-set=utf8
[mysqld]
# Remove leading # and set to the amount of RAM for the most important data
# cache in MySQL. Start at 70% of total RAM for dedicated server, else 10%.
# innodb_buffer_pool_size = 128M
# Remove leading # to turn on a very important data integrity option: logging
# changes to the binary log between backups.
# log_bin
# These are commonly set, remove the # and set as required.
basedir = "D:\\mysql-5.7.12-winx64"
datadir = "D:\\mysql-5.7.12-winx64\\data"
tmpdir = "D:\\mysql-5.7.12-winx64\\data"
socket = "D:\\mysql-5.7.12-winx64\\data\\mysql.sock"
port = 3306
log-error = "D:\\mysql-5.7.12-winx64\\data\\mysql_error.log"
# server_id = .....
max_connections = 100
table_open_cache = 256
query_cache_size = 1M
tmp_table_size = 32M
thread_cache_size = 8
innodb_data_home_dir = "D:\\mysql-5.7.12-winx64\\data\\"
innodb_flush_log_at_trx_commit = 1
innodb_log_buffer_size = 128M
innodb_buffer_pool_size = 128M
innodb_log_file_size = 10M
innodb_thread_concurrency = 16
innodb-autoextend-increment = 1000
# Remove leading # to set options mainly useful for reporting servers.
# The server defaults are faster for transactions and fast SELECTs.
# Adjust sizes as needed, experiment to find the optimal values.
join_buffer_size = 128M
sort_buffer_size = 32M
read_rnd_buffer_size = 32M
max_allowed_packet = 32M
explicit_defaults_for_timestamp = true
sql_mode="STRICT_TRANS_TABLES,NO_AUTO_CREATE_USER,NO_ENGINE_SUBSTITUTION"
----------------------------------my.ini配置文件 结束--------------------------------------------
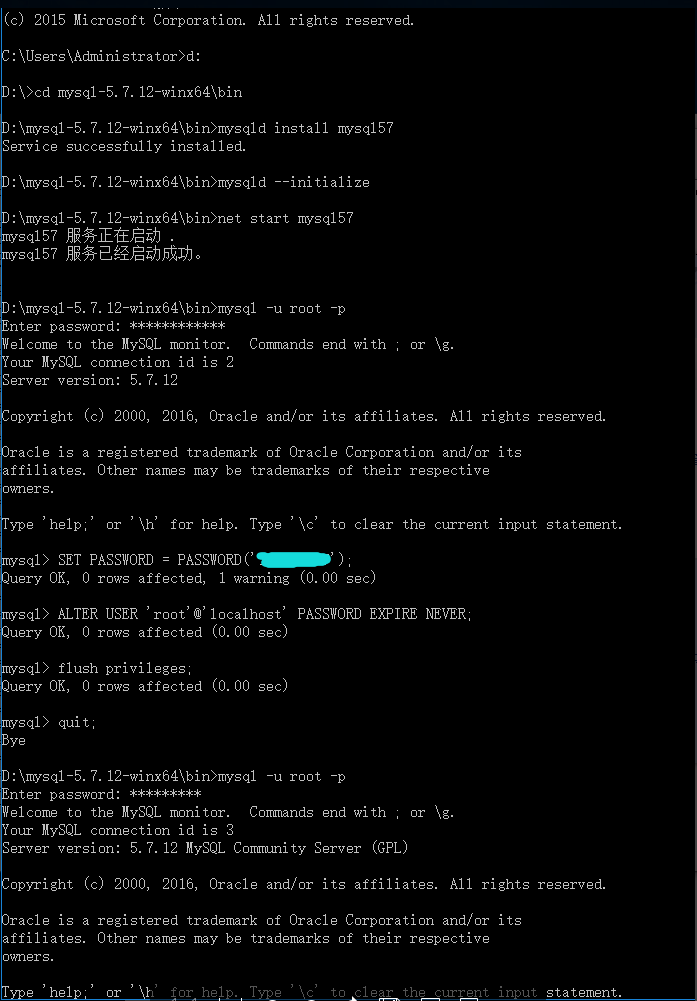
图八 以管理员身份打开 【命令提示符】 按顺序执行
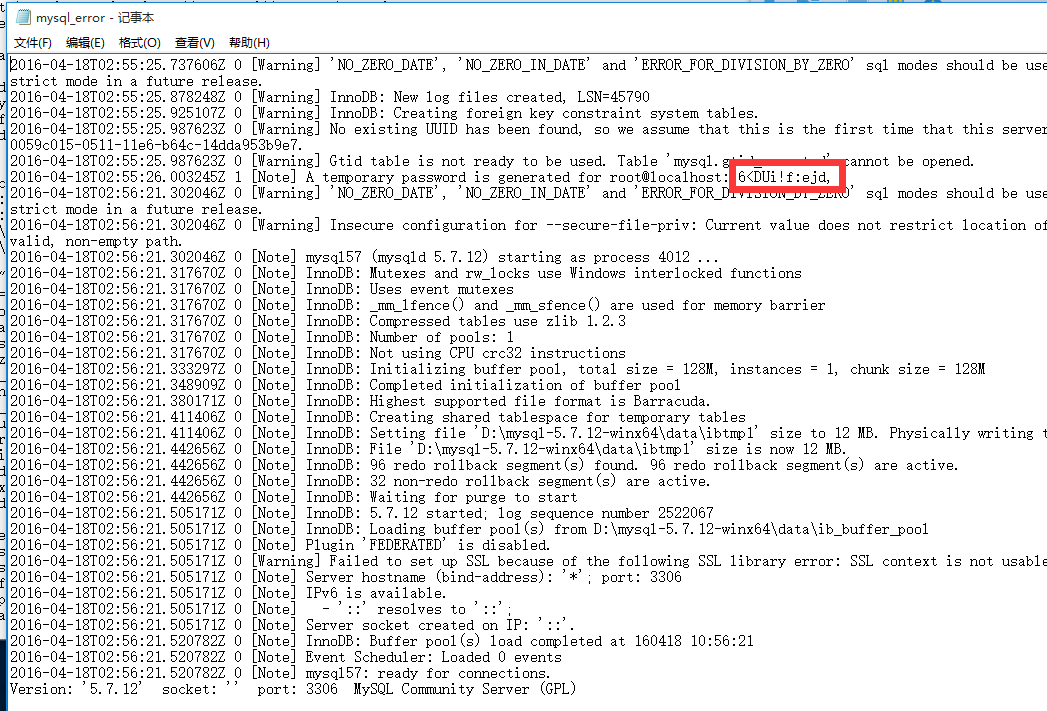
默认密码查找方式看后面的截图。
下面是一些命令的解释:
SET PASSWORD = PASSWORD('your new password'); 设置密码your new password=你要设置的密码
ALTER USER 'root'@'localhost' PASSWORD EXPIRE NEVER; 避免mysql的密码过期突然停止服务。一直但执行就是将password_lifetime的值改为0
flush privileges; 刷新刚才修改,使其生效。
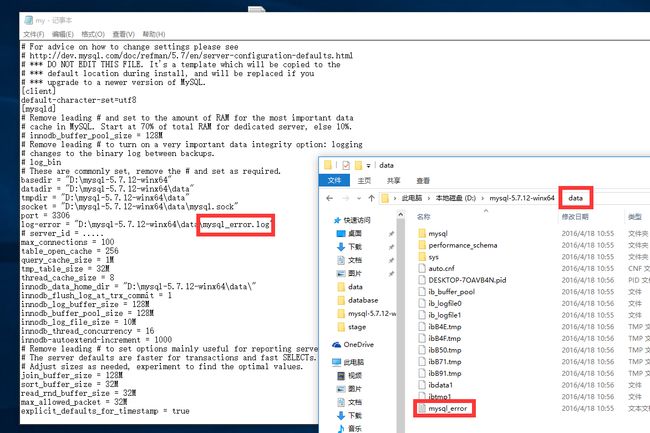
图九图十步骤详解:在生成data的文件夹下>>>找到你在配置文件中log-error的文件名,打开>>>图十找到默认密码
