利用busybox制作根文件系统
我的系统是Ubuntu 10.04 开发板为EVM3730 交叉编译器为arm-linux- none-gnueabi- gcc 4.3.3
一、busybox 配置安装
1、从http://www.busybox.net/ 下载最新 busybox-1.21.1.tar.bz2
2、tar xjvf busybox-1.21.1.tar.bz2解包
3、修改Makefile文件 ARCH ?= arm
CROSS_COMPILE ?= arm-linux- none-gnueabi-
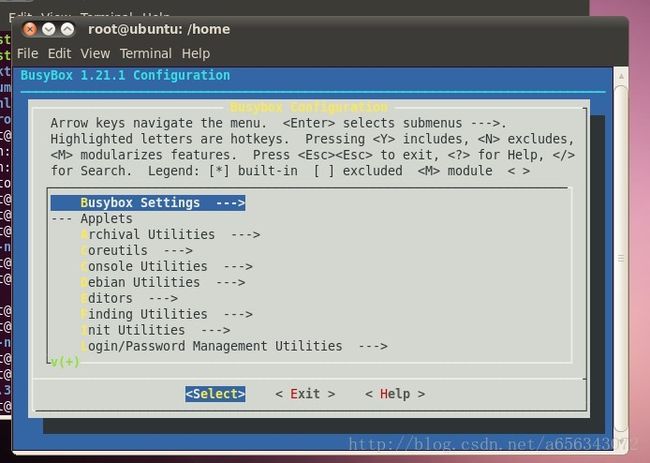
4、make menuconfig配置busybox
make menuconfig 出现错误如下:
scripts/kconfig/lxdialog/checklist.c:211: error: ‘KEY_UP’ undeclared (first use in this function)
scripts/kconfig/lxdialog/checklist.c:211: error: ‘KEY_DOWN’ undeclared (first use in this function)
scripts/kconfig/lxdialog/checklist.c:221: error: ‘FALSE’ undeclared (first use in this function)
scripts/kconfig/lxdialog/checklist.c:222: warning: implicit declaration of function ‘scrollok’
scripts/kconfig/lxdialog/checklist.c:223: warning: implicit declaration of function ‘wscrl’
scripts/kconfig/lxdialog/checklist.c:232: warning: implicit declaration of function ‘wrefresh’
scripts/kconfig/lxdialog/checklist.c:282: warning: incompatible implicit declaration of built-in function ‘fprintf’
scripts/kconfig/lxdialog/checklist.c:283: warning: implicit declaration of function ‘delwin’
scripts/kconfig/lxdialog/checklist.c:287: error: ‘KEY_LEFT’ undeclared (first use in this function)
scripts/kconfig/lxdialog/checklist.c:288: error: ‘KEY_RIGHT’ undeclared (first use in this function)
make[2]: *** [scripts/kconfig/lxdialog/checklist.o] 错误 1
make[1]: *** [menuconfig] 错误 2
make: *** [menuconfig] 错误 2
解决办法:ubuntu系统中缺少一个套件 ncurses devel ,把此套件安装下即可
#sudo apt-get install libncurses5-dev
Busybox Setting ----->
Build Options ----->
//1选择将busybox进行静态编译
[*]Build BusyBox as a static binary (no shared libs)
//2.指定交叉编译器为
(/usr/local/arm/4.3.2/bin/arm-linux-)Cross Compiler prefix
Installation Options ----->
//3.选择上 Don’t use /usr
(/opt/rootfs) BusyBox installation prefix,表示busybox的安装位置。我们选择/opt/rootfs//4.Applets links 选择软链接
Applets links (as soft-links) -- (X) as soft-links,表示安装busybox时,将各个命令安装为指向busybox的软链接还是硬链接。我们选择软链接。(默认已选上) //5.编译出的busybox的shell命令解释器支持显示当前路径及主机信息
Busybox Library Tuning--->
[*]Username completion
[*]Fancy shell prompts
[*]Username completion
[*]History size 以支持记忆历史命令
[*]选中Tab completion和Username completion以支持命令自动补全
第二部分是Applets,他将busybox的支持的几百个命令分门别类。我们只要在各个门类下选择想要的命令即可。这里我们基本保持默认设置。
Networking Utilities -- httpd下的Enable -u <user> option,以启用http服务器的功能allows the server to run as a specific user
保存退出
5、编译busybox make
6、安装busybox make install
二、根文件系统目录补全
1、构建lib目录
复制交叉编译器中的动态链接库到/lib目录下 cp /home/arm-2009q1/arm-linux-none-gnueabi/libc/* ./lib
可以根据自己的需要自由的拷贝动态链接库到这/lib目录下
2、构建etc目录
复制busybox的examples/bootfloppy/etc 中的文件到 文件系统的/etc 目录下
inittab文件的内容修改如下:
::sysinit:/etc/init.d/rcS
::askfirst:-/bin/sh
::ctrlaltdel:/sbin/reboot
::shutdown:/bin/umount -a -r
3、构建dev目录
系统启动所必须的设备文件 有console 和null使用 ls -l /dev/console 来查看console设备的属性
root@ubuntu:/opt/hzgrootfs/etc/init.d# ls /dev/console -l
crw------- 1 root root 5, 1 2013-11-18 07:09 /dev/console 可知设备主设备号为5,次设备号为1
所以使用命令# mknod console c 5 1 来创建console设备
同理使用 # mknod null c 1 3 来创建null设备
4、创建其他空目录
mkdir home opt root proc mnt var tmp sys
5、利用udev构建完整的/dev目录并支持热插拔
在linux机器上,执行ls /dev可看到几百个设备文件,难道要我揉着酸疼的眼睛查看这几百个设备文件的主、次设备号,然后再手工使用mknod命令来生成这几百个设备文件吗?那你不如杀了我算了!其实构建/dev目录有3种方法:
1)、 创建静态设备文件:需要使用mknod命令事先创建很多设备文件,麻烦大了
2)、 使用devfs:使用上存在一些问题,在2.6.13后已被废弃
3)、 使用udev(user dev),我们采用该方法
udev的原理是:操作系统启动的时候将识别到的所有设备的信息自动导出到/sys目录,然后用户态的应用程序udev根据/sys中的设备信息,自动在/dev目录下创建所有正确的设备文件。因此我们要做的就是:配置自动生成/sys目录下的内容并调用mdev(mdev是busybox中对udev的简化实现)。
# ls /sys
# mount -t sysfs none /sys
# ls /sys
block class firmware kernel power bus devices fs module
# ls /dev console null
# mdev -s
我们需进行如下操作,以使系统能够实现即插即用:
# echo /sbin/mdev > /proc/sys/kernel/hotplug
将上述工作放到rcS中:
#!/bin/sh
mount -t proc none /proc
mount -t sysfs none /sys
echo /sbin/mdev > /proc/sys/kernel/hotplug
mdev -s
本文部分内容引用文库文章:http://wenku.baidu.com/view/070e35d8d15abe23482f4d8a.html
