Spring Security 3.1 自定义实例之登陆
Spring Security 3.1 自定义实例之登陆
Spring Security的前身是Acegi,功能强大,配置也比较复杂,我也是新手,先通过动手实现一个登陆验证实例来进入Spring Security的世界吧!
1.准备:
下载Spring Security:官方下载地址: http://www.springsource.org/spring-security 在下载之前Spring会要你填写一些基本信息,然后就会自动跳转到下载地址,
目前最新版本为spring-security-3.1.0.RELEASE,解压后在dist目录下可以看到:
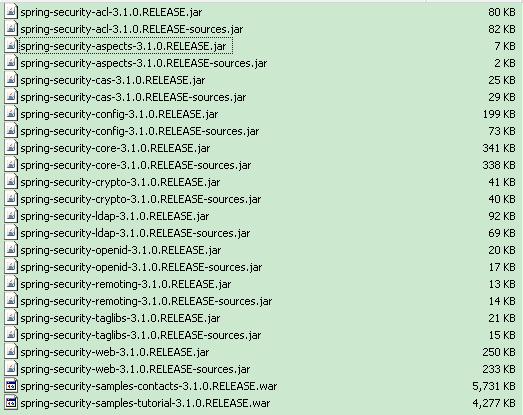
其中两个War包是实例,*-source.jar是源代码
将dist中的Jar包全部导入到工程中,如图:

2.修改web.xml,插入以下代码
  <filter>
     <filter-name>springSecurityFilterChain</filter-name>
     <filter-class>org.springframework.web.filter.DelegatingFilterProxy</filter-class>
  </filter>

   <filter-mapping>
     <filter-name>springSecurityFilterChain</filter-name>
     <url-pattern>/*</url-pattern>
   </filter-mapping>
修改context-param项,目的就是带起接下来要新建的AppSecurity.xml(名字随意)
  <context-param>
    <param-name>contextConfigLocation</param-name>
    <param-value>classpath*:App*.xml</param-value>
  </context-param>
3.新建AppSecurity.xml,如下:
<?xml version="1.0" encoding="UTF-8"?>
<beans:beans xmlns="http://www.springframework.org/schema/security"
       xmlns:xsi="http://www.w3.org/2001/XMLSchema-instance"
       xmlns:beans="http://www.springframework.org/schema/beans"
       xsi:schemaLocation="
       http://www.springframework.org/schema/beans
       http://www.springframework.org/schema/beans/spring-beans.xsd
       http://www.springframework.org/schema/security
       http://www.springframework.org/schema/security/spring-security-3.1.xsd">

	<http auto-config="true">
		<intercept-url pattern="/*" access="ROLE_USER" />
	</http>

	<authentication-manager alias="authenticationManager">
		<authentication-provider>
      			<user-service>
        	    		<user name="test" password="test" authorities="ROLE_USER" />
	        	</user-service>
    	</authentication-provider>
    </authentication-manager>
</beans:beans>
这个xml文件里用了Spring Security的最简单配置 <http auto-config="true"/>含义就是使用Spring Security自动为我们设置一些参数,然后声明了访问所有URL都需要为ROLE_USER,然后在authentication-manager用硬编码的形式定义了一个用户test,权限为ROLE_USER,运行这个实例应该可以看到这样的登录界面:

这个界面就是Spring Security为我们提供的登陆界面;
上面这个实例太简单了,在现实项目中基本不会这么用,比如项目如有如下需求:
1.自定义登录界面;
2.用Ajax方式登录验证;
3.用数据库记录用户信息,进行登录验证;
4.用MD5方式密码加密;
OK 接下来我们先来看看
自定义登录界面的配置实例吧!
1.修改AppSecurity.xml中的http项,如下:
	<http auto-config="true">
		<intercept-url pattern="/login.jsp" filters="none" />
		<intercept-url pattern="/*" access="ROLE_USER" />
		<form-login login-page="/login.jsp" authentication-failure-url="/login.jsp?error=true" default-target-url="/index.jsp"/>
	</http>
login-page:当用户登录时显示自定义登录页面
authentication-failure-url:登录失败时跳转到哪个页面
default-target-url:登录成功后跳转到哪个页面
这样就把默认的登录界面指向了login.jsp了,并且配置了出错后的指向路径和默认跳转路径等信息,当然这里的login.jsp需要任何人都可以访问,不然的话会造成循环调用
authentication-failure-url:登录失败时跳转到哪个页面
default-target-url:登录成功后跳转到哪个页面
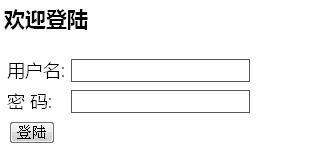
2.设计login.jsp,关键代码如下:
<html>
<head>
<meta http-equiv="Content-Type" content="text/html; charset=utf-8" />
<title>登陆界面</title>
</head>
<body>
<h3>欢迎登陆</h3>
<form action='/ctosii_middle/j_spring_security_check' method='POST'>
 <table>
    <tr><td>用户名:</td><td><input type='text' name='j_username' value=''></td></tr>
    <tr><td>密    码:</td><td><input type='password' name='j_password'/></td></tr>
    <tr><td colspan='2'><input name="submit" type="submit" value="登陆"/></td></tr>
  </table>
</form>
</body>
</html>
大家可以看到这里的action指向了j_spring_security_check,这个路径也是Spring Security为我们自动生成的,这里需要post的两个个参数为 j_username,j_password,运行这个实例可以看到如下登陆界面:
2.用ajax的方式实现的登录验证
Spring Security默认的是登陆验证通过用跳转的方式,但是在实际应用中很多应用的登录界面需要用到ajax的方式来实现登陆验证
1.修改AppSecurity.xml中的http项,如下:
<http auto-config="true"> <intercept-url pattern="/login**" access="IS_AUTHENTICATED_ANONYMOUSLY" /> <intercept-url pattern="/**/*.js" access="IS_AUTHENTICATED_ANONYMOUSLY" /> <intercept-url pattern="/**" access="ROLE_USER" /> <form-login login-page="/login.jsp" authentication-failure-url="/login_fail.do" default-target-url="/login_success.do"/> </http>这里配置了两个路径失败后的调用路径和成功后的调用路径。利用这两个路径可以实现ajax登陆。
在login_fail.do和login_success.do中可以输出登陆失败、成功的消息2.Login.jsp修改如下:<html> <head> <meta http-equiv="Content-Type" content="text/html; charset=utf-8" /> <script type="text/javascript" src="js/jquery-last.min.js"></script> <script type="text/javascript"> function doLogin(){ var url = "/ctosii_middle/j_spring_security_check"; var username= $("input[name='j_username']").val(); var password= $("input[name='j_password']").val(); $.ajax({ url:url, type:"POST", data:"j_username="+username+"&j_password="+password, success: function(data){ $("#results").text(data); } }); } </script> <title>登陆界面</title> </head> <body> <h3>欢迎登陆</h3> <form> <table> <tr><td>用户名:</td><td><input type='text' name='j_username' value=''></td></tr> <tr><td>密 码:</td><td><input type='password' name='j_password'/></td></tr> <tr><td colspan='2'><input name="submit" type="button" onclick="doLogin()" value="登陆"/></td></tr> </table> <div id="results"></div> </form> </body> </html>
3.用数据库记录用户信息,进行登录验证
上面的两个例子都是用了硬编码的方式验证用户信息,而实际项目中肯定是会把用户信息存到数据库中的,最典型的就是建users,role,user_role这三张表:1.新建数据表:users:DROP TABLE IF EXISTS `users`; CREATE TABLE `users` ( `id` int(11) NOT NULL AUTO_INCREMENT, `username` varchar(20) CHARACTER SET utf8 NOT NULL, `password` varchar(100) NOT NULL, `enabled` varchar(1) NOT NULL DEFAULT '0', PRIMARY KEY (`id`) ) ENGINE=InnoDB AUTO_INCREMENT=2 DEFAULT CHARSET=latin1;role:DROP TABLE IF EXISTS `role`; CREATE TABLE `role` ( `id` int(11) NOT NULL AUTO_INCREMENT, `name` varchar(100) CHARACTER SET utf8 NOT NULL, `description` varchar(255) CHARACTER SET utf8 DEFAULT NULL, `enabled` tinyint(1) DEFAULT NULL, PRIMARY KEY (`id`), UNIQUE KEY `rolename_index` (`name`) USING BTREE ) ENGINE=InnoDB AUTO_INCREMENT=3 DEFAULT CHARSET=latin1;user_role:DROP TABLE IF EXISTS `users`; CREATE TABLE `users` ( `id` int(11) NOT NULL AUTO_INCREMENT, `username` varchar(20) CHARACTER SET utf8 NOT NULL, `password` varchar(100) NOT NULL, `enabled` varchar(1) NOT NULL DEFAULT '0', PRIMARY KEY (`id`) ) ENGINE=InnoDB AUTO_INCREMENT=2 DEFAULT CHARSET=latin1;然后执行Sql插入数据:INSERT INTO `users` VALUES ('0', 'xiakan', 'xiakan', '1'); INSERT INTO `role` VALUES ('1', 'user', '用户角色', 1); INSERT INTO `role` VALUES ('2', 'admin', '管理员角色', 1); INSERT INTO `user_role` VALUES ('1', '1', '0');2.修改AppSecurity.xml<?xml version="1.0" encoding="UTF-8"?> <beans:beans xmlns="http://www.springframework.org/schema/security" xmlns:xsi="http://www.w3.org/2001/XMLSchema-instance" xmlns:beans="http://www.springframework.org/schema/beans" xsi:schemaLocation=" http://www.springframework.org/schema/beans http://www.springframework.org/schema/beans/spring-beans.xsd http://www.springframework.org/schema/security http://www.springframework.org/schema/security/spring-security-3.1.xsd"> <http auto-config="true"> <intercept-url pattern="/login**" access="IS_AUTHENTICATED_ANONYMOUSLY" /> <intercept-url pattern="/**/*.js" access="IS_AUTHENTICATED_ANONYMOUSLY" /> <intercept-url pattern="/**" access="ROLE_USER" /> <form-login login-page="/login.jsp" authentication-failure-url="/login_fail.do" default-target-url="/login_success.do"/> </http> <beans:bean id="userDetailsService" class="com.xk.security.UserDetailServiceImpl" /> <authentication-manager alias="authenticationManager"> <authentication-provider user-service-ref="userDetailsService" /> </authentication-manager> </beans:beans>我们添加了一个Bean:com.xk.security.UserDetailServiceImpl,这个bean的代码如下:4.用MD5方式密码加密;package com.xk.security; import java.util.ArrayList; import java.util.List; import org.springframework.beans.factory.annotation.Autowired; import org.springframework.security.core.GrantedAuthority; import org.springframework.security.core.authority.SimpleGrantedAuthority; import org.springframework.security.core.userdetails.UserDetails; import org.springframework.security.core.userdetails.UserDetailsService; import org.springframework.security.core.userdetails.UsernameNotFoundException; import com.xk.dao.IUserManager; import com.xk.item.Role; import com.xk.item.User; public class UserDetailServiceImpl implements UserDetailsService{ @Autowired private IUserManager userManager = null; public UserDetailServiceImpl(){ } public IUserManager getUserManager() { return userManager; } public UserDetails loadUserByUsername(String username) throws UsernameNotFoundException { User user = userManager.search(username); if (user==null) throw new UsernameNotFoundException(username+" not exist!"); List<GrantedAuthority> authsList = new ArrayList<GrantedAuthority>(); for (Role role:userManager.getRoles(user)) { authsList.add(new SimpleGrantedAuthority(role.getName())); } boolean accountNonExpired = true; boolean credentialsNonExpired = true; boolean accountNonLocked = true; UserDetails userdetails = new org.springframework.security.core.userdetails.User(user.getUsername(), user .getPassword(),user.isEnabled(), accountNonExpired, credentialsNonExpired, accountNonLocked, authsList); return userdetails; } }用刚刚的insert到数据库的用户信息,就可以看到如下界面:这里的其他代码就不再贴上来了,有需要的朋友可以留言!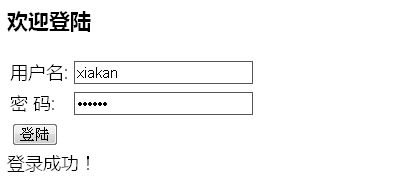
这里的数据库中用了明码的方式来存储用户密码,这样对用户来说是很不安全的,前段时间各大网站的密码泄露事件就是因为用了明文存储用户密码,为了加密用户的密码,这里我们可以用MD5的方式:
1.修改AppSecurity.xml:
	<authentication-manager alias="authenticationManager">
		<authentication-provider user-service-ref="userDetailsService">
			<password-encoder hash="md5">
				<salt-source user-property="username" />
			</password-encoder>
		</authentication-provider>
	</authentication-manager>
并将xiakan的密码改成65aedbe7fb37dc0b2a0da914fb905328
其实也可以用js做好加密后post到服务器,这样更安全!