Android Push Notification实现信息推送使用及修改使用于项目
本文介绍AndroidPn项目实现推送的使用过程。
上个博文中提到在Android中实现信息推送,其中一个比较成熟的解决方案便是使用XMPP协议实现。而AndroidPn项目就是使用XMPP协议实现信息推送的一个开源项目。在这里给大家介绍其使用过程。
Apndroid Push Notification的特点:
快速集成:提供一种比C2DM更加快捷的使用方式,避免各种限制.
无需架设服务器:通过使用"云服务",减少额外服务器负担.
可以同时推送消息到网站页面,android 手机
耗电少,占用流量少.
具体配置过程:
首先, 我们需要下载androidpn-client-0.5.0.zip和androidpn-server-0.5.0-bin.zip。
下载地址:http://sourceforge.net/projects/androidpn/
推荐 修改之后的JAR 和源码下载
客户端: http://download.csdn.net/detail/wuhualong1314/4639394
服务器端:http://download.csdn.net/detail/wuhualong1314/6631345
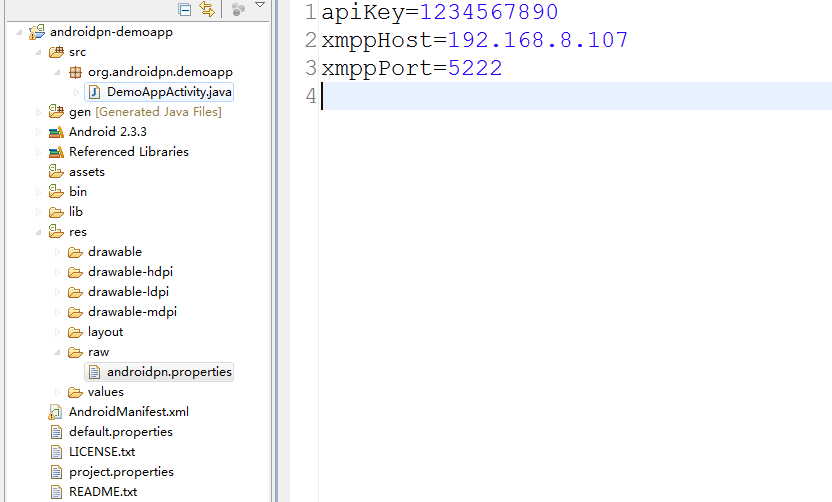
解压两个包,Eclipse导入client,配置好目标平台,打开raw/androidpn.properties文件,配置客户端程序。
1. 如果是模拟器来运行客户端程序,把xmppHost配置成10.0.2.2[模拟器把10.0.2.2认为是所在主机的地址,127.0.0.1是模拟器本身的回环地址,10.0.2.1表示网关地址,10.0.2.3表示DNS地址,10.0.2.15表示目标设备的网络地址],关于模拟器的详细信息,大家可参阅相关资料,这里不再详述.
2. 如果是在同一个局域网内的其他机器的模拟器测试(或者使用同一无线路由器wifi上网的真机) ,则需要把这个值设置为服务器机器的局域网ip.
例如 你的电脑和android手机 都通过同一个无线路由器wifi上网, 电脑的ip地址为 192.168.1.2 而 手机的ip地址为 192.168.1.3, 这个时候 需要把这个值修改为 xmppHost=192.168.1.1 或是电脑的IP地址,就可以在手机上使用了.
3. 如果是不在同一个局域网的真机测试,我们需要将这个值设置为服务器的IP地址。
具体配置如下图所示:
我的电脑IP是:192.168.8.107
相关的配置可以查看 服务器的config.properties,和spring-config.xml
config.properties

apiKey=1234567890
admin.console.host=127.0.0.1
admin.console.port=7070
xmpp.ssl.storeType=JKS
xmpp.ssl.keystore=conf/security/keystore
xmpp.ssl.keypass=changeit
xmpp.ssl.truststore=conf/security/truststore
xmpp.ssl.trustpass=changeit
spring-config.xml


<bean id="ioAcceptor" class="org.apache.mina.transport.socket.nio.NioSocketAcceptor"
		init-method="bind" destroy-method="unbind">
		<property name="defaultLocalAddress" value=":5222" />
		<property name="handler" ref="xmppHandler" />
		<property name="filterChainBuilder" ref="filterChainBuilder" />
		<property name="reuseAddress" value="true" />
	</bean>
至于客户端的用户名和密码,那个是自动生成的,可以不管,源码查看。org.androidpn.client.XmppManager
/**
* A runnable task to register a new user onto the server.
*/
private class RegisterTask implements Runnable {
final XmppManager xmppManager;
private RegisterTask() {
xmppManager = XmppManager.this;
}
public void run() {
Log.i(LOGTAG, "RegisterTask.run()...");
if (!xmppManager.isRegistered()) {
final String newUsername = newRandomUUID();
final String newPassword = newRandomUUID();
Registration registration = new Registration();
PacketFilter packetFilter = new AndFilter(new PacketIDFilter(
registration.getPacketID()), new PacketTypeFilter(
IQ.class));
PacketListener packetListener = new PacketListener() {
public void processPacket(Packet packet) {
Log.d("RegisterTask.PacketListener",
"processPacket().....");
Log.d("RegisterTask.PacketListener", "packet="
+ packet.toXML());
if (packet instanceof IQ) {
IQ response = (IQ) packet;
if (response.getType() == IQ.Type.ERROR) {
if (!response.getError().toString().contains(
"409")) {
Log.e(LOGTAG,
"Unknown error while registering XMPP account! "
+ response.getError()
.getCondition());
}
} else if (response.getType() == IQ.Type.RESULT) {
xmppManager.setUsername(newUsername);
xmppManager.setPassword(newPassword);
Log.d(LOGTAG, "username=" + newUsername);
Log.d(LOGTAG, "password=" + newPassword);
Editor editor = sharedPrefs.edit();
editor.putString(Constants.XMPP_USERNAME,
newUsername);
editor.putString(Constants.XMPP_PASSWORD,
newPassword);
editor.commit();
Log
.i(LOGTAG,
"Account registered successfully");
xmppManager.runTask();
}
}
}
};
connection.addPacketListener(packetListener, packetFilter);
registration.setType(IQ.Type.SET);
// registration.setTo(xmppHost);
// Map<String, String> attributes = new HashMap<String, String>();
// attributes.put("username", rUsername);
// attributes.put("password", rPassword);
// registration.setAttributes(attributes);
registration.addAttribute("username", newUsername);
registration.addAttribute("password", newPassword);
connection.sendPacket(registration);
} else {
Log.i(LOGTAG, "Account registered already");
xmppManager.runTask();
}
}
}
如果想使用登录的用户名和密码 使用如下代码
//保存到推送的用户名
		SharedPreferences sharedPrefs = getSharedPreferences(Constants.SHARED_PREFERENCE_NAME,
                Context.MODE_PRIVATE);
		Editor editor= sharedPrefs.edit();
		editor.putString(Constants.XMPP_USERNAME, "wuhualong1314");
		editor.putString(Constants.XMPP_PASSWORD, "pass");
		editor.commit();
并且修改 RegisterTask
if (!xmppManager.isRegistered()) {
                /*final String newUsername = newRandomUUID();
                final String newPassword = newRandomUUID();*/
            	final String newUsername = username;
                final String newPassword = password;
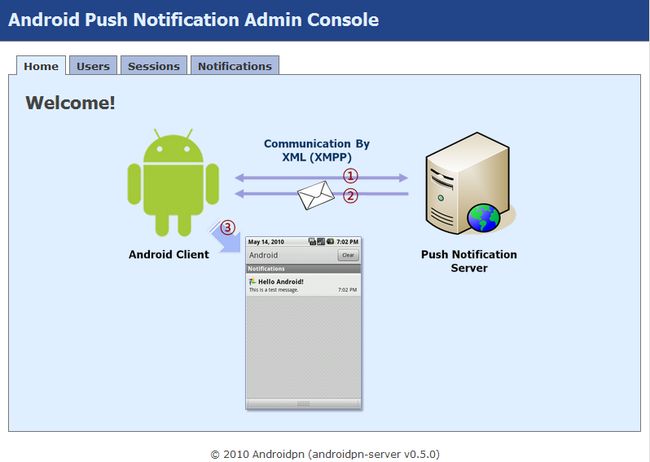
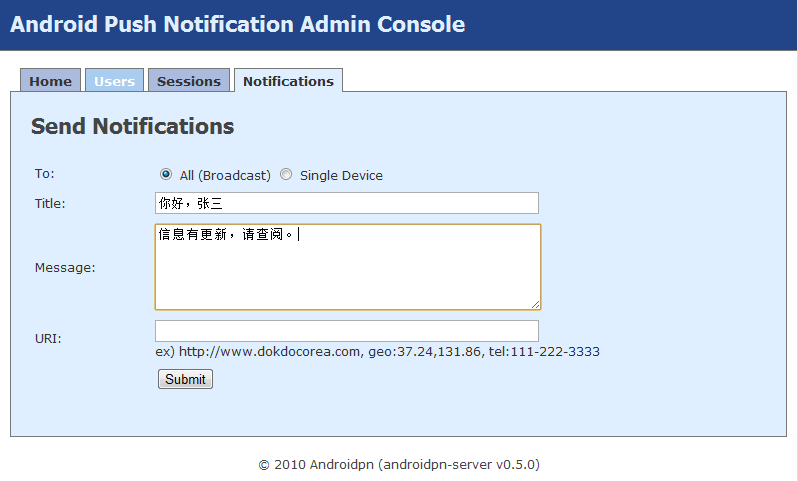
服务器运行主界面:
推送信息:
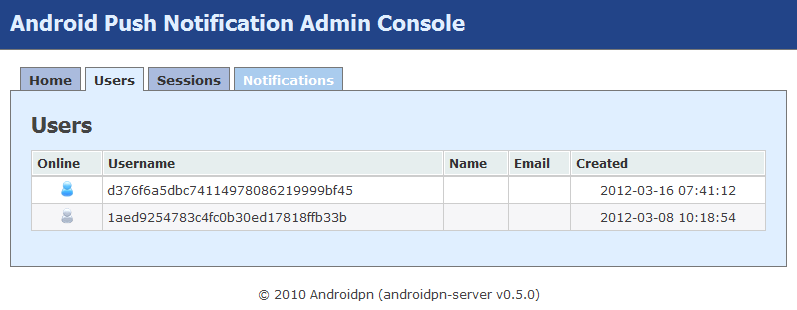
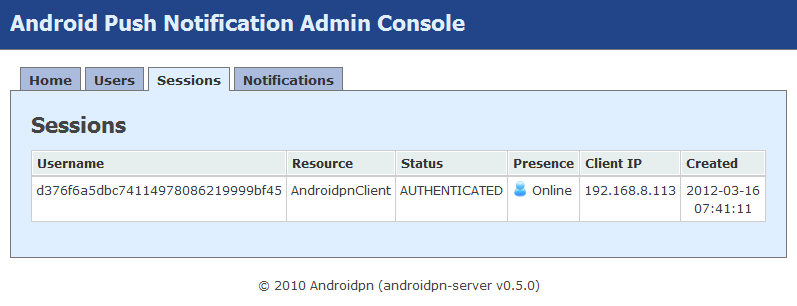
测试结果如下图:
这里查看的通知消息 只是客户端自带的一个查看的activity .org.androidpn.client.Notifier
  Intent intent = new Intent(context,
                    NotificationDetailsActivity.class);
            intent.putExtra(Constants.NOTIFICATION_ID, notificationId);
            intent.putExtra(Constants.NOTIFICATION_API_KEY, apiKey);
            intent.putExtra(Constants.NOTIFICATION_TITLE, title);
            intent.putExtra(Constants.NOTIFICATION_MESSAGE, message);
            intent.putExtra(Constants.NOTIFICATION_URI, uri);
            intent.setFlags(Intent.FLAG_ACTIVITY_NEW_TASK);
            intent.setFlags(Intent.FLAG_ACTIVITY_EXCLUDE_FROM_RECENTS);
            intent.setFlags(Intent.FLAG_ACTIVITY_NO_HISTORY);
            intent.setFlags(Intent.FLAG_ACTIVITY_SINGLE_TOP);
            intent.setFlags(Intent.FLAG_ACTIVITY_CLEAR_TOP);
可以看到 查看的是 NotificationDetailsActivity
而NotificationDetailsActivity 一般情况下不是我们想要的, 所以需要定义自己的通知处理。
所以 我这边推荐的做法是修改一下原有的代码, 把固定Activity 改成action: org.androidpn.client.NotificationProcess
只要我们只需要声明 action就好了
<!--
		<activity android:name="org.androidpn.client.NotificationDetailsActivity"
			android:label="Notification Details">
		</activity>
		 -->
		 <activity android:name="org.androidpn.client.NotificationDetailsActivity"
		     android:label="Notification Details">
		     <intent-filter>
				<action android:name="org.androidpn.client.NotificationProcess" /> <category android:name="android.intent.category.DEFAULT"/>
			</intent-filter>
		 </activity>
还需要修改下 Notifier 101 行到 103行
/* Intent intent = new Intent(context,
                    NotificationDetailsActivity.class);*/
            Intent intent = new  Intent("org.androidpn.client.NotificationProcess");
模拟器和真机测试通过。
数据格式:
<iq type="set" id="328-3" to="4e2327d0641e43368bc65ff3e821a1e8@127.0.0.1/AndroidpnClient">
<notification xmlns="androidpn:iq:notification">
<id>65a5db88</id>
<apiKey>1234567890</apiKey>
<title>Dokdo Island</title>
<message>Dokdo is a Korean island, the far east of the Korean territory. No doubt! No question! Don't mention it any more!</message>
<uri></uri>
</notification>
</iq>
(ssh版本)其他地方的修改
(一)请修改 XmppServer 的start方法
屏蔽掉context = new ClassPathXmlApplicationContext("spring-config.xml");
改为使用ApplicationContextAware 接口中的
public void setApplicationContext(ApplicationContext context) throws BeansException
方法,获得ApplicationContext对象。
否则会启动了2个名为ioAcceptor的NioSocketAcceptor实例,可以查看log日志,在tomcat的log目录下的androidpn.log日志,浪费资源
而且在linux系统下会提示5552端口被占用
(二) <bean id="ioAcceptor" class="org.apache.mina.transport.socket.nio.NioSocketAcceptor"
init-method="bind" destroy-method="unbind">
修改成destroy-method="disponse">能快速关闭tomcat进程
(三)把用户系统融合到自己的应用中去,请修改org.androidpn.server.service.impl.UserServiceImpl
,使用自己系统的用户接口
(四)客户端自动注册使用的随机串,如果要使用自己系统的用户,客户端请修改org.androidpn.client.XmppManager 中的username和password
并用修改服务器端的用户身份验证类org.androidpn.server.xmpp.auth.AuthManager的public static AuthToken authenticate(String username, String token,
String digest) throws UnauthenticatedException 方法
其他使用过程介绍:
当然了,以上是在自己的服务器上配置并实现信息推送,如果大家想省事的话,在这里给大家推荐个网址, 可以更轻松地实现推送,缺点是需要通过别人的服务器,关于这点,你懂的。
网址: http://www.push-notification.org/
只需申请个API即可使用。
至于其他的推送方案会在以后的博文中介绍。
其他资料整理
一、企业通讯录
通讯录资源
参考借鉴:
http://shouji.ctrip.com/index.html
http://zujimi.com/index.html
http://shouji.baidu.com/txl/index.html?from=
http://txl.360.cn/
http://www.uc.cn/browser/index.shtml
http://www.51yunlu.com/index.html
http://txl.qq.com/main/downloadinfo_iphone.jsp
二、Push技术
Push机制资料
Android+push+notification
android IM
Android推送通知指南
即时通讯相关的资料:
android asmack 注册 登陆 聊天 多人聊天室 文件传输成功解决asmack不能收发文件的问题
asmack
Android资料_XMPP
用androidpn来实现推送
AndroidPN环境建立
smack 源码分析一(android上实现长连接)http://www.push-notification.mobi/get_api_key.php
android smack源码分析——接收消息以及如何解析消息
MTQQ
http://www.cnblogs.com/charley_yang/archive/2011/03/27/1997938.html
http://javatech.blog.163.com/blog/static/1766322992010111725339587/
http://www.cnblogs.com/charley_yang/archive/2011/03/27/1997058.html
http://www.cnblogs.com/charley_yang/archive/2011/03/27/1997049.html
http://wangdan.info/?p=169
三、对讲机(广播机制)
android 功能强大的飞鸽源码
android 飞鸽 源代码
四、LBS
Android Map Api 使用和开发(3)浮动搜索框 ,通过地址名称获取经纬度和详细地址并定位
百度地图移动版API
完毕。
