感谢会员
郭亚鑫的热心翻译。
原文在这里,如有翻译不当的地方,还请指正。
iBeacons是苹果在WWDC 2013上有意无意透漏出来的一项重要功能,通过低功耗蓝牙(BluetoothLowEnergy)技术进行十分精确的微定位和室内导航,据悉其定位精度可以以厘米计算。
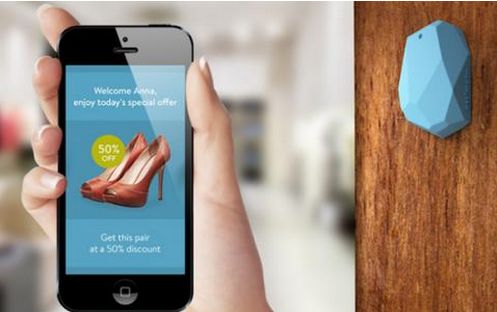
实现iBeacons精准的微定位功能除了需要运行iOS 7且支持BLE的设备外,还需要在室内、店内或者其他公共环境中部署iBeacon基站。当用户走进信号覆盖区域内时,用户就会收到相关的提醒和询问。以梅西百货为例,当用户走到商场某个店面附近时,安装了相应app的用户就会收到由iBeacons基站发出的产品信息或者打折信息。此外,美国职棒大联盟(MLB)也已经测试使用了iBeacon 技术,苹果更是在254间Apple Store 里应用了iBeacon 技术。
对于开发者来说,可以创建一个更加具有交互性的博物馆应用,当用户在博物馆内随意行走时,通过信息提醒用户某些特别的展览。技术还可以用作室内导航,比如在地铁站或者机场这些GPS信号不大好的地方更好地引导用户。
文章目的有两个,一是理解iBeacons,二是展示如何在app中使用iBeacons。
Demo
文中所用的demo是我们用来展示如何检测和处理来自beacon的广播,但首先我们需要创建另外一款app来担当beacon的角色--没有其他功能,只是用来广播信号。最后,我们将有代表双方沟通的两款app。
注意:iBeacons是iOS 7引入的新技术,所以我们需要两部运行iOS 7并支持BLE的设备,比如iPhone 4S以上设备,iPad mini以及iPad 3以后设备。同时,为了在设备上部署app,你还需要是苹果iOS开发者计划(99美元)成员。
设置:Broadcasting App
beacon广播的是什么?它是一个UUID,类似:C293726B-63BF-420A-9D79-92C71F67536A。beacon会不断地广播该UUID,并且接收方app会用同样的UUID检测信号。
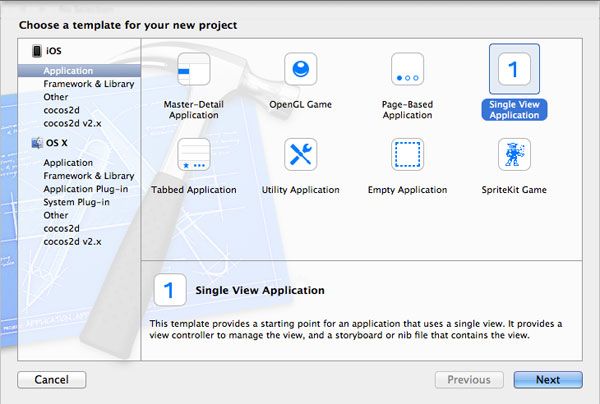
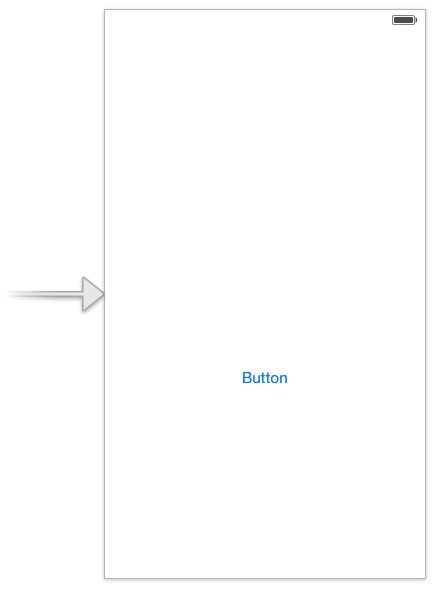
首先在Xcode中创建一个新的Single View Application,
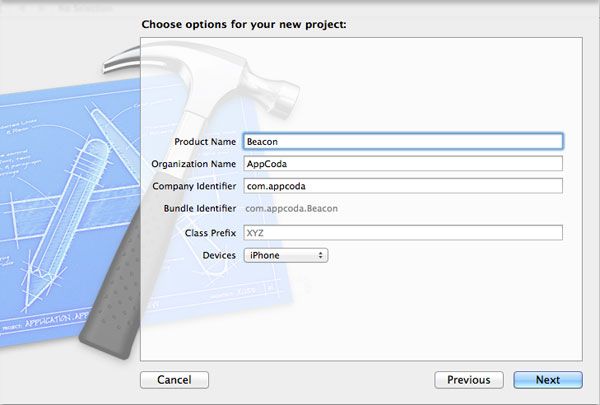
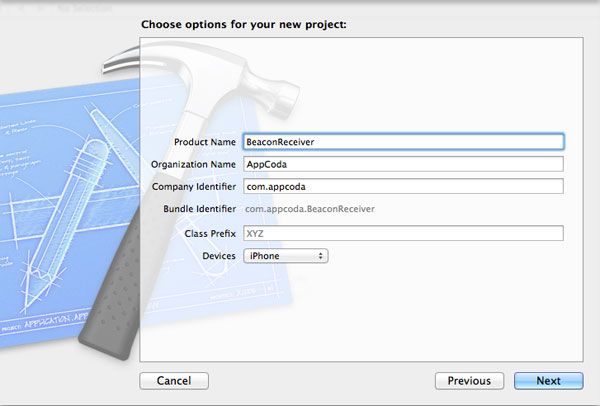
点击下一步,并给项目命名,你可以输入“AppCoda”作为组织名称,把“com.appcoda”作为bundle identifier:
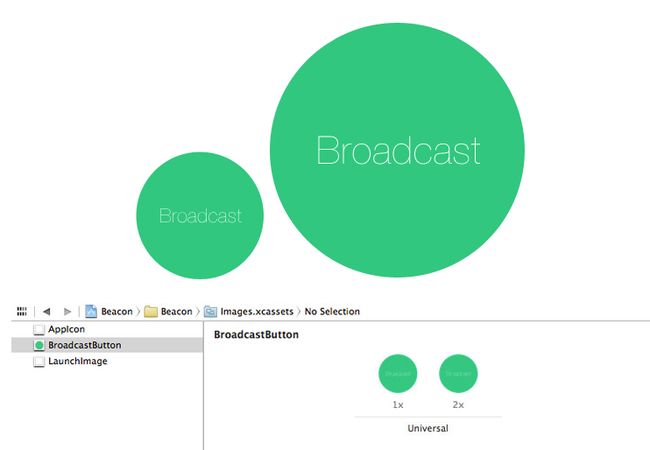
下一步为开启广播的按钮添加图片。
打开图片资产库(images.xcassets),找到资产列表,右键点击并选择“New Image Set”。
给图片重新命名为“BroadcastButton”。选择图片后,你会看到两个spot,一个是用来添加2x图片,一个是用来添加1x图片。
把两个按钮图片保存至文件系统,并把“[email protected]”和“BroadcastBtn.png”分别拖至2x spot和1x spot.
在Main.storyboard中,为了添加一个UIButton按钮,我们需要把其中一个从右下角的Objects pane中拖至视图上。
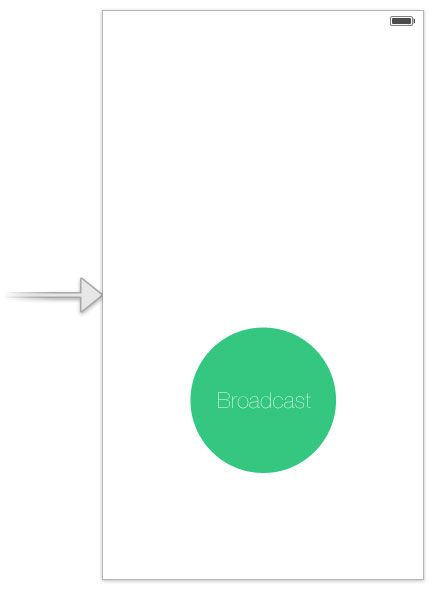
在storyboard中选择按钮,并找到属性面板,取消标题,并把图片改为我们之前添加的那个。
把按钮放置在视图中间,如下图:
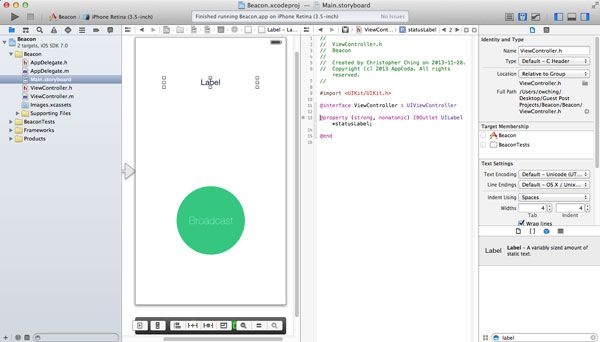
现在,在视图中添加UILabel元素,这样我们就知道app什么时候广播。从Objects pane中把一个UILabel元素拖至视图上。然后,查看尺寸属性,并把它设置为居中对齐,宽度为200。让它在你的视图中居中对齐,如下图:
接下来,通过IBOutlet属性连接把这个UILabel 添加到viewcontroller对象上。打开辅助编辑器(你也可以使用Xcode interface右上角的帮助编辑器按钮来做这些)。
确定右窗格中展示的是ViewController.h ,然后按着control键,点击uilabel、拖动一条线放到“@interface” 和“@end”行之间。
松开鼠标,出现一个弹出对话框,给属性指定一个名称--“statusLabel”.
ViewController.h文件应该是这样的:
- @interface ViewController : UIViewController
- @property (strong, nonatomic) IBOutlet UILabel *statusLabel;
- @end
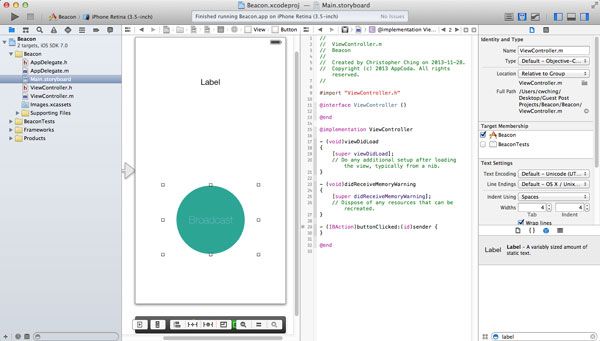
现在把广播按钮连接至IBAction method handler。在辅助编辑器中,把右面板改为ViewController.m。按住control键,从UIButton拖出一条线放在.m 文件中的“@implementation” 和 “@end”行中间。在弹出对话框中,为该方法命名为“buttonClicked”
ViewController.m 文件在结束时会有这个方法:
- - (IBAction)buttonClicked:(id)sender {
- }
添加需要的框架
在通过Bluetooth进行实际广播前,我们需要为项目添加适当的框架。
打开项目设置,滚动至底部。在“Linked Frameworks and Libraries”下点击“+”按钮添加CoreBluetooth.framework和CoreLocation.framework.
创建一个UUID
在Mac上打开Launchpad(或者仅打开应用程序文件夹),并打开Terminal app。在Launchpad中,它可能是一个被叫做“Other”的文件夹,图标如下图:
打开后,你会看见一个可以键入“uuidgen”的窗口,它会输出一个可供使用的UUID!复制生成的UUID,我们将会用它进行广播。
Beacon广播
在ViewController.h中,我们要输入先前添加的框架。
- #import <CoreLocation/CoreLocation.h>
- #import <CoreBluetooth/CoreBluetooth.h>
下一步,添加用以广播的3个以上属性,这样你在ViewController.h file中会有4个属性。
- @property (weak, nonatomic) IBOutlet UILabel *statusLabel;
- @property (strong, nonatomic) CLBeaconRegion *myBeaconRegion;
- @property (strong, nonatomic) NSDictionary *myBeaconData;
- @property (strong, nonatomic) CBPeripheralManager *peripheralManager;
这里还有一件事要完成--让ViewController类遵循“CBPeripheralManagerDelegate”协议,我们可以在class declaration中添加如下代码
- @interface ViewController : UIViewController<CBPeripheralManagerDelegate>
.h file完成后,打开.m file,
在viewDidLoad方法中添加如下代码(替代我们之前生成的UUID)
- - (void)viewDidLoad
- {
- [super viewDidLoad];
- // Do any additional setup after loading the view, typically from a nib.
- // Create a NSUUID object
- NSUUID *uuid = [[NSUUID alloc] initWithUUIDString:@"A77A1B68-49A7-4DBF-914C-760D07FBB87B"];
- // Initialize the Beacon Region
- self.myBeaconRegion = [[CLBeaconRegion alloc] initWithProximityUUID:uuid
- major:1
- minor:1
- identifier:@"com.appcoda.testregion"];
- }
在上边的代码中,我们创建了一个新的NSUUID对象。
然后,我们设置了一个
CLBeaconRegion,并通过那个UUID进行初始化,major number,minor number 以及identifier。如果你所处的位置内有一大堆数据,major number和minor number就是用来识别你的beacons。在上边梅西百货的例子中,每个department会有一个特定的major number--识别一组beacons,在店内,每个beacon会有一个特定的minor number。
通过major number和minor number ,你将能精确识别哪个beacon被获取了。最后,标识符是该区域唯一的ID。
在之前我们设置的buttonClicked method中,我们添加如下代码:
- - (IBAction)buttonClicked:(id)sender {
- // Get the beacon data to advertise
- self.myBeaconData = [self.myBeaconRegion peripheralDataWithMeasuredPower:nil];
- // Start the peripheral manager
- self.peripheralManager = [[CBPeripheralManager alloc] initWithDelegate:self
- queue:nil
- options:nil];
- }
在上述代码中,我们调用了“peripheralDataWithMeasuredPower:” ,它可以给我们提供即将进行广播的beacon data。
第二行代码启动了外围设备管理,并监控Bluetooth的状态更新。
现在我们需要处理状态更新方法来检测Bluetooth何时打开和关闭。所以添加以下委托方法,因为我们的ViewController类遵照“CBPeripheralManagerDelegate” protocol。
- -(void)peripheralManagerDidUpdateState:(CBPeripheralManager*)peripheral
- {
- if (peripheral.state == CBPeripheralManagerStatePoweredOn)
- {
- // Bluetooth is on
- // Update our status label
- self.statusLabel.text = @"Broadcasting...";
- // Start broadcasting
- [self.peripheralManager startAdvertising:self.myBeaconData];
- }
- else if (peripheral.state == CBPeripheralManagerStatePoweredOff)
- {
- // Update our status label
- self.statusLabel.text = @"Stopped";
当Bluetooth外围设备状态改变时会触发该方法。所以在该方法中,我们要检查当前设备处于什么状态。如果Bluetooth处于打开状态,我们将会更新我们的标签,调用“startAdvertising”方法,并把传递beacon data进行广播。相反,如果Bluetooth处于关闭状态,我们将会停止广播。
现在把app部署至设备,打开Bluetooth并点击按钮,系统就会广播你的UUID!现在我们要创建一个接收方的app来检测和处理广播。
注意:模拟器不能使用Bluetooth,所以不能通过模拟器进行广播。为了把app部署至支持BLE的真实设备上(iPhone 4S and up, iPad mini and iPad 3 and up),你需要加入苹果开发者计划。
检测Beacon
设置另一个Single View Application,并命名为“BeaconReceiver”
打开Main.storyboard,在view中添加单个UILabel,当检测到用来更新状态--当检测到detected时。从 Objects pane中拖放一个UILable元素至你的视图中。然后点击UILable,打开属性面板改为居中对齐,并把宽度改为200,如下图:
添加CoreLocation框架
CoreLocation框架已经更新以支持beacon检测,我们需要把它添加在我们项目中。打开项目属性并点击“Linked Libraries and Frameworks”下的“+”图标。添加CoreLocation框架
现在,像之前那样,通过IBOutlet属性连接来添加UILabel。打开辅助编辑器,确保ViewController.h位于右边窗格。按下“control”键并点击UILabel,拖出一条线并放在 “@interface” 和 “@end”行之间。放开后,出现一个弹出对话框,你可以给属性命名为“statusLabel”。
- @interface ViewController : UIViewController
- @property (weak, nonatomic) IBOutlet UILabel *statusLabel;
- @end
最后打开ViewController.h,在文件顶部添加该框架,并调整类声明使之遵从CLLocationManagerDelegate协议,该协议包含一个delegate method,可以让我们知道最新监测到的beacons。
- #import <UIKit/UIKit.h>
- #import <CoreLocation/CoreLocation.h>
- @interface ViewController : UIViewController<CLLocationManagerDelegate>
- @property (weak, nonatomic) IBOutlet UILabel *statusLabel;
- @end
监测Beacons
我们需要添加两个属性,一个是保持对beacon region(我们即将进行检测)的跟踪;另一个是保存locationmanager,它会更新发现的beacons,在ViewController.h添加以下代码:
- @interface ViewController : UIViewController<CLLocationManagerDelegate>
- @property (strong, nonatomic) CLBeaconRegion *myBeaconRegion;
- @property (strong, nonatomic) CLLocationManager *locationManager;
- @property (weak, nonatomic) IBOutlet UILabel *statusLabel;
- @end
现在打开ViewController.m,在“viewDidLoad” 方法中,我们将要初始化locationManager,把我们设置为它的委托。我们也将开始监控想要的beacon,so have that UUID handy!
- - (void)viewDidLoad
- {
- [super viewDidLoad];
- // Do any additional setup after loading the view, typically from a nib.
- // Initialize location manager and set ourselves as the delegate
- self.locationManager = [[CLLocationManager alloc] init];
- self.locationManager.delegate = self;
- // Create a NSUUID with the same UUID as the broadcasting beacon
- NSUUID *uuid = [[NSUUID alloc] initWithUUIDString:@"A77A1B68-49A7-4DBF-914C-760D07FBB87B"];
- // Setup a new region with that UUID and same identifier as the broadcasting beacon
- self.myBeaconRegion = [[CLBeaconRegion alloc] initWithProximityUUID:uuid
- identifier:@"com.appcoda.testregion"];
- // Tell location manager to start monitoring for the beacon region
- [self.locationManager startMonitoringForRegion:self.myBeaconRegion];
- }
在第7和第8行代码中,我们把locationManager初始化为CLLocationManager的新实例,然后把我们设置为它的委托,这样当更新时就会通知我们。
在11行中,我们通过同样的UUID设置了NSUUID对象,作为一个被app(先前创建的那个)广播的对象。
最后我们把region传递给location manager 以便于监视。
下一步,我们需要执行一些委托方法,当region被检测时将会调用该方法。
首先,在ViewController.m中添加如下代码:
- - (void)locationManager:(CLLocationManager*)manager didEnterRegion:(CLRegion*)region
- {
- [self.locationManager startRangingBeaconsInRegion:self.beaconRegion];
- }
- -(void)locationManager:(CLLocationManager*)manager didExitRegion:(CLRegion*)region
- {
- [self.locationManager stopRangingBeaconsInRegion:self.beaconRegion];
- self.beaconFoundLabel.text = @"No";
- }
上边代码执行了两个方法,当设备进入区域或者离开区域时会被调用。当区域被检测,我们通知locationManager开始寻找区域内的beacons。
现在执行这个方法
- -(void)locationManager:(CLLocationManager*)manager
- didRangeBeacons:(NSArray*)beacons
- inRegion:(CLBeaconRegion*)region
- {
- // Beacon found!
- self.statusLabel.text = @"Beacon found!";
- CLBeacon *foundBeacon = [beacons firstObject];
- // You can retrieve the beacon data from its properties
- //NSString *uuid = foundBeacon.proximityUUID.UUIDString;
- //NSString *major = [NSString stringWithFormat:@"%@", foundBeacon.major];
- //NSString *minor = [NSString stringWithFormat:@"%@", foundBeacon.minor];
- }
当一个或者更多beacons被检测时,该方法将会被失效。在上述代码中,你可以看到我们如何获得UUID,来自beacon的major和minor数据。另外,虽然我们上边并未执行,但你可以遍历beacons array,并通过检测
近距离的beacon属性来决定哪一个是最近的。
运行demo
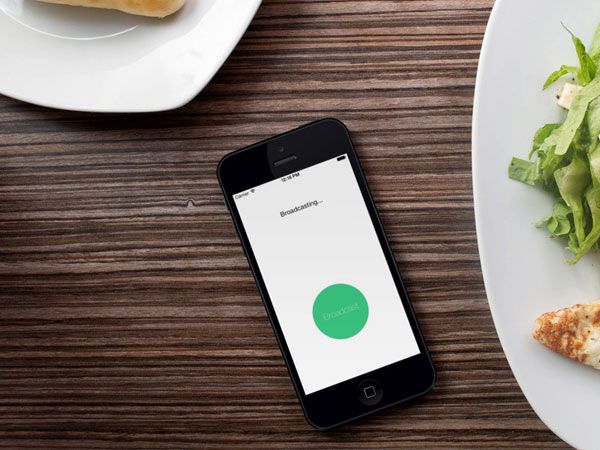
如果你有两台iOS真机,并且你已经加入了苹果iOS开发者计划,那你就可以对该技术进行测试。发布beacon app和点击“Broadcast”按钮,然后等待“Broadcasting…”信息出现。发布receiver app,并让它远离broadcasting beacon,然后走近它模仿实际进入beacon区域。
总结
如果你没有多台设备,你可以通过购买BLE beacons并把他们放在房子周围来创建很酷的app。 Estimote makes such beacons and you get three for $99.
所以我希望你能明白iBeacons应用的强大之处,我也希望这个demo能点燃你对真实世界的想象。你可以下载在此下载demo app的Xcode项目。
本文由 Code With Chris的Chris Ching提供,Chris通过其网站和YouTube教授iOS开发课程。
