silverlight 中绘制扇形(前台+后台)
以Y轴正方向为0度,顺时针递增,我们来做一个40度角的扇形,对称轴是Y轴。
前台:利用Blend
1、按住shift画出一个圆形,去掉生成的Ellipse对象的Margin、Stroke属性,添加 Width, Height属性值(目的为了能比较准确的切割)。
<Ellipse Fill="#FFF4F4F5" Width="200" Height="200"/>
2、在画一个矩形,去掉生成的Rectangle对象的VerticalAlignment属性,修改Height属性为圆形半径大小,修改Margin属性为距离顶部圆形半径的距离。
<Rectangle Fill="#FFF4F4F5" Height="100" Margin="0,100,0,0"/>
3、先选择圆形再选择矩形后右键->合并->相减,就可以得到一个半圆。
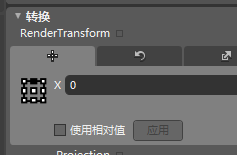
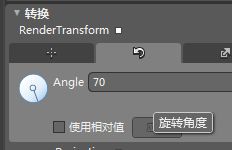
4、在做一个相同的矩形,在其转换属性里设置中心点中上(0.5,0),在设置其旋转70度(Y轴左右个20度),重复3的动作,得到一个扇形。
5、重复4的动作,只是旋转角度写-70或是110度,得到了最终的40度扇形。
PS:最后获得的是一个Path对象,
<Path Data="M34.209873,0 C44.565228,1.2682605E-06 54.552952,1.5740005 63.946861,4.4958038 L68.419853,6.0092916 L34.210033,100 L0,6.0092602 L4.4728832,4.4958038 C13.866797,1.5740012 23.854521,2.2721511E-06 34.209873,0 z" Fill="#FFF4F4F5" Height="100" Margin="165.79,50,165.79,0" Stretch="Fill" UseLayoutRounding="False" VerticalAlignment="Top"/>
后台:
方法1:这种方法就是通过XamlReader读取上面Blend画出的Path对象的XAML标识获得Path(扇形)。
string xaml = "<Path ";
//引用
xaml += " xmlns=\"http://schemas.microsoft.com/client/2007\"";
//创建属性
xaml += " Fill=\"#AE1E5E19\" Height=\"20\" RenderTransformOrigin=\"0.5,1\" Stretch=\"Uniform\"";
xaml += string.Format(" Data=\"{0}\" />", "M34.209953,0 C44.565323,3.5734599E-06 54.55307,1.5740019 63.946991,4.4958062 L68.419983,6.0092931 L34.210087,100 L0,6.0092659 L4.4728961,4.4958062 C13.86683,1.5739993 23.854574,3.1432953E-07 34.209953,0 z");
//创建路径对象
Path path;
//<Path x:Name="ArcPath" Data=/>
path = (Path)XamlReader.Load(xaml);
方法2:通过C代码生成,要根据角度计算偏移值。
public class BaseStation
    {
        /// <summary>
        /// 扇形的半径大小,更改其值会影响扇形大小。
        /// </summary>
        private const int Radius = 10;

        public static Path GetBaseStation(double rotationAngle)
        {
            var path = new Path
                           {
                               Fill = new SolidColorBrush(Colors.Green),
                               //以扇形的两直线连接顶点为几何中心进行定位和旋转。
                               RenderTransformOrigin = new Point(0.5, 1),
                               Stretch = Stretch.None,
                               UseLayoutRounding = false
                           };
            //以几何中心为准直线顶点的偏移值。
            var offsetx = Radius * Math.Cos(20);
            var offsety = Radius * Math.Sin(20);

            //绘制起始直线
            var startLine = new LineSegment()
                                {
                                    Point = new Point(0 - offsetx, 0 - offsety)
                                };
            //绘制弧线,一条三次方贝塞尔曲线,Point1起点,Point2为峰值点,Point3为终点。
            var arcLine = new BezierSegment()
                              {
                                  Point1 = new Point(0 - offsetx, 0 - offsety),
                                  Point2 = new Point(0, 0 - Radius),
                                  Point3 = new Point(0 + offsetx, 0 - offsety)
                              };
            //绘制结束直线
            var endLine = new LineSegment()
                              {
                                  Point = new Point(0, 0)
                              };
            //把三条线段集合在一起。
            var segments = new PathSegmentCollection { startLine, arcLine, endLine };

            //为直线的Data赋值,由三段封闭的线段绘制成一个扇形
            path.Data = new PathGeometry()
            {
                Figures = new PathFigureCollection() { new PathFigure()
                                                           {
                                                               StartPoint = new Point(0, 0),
                                                               Segments = segments
                                                           }}
            };

            //设置扇形对称轴偏转角度。
            path.RenderTransform = new CompositeTransform() { Rotation = rotationAngle };

            return path;
        }
    }
通过类Path path= BaseStation.GetBaseStation(90);就可以获得对称轴为90度,角度为40的扇形。
当然还有最直接的方法:Arc类
命名空间: Microsoft.Expression.Shapes
程序集: Microsoft.Expression.Drawing(在 microsoft.expression.drawing.dll 中)
只需要几行代码就可以了,也可以在Blend里直接拖到页面上:
var arc = new Arc
          {
                              Width = 250,
                              Height = 250,
                              ArcThickness = 1,
                              ArcThicknessUnit = Microsoft.Expression.Media.UnitType.Percent,
                              StartAngle = -20,
                              EndAngle = 20,
                              Stretch = Stretch.None,
                              UseLayoutRounding = false,
                              Stroke = new SolidColorBrush(Colors.Transparent),
                              StrokeThickness = 1,                                    };


