Xfire 整合spring和hibernate的过程
Xfire 整合spring和hibernate的过程
1 第一步首先创建一个web project工程,例如WebServicesTest

引入Xfire的一些有用的包
Commons-httpClient-3.0.jar
Xfire1.2 core libraries
Xfire1.2 jaxb2 libraries
Xfire的一些核心包

Spring的一些包
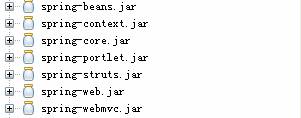
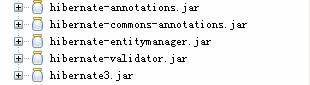
Hibernate的一些包
2 在WEB-INF下建两个配置文件,一个applcationContext.xml(这个文件可以放到别的地方)用来定义本工程中的bean,一个为 xfire-servlet.xml用来定义xfire相关的bean
配置web.xml文件
| <!-- begin Spring配置 --> <context-param> <param-name>contextConfigLocation</param-name> <!--param-value>/WEB-INF/applicationContext.xml classpath:org/codehaus/xfire/spring/xfire.xml</param-value--> <param-value> /WEB-INF/applicationContext.xml, /WEB-INF/xfire-servlet.xml </param-value> </context-param> <listener> <listener-class> org.springframework.web.context.ContextLoaderListener </listener-class> </listener> <listener> <listener-class> org.springframework.web.util.IntrospectorCleanupListener </listener-class> </listener> <!-- end Spring配置 --> <!-- begin XFire 配置 --> <servlet> <servlet-name>xfire</servlet-name> <servlet-class> org.springframework.web.servlet.DispatcherServlet </servlet-class> </servlet> <servlet-mapping> <servlet-name>xfire</servlet-name> <!-- 在这个URI下开放Web Service服务 --> <url-pattern>/services/*</url-pattern> </servlet-mapping> <servlet> <!-- 配合Spring容器中XFire一起工作的Servlet--> <servlet-name>xfireServlet</servlet-name> <servlet-class> org.codehaus.xfire.spring.XFireSpringServlet </servlet-class> </servlet> <!-- end XFire 配置 --> |
3 建立webservice的接口类和实现类
接口类
| package test.service;
publicinterface Hello {
publicabstract String sayHello(String name); } |
接口实现类
| package test.service;
publicclass HelloImpl implements Hello {
public String sayHello(String name){ System.out.println("测试webservices " + name); return name; } } |
4在applicationContext.xml中增加如下配置:
| <!DOCTYPE beans PUBLIC "-//SPRING//DTD BEAN//EN" "http://www.springframework.org/dtd/spring-beans.dtd"> <beans> <!-- begin 定义接口实现类 --> <bean id="helloBean" class="test.service.HelloImpl" /> <!-- end 定义接口实现类 --> </beans> |
5在xfire-servlet.xml中新增如下配置:
| <!DOCTYPE beans PUBLIC "-//SPRING//DTD BEAN//EN" "http://www.springframework.org/dtd/spring-beans.dtd"> <beans> <!-- 引入XFire预配置信息 --> <import resource="classpath:org/codehaus/xfire/spring/xfire.xml" /> <bean class="org.springframework.web.servlet.handler.SimpleUrlHandlerMapping"> <property name="urlMap"> <map> <entry key="/HelloService"><!--此为服务名--> <ref bean="helloService" /> </entry> </map> </property> </bean> <!-- 使用XFire导出器 --> <bean id="baseWebService" class="org.codehaus.xfire.spring.remoting.XFireExporter" lazy-init="false" abstract="true"> <!-- 引用xfire.xml中定义的工厂 --> <property name="serviceFactory" ref="xfire.serviceFactory" /> <!-- 引用xfire.xml中的xfire实例 --> <property name="xfire" ref="xfire" /> </bean> <bean id="helloService" parent="baseWebService"> <property name="serviceBean"> <ref bean="helloBean" /><!--在 applicationContext.xml 中装配的类(接口的实现类)--> </property> <property name="serviceClass" value="test.service.Hello"/><!--接口--> </bean> </beans> |
到此,发布刚才创建的工程WebServicesTest,发布好后,启动服务器,发布服务
| http://localhost:8080/WebServicesTest/services/HelloService?wsdl |
以上是xfire整合sping发布的服务
首先引入包mysql-connector-java-3.2.0-alpha-bin.jar
在s2sh框架中整合XFIRE的过程
1 首先在已有的项目中添加如下的包:
|
2 其次在src下面建立service.facade的包,新建一个接口HelloService。
| package service.facade; public interface HelloService { public String sayHello(String name); } |
3 再在service.service下建立HelloService的接口实现类HelloServiceImpl。
| package service.service; public class HelloServiceImpl implements HelloService { public String sayHello(String name) { return "Hello,"+name+" !"; } } |
4 修改WEB-INF下的web.xml
| <?xml version="1.0" encoding="UTF-8"?> <web-app version="2.4" xmlns="http://java.sun.com/xml/ns/j2ee" xmlns:xsi="http://www.w3.org/2001/XMLSchema-instance" xsi:schemaLocation="http://java.sun.com/xml/ns/j2ee http://java.sun.com/xml/ns/j2ee/web-app_2_4.xsd"> <context-param> <param-name>contextConfigLocation</param-name> <param-value> classpath*:spring/*.xml, classpath:org/codehaus/xfire/spring/xfire.xml </param-value> </context-param> <listener> <listener-class>org.springframework.web.context.ContextLoaderListener</listener-class> </listener> <servlet> <servlet-name>xfire</servlet-name> <servlet-class> org.springframework.web.servlet.DispatcherServlet </servlet-class> </servlet> <servlet-mapping> <servlet-name>xfire</servlet-name> <url-pattern>/webservice/*</url-pattern> </servlet-mapping> </web-app> |
5 修改service.service实现类的配置applicationContext--*.xml
| <?xml version="1.0" encoding="UTF-8"?> <!DOCTYPE beans PUBLIC "-//SPRING//DTD BEAN 2.0//EN" "http://www.springframework.org/dtd/spring-beans-2.0.dtd"> <beans default-autowire="byName" default-lazy-init="false"> <bean id="helloBean" class="service.service.HelloServiceImpl"/> </beans> |
6 修改xfire-servlet.xml的配置文件
| <?xml version="1.0" encoding="UTF-8"?> <!DOCTYPE beans PUBLIC "-//SPRING//DTD BEAN//EN" "http://www.springframework.org/dtd/spring-beans.dtd"> <beans> <bean class="org.springframework.web.servlet.handler.SimpleUrlHandlerMapping"> <property name="urlMap"> <map> <entry key="/HelloService"> <ref bean="helloService" /> </entry> <entry key="/HelloService"><!—多个webservice的服务 --> <ref bean="helloService" /> </entry>
</map> </property> </bean>
<!-- --> <bean id="baseWebService" class="org.codehaus.xfire.spring.remoting.XFireExporter" lazy-init="false" abstract="true"> <!-- 引用xfire.xml中定义的工厂 --> <property name="serviceFactory" ref="xfire.serviceFactory" /> <!-- 引用xfire.xml中的xfire实例 --> <property name="xfire" ref="xfire" /> </bean> <bean id=" helloService " parent="baseWebService"> <property name="serviceBean"> <ref bean=" helloBean" /><!--在 applicationContext-service.xml 中装配的类(接口的实现类)--> </property> <property name="serviceClass" value="service.service.HelloService"/><!--接口--> </bean> </beans> |
7 发布
在地址栏里输入http://主机IP:端口号/项目名称/WebService/HelloService,这个就可以看到相关信息,表明发布成功.
8 在服务器端的测试
在myeclipse的地址栏点击”launch Web Service Exploer”即红色圈的部分,就可以进入到一个页面:

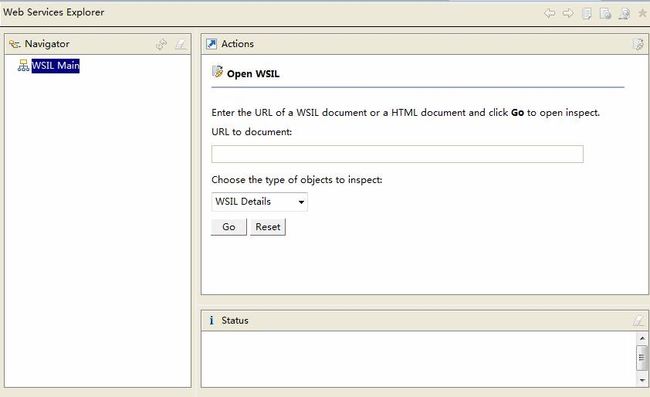
输入相应的发布地址就就可以测试接口信息了。
9 利用客户端测试接口信息
| import java.net.MalformedURLException; import java.net.URL; import org.codehaus.xfire.client.Client; public class UrlInvokeClient { public static void main(String[] args) { Client client = null; try { client = new Client(new URL("http://192.168.3.105:7001/prpall/webservice/PrpallService?wsdl")); System.out.println("=============测试==========="); Object[] result1 = client.invoke("queryPolicy", new Object[] {"张三"}); System.out.println("=======客户端接收到的数据======" + result1[0]); }catch (MalformedURLException e) { e.printStackTrace(); } catch (Exception e) { e.printStackTrace(); } } } |