Spring + JDBC + Struts联合开发(实现单表的CRUD)
这里使用Spring + JDBC +Struts,完成新闻表的添加,修改,删除和查询功能。
建立数据库:
- CREATE TABLE news_type (
- tid number(8) primary key ,
- tname varchar2(50) not null
- );
- INSERT INTO news_type VALUES (1,'财经');
- INSERT INTO news_type VALUES (2,'娱乐');
- INSERT INTO news_type VALUES (3,'影视');
- INSERT INTO news_type VALUES (4,'军事');
- INSERT INTO news_type VALUES (5,'生活');
- CREATE TABLE news (
- id number(8) primary key ,
- title varchar2(50) not null,
- content varchar2(500) not null,
- pub_date date not null,
- type_id number(8) not null,
- foreign key (type_id) references news_type (tid) on delete cascade
- );
- commit;
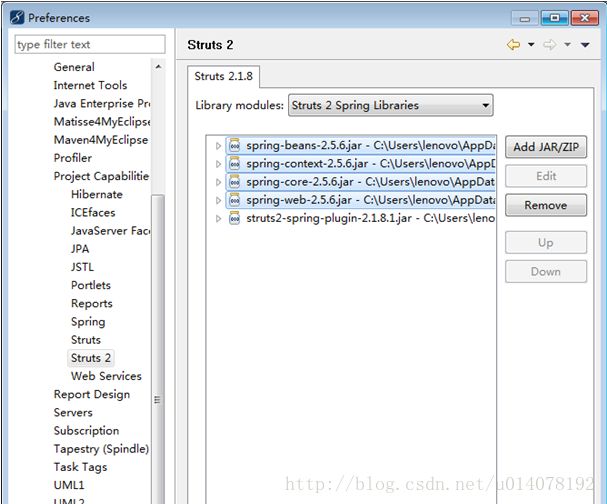
一、加入Spring支持库

加入Struts支持库:
加入Struts2支持时,一定也要多选择一个SpringLibraries支持库。
还要删除掉Struts2中擅自加入的Spring2.5支持包,这是Struts2自动添加的,Remove掉就可以。
拷贝数据库驱动(不要忘记)。
开始进行后台开发,先完成数据库连接处理。
这里通过配置文件完成。
- <span style="white-space:pre"> </span><bean id="dataSource" class="org.apache.commons.dbcp.BasicDataSource">
- <property name="driverClassName" value="oracle.jdbc.driver.OracleDriver"></property>
- <property name="url" value="jdbc:oracle:thin:@localhost:1521:ORCL"></property>
- <property name="username" value="SUNXUN"></property>
- <property name="password" value="123"></property>
- </bean>
二、编写vo类
- public class News {
- private Integer id;
- private String title;
- private String content;
- private Integer typeId;
- private Date pubDate;
三、编写DAO的接口并实现
- public interface IDAO<K, V> {
- public void doCreate(V vo) throws Exception;
- public void doUpdate(V vo) throws Exception;
- public void doRemove(K id) throws Exception;
- public List<V> findAll() throws Exception;
- public V findById(K id) throws Exception;
- public List<V> findAll(int pageNo, int pageSize, String keyword,
- String column) throws Exception;
- public int getAllCount(String keyword, String column) throws Exception;
- }
- public interface INewsDAO extends IDAO<Integer, News> {
- }
实现类:
这个实现类必须继承JdbcDaoSupport类。
- // 实现类需要多实现一个RowMapper接口,该接口表示怎样将ResultSet转换为News对象的规则,需要覆写一个mapRow方法.
- public class NewsDAOImpl extends JdbcDaoSupport implements INewsDAO,
- RowMapper<News> {
- public void doCreate(News vo) throws Exception {
- <span style="color:#cc0000;background-color: rgb(51, 204, 0);">// 这里不要使用Connection类来操作,因为Spring封装了数据库处理,如果使用Connection,就必须自己手工关闭连接,Spring就不管了.
- // 这里需要使用的是JdbcTemplate来完成操作.</span>
- String sql = "INSERT INTO news (id,title,content,pub_date,type_id) VALUES (news_seq.nextVal,?,?,?,?)";
- super.getJdbcTemplate().update(sql, vo.getTitle(), vo.getContent(),
- new java.sql.Date(vo.getPubDate().getTime()), vo.getTypeId());
- }
- public void doRemove(Integer id) throws Exception {
- String sql = "DELETE FROM news WHERE id = ?";
- super.getJdbcTemplate().update(sql, id);
- }
- public void doUpdate(News vo) throws Exception {
- String sql = "UPDATE news SET title=?,content=?,pub_date=?,type_id=? WHERE id = ?";
- super.getJdbcTemplate().update(sql, vo.getTitle(), vo.getContent(),
- new java.sql.Date(vo.getPubDate().getTime()), vo.getTypeId(),
- vo.getId());
- }
- public List<News> findAll() throws Exception {
- String sql = "SELECT id,title,content,pub_date,type_id FROM news";
- // 通过写好的规则,自动转换查询结果,并自动加入到集合中返回
- List<News> all = super.getJdbcTemplate().query(sql, this);
- return all;
- }
- public List<News> findAll(int pageNo, int pageSize, String keyword,
- String column) throws Exception {
- String sql = "SELECT * FROM (SELECT id,title,content,pub_date,type_id,ROWNUM rn FROM News WHERE "
- + column + " LIKE ? AND ROWNUM <= ?) temp WHERE temp.rn > ?";
- List<News> all = super.getJdbcTemplate()
- .query(sql, this, "%" + keyword + "%", pageNo * pageSize,
- (pageNo - 1) * pageSize);
- return all;
- }
- public News findById(Integer id) throws Exception {
- String sql = "SELECT id,title,content,pub_date,typeId FROM news WHERE id = ?";
- News news = super.getJdbcTemplate().queryForObject(sql, this, id);
- return news;
- }
- public int getAllCount(String keyword, String column) throws Exception {
- String sql = "SELECT COUNT(*) FROM news WHERE " + column + " LIKE ?";
- int count = super.getJdbcTemplate().queryForInt(sql,
- "%" + keyword + "%");
- return count;
- }
- <span style="white-space:pre"> </span>//这里是为查询缩减步骤。
- public News mapRow(ResultSet rs, int arg1) throws SQLException {
- // 建立News对象
- News news = new News();
- news.setId(rs.getInt(1));
- news.setTitle(rs.getString(2));
- news.setContent(rs.getString(3));
- news.setPubDate(rs.getDate(4));
- news.setTypeId(rs.getInt(5));
- return news;
- }
- }
配置这个类
- <span style="white-space:pre"> </span><!--
- 还要单独配置一个jdbcTemplate这个<bean>,为了注入到DAOImpl中.
- -->
- <bean id="jdbcTemplate" class="org.springframework.jdbc.core.JdbcTemplate">
- <property name="dataSource">
- <ref bean="dataSource"/>
- </property>
- </bean>
- <bean id="newsDAOImpl" class="org.liky.dao.impl.NewsDAOImpl">
- <property name="jdbcTemplate">
- <ref bean="jdbcTemplate"/>
- </property>
- </bean>
四、编写Service接口和实现类
- public interface INewsService {
- public void insert(News news) throws Exception;
- public void delete(int id) throws Exception;
- public News findById(int id) throws Exception;
- public Map<String, Object> list(int pageNo, int pageSize, String column,
- String keyword) throws Exception;
- }
- public class NewsServiceImpl implements INewsService {
- private INewsDAO newsdao;
- public void delete(int id) throws Exception {
- newsdao.doRemove(id);
- }
- public News findById(int id) throws Exception {
- return newsdao.findById(id);
- }
- public void insert(News news) throws Exception {
- newsdao.doCreate(news);
- }
- public Map<String, Object> list(int pageNo, int pageSize, String column,
- String keyword) throws Exception {
- Map<String, Object> map = new HashMap<String, Object>();
- map.put("allNews", newsdao.findAll(pageNo, pageSize, keyword, column));
- map.put("allCount", newsdao.getAllCount(keyword, column));
- return map;
- }
- public void setNewsdao(INewsDAO newsdao) {
- this.newsdao = newsdao;
- }
- }
配置这个Service
- <span style="white-space:pre"> </span><bean id="newsServiceImpl" class="org.liky.service.impl.NewsServiceImpl">
- <property name="newsdao">
- <ref bean="newsDAOImpl"/>
- </property>
- </bean>
五、配置Spring的AOP部分,设置拦截器。
这里的拦截器由Spring提供,直接使用即可。
- <span style="white-space:pre"> </span><!--
- 声明一个用来规范格式的<bean>
- -->
- <bean id="transactionManager"
- class="org.springframework.jdbc.datasource.DataSourceTransactionManager">
- <property name="dataSource">
- <ref bean="dataSource" />
- </property>
- </bean>
- <bean id="transactionInterceptor"
- class="org.springframework.transaction.interceptor.TransactionInterceptor">
- <property name="transactionManager">
- <ref bean="transactionManager" />
- </property>
- <!--
- 配置事务处理的方法和方式
- -->
- <property name="transactionAttributes">
- <props>
- <!--
- 表示所有方法都要关闭连接,并进行事务处理.
- PROPAGATION_REQUIRED:如果之前有事务,则将当前操作合并到之前的事务中,如果之前没有事务,则开始一个新的事务。
- PROPAGATION_REQUIRED_NEW:无论之前是否有事务,都开始一个新的事务。
- PROPAGATION_REQUIRED_NEVER:不使用事务处理,使用自动提交方式。
- -->
- <prop key="*">PROPAGATION_REQUIRED</prop>
- </props>
- </property>
- </bean>
- <bean
- class="org.springframework.aop.framework.autoproxy.BeanNameAutoProxyCreator">
- <property name="beanNames">
- <list>
- <value>*ServiceImpl</value>
- </list>
- </property>
- <property name="interceptorNames">
- <list>
- <value>transactionInterceptor</value>
- </list>
- </property>
- </bean>
六、实现测试功能,也使用JUnit进行测试。
- public class NewsServiceImplTest {
- private INewsService service;
- // 在执行测试方法前,先执行这个方法.若不加@Before,那么在每个方法前都需要添加init()。
- @Before
- public void init() {
- ApplicationContext ctx = new ClassPathXmlApplicationContext(
- "applicationContext.xml");
- service = (INewsService) ctx.getBean("newsServiceImpl");
- }
- @Test
- public void testDelete() throws Exception {
- service.delete(1);
- }
- @Test
- public void testFindById() throws Exception {
- System.out.println(service.findById(3).getTitle());
- }
- @Test
- public void testInsert() throws Exception {
- News news = new News();
- news.setTitle("测试添加");
- news.setContent("Spring JDBC 添加测试");
- news.setPubDate(new Date());
- news.setTypeId(3);
- service.insert(news);
- }
- @Test
- public void testList() throws Exception {
- Map<String,Object> map = service.list(1, 3, "测试", "title");
- System.out.println(map.get("allNews"));
- System.out.println(map.get("allCount"));
- }
- }
七、测试完成功,进行前台页面的编写:
如果想让Spring结合其他框架一起开发,需要先在web.xml中加入以下配置。
- <span style="white-space:pre"> </span><context-param>
- <param-name>contextConfigLocation</param-name>
- <param-value>/WEB-INF/classes/applicationContext.xml</param-value> //加载Spring的配置文件
- </context-param>
- <listener>
- <listener-class>org.springframework.web.context.ContextLoaderListener</listener-class>
- </listener>
如果怕配置错误,可以将项目部署后,启动服务器,查看控制台打印信息,如果出现以下内容,表示配置成功
信息: Initializing Spring root WebApplicationContext如果没有问题,可以正常开始编写添加功能
- <span style="white-space:pre"> </span><center>
- <a href="pages/news/news_insert.jsp">添加新闻</a>
- </center>
完成添加页。
- <span style="white-space:pre"> </span><center>
- <s:form action="news!insert.action" method="post" theme="simple" namespace="/">
- 新闻标题: <s:textfield name="news.title"></s:textfield> <br/>
- 新闻内容: <s:textfield name="news.content"></s:textfield> <br/>
- 新闻发布日期: <s:textfield name="news.pubDate"></s:textfield> <br/>
- 新闻类型: <s:textfield name="news.typeId"></s:textfield>
- <s:submit value="提交"></s:submit>
- </s:form>
- </center>
编写Action
- public class NewsAction extends ActionSupport {
- private INewsService service;
- private News news;
- private String message;
- private String url;
- public void validateInsert() {
- <span style="background-color: rgb(51, 204, 0);">// 完成验证功能,可以对表单提交的数据,在进入分发方法前进行验证,如果验证通过,则继续执行下面的操作,如果不通过,自动返回input错误页.
- // validate方法同样支持分发功能, 由于只需要对insert操作进行验证,因此将validate方法改为
- // validateInsert即可.</span>
- if (news.getTitle() == null || news.getTitle().trim().equals("")) {
- // 提示错误
- super.addFieldError("title", "新闻标题不能为空!");
- }
- }
- public String insert() throws Exception {
- service.insert(news);
- message = "添加成功" ;
- url = "index.jsp" ;
- return "success";
- }
配置Spring:Spring中的<bean>默认是单例设计,也就是说所有的Action都是单例,
解决方法是取消Action类的单例设计。
- <span style="white-space:pre"> </span><bean id="newsAction" class="org.liky.action.NewsAction" <span style="color: red; ">scope=<em>"prototype"</em></span>>
- <property name="service">
- <ref bean="newsServiceImpl"/>
- </property>
- </bean>
配置Struts
- <span style="white-space:pre"> </span><package name="root" namespace="/" extends="struts-default">
- <action name="news" class="newsAction">
- <result name="success">/success.jsp</result>
- </action>
- </package>