自定义FlowLayout,支持多种布局优化--android-flowlayout
编辑推荐:稀土掘金,这是一个针对技术开发者的一个应用,你可以在掘金上获取最新最优质的技术干货,不仅仅是Android知识、前端、后端以至于产品和设计都有涉猎,想成为全栈工程师的朋友不要错过!
原文出处:http://blog.csdn.net/u013015161/article/details/51205292
前言
flow layout, 流式布局, 这个概念在移动端或者前端开发中很常见,特别是在多标签的展示中, 往往起到了关键的作用。然而Android 官方, 并没有为开发者提供这样一个布局, 于是有很多开发者自己做了这样的工作,github上也出现了很多自定义FlowLayout。 最近, 我也实现了这样一个FlowLayout,自己感觉可能是当前最好用的FlowLayout了(捂脸),在这里做一下分享。
项目地址:https://github.com/lankton/android-flowlayout
展示


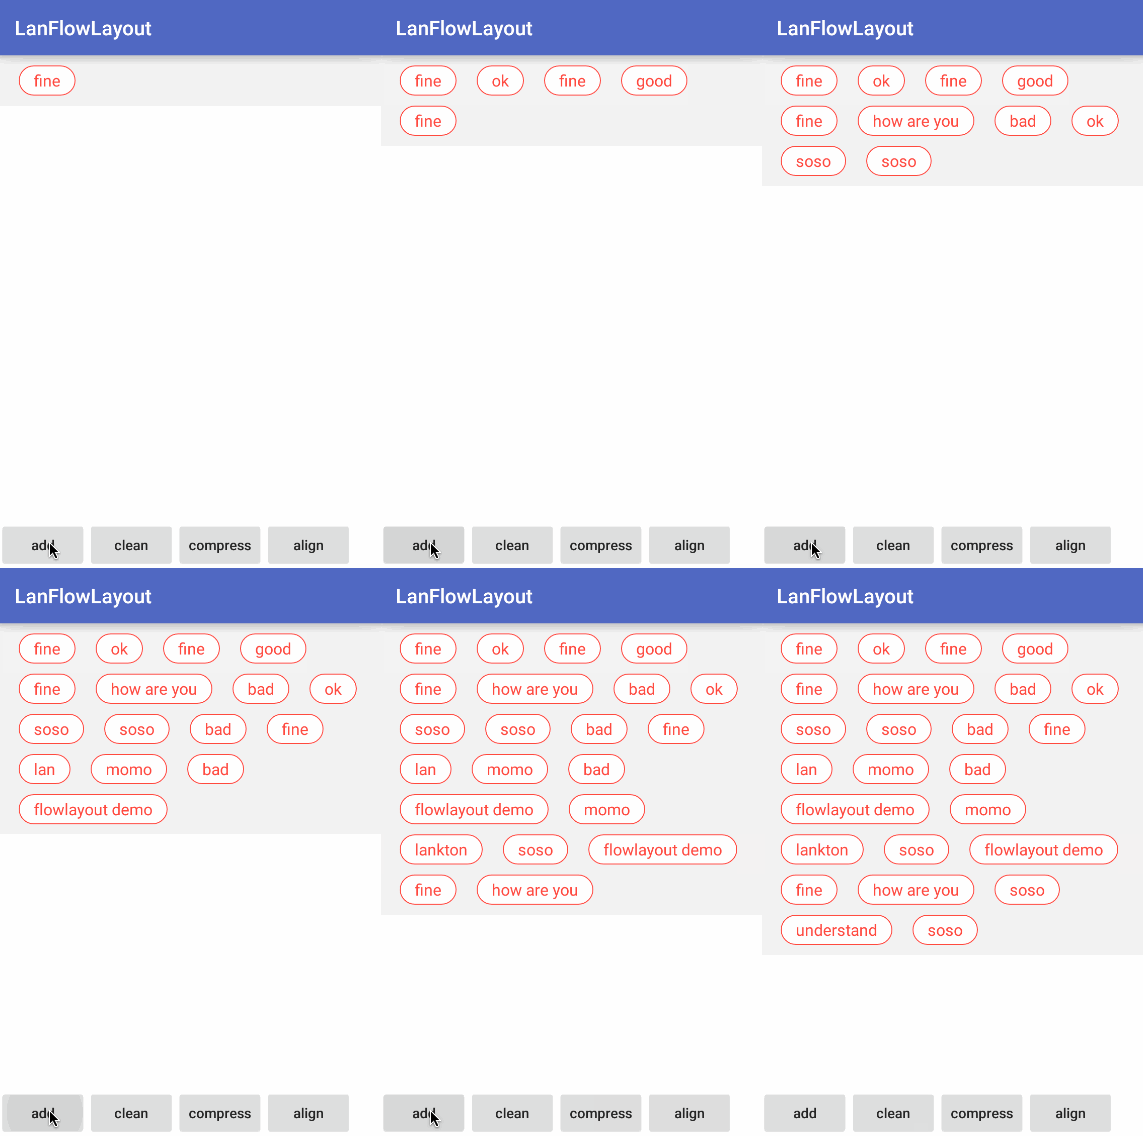
第一张图, 展示向FlowLayout中不断添加子View
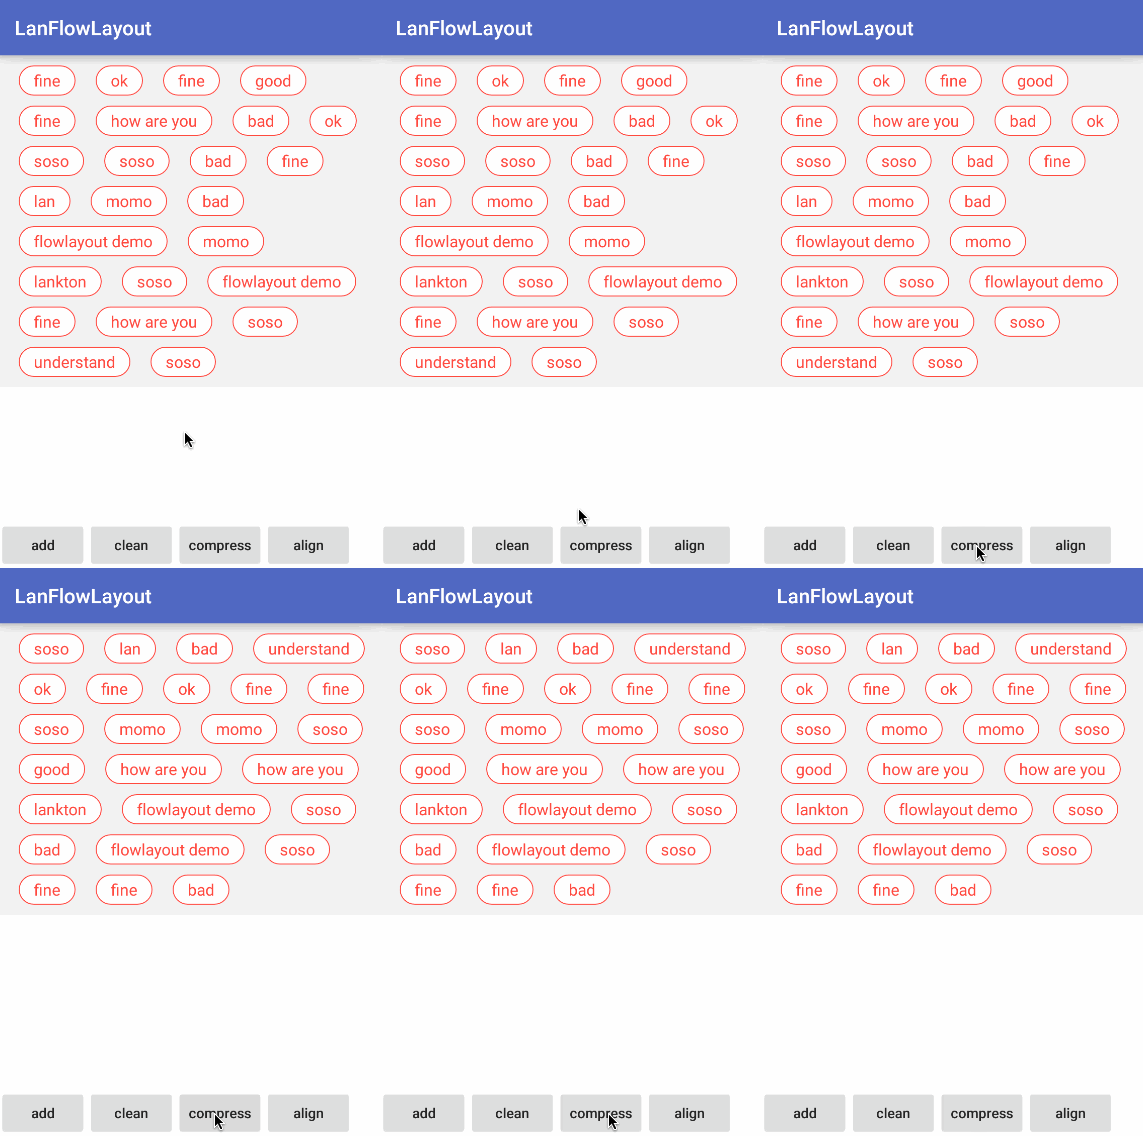
第二张图, 展示压缩子View, 使他们尽可能充分利用空间
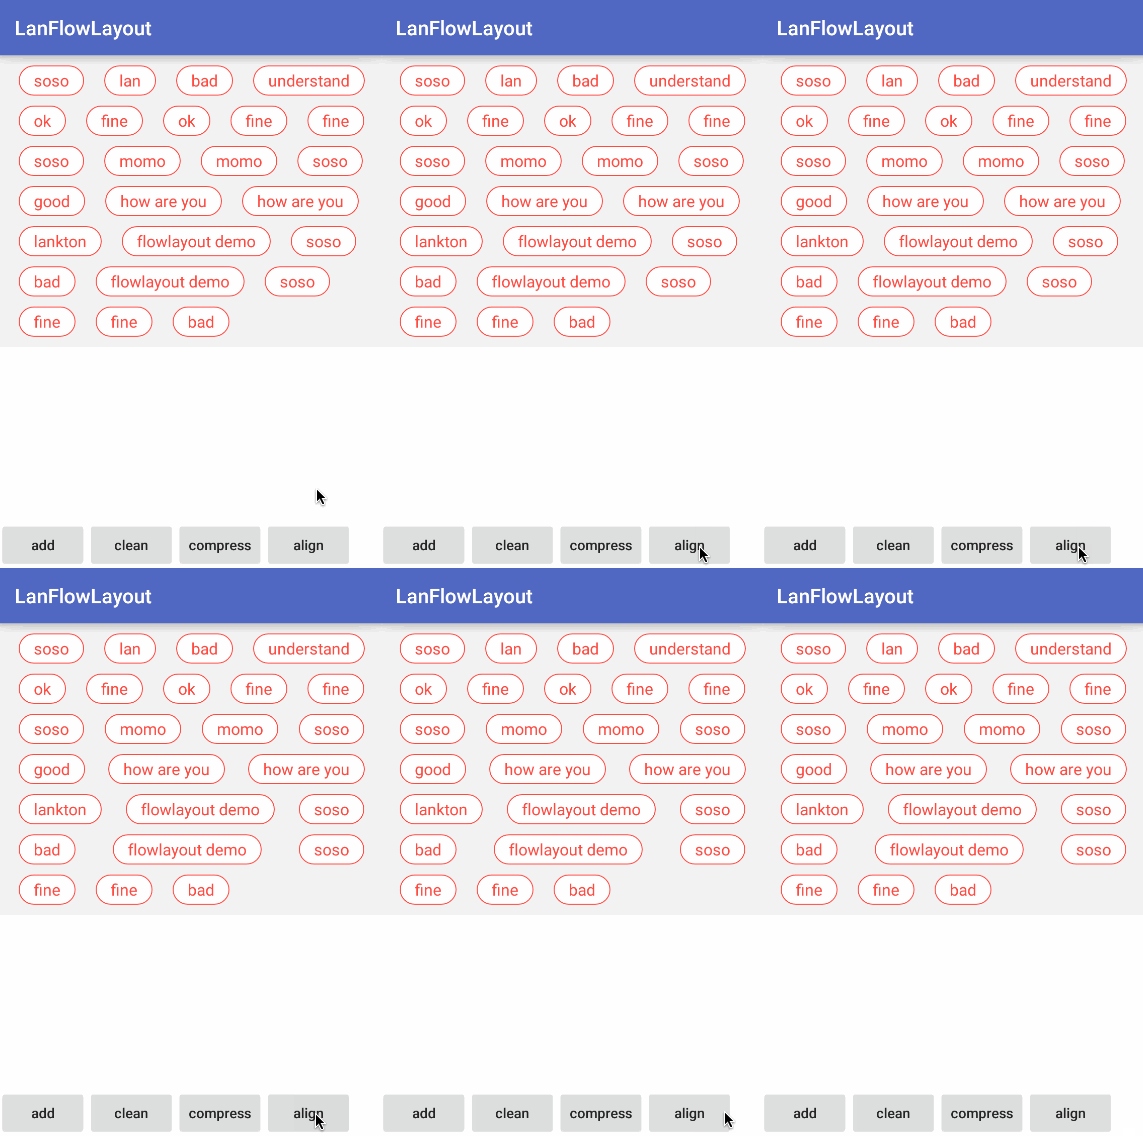
第三张图, 展示调整子View之间间隔, 使各行左右对齐
使用#
基本的流式布局功能
在布局文件中使用FlowLayout即可:
<cn.lankton.flowlayout.FlowLayout
        android:id="@+id/flowlayout"
        android:layout_width="match_parent"
        android:layout_height="wrap_content"
        android:padding="10dp"
        app:lineSpacing="10dp"
        android:background="#F0F0F0">

</cn.lankton.flowlayout.FlowLayout>
可以看到, 提供了一个自定义参数lineSpacing, 来控制行与行之间的间距。
压缩
flowLayout.relayoutToCompress();
压缩的方式, 是通过对子View重新排序, 使得它们能够更合理的挤占空间, 后面会做详细说明。
对齐
flowLayout.relayoutToAlign();
对齐, 不会改变子View的顺序, 也不会起到压缩的作用。
实现
流式布局的实现
重写generateLayoutParams方法
@Override
protected LayoutParams generateLayoutParams(LayoutParams p) {
    return new MarginLayoutParams(p);
}

@Override
public LayoutParams generateLayoutParams(AttributeSet attrs)
{
    return new MarginLayoutParams(getContext(), attrs);
}
重写该方法的2种重载是有必要的。这样子元素的LayoutParams就是MarginLayoutParam, 包含了margin 属性, 正是我们需要的。
重写onMeasure
主要有2个目的, 第一是测量每个子元素的宽高, 第二是根据子元素的测量值, 设置的FlowLayout的测量值。
@Override
protected void onMeasure(int widthMeasureSpec, int heightMeasureSpec) {
    int mPaddingLeft = getPaddingLeft();
    int mPaddingRight = getPaddingRight();
    int mPaddingTop = getPaddingTop();
    int mPaddingBottom = getPaddingBottom();

    int widthSize = MeasureSpec.getSize(widthMeasureSpec);
    int heightMode = MeasureSpec.getMode(heightMeasureSpec);
    int heightSize = MeasureSpec.getSize(heightMeasureSpec);
    int lineUsed = mPaddingLeft + mPaddingRight;
    int lineY = mPaddingTop;
    int lineHeight = 0;
    for (int i = 0; i < this.getChildCount(); i++) {
        View child = this.getChildAt(i);
        if (child.getVisibility() == GONE) {
            continue;
        }
        measureChildWithMargins(child, widthMeasureSpec, 0, heightMeasureSpec, lineY);
        MarginLayoutParams mlp = (MarginLayoutParams) child.getLayoutParams();
        int childWidth = child.getMeasuredWidth();
        int childHeight = child.getMeasuredHeight();
        int spaceWidth = mlp.leftMargin + childWidth + mlp.rightMargin;
        int spaceHeight = mlp.topMargin + childHeight + mlp.bottomMargin;
        if (lineUsed + spaceWidth > widthSize) {
            //approach the limit of width and move to next line
            lineY += lineHeight + lineSpacing;
            lineUsed = mPaddingLeft + mPaddingRight;
            lineHeight = 0;
        }
        if (spaceHeight > lineHeight) {
            lineHeight = spaceHeight;
        }
        lineUsed += spaceWidth;
    }
    setMeasuredDimension(
            widthSize,
            heightMode == MeasureSpec.EXACTLY ? heightSize : lineY + lineHeight + mPaddingBottom
    );
}
代码逻辑很简单, 就是遍历子元素, 计算累计长度, 超过一行可容纳宽度, 就将累计长度清0,同时假设继续向下一行放置子元素。为什么是假设呢, 因为真正在FlowLayout中放置子元素的过程, 是在onLayout方法中的。
重点在最后的setMeasuredDimension方法。在日常使用FlowLayout中, 我们的宽度往往是固定值, 或者match_parent, 不需要根据内容而改变, 所以宽度值直接用widthSize, 即从传进来的测量值获得的宽度。
高度则根据MeasureSpec的mode来判断, EXACTLY意味着和宽度一样, 直接用测量值的宽度即可, 否则,则是wrap_content, 需要用子元素排布出来的高度进行判断。
重写onLayout
@Override
protected void onLayout(boolean changed, int l, int t, int r, int b) {
    int mPaddingLeft = getPaddingLeft();
    int mPaddingRight = getPaddingRight();
    int mPaddingTop = getPaddingTop();

    int lineX = mPaddingLeft;
    int lineY = mPaddingTop;
    int lineWidth = r - l;
    usefulWidth = lineWidth - mPaddingLeft - mPaddingRight;
    int lineUsed = mPaddingLeft + mPaddingRight;
    int lineHeight = 0;
    for (int i = 0; i < this.getChildCount(); i++) {
        View child = this.getChildAt(i);
        if (child.getVisibility() == GONE) {
            continue;
        }
        MarginLayoutParams mlp = (MarginLayoutParams) child.getLayoutParams();
        int childWidth = child.getMeasuredWidth();
        int childHeight = child.getMeasuredHeight();
        int spaceWidth = mlp.leftMargin + childWidth + mlp.rightMargin;
        int spaceHeight = mlp.topMargin + childHeight + mlp.bottomMargin;
        if (lineUsed + spaceWidth > lineWidth) {
            //approach the limit of width and move to next line
            lineY += lineHeight + lineSpacing;
            lineUsed = mPaddingLeft + mPaddingRight;
            lineX = mPaddingLeft;
            lineHeight = 0;
        }
        child.layout(lineX + mlp.leftMargin, lineY + mlp.topMargin, lineX + mlp.leftMargin + childWidth, lineY + mlp.topMargin + childHeight);
        if (spaceHeight > lineHeight) {
            lineHeight = spaceHeight;
        }
        lineUsed += spaceWidth;
        lineX += spaceWidth;

    }
}
这段代码也很好理解, 逐个判断子元素,是继续在本行放置, 还是需要换行放置。这一步和onMeasure一样, 基本上所有的FlowLayout都会进行重写, 我的自然也没什么特别的新意, 这两块就不重点介绍了。下面重点介绍一下2种布局优化的实现。
压缩的实现
关于如何实现压缩, 这个问题开始的确很让我头疼。因为我的脑子里只有大致的概念,那就是压缩应该是一个什么样的效果, 而这个模糊的概念很难转换成具体的数学模型。没有数学模型, 就无法用代码解决这个问题,简直恨不得回到大学重学算法。。但有一个想法是明确的, 那就是解决这个问题, 实际上就是对子元素的重新排序。
后来决定简化思路, 用类似贪心算法的思维解决问题,那就是:逐行解决, 每一行都争取最大程度的占满。
1. 从第一行开始, 从子元素集合中,选出一部分, 使得这一部分子元素可以最大程度的占据这一行;
2. 将这部分已经选出的从集合中拿出, 继续对下一行执行第一步操作。
这个思路确立了, 那我们如何从集合中选出子集, 对某一行进行最大程度的占据呢?
我们已知的条件:
1. 子元素集合
2. 每行可容纳宽度
3. 每个子元素的宽度
这个时候, 脑子里就想到了01背包问题:
已知
1. 物品集合
2. 背包总容量
3. 每个物品的价值
4. 每个物品的体积
求背包包含物品的最大价值(及其方案
有朋友可能有疑问, 二者确实很像, 但不是还差着一个条件吗?嗯 ,是的。。但是在当前状况下,因为我们要尽可能的占满某一行, 那么每个子元素的宽度就不仅仅是限制了, 也是价值所在。
这样, 该状况就完全和01背包问题一致了。之后就可以用动态规划解决问题了。 关于如何用动态规划解决01背包问题, 其实我也忘的差不多了, 也是在网上查着资料, 一边回顾,一边实现的。所以这里我自己就不展开介绍了, 也不贴自己的代码了(感兴趣的可以去github查看), 放一个链接。我感觉这个链接里的讲解对我回顾相关知识点帮助很大,有兴趣的也可以看看~
背包问题——“01背包”详解及实现(包含背包中具体物品的求解)
对齐的实现
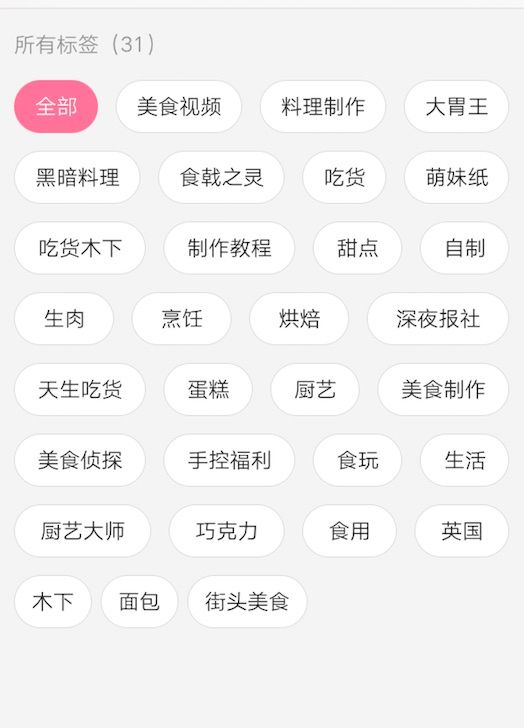
这个功能,我最早是在bilibili的ipad客户端上看到的,如下。
当时觉得挺好看的,还想过一阵怎么做, 但一时没想出来。。。这次实现FlowLayout, 就顺手将这种对齐样式用自己的想法实现了一下。
public void relayoutToAlign() {
    int childCount = this.getChildCount();
    if (0 == childCount) {
        //no need to sort if flowlayout has no child view
        return;
    }
    int count = 0;
    for (int i = 0; i < childCount; i++) {
        View v = getChildAt(i);
        if (v instanceof BlankView) {
            //BlankView is just to make childs look in alignment, we should ignore them when we relayout
            continue;
        }
        count++;
    }
    View[] childs = new View[count];
    int[] spaces = new int[count];
    int n = 0;
    for (int i = 0; i < childCount; i++) {
        View v = getChildAt(i);
        if (v instanceof BlankView) {
            //BlankView is just to make childs look in alignment, we should ignore them when we relayout
            continue;
        }
        childs[n] = v;
        MarginLayoutParams mlp = (MarginLayoutParams) v.getLayoutParams();
        int childWidth = v.getMeasuredWidth();
        spaces[n] = mlp.leftMargin + childWidth + mlp.rightMargin;
        n++;
    }
    int lineTotal = 0;
    int start = 0;
    this.removeAllViews();
    for (int i = 0; i < count; i++) {
        if (lineTotal + spaces[i] > usefulWidth) {
            int blankWidth = usefulWidth - lineTotal;
            int end = i - 1;
            int blankCount = end - start;
            if (blankCount > 0) {
                int eachBlankWidth = blankWidth / blankCount;
                MarginLayoutParams lp = new MarginLayoutParams(eachBlankWidth, 0);
                for (int j = start; j < end; j++) {
                    this.addView(childs[j]);
                    BlankView blank = new BlankView(mContext);
                    this.addView(blank, lp);
                }
                this.addView(childs[end]);
                start = i;
                i --;
                lineTotal = 0;
            }
        } else {
            lineTotal += spaces[i];
        }
    }
    for (int i = start; i < count; i++) {
        this.addView(childs[i]);
    }
}
代码很长, 但说起来很简单。获得子元素列表,从头开始, 逐一判断哪些子元素在同一行。即每一次的start 到 end。 然后计算这些子元素装满一行的话, 还差多少, 设为d。则每两个子元素之间需要补上的间距为 d / (end - start)。 如果设置间距呢, 首先我们肯定不能去更改子元素本身的性质。那么, 就只能在两个子元素中间补上一个宽度为d / (end - start) 的BlankView了。
至于这个BlankView是个什么鬼, 定义如下:
class BlankView extends View {

    public BlankView(Context context) {
        super(context);
    }
}
你看, 根本什么也没做。 那我新写一个类继承View的意义是什么呢? 其实从上边对齐的代码里也能看到,这样我们在遍历FlowLayout的子元素时, 就可以通过 instance of BlankView 来判断是真正需要处理、计算的子元素,还是我们后来加上的补位View了。
总结
代码没有全部贴出, 因为所有的代码都在github上了~这里再贴一下项目地址:
https://github.com/lankton/android-flowlayout
这个项目, 肯定还是有很多需要优化的地方, 欢迎各位提出各种意见或者建议,也期待能够被大家使用。
可以的话,也顺求star~ 谢谢。
