How to Add Splash Screen in Your iOS App
Before moving onto another detailed tutorial about Storyboard, I’d like to first answer a couple of questions left in comment or in our forum. One question is:
How can I add a splash screen for my app? Is it difficult to do?
While you may think you need to write code for the splash screen, Apple has made it extremely easy to get it done in Xcode. No coding is required. What you just need to do is to make a couple of configuration in Xcode.
What’s Splash Screen?
For those who are new to programming and haven’t heard of the term “Splash Screen”, let me first give a brief explanation about it. Splash screen is commonly found in iOS apps, as well as, other desktop applications. This is the first screen you see when launching an application. Usually, splash screen is an image covering the entire screen and disappears after the main screen is loaded. Below figure shows you a few samples of splash screen:
The primary purpose of splash screen is to let user know your app is loading and give user an introductory screen showing your brand. Splash screen is especially important for apps that take longer time to launch. Perceptually, it gives a better user experience.
Adding Splash Screen in Your App
As mentioned earlier, it’s not required to write any code to display the splash screen. iOS comes with a built-in function called launch image. This image is automatically displayed when user opens the app and disappeared until the app is fully ready to use. You can simply specify your splash screen as launch image in Xcode and it will handle the rest for you.
Preparing Your Splash Screen
As you know, iPhone 4/4S supports a higher screen resolution (what so called Retina Display). In order to support both screen resolution of older iPhone models and latest models, you have to prepare two versions of splash screen images of these sizes:
- 320 x 480 (for iPhone 2G / 3G / 3GS)
- 640 x 960 (for iPhone 4 / 4S)
The splash screen image should be in PNG format. By default, you should name the image file for lower screen resolution as “Default.png”. For the image intended for Retina Display (i.e. 640 x 960 screen resolution), name the file as “[email protected]”. The “@2x” is a standard scale modifier used in iOS. All image files designated for displaying in Retina Display should name with the optional string “@2x”.
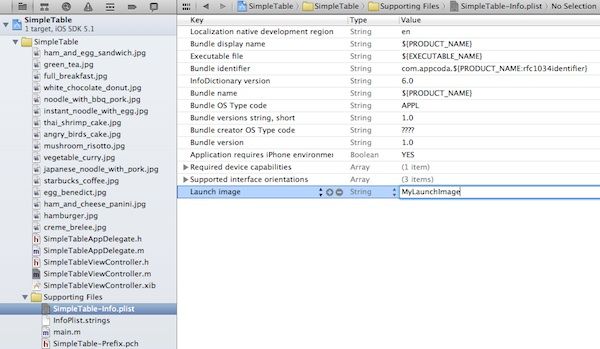
The change instructs iOS to pick “MyLaunchImage.png” and “[email protected]” as launch image.
You can design your own splash screen. For testing purpose, you may download the sample splash screens.
Splash Screen for Our Simple Table App
Add Your Launch Image in Xcode
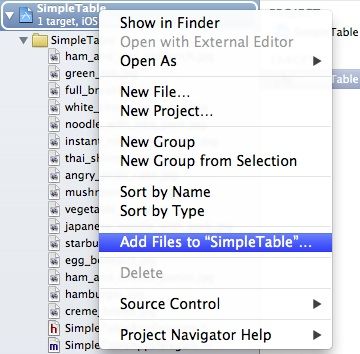
After preparing the launch image, go back to Xcode and open your Xcode project. Here we’ll continue to use our Simple Table project. Right click the “SimpleTable” project and select “Add Files to SimpleTable”. Add both “Default.png” and “[email protected]” to your project.
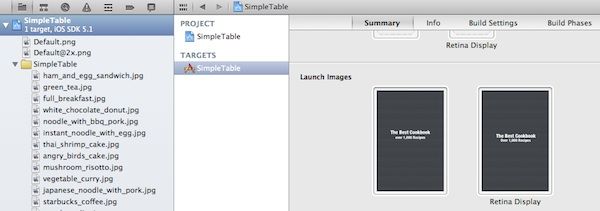
If you’ve done everything correctly, you’ll see both files in your project and Xcode automatically recognizes the files as launch images.
Test it Out!
Simply run your app again. This time you’ll see a splash screen shown up instantly as it runs. For now, there is not much thing to load during application startup. (Note: the splash screen only shows up for a second and disappears.)
Further Information
In this really short tutorial, we show you how to add a simple splash screen (aka launch image) in your iPhone app. The launch image we use is in portrait orientation. What if you’re design an app in landscape orientation? How should you name the launch image? I high recommend you to check outApple’s programming guideline for App Launch Image for further information. iOS supports various versions of launch image with different naming convention. So check it out and learn more about it.
转载:http://www.appcoda.com/how-to-add-splash-screen-in-your-ios-app/


