绘图和可视化(matplotlib)
《Python for Data Analysis》
绘图和可视化是数据分析中的一项重要工作。通过可视化,能够更好的观察数据的模式,帮助我们找出数据的异常值、必要的数据转换、得出有关模型的想法。
matplotlib
用法:
在ipython中,使用
ipython --pylab模式启动;或jupyter notebook中,
%matplotlib inline(better!)
In [1]: import numpy as np
   ...: data = np.arange(10)
   ...: data
   ...: plt.plot(data)
   ...:
Out[1]: [0x70b6c18>]
Figure对象
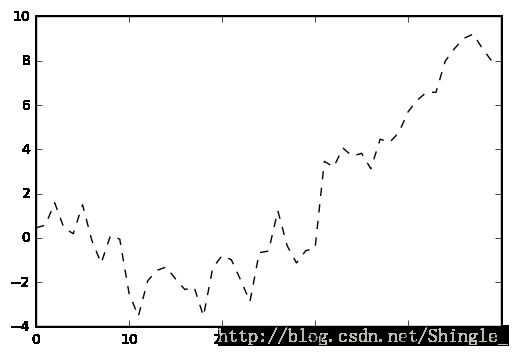
In [3]: fig = plt.figure()

In [4]: ax1 = fig.add_subplot(2, 2, 1)

In [5]: ax2 = fig.add_subplot(2, 2, 2)
   ...: ax3 = fig.add_subplot(2, 2, 3)
   ...:

In [6]: plt.plot(np.random.randn(50).cumsum(), 'k--')
Out[6]: [0xe404ba8>] subplots方法
创建一个新的Figure对象,并返回一个含有已创建的subplot对象的Numpy数组。
In [7]: fig, axes = plt.subplots(2, 3)
   ...: axes
   ...:
Out[7]:
array([[0x000000000E363588>,
        0x000000000E598198>,
        0x000000000E693B00>],
       [0x000000000E6F67F0>,
        0x000000000E8065F8>,
        0x000000000E851EB8>]], dtype=object)
| 参数 | 选项 |
|---|---|
| nrows | subplot的行数 |
| ncols | subplot的列数 |
| sharex | 所有subplot使用相同的X轴刻度(调节xlim会影响所有subplot) |
| sharey | 共享Y轴刻度 |
| subplot_kw | 用于创建各subplot的关键字字典 |
| **fig_kw | 创建figure的其他关键字,如plot.subplots(2,2,figuresize=(8,6)) |
调整subplot周围的间距:subplots_adjust方法
subplots_adjust(left=None, bottom=None, right=None, top=None, wspace=None, hspace=None)
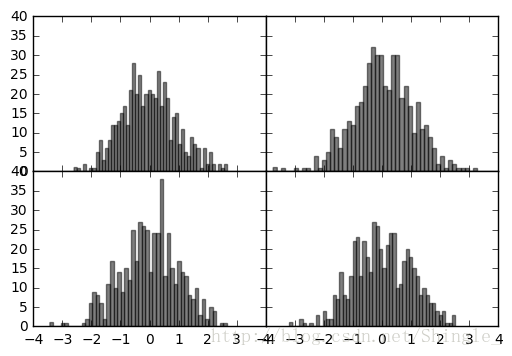
In [8]: fig, axes = plt.subplots(2, 2, sharex=True, sharey=True)
   ...: for i in range(2):
   ...:     for j in range(2):
   ...:         axes[i, j].hist(np.random.randn(500), bins=50, color='k', alpha=0.5)
   ...: plt.subplots_adjust(wspace=0, hspace=0)
   ...:
颜色、标记和线型
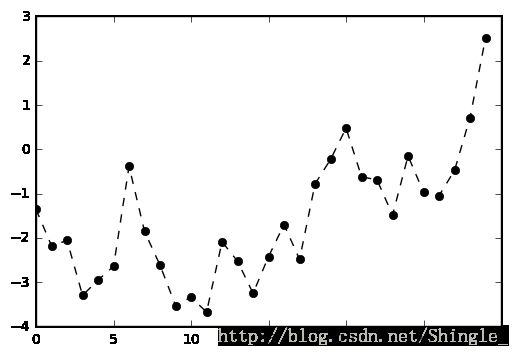
In [9]: plt.figure()
   ...: from numpy.random import randn
   ...: plt.plot(randn(30).cumsum(), 'ko--')
   ...:
Out[9]: [0x10c49b00>]
In [10]: data = np.random.randn(30).cumsum()
...: plt.plot(data, 'k--', label='Default')
...: plt.plot(data, 'k-', drawstyle='steps-post', label='steps-post')
...: plt.legend(loc='best')
...:
Out[10]: 0x10dd6ef0> 刻度、标签和图例
In [11]: fig = plt.figure()
    ...: ax = fig.add_subplot(1, 1, 1)
    ...: ax.plot(np.random.randn(1000).cumsum())
    ...: ticks = ax.set_xticks([0, 250, 500, 750, 1000])
    ...: labels = ax.set_xticklabels(['one', 'two', 'three', 'four', 'five'],
    ...:                             rotation=30, fontsize='small')
    ...: ax.set_title('My first matplotlib plot')
    ...: ax.set_xlabel('Stages')
    ...:
Out[11]: 0x10e6c3c8>
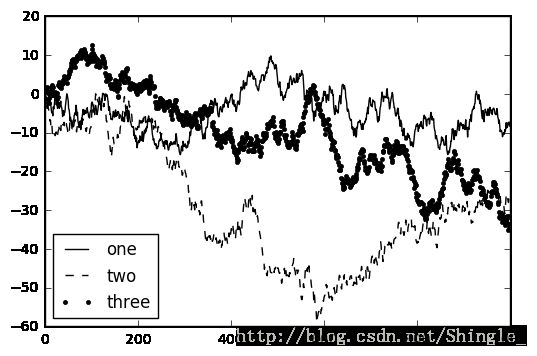
In [12]: from numpy.random import randn
...: fig = plt.figure(); ax = fig.add_subplot(1, 1, 1)
...: ax.plot(randn(1000).cumsum(), 'k', label='one')
...: ax.plot(randn(1000).cumsum(), 'k--', label='two')
...: ax.plot(randn(1000).cumsum(), 'k.', label='three')
...: ax.legend(loc='best')
...:
Out[12]: 0x111d06d8>
注解以及在Subplot上绘图
from datetime import datetime

fig = plt.figure()
ax = fig.add_subplot(1, 1, 1)

data = pd.read_csv('examples/spx.csv', index_col=0, parse_dates=True)
spx = data['SPX']

spx.plot(ax=ax, style='k-')

crisis_data = [
    (datetime(2007, 10, 11), 'Peak of bull market'),
    (datetime(2008, 3, 12), 'Bear Stearns Fails'),
    (datetime(2008, 9, 15), 'Lehman Bankruptcy')
]

for date, label in crisis_data:
    ax.annotate(label, xy=(date, spx.asof(date) + 75),
                xytext=(date, spx.asof(date) + 225),
                arrowprops=dict(facecolor='black', headwidth=4, width=2,
                                headlength=4),
                horizontalalignment='left', verticalalignment='top')

# Zoom in on 2007-2010
ax.set_xlim(['1/1/2007', '1/1/2011'])
ax.set_ylim([600, 1800])

ax.set_title('Important dates in the 2008-2009 financial crisis')


