caffe finetuning CaffeNet流程总结
所谓finetuning,就是说我们针对某相似任务已经训练好的模型,比如CaffeNet, VGG-16, ResNet等, 再通过自己的数据集进行权重更新, 如果数据量比较小,可以只更新最后一层,其他层的权重不变,如果数据量中等,可以训练后面几层,如果数据量很大,那OK,直接从头训练,只不过在训练时间上,需要花费比较多。
选择Caffe做finetuning的原因在于,相比于tensorflow, 具有很明显的优势,Caffe中定义的网络每一层都有learning rate,这让我们可以很轻易的选择是否对层数进行更新。
言归正传, fineturning一个模型有下面几个步骤:
1. 下载模型
官方提供了Model Zoo,有很多训练好的经典模型;
https://github.com/BVLC/caffe/wiki/Model-Zoo
2. 下载数据集及数据准备
比如牛津的 102 Category Flower Dataset: http://www.robots.ox.ac.uk/~vgg/data/flowers/102/
把数据集处理成[图片,标签]的形式,如下图,分为train, test, validation set;
/aa/caffe/data/jpg/image_03860.jpg 16
/aa/caffe/data/jpg/image_06092.jpg 13
/aa/caffe/data/jpg/image_02400.jpg 42
/aa/caffe/data/jpg/image_02852.jpg 55
/aa/caffe/data/jpg/image_07710.jpg 96
/aa/caffe/data/jpg/image_07191.jpg 5
/aa/caffe/data/jpg/image_03050.jpg 91
/aa/caffe/data/jpg/image_07742.jpg 96
/aa/caffe/data/jpg/image_06523.jpg 25
/aa/caffe/data/jpg/image_05517.jpg 86
/aa/caffe/data/jpg/image_06248.jpg 60
/aa/caffe/data/jpg/image_07225.jpg 6
/aa/caffe/data/jpg/image_07279.jpg 61
/aa/caffe/data/jpg/image_08148.jpg 56
/aa/caffe/data/jpg/image_05699.jpg 41
/aa/caffe/data/jpg/image_06715.jpg 78
/aa/caffe/data/jpg/image_08165.jpg 61
/aa/caffe/data/jpg/image_07153.jpg 44
/aa/caffe/data/jpg/image_04806.jpg 84
/aa/caffe/data/jpg/image_05972.jpg 68
/aa/caffe/data/jpg/image_05523.jpg 65
3.修改网络结构
在flower的例子中,最后一层的输出改为102,然后不希望更新的层lr修改为0;
具体代码可以参见参考1;
layer {
  name: "fc8_oxford_102"
  type: "InnerProduct"
  bottom: "fc7"
  top: "fc8_oxford_102"
  # blobs_lr is set to higher than for other layers, because this layer is starting from random while the others are already trained
  param {
    lr_mult: 10
    decay_mult: 1
  }
  param {
    lr_mult: 20
    decay_mult: 0
  }
  inner_product_param {
    num_output: 102
    weight_filler {
      type: "gaussian"
      std: 0.01
    }
    bias_filler {
      type: "constant"
      value: 0
    }
  }
}
4. 训练
根据自己硬件条件修改solver中的batch_size等一些参数,运行脚本开始训练;
caffe train -solver=solver.prototxt -weights=pretrain.caffemodel5.测试
caffe test -model=test.prototxt -weights=m1000.caffemodel1000次迭代的test acc达到了0.726
6. 预测
python predict.py 2.jpg deploy.prototxt m1000.caffemodel mean.npy 227
这里面涉及到的一个问题是Caffe在使用C++接口时使用的均值文件一般是mean.binaryproto,但是再使用python接口时,需要使用mean.npy,因此需要把mean.binaryproto转化为mean.npy,转化的代码如下;
# -*- coding:UTF-8 -*-

import caffe
import numpy as np

MEAN_PROTO_PATH = 'imagenet_mean.binaryproto'               # 待转换的pb格式图像均值文件路径
MEAN_NPY_PATH = 'mean.npy'                         # 转换后的numpy格式图像均值文件路径

blob = caffe.proto.caffe_pb2.BlobProto()           # 创建protobuf blob
data = open(MEAN_PROTO_PATH, 'rb' ).read()         # 读入mean.binaryproto文件内容
blob.ParseFromString(data)                         # 解析文件内容到blob

array = np.array(caffe.io.blobproto_to_array(blob))# 将blob中的均值转换成numpy格式,array的shape (mean_number,channel, hight, width)
mean_npy = array[0]                                # 一个array中可以有多组均值存在,故需要通过下标选择其中一组均值
np.save(MEAN_NPY_PATH ,mean_npy)
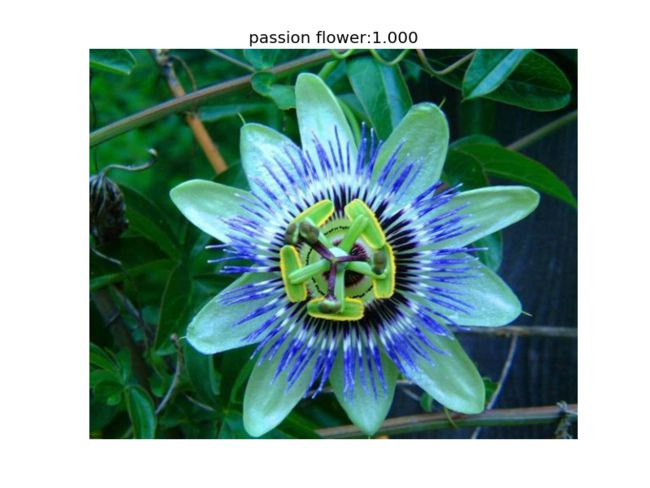
测试结果如下图:
7. 可视化
caffe自带有可视化acc和loss的工具包!需要 caffe-master/tools/extra/parse_log.sh caffe-master/tools/extra/extract_seconds.py和 caffe-master/tools/extra/plot_training_log.py.example 这么几个文件,都可以直接在github上下载,点击这里。
(1)首先需要保存训练日志,只需要在训练时加上一个保存的参数,后缀名必须是.log,因为后面对解析日志有这个要求;
caffe train -solver=solver.prototxt -weights=pretrain.caffemodel 2>&1 | tee train.log| 文件 | 文件描述符 |
| 输入文件——标准输入 | 0(默认为终端(网上有说默认为键盘的)) |
| 输出文件——标准输出 | 1(默认为终端) |
| 错误输出文件——标准错误 | 2(默认为终端) |
| Commond >&m | 标准输出重定向到文件描述符m中 |
| Command <&- | 关闭标准输入 |
| Command 0>&- | 关闭标准输出 |
命令tee会把管道过来标准输入写入文件train.log
(2)通过parse_log.py来解析日志文件
python parse_log.py train.log ./ #注意是两个参数,一个是日志文件,另一个是保存的路径会生成两个文件,分别以.train和.test结尾。
(3)绘制accuracy了loss曲线
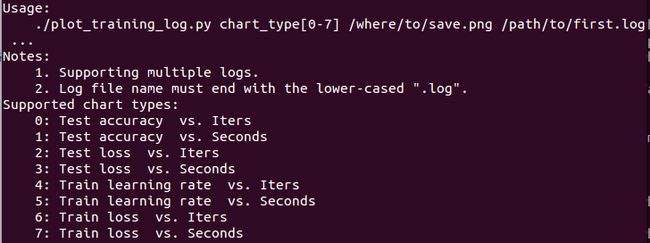
python plot_training_log.py 0 test_acc.png train.log通过plot_training_log.py文件来绘制,具体参数如下:
但是要注意的是直接运行可能出现错误,查看.train和.test文件,发现第一行一个有‘#’,一个没有, 所以进行相应的修改就好,加个'#'或者改代码里面load_data代码。
参考:
1.https://github.com/fish145/fine-tuning/tree/master/Oxford102 ((详细的finetuning代码))
2. https://github.com/BVLC/caffe/issues/290
3. http://stackoverflow.com/questions/12689304/ctypes-error-libdc1394-error-failed-to-initialize-libdc1394
4.https://github.com/BVLC/caffe/tree/master/tools/extra
5.http://blog.csdn.net/u013078356/article/details/51154847

