ansibel部署TIDB集群
Ansible
- Ansible 一种集成 IT 系统的配置管理、应用部署、执行特定任务的开源平台,是 AnsibleWorks 公司名下的项目,该公司由 Cobbler 及 Func 的作者于 2012 年创建成立。
Ansible 基于 Python 语言实现,由 Paramiko 和 PyYAML 两个关键模块构建。 - Ansible 特点:
- 部署简单,只需在主控端部署 Ansible 环境,被控端无需做任何操作。
- 默认使用 SSH(Secure Shell)协议对设备进行管理。
- 主从集中化管理。
- 配置简单、功能强大、扩展性强。
- 支持 API 及自定义模块,可通过 Python 轻松扩展。
- 通过 Playbooks 来定制强大的配置、状态管理。
- 对云计算平台、大数据都有很好的支持。
- 提供一个功能强大、操作性强的 Web 管理界面和 REST API 接口 —- AWX 平台。
- Ansible 一种集成 IT 系统的配置管理、应用部署、执行特定任务的开源平台,是 AnsibleWorks 公司名下的项目,该公司由 Cobbler 及 Func 的作者于 2012 年创建成立。
TiDB 是 PingCAP 公司设计的开源分布式 HTAP (Hybrid Transactional and Analytical Processing) 数据库,结合了传统的 RDBMS 和 NoSQL 的最佳特性。TiDB 兼容 MySQL,支持无限的水平扩展,具备强一致性和高可用性。TiDB 的目标是为 OLTP (Online Transactional Processing) 和 OLAP (Online Analytical Processing) 场景提供一站式的解决方案。
实验拓扑:
| NameHost | IP | Services |
|---|---|---|
| Server4 | 172.25.25.4 | Ansible中控机,PD1, TiDB1 |
| Server5 | 172.25.25.5 | TiKV1 |
| Server6 | 172.25.25.6 | TiKV2 |
| Server7 | 172.25.25.7 | TiKV3 |
中控机依赖性安装
 [root@server4 ~]# yum -y install epel-release git curl sshpass
 [root@server4 ~]# yum install -y python-pip-8.1.2-1.el7.noarch.rpm
进行tidb 用户的创建,以及密码修改
 [root@server4 ~]# useradd -m -d /home/tidb tidb
 [root@server4 ~]# passwd tidb
进行用户授权
 [root@server4 ~]# vim /etc/sudoers
 在最后添加:
 #includedir /etc/sudoers.d
 tidb ALL=(ALL) NOPASSWD: ALL
生成 ssh key:
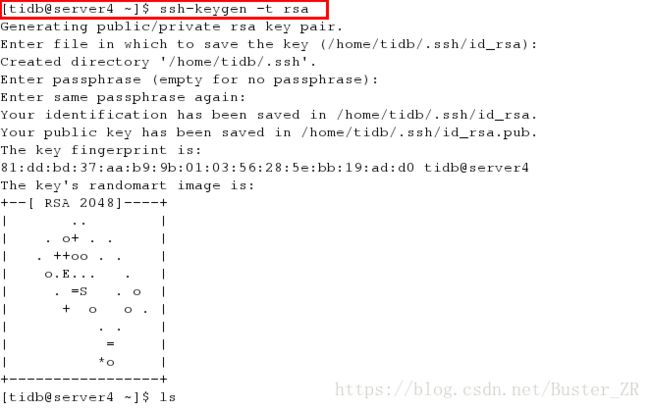
执行 su 命令从 root 用户切换到 tidb 用户下,创建 tidb 用户 ssh key, 提示 Enter passphrase 时直接回车即可。执行成功后,ssh 私钥文件为 /home/tidb/.ssh/id_rsa, ssh 公钥文件为 /home/tidb/.ssh/id_rsa.pub。
进行anisble 安装
获取ansble-master并进行解压( https://github.com/pingcap/tidb-ansible.git)
 [tidb@server4 ~]$ unzip tidb-ansible-master.zip
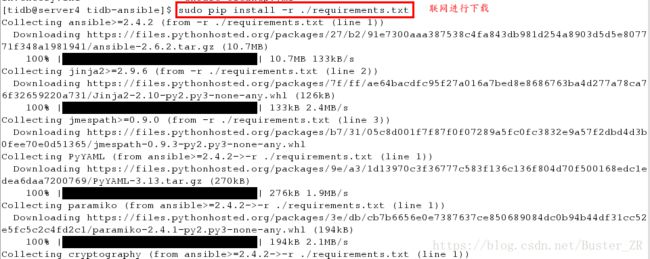
 在中控机器上,进行联网下载ansble
 进入tide-asible 目录
 [tidb@server4 tidb-ansible]$ sudo pip install -r ./requirements.txt
 Ansible 及相关依赖版本记录在 tidb-ansible/requirements.txt 文件中
中控机上配置部署机器 ssh 互信及 sudo 规则
 [tidb@server4 tidb-ansible]$ vim hosts.ini
 [servers]    # 控制的Servers
 172.25.25.4
 172.25.25.5
 172.25.25.6
 172.25.25.7

 [all:vars]
 username = tidb
 ntp_server = pool.ntp.org
中控机与部署目标机器之间的 ssh 互信
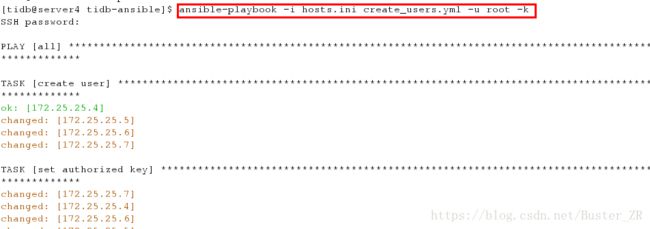
执行以下命令,按提示输入部署目标机器 root 用户密码。该步骤将在部署目标机器上创建 tidb 用户,并配置 sudo 规则,配置中控机与部署目标机器之间的 ssh 互信。
 [tidb@server4 tidb-ansible]$ ansible-playbook -i hosts.ini  create_users.yml -u root -k
 SSH password:

 PLAY [all]  ************************************************************************************************************

 ............................省略................................
 Congrats! All goes well. :-)
为主机进行ntp时间同步服务的配置(此服务不配置,无法进行集群部署)
 Yum isntall -y ntp ntpstat
 编辑ntpd服务配置文件,/etc/ntp.conf
 每个机器内容相同
 restrict 172.25.0.0 mask 255.255.0.0 nomodify
 # Hosts on local network are less restricted.
 #restrict 192.168.1.0 mask 255.255.255.0 nomodify notrap
 # 允许同步的网段

 # Use public servers from the pool.ntp.org project.
 # Please consider joining the pool (http://www.pool.ntp.org/join.html).
 server 172.25.25.4 iburst   # 服务端列表
 server 172.25.25.5 iburst
 server 172.25.25.6 iburst
server 172.25.25.7 iburst [root@server4 tidb-ansible]# ntpstat
synchronised to NTP server (46.243.26.34) at stratum 2
time correct to within 278 ms
polling server every 256 s
[root@server5 ~]# ntpstat
synchronised to NTP server (172.25.25.4) at stratum 3
time correct to within 302 ms
polling server every 128 s
[root@server6 ~]# ntpstat
synchronised to NTP server (172.25.25.4) at stratum 3
time correct to within 305 ms
polling server every 128 s
[root@server7 ~]# ntpstat
synchronised to NTP server (172.25.25.4) at stratum 3
time correct to within 298 ms
polling server every 128 s在部署目标机器上添加数据盘 ext4 文件系统挂载参数
注:此步不部署,无法完成集群的配置(亲身验证)
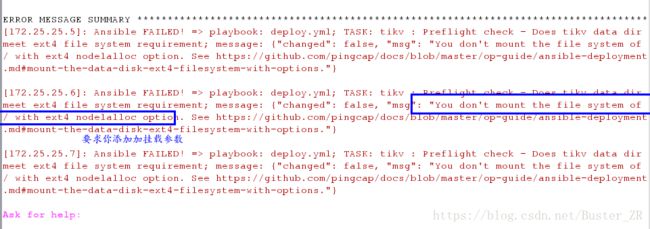
部署目标机器(除tidb-server外的tikv机器)数据盘请格式化成 ext4 文件系统,挂载时请添加 nodelalloc 和 noatime 挂载参数。nodelalloc 是必选参数,否则 Ansible 安装时检测无法通过,noatime 是可选建议参数。
注:据我经历,每个系统盘的状态最好都为,ext4,并且挂载参数:nodelalloc ,否则无法进行部署,/目录和/boot目录,可通过 修改/etc/fstab 然后重启机器进行实现
 Vim /etc/fstab
 UUID=d3059860-fd4b-4e63-b630-6ca580fc5ad6 /          ext4  defaults,nodelalloc,noatime        1 1
 UUID=ab532637-8a0d-49a1-9b3d-874e13313143 /boot      ext4  defaults,nodelalloc,noatime     1 2
 UUID=c038ee40-55b0-4ee8-ad56-47ccb0752a95 swap                     swap    defaults       0 0
 UUID=2cdf5e99-c327-44d1-9a50-666fd5edf266 /data1                   ext4    defaults,nodelalloc,noatime 0 2
[root@server5 ~]# mount -t ext4 (查看ext4的挂载参数)
/dev/vda3 on / type ext4 (rw,noatime,nodelalloc,data=ordered)
/dev/vda1 on /boot type ext4 (rw,noatime,nodelalloc,data=ordered)
/dev/vdb on /data1 type ext4 (rw,noatime,nodelalloc,data=ordered)若是为添加挂载参数,会报如下错误
在执行集群安装时:
关闭swap分区,否则也无法进行部署
执行: Swapoff -a 分配机器资源,编辑 inventory.ini 文件
编辑
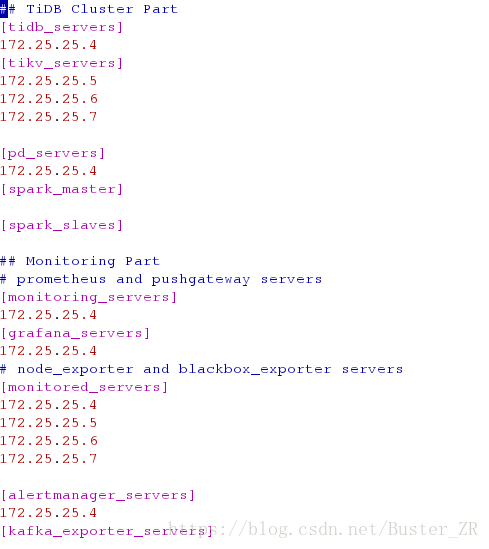
 [root@server4 tidb-ansible]# vim inventory.ini
 ## TiDB Cluster Part
 [tidb_servers]
 172.25.25.4
 [tikv_servers]
 172.25.25.5
 172.25.25.6
 172.25.25.7

 [pd_servers]
 172.25.25.4
 [spark_master]

 [spark_slaves]

 ## Monitoring Part
 # prometheus and pushgateway servers
 [monitoring_servers]
 172.25.25.4
 [grafana_servers]
 172.25.25.4
 # node_exporter and blackbox_exporter servers
 [monitored_servers]
 172.25.25.4
 172.25.25.5
 172.25.25.6
 172.25.25.7

 [alertmanager_servers]
 172.25.25.4
 [kafka_exporter_servers]
部署任务
1.执行以下命令如果所有 server 返回 tidb 表示 ssh 互信配置成功。
 [tidb@server4 tidb-ansible]$ ansible -i inventory.ini all -m shell -a 'whoami'
 172.25.25.6 | SUCCESS | rc=0 >>
 tidb

 172.25.25.5 | SUCCESS | rc=0 >>
 tidb

 172.25.25.7 | SUCCESS | rc=0 >>
 tidb

 172.25.25.4 | SUCCESS | rc=0 >>
 tidb
2.执行以下命令如果所有 server 返回 root 表示 tidb 用户 sudo 免密码配置成功。
 [tidb@server4 tidb-ansible]$ ansible -i inventory.ini all -m shell -a 'whoami' -b
 172.25.25.5 | SUCCESS | rc=0 >>
 root

 172.25.25.6 | SUCCESS | rc=0 >>
 root

 172.25.25.7 | SUCCESS | rc=0 >>
 root

 172.25.25.4 | SUCCESS | rc=0 >>
 root
* 3.执行 local_prepare.yml playbook,联网下载 TiDB binary 到中控机:*
 [tidb@server4 tidb-ansible]$ ansible-playbook local_prepare.yml

 PLAY [do local preparation]  ****************************************************************************************

 TASK [local : Stop if ansible version is too low, make sure that the Ansible version is  Ansible 2.4.2 or later, otherwise a compatibility issue occurs.] *** ok: [localhost] => {
 "changed": false,
 "msg": "All assertions passed"
 }

 .........................省略...............................
 PLAY RECAP  *********************************************************************************************************
 localhost                  : ok=28   changed=20   unreachable=0     failed=0

 Congrats! All goes well. :-)
4.初始化系统环境,修改内核参数
 [tidb@server4 tidb-ansible]$ ansible-playbook bootstrap.yml
 ................................. 省略  ......................................
 TASK [check_system_optional : Preflight check - Check TiDB server's CPU] ******************************************* fatal: [172.25.25.4]: FAILED! => {"changed": false, "msg": "This machine does not have sufficient CPU to run TiDB, at least 8 cores."} [172.25.25.4]: Ansible FAILED! => playbook: bootstrap.yml; TASK: check_system_optional : Preflight check - Check TiDB server's CPU;  message: {"changed": false, "msg": "This machine does not have sufficient CPU to run TiDB, at least 8 cores."}

 Ask for help:
 Contact us: support@pingcap.com
 It seems that you encounter some problems. You can send an email to the  above email address, attached with the tidb-ansible/inventory.ini and  tidb-ansible/log/ansible.log files and the error message, or new issue on https://github.com/pingcap/tidb-ansible/issues. We'll try our best to help you deploy a TiDB cluster. Thanks. :-)
此问题无法解决,因为要求8核的cpu,不过对于实验环境,可进行忽略,不影响集群部署
4.部署 TiDB 集群软件
PLAY [check config locally]
***********************************************************************************************
。。。。。。。。。。。 省略 。。。。。。。。。。。。
PLAY RECAP ***********************************************************************************************
172.25.25.4                : ok=140  changed=21   unreachable=0    failed=0
172.25.25.5                : ok=60   changed=9    unreachable=0    failed=0
172.25.25.6                : ok=60   changed=9    unreachable=0    failed=0
172.25.25.7                : ok=60   changed=9    unreachable=0    failed=0
localhost                  : ok=1    changed=0    unreachable=0    failed=0

Congrats! All goes well. :-)
部署成功
5.启动 TiDB 集群
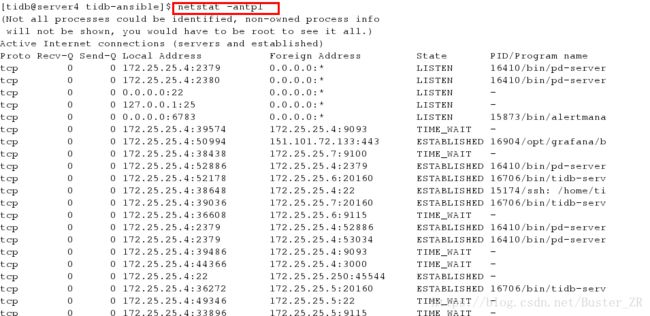
[tidb@server4 tidb-ansible]$ ansible-playbook start.yml启动成功后,查看端口情况
 [tidb@server4 tidb-ansible]$ mysql -u root -h 172.25.25.4 -P 4000
 Welcome to the MariaDB monitor.  Commands end with ; or \g.
 Your MySQL connection id is 5
 Server version: 5.7.10-TiDB-v2.1.0-beta-235-g1f87107 MySQL Community  Server (Apache License 2.0)

 Copyright (c) 2000, 2016, Oracle, MariaDB Corporation Ab and others.

 Type 'help;' or '\h' for help. Type '\c' to clear the current input statement.

 MySQL [(none)]> Ctrl-C -- exit!
通过浏览器访问监控平台
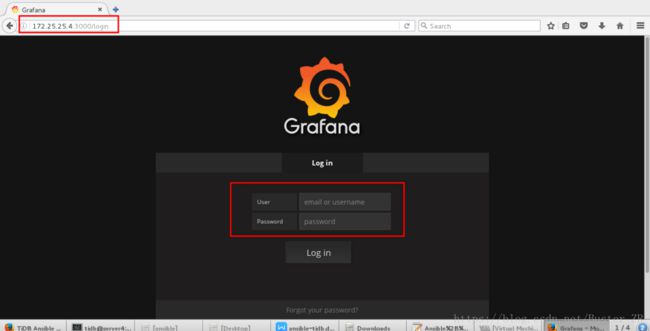
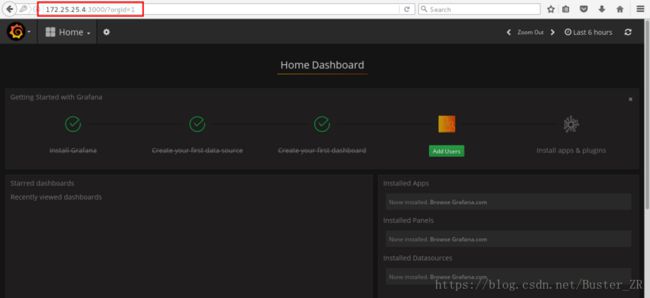
地址:http://172.16.10.1:3000 默认帐号密码是:admin/admin


