Python黑帽子学习笔记-----第三章
一.Windows和Linux上的包嗅探
首先创建套接字对象,然后再判断程序在哪个平台上运行。在Windows平台上,我们需要通过套接字输入/输出控制(IOCTL)设置一些额外的标志,它允许在网络接口上启用混杂模式。下面例子只设置原始套接字嗅探器,读取一个数据包,然后退出即可
# -*- coding:utf -*-
import socket
import os

#监听主机
#Windows主机IP
host = "172.xx.xx.xx"
#Linux主机IP
#host = "192.168.233.1"


# 创建原始套接字,然后绑定在公开接口上
if os.name == "nt":
    socket_protocol = socket.IPPROTO_IP
else:
    socket_protocol = socket.IPPROTO_ICMP

sniffer = socket.socket(socket.AF_INET,socket.SOCK_RAW,socket_protocol)

sniffer.bind((host,0))

# 设置在捕获的数据包中包含IP头
sniffer.setsockopt(socket.IPPROTO_IP,socket.IP_HDRINCL,1)

# 在Windows平台上,我们需要设置IOCTL以启用混杂模式(是用户隔离模式下与内核模式下的组件进行通信的方式)
if os.name == "nt":
    sniffer.ioctl(socket.SIO_RCVALL,socket.RCVALL_ON)

# 读取单个数据包
print(sniffer.recvfrom(65565))

# 在Windows平台上关闭混杂模式
if os.name == "nt":
    sniffer.ioctl(socket.SIO_RCVALL,socket.RCVALL_OFF)
在Windows系统上打开一个管理员模式的cmd窗口,然后运行脚本:
py -2 sniffer.py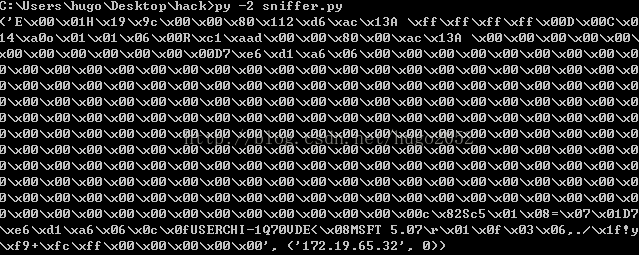
二.解码IP层
刚才的代码只是接收了任何高层协议如TCP,UDP或ICMP的所有IP头信息。而且是二进制数的形式,非常难以理解。所以接下来就是解码数据包中IP头的部分,提取诸如协议类型(TCP,UDP和ICMP),源IP地址和目的IP地址等有用信息。下图为典型的IPv4头结构。

IP解码
#!/usr/bin/python
#coding=utf-8
import socket
import os
import struct
from ctypes import *

#监听的主机--Windows主机
host = "172.xx.xx.x"

#IP头定义
class IP(Structure):
    """docstring for IP"""
    _fields_ = [
        ("ihl",         c_ubyte, 4),  #ip head length:头长度
        ("version",     c_ubyte, 4),  #版本
        ("tos",         c_ubyte),     #服务类型
        ("len",         c_ushort),    #ip数据包总长度
        ("id",          c_ushort),    #标识符
        ("offset",      c_ushort),    #片偏移
        ("ttl",         c_ubyte),     #生存时间
        ("protocol_num",    c_ubyte), #协议数字,应该是协议类型,这里用数字来代表时哪个协议,下面构造函数有设置映射表
        ("sum",         c_ushort),    #头部校验和
        ("src",         c_ulong),     #源ip地址
        ("dst",         c_ulong)      #目的ip地址
    ]

    def __new__(self,socket_buffer=None):
        return self.from_buffer_copy(socket_buffer)

    def __init__(self, socket_buffer=None):
        #协议字段与协议名称对应
        self.protocol_map = {1:"ICMP",6:"TCP",17:"UDP"}

        #可读性更强的IP地址
        self.src_address = socket.inet_ntoa(struct.pack(" %s"%(ip_header.protocol,ip_header.src_address,ip_header.dst_address)
#处理CTRL-C
except KeyboardInterrupt:

    #如果运行在Windows上,关闭混杂模式
    if os.name == "nt":
        sniffer.ioctl(socket.SIO_RCVALL,socket.RCVALL_OFF)
注:Windows可以看到TCP,UDP,ICMP的数据信息
在Windows系统上打开一个管理员模式的cmd窗口,然后运行脚本:
py -2 sniffer_ip_header_decode.py
程序运行在Linux下时需要将_fields_中的src和dst修改一下,变化如下:
    _fields_ = [
        ("ihl",         c_ubyte, 4),  #ip head length:头长度
        ("version",     c_ubyte, 4),  #版本
        ("tos",         c_ubyte),     #服务类型
        ("len",         c_ushort),    #ip数据包总长度
        ("id",          c_ushort),    #标识符
        ("offset",      c_ushort),    #片偏移
        ("ttl",         c_ubyte),     #生存时间
        ("protocol_num",    c_ubyte), #协议数字,应该是协议类型,这里用数字来代表时哪个协议,下面构造函数有设置映射表
        ("sum",         c_ushort),    #头部校验和
        ("src",         c_ulong),     #源ip地址  Windows版
        ("dst",         c_ulong)      #目的ip地址 Windows 版
    ]
修改后:
    _fields_ = [
        ("ihl",         c_ubyte, 4),  #ip head length:头长度
        ("version",     c_ubyte, 4),  #版本
        ("tos",         c_ubyte),     #服务类型
        ("len",         c_ushort),    #ip数据包总长度
        ("id",          c_ushort),    #标识符
        ("offset",      c_ushort),    #片偏移
        ("ttl",         c_ubyte),     #生存时间
        ("protocol_num",    c_ubyte), #协议数字,应该是协议类型,这里用数字来代表时哪个协议,下面构造函数有设置映射表
        ("sum",         c_ushort),    #头部校验和
        ("src",         c_uint32),     #源ip地址
        ("dst",         c_uint32)      #目的ip地址
] Linux系统下的运行效果如下:
正在ping www.baidu.com 获得的数据包


三.解码ICMP
ICMP每条信息都包含三个固定的字段:数据类型,代码值和校验和。数据类型和代码值字段包含了主机接收到的ICMP信息的类别,它们揭示了正确解码ICMP信息的方法。

sniffer_with_icmp.py
#!/usr/bin/python
#coding=utf-8
import socket
import os
import struct
from ctypes import *

#监听的主机
#host = "192.168.64.128"

#Windows主机地址
#host = "172.xx.xx.xx"

# 实训ip
host = "10.0.x.x"

#IP头定义
class IP(Structure):
    """docstring for IP"""
    _fields_ = [
        ("ihl",         c_ubyte, 4),  #ip head length:头长度
        ("version",     c_ubyte, 4),  #版本
        ("tos",         c_ubyte),     #服务类型
        ("len",         c_ushort),    #ip数据包总长度
        ("id",          c_ushort),    #标识符
        ("offset",      c_ushort),    #片偏移
        ("ttl",         c_ubyte),     #生存时间
        ("protocol_num",    c_ubyte), #协议数字,应该是协议类型,这里用数字来代表时哪个协议,下面构造函数有设置映射表
        ("sum",         c_ushort),    #头部校验和
        ("src",         c_uint32),     #源ip地址
        ("dst",         c_uint32)      #目的ip地址
    ]

    def __new__(self,socket_buffer=None):
        return self.from_buffer_copy(socket_buffer)

    def __init__(self, socket_buffer=None):
        #协议字段与协议名称对应
        self.protocol_map = {1:"ICMP",6:"TCP",17:"UDP"}

        #可读性更强的IP地址
        self.src_address = socket.inet_ntoa(struct.pack(" %s"%(ip_header.protocol,ip_header.src_address,ip_header.dst_address)

        # ------------------ICMP add------------------
        # 如果为ICMP,进行处理
        if ip_header.protocol == "ICMP":
            # 计算ICMP包的起始位置
            offset = ip_header.ihl * 4
            buf = raw_buffer[offset:offset + sizeof(ICMP)]

            #解释ICMP数据
            icmp_header = ICMP(buf)

            print("ICMP -> Type:%d Code: %d " % (icmp_header.type,icmp_header.code))
        # ------------------------------------


#处理CTRL-C
except KeyboardInterrupt:

    #如果运行在Windows上,关闭混杂模式
    if os.name == "nt":
        sniffer.ioctl(socket.SIO_RCVALL,socket.RCVALL_OFF)
Windows下运行效果:

4.小试牛刀
使用扫描器对局域网进行扫描寻找其他主机
首先要先安装netaddr
easy_install netaddr#-*- coding:utf8 -*-
import socket
import os
import struct
import threading
import time
import sys
from netaddr import IPNetwork,IPAddress
from ctypes import *
# 监听主机,即监听那个网络接口,下面的ip为我的ip
#host = "172.xx.xx.xx"
# 实训ip
host = "10.0.2.10"
# 扫描的目标子网
# subnet = "192.168.1.0/24"
# 没有命令行参数,默认192.168.1.0/24
if len(sys.argv) == 1:# 扫描当前IP网段存在的主机
#subnet = "172.19.65.0/24"
subnet = "10.0.2.0/24"
else:
subnet = sys.argv[1]
# 自定义的字符串,我们将在ICMP响应中进行核对
magic_message = "PYTHONRULES!"
# 批量发送UDP数据包
def udp_sender(subnet, magic_message):
time.sleep(5) #可以说程序暂停5秒吧
# 建立一个socket对象(SOCK_DGRAM:UDP客户端)
sender = socket.socket(socket.AF_INET, socket.SOCK_DGRAM)
for ip in IPNetwork(subnet):
try:
# 尝试发送magic_message这个消息到子网的每个ip,还用了个不怎么可能用的65212端口
sender.sendto(magic_message, ("%s" % ip, 65212))
except:
pass #代表什么也不做
# ip头定义
class IP(Structure):
_fields_ = [
("ihl", c_ubyte, 4), #ip head length:头长度
("version", c_ubyte, 4), #版本
("tos", c_ubyte), #服务类型
("len", c_ushort), #ip数据包总长度
("id", c_ushort), #标识符
("offset", c_ushort), #片偏移
("ttl", c_ubyte), #生存时间
("protocol_num", c_ubyte), #协议数字,应该是协议类型,这里用数字来代表时哪个协议,下面构造函数有设置映射表
("sum", c_ushort), #头部校验和
("src", c_uint32), #源ip地址
("dst", c_uint32) #目的ip地址
]
# __new__(cls, *args, **kwargs) 创建对象时调用,返回当前对象的一个实例;注意:这里的第一个参数是cls即class本身
def __new__(self, socket_buffer=None):
return self.from_buffer_copy(socket_buffer)
# __init__(self, *args, **kwargs) 创建完对象后调用,对当前对象的实例的一些初始化,无返回值,即在调用__new__之后,根据返回的实例初始化;注意,这里的第一个参数是self即对象本身【注意和new的区别】
def __init__(self, socket_buffer=None):
# 协议字段与协议名称的对应
self.protocol_map = {1:"ICMP", 6:"TCP", 17:"UDP"}
# 可读性更强的ip地址(转换32位打包的IPV4地址为IP地址的标准点号分隔字符串表示。)
self.src_address = socket.inet_ntoa(struct.pack(" %s" % (ip_header.protocol, ip_header.src_address, ip_header.dst_address)
# 如果为ICMP,进行处理
if ip_header.protocol == "ICMP":
# 计算ICMP包的起始位置,并获取ICMP包的数据
offset = ip_header.ihl * 4 #ihl是头部长度,代表32位(即4字节)长的分片的个数 [我的理解是因为一个字节表示一个符号,所以这里的offset要搞成以字节为单位的,为的是下一句的提取数据]
buf = raw_buffer[offset:offset+sizeof(ICMP)]
# 解析ICMP数据
icmp_header = ICMP(buf)
#print "ICMP -> Type: %d Code: %d" % (icmp_header.type, icmp_header.code)
# 检查类型和代码值是否都为3
if icmp_header.type == 3 and icmp_header.code == 3:
# 确认响应的主机再我们的目标子网之内
if IPAddress(ip_header.src_address) in IPNetwork(subnet):
# 确认ICMP包中包含我们发送的自定义的字符串
if raw_buffer[len(raw_buffer) - len(magic_message):] == magic_message:
print "Host Up: %s" % ip_header.src_address
# 处理CTRL-C
except KeyboardInterrupt:
# 如果运行再Windows上,关闭混杂模式
if os.name == "nt":
sniffer.ioctl(socket.SIO_RCVALL, socket.RCVALL_OFF) 由于我的网段只有本机所以只能扫描自己的ip
