Python3.4(Pyhon)代码如何打包成.exe可执行文件——详细教程
刚学Python还没一个月,迫于急着要搞一个项目的demo演示程序,由于这个demo是有GUI界面,而且代码里用了好多模块,为了拿出去让别人演示的时候可以不用再次安装那么多的库包,将Python代码打包成exe可执行文件还是很有必要的。
我就将我打包过程中研究的东西或遇到的问题在这里总结一下,尽量写成一个详细的教程。
1.可以打包Python代码的工具
1.1. py2exe:
这个是知名度最高的,但是好像不太适合新手,需要各种库,用起来比较繁琐,不推荐啊
1.2. Pyinstaller :
可以只是生成单独的可执行程序
且支持的版本也多:2.3到2.7都支持。以及x64也支持
也可以自定义图标
还是挺不错的啊,我用下面链接的教程试着打包过,但没有成功,原因还在进一步分析中,如果打包成功了就写一个Pyinstaller的教程。
先在这儿贴上这个Pyinstaller教程,写的挺不错的。
【记录】用PyInstaller把Python代码打包成单个独立的exe可执行文件
1.3 cx_Freeze :
这个打包质量挺好,操作也简单,本人用这个摸索了2个小时,然后就成功打包了 python代码。缺点是不能生产单独的可执行文件,这样子的结果就是exe文件被淹没在众多文件中,看着不高大上(另有一说法是可以的,我没试出来)。
2. 用cx_Freeze打包Python代码到exe文件
2.1. 首先需要去下载cx_freeze 并安装
下载地址:http://sourceforge.net/projects/cx-freeze/files/
文档地址:Welcome to cx_Freeze’s documentation
建议自学能力强的同学直接转到参考文档的页面!!
下载与自己的系统和Python版本对应的安装包,然后安装,安装好后用cmd 命令检查一下时候安装正确。
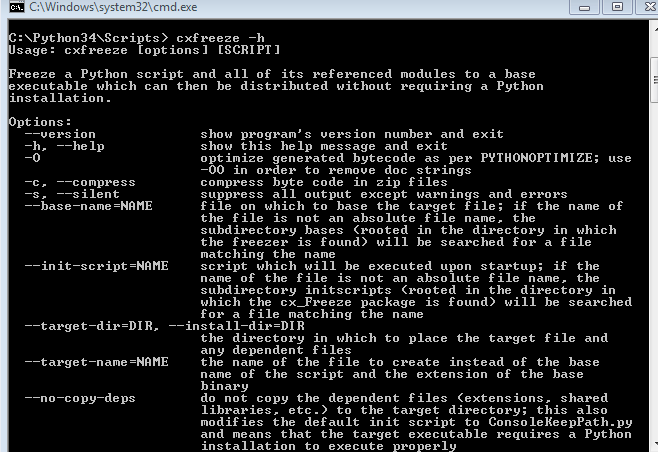
(1) 运行cmd,将路径切换到你的python安装路径下的Scripts文件下,然后执行cxfreeze -h,然后出现下面的图,就说明安装正确啦。
有新手可能会问那怎么才能将路径切换到你的python安装路径下的Scripts文件下呢?
下面是CMD 教程:
DOS命令行运行程序:
dir :显示当前目录下的文件及文件夹
cd 目录名:进入当下目录里
cd.. : 返回上级目录
E: :切换到E盘
下图是实例:
言归正传,如何使用该命令没有出现上如所示的画面,那就要查看一下Python的安装路径。
修改路径的办法:
我的电脑->左击鼠标选‘属性’->选高级系统设置 -> …选择环境变量,点击Path,在path的最后面加上自己的安装路径,一般是这个样子的:
![]()
注意后面加‘;’分号。
再重新运行CMD命令,就好了。
2.2. 安装Python的扩展包
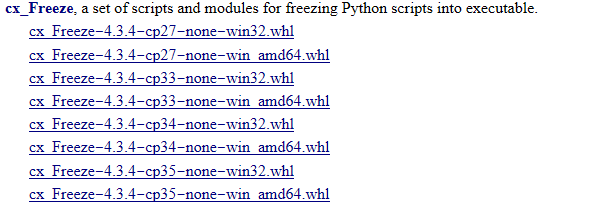
cx_Freeze扩展包下载地址http://www.lfd.uci.edu/~gohlke/pythonlibs/
(1)首先,修改下载文件的扩展名,把扩展名whl,改为zip
(2) 然后,把该文件解压缩,取出其中的3个子目录
(3)其次,删除cx_freeze的旧包:把Python 安装目录下,Lib\site-packages 里与 cx_Freeze 相关的子目录删除
(4) 最后,放置cx_freeze的新包:在 Lib\site-packages 中,放置上述取出的3个子目录
这个时候差不多就可以开始打包了。
2.3. 打包python代码生成exe文件
运行cmd,将路径切换到python的安装路径下的Scripts目录下,输入命令:
cxfreeze X:\XX|XX.PY - -target-dir yy:\yy\yyy
X:\XX|XX.PY是你要打包的主文件(即启动文件)的路径,yy:\yy\yyy是要生成的目标文件夹得路径,在yyy目录下就有exe可执行文件。
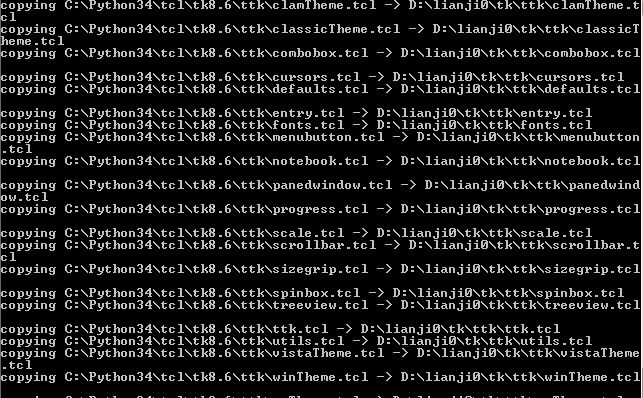
你会看到cmd在运行一小段时间后停止,这是就可以找到目标文件,会惊喜的发现文件夹下面有个.exe文件,点击运行,就会出来你要的效果了。
如果生成的exe不能运行,我在这里提供几个查错方向
(1)你的.py程序中是不是涉及到了对图片,或者文档的调用,如果有,那请把这些文件copy到这个exe目标文件下,当然前提是你代码中对文档图片的调用使用的是相对路径。
(2)查查你的代码是不是完整的,即在python shell (或别的代码编辑器)下运行时保证不会出现红色的ERROR. 具体出错类型可以查看那个黑色的控制窗口。
2.4 去掉黑色的控制窗
当python代码全部OK的时候,这个黑色的窗就显得很多余,很LOW了。这是我们就要把它去掉。重新生成没有黑窗的exe,命令如下:
‘cxfreeze X:\XX|XX.PY –target-dir yy:\yy\yyy - -base-name=win32gui’
然后你就可以拿去任何一个电脑上去运行你的python程序了。
2.5 生成单一可执行文件的方法
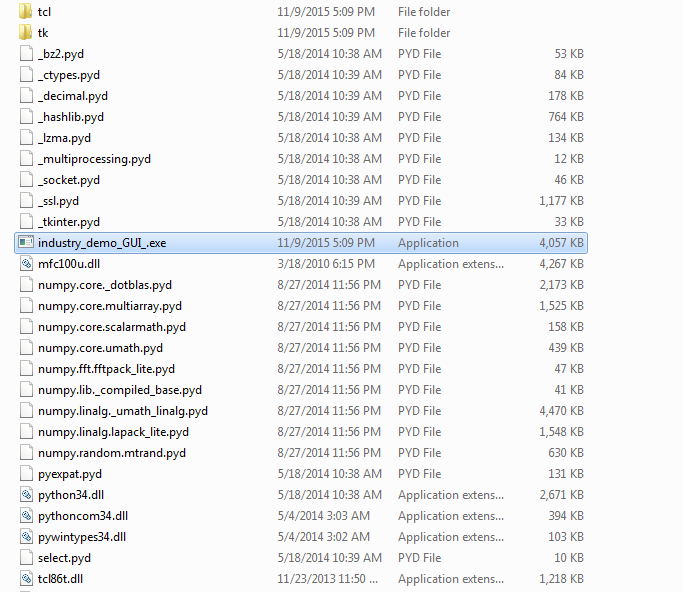
cx_Freeze默认情况下,是会生成,一个可执行文件,加上一堆运行所需的(.dll或.so等)库文件,就像上面给出的图片一样。
如果想要生成单一的可执行文件:可以使用
distutils setup script:http://cx-freeze.readthedocs.org/en/latest/distutils
由于公司时间急,我还没有研究过这个,感兴趣的可以去看看,好像也不要复杂。
3.cx_Freeze的其他选项参数
授人以鱼不如授人以渔,最后这点很关键,你可以通过修改其他参数来实现自己想要的功能,最后附上cxfreeze的其他的参数:
cxfreeze其他参数的含义
–version
show version number and exit
-O
optimize generated bytecode as per PYTHONOPTIMIZE; use -OO in order to remove doc strings
-c, –compress
compress byte code in zip files
-s, –silent
suppress all output except warnings and errors
–base-name=NAME
file on which to base the target file; if the name of the file is not an absolute file name, the subdirectory bases (rooted in the directory in which the freezer is found) will be searched for a file matching the name
–init-script=NAME
script which will be executed upon startup; if the name of the file is not an absolute file name, the subdirectory initscripts (rooted in the directory in which the cx_Freeze package is found) will be searched for a file matching the name
–target-dir=DIR, –install-dir=DIR #我们用的就是这一条哦
The directory in which to place the target file and any dependent files
–target-name=NAME
the name of the file to create instead of the base name of the script and the extension of the base binary
–default-path=DIRS
list of paths separated by the standard path separator for the platform which will be used to initialize sys.path prior to running the module finder
–include-path=DIRS
list of paths separated by the standard path separator for the platform which will be used to modify sys.path prior to running the module finder
–replace-paths=DIRECTIVES
replace all the paths in modules found in the given paths with the given replacement string; multiple values are separated by the standard path separator and each value is of the form path=replacement_string; path can be * which means all paths not already specified
–include-modules=NAMES
comma separated list of modules to include
–exclude-modules=NAMES
comma separated list of modules to exclude
–ext-list-file=NAME
name of file in which to place the list of dependent files which were copied into the target directory
-z SPEC, –zip-include=SPEC
name of file to add to the zip file or a specification of the form name=arcname which will specify the archive name to use; multiple –zip-include arguments can be used
–icon=ICON
name of the icon file for the application
结束语:
如果大家按我的方法操作还不能实现Python代码打包的话,下面我给出几个链接,可以继续参考:
【记录】用cx_Freeze把Python代码打包成单个独立的exe可执行文件
利用cx_Freeze将py文件打包成exe文件(图文全解)


