利用ContentProvider实现同步Binder
在Android中跨进程通信的方式有好多种,比如
- Intent
- Messenger
- AIDL(Android 接口定义语言)
- ContentProvider
- Socket
以AIDL为例,在使用AIDL实现安卓跨进程通信的时候,通常分为3步:
- 定义AIDL接口文件,在
Service的onBind方法中返回binder给客户端 - 客户端与服务端绑定,在回调函数
onServiceConnected中获取binder - 通过
Stub的asInterface方法转换为我们定义的接口,然后调用服务端逻辑。
这是一种典型的CS(客户端-服务端)架构。下面我们就用AIDL来实现跨进程通信,首先我们来定义一个问题:
假如小王是一家连锁超市的老板,他最关心的是自己的超市目前的规模以及自己超市的营业额的情况。他是需要服务的一端,所以把小王定义为客户端。针对老板的需求,我们需要提供两个服务,一是查询连锁超市的数量而是查询超市的营业额。
既然需求有了,现在我们就来实现它:
客户端就定义一个BossActivity用于显示连锁超市目前的规模以及营业额。
服务端为了解耦就定义两个Service,OrderService(查询营业额)和StoreService(查询超市规模)
接下来按照上面的三步走,我们依次来实现一下
1. 定义AIDL
- 定义
IOrderService.aidl包括查询营业额的服务
package qiwoo.android.sync.binder;

interface IOrderService {

	// 获取营业额
    int getOrderAmount();

}
- 定义
IStoreService.aidl包括查询超市规模的的服务,其实就是store的数量
package qiwoo.android.sync.binder;

import qiwoo.android.sync.binder.Store;

interface IStoreService {

	// 获取超市的列表
    List getStores();

}
2. 在Service中实现接口并作为binder返回
OrderService具体实现如下
public class OrderService extends Service {

    @Override
    public void onCreate() {
        super.onCreate();
    }

    IOrderService.Stub mOrderService = new IOrderService.Stub() {
        @Override
        public int getOrderAmount() throws RemoteException {
	        // 方便演示这里就不涉及过多逻辑,简单返回数据
            return 100;
        }
    };

    @Nullable
    @Override
    public IBinder onBind(Intent intent) {
    	//返回 OrderService binder
        return mOrderService;
    }
}
StoreService具体实现如下
public class StoreService extends Service {

    private List stores;

    @Override
    public void onCreate() {
        super.onCreate();

		// 方便演示这里就不涉及过多逻辑,简单创建数据
        Store store1 = new Store(1, "qiwoo", "123", "beijing");
        Store store2 = new Store(2, "mobile", "123", "beijing");

        stores = new ArrayList<>();
        stores.add(store1);
        stores.add(store2);
    }

    IStoreService.Stub mStoreService = new IStoreService.Stub() {

        @Override
        public List getStores() throws RemoteException {
            return stores;
        }
    };

    @Nullable
    @Override
    public IBinder onBind(Intent intent) {
        // 返回 StoreService binder
        return mStoreService;
    }
}
3. 在BossActivity中 bindService
- 绑定服务
Intent orderIntent = new Intent();
orderIntent.setClass(this, OrderService.class);
bindService(orderIntent, mOrderServiceConnection, Context.BIND_AUTO_CREATE);

Intent storeIntent = new Intent();
storeIntent.setClass(this, StoreService.class);
bindService(storeIntent, mStoreServiceConnection, Context.BIND_AUTO_CREATE);
- 传入的ServiceConnection
private ServiceConnection mOrderServiceConnection = new ServiceConnection() {
    @Override
    public void onServiceConnected(ComponentName name, IBinder service) {
    	// 在这里,绑定成功之后,我们就拿到了binder
        mOrderService = IOrderService.Stub.asInterface(service);
    }

    @Override
    public void onServiceDisconnected(ComponentName name) {

    }
};
- 调用远程服务
try {
	// 在 onServiceConnected 中拿到的binder
    int amount = mOrderService.getOrderAmount();
    Toast.makeText(BossActivity.this, "恭喜老板营业额是:" + amount + " 亿", Toast.LENGTH_SHORT).show();
} catch (RemoteException e) {
    e.printStackTrace();
}
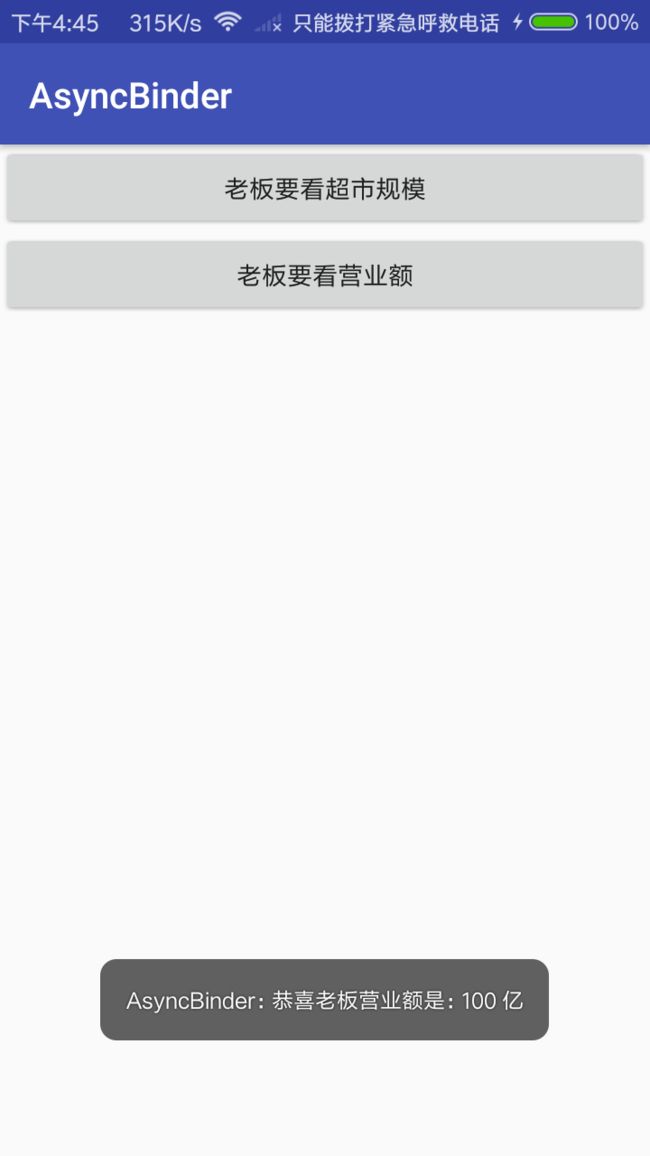
到目前为止,一切都很顺利。我们通过AIDL实现了跨进程通信,来测试一下结果和我们预期的也一样。


非常棒,老板很有钱,晚上又可以给我们加鸡腿了。但是有没有发现一个问题:在BossActivity中想要调用另一个进程的服务,必须要等 bindService中传入的ServiceConnection拿到onServiceConnected的回调才能使用,也就是我们异步的获取了binder。有的时候我们并不想这样做,有没有一个办法可以直接通过一个get方法就拿到binder呢?
答案当然是肯定的啦,现在我们再回到文章开头看看实现跨进程通信中常见的几种方式,有一个ContentProvider接下来它就是我们的主角了,对ContentProvider不熟的同学可以去查一下它的用法。我们就通过它来实现在客户端同步获取binder,怎么去做呢,同样三步走。
- 定义AIDL接口文件和实现类
- 定义一个
ContentProvider根据查询参数的不同返回具体的服务binder - 查询
ContentProvider获得Cursor然后通过Stub的asInterface方法转换为我们定义的接口,然后调用服务端逻辑。
1. 定义AIDL和实现类
AIDL和上面完全一样,不再重复
OrderServiceImpl实现
public class OrderServiceImpl extends IOrderService.Stub {

    @Override
    public int getOrderAmount() throws RemoteException {
        return 100;
    }
}
StoreServiceImpl实现
public class StoreServiceImpl extends IStoreService.Stub {

    private List stores;

    public StoreServiceImpl() {

        Store store1 = new Store(1, "qiwoo", "123", "beijing");
        Store store2 = new Store(2, "mobile", "123", "beijing");

        stores = new ArrayList<>();
        stores.add(store1);
        stores.add(store2);
    }

    @Override
    public List getStores() throws RemoteException {
        return stores;
    }
}
2. 定义BinderProvider主要代码如下:
public Cursor query(@NonNull Uri uri, @Nullable String[] projection, @Nullable String selection, @Nullable String[] selectionArgs, @Nullable String sortOrder) {

    IBinder binder;

    if (selectionArgs[0].equals(SERVICE_ORDER)) {
        binder = new OrderServiceImpl();

        Log.d(TAG, "Query OrderServiceImpl");

    } else if (selectionArgs[0].equals(SERVICE_STORE)) {
        binder = new StoreServiceImpl();

        Log.d(TAG, "Query StoreServiceImpl");

    } else {
        return null;
    }

    BinderCursor cursor = new BinderCursor(new String[]{"service"}, binder);

    return cursor;
}
ContentProvider的query方法返回的是一个Cursor,现在的场景不像查询数据库一样可以通过SQLiteDatabase的query方法直接返回一个Cursor,而Cursor又是一个接口,没有办法直接实例化。所以我们需要找一个可以实例化一个Cursor,这里用到了MatrixCursor。有了Cursor之后就可以把根据查询参数的不同我们返回了不同的binder放到Cursor中返回。下面我们来看一下BinderCursor
public class BinderCursor extends MatrixCursor {

    static final String KEY_BINDER = "binder";

    Bundle mBinderExtra = new Bundle();

    public static class BinderParcelable implements Parcelable {

        public IBinder mBinder;

        public static final Creator CREATOR = new Creator() {
            @Override
            public BinderParcelable createFromParcel(Parcel source) {
                return new BinderParcelable(source);
            }

            @Override
            public BinderParcelable[] newArray(int size) {
                return new BinderParcelable[size];
            }
        };

        BinderParcelable(IBinder binder) {
            mBinder = binder;
        }

        BinderParcelable(Parcel source) {
            mBinder = source.readStrongBinder();
        }

        @Override
        public int describeContents() {
            return 0;
        }

        @Override
        public void writeToParcel(Parcel dest, int flags) {
            dest.writeStrongBinder(mBinder);
        }
    }

    public BinderCursor(String[] columnNames, IBinder binder) {
        super(columnNames);

        if (binder != null) {
            Parcelable value = new BinderParcelable(binder);
            mBinderExtra.putParcelable(KEY_BINDER, value);
        }
    }

    @Override
    public Bundle getExtras() {
        return mBinderExtra;
    }

}
可以看到它继承自MatrixCursor,然后通过Bundle包装了binder,这样就可以 new 一个 MatrixCursor的对象返回了。
3. 查询ContentProvider获得cursor调用服务端逻辑。
final ContentResolver resolver = MainActivity.this.getContentResolver();

final Cursor cu = resolver.query(CONTENT_URI, null, null, new String[]{SERVICE_ORDER}, null);
if (cu == null) {
    return;
}

IBinder binder = getBinder(cu);
try {
    IOrderService orderService = IOrderService.Stub.asInterface(binder);
    int amount = orderService.getOrderAmount();

    Toast.makeText(MainActivity.this, "恭喜老板营业额是:" + amount + " 亿", Toast.LENGTH_SHORT).show();

} catch (RemoteException e) {
    e.printStackTrace();
}

cu.close();
这里,我们为了获得营业额和超市规模的数据传入的查询参数是SERVICE_ORDER和SERVICE_STORE,假如有很多个服务就可以把这部分代码再进行封装,写一个管理类,根据不同的参数返回不同的service。
这样我们获取binder就是同步的了,不需要再等待回调,query出来直接使用。打印的结果和上面是一样的,不再展示。
本文demo地址: github.com/77Y/SyncBinder