STRUTS2和SPRINGMVC之间的区别
完成了SSH(Struts2+Spring+Hibernate)
一、新建工程
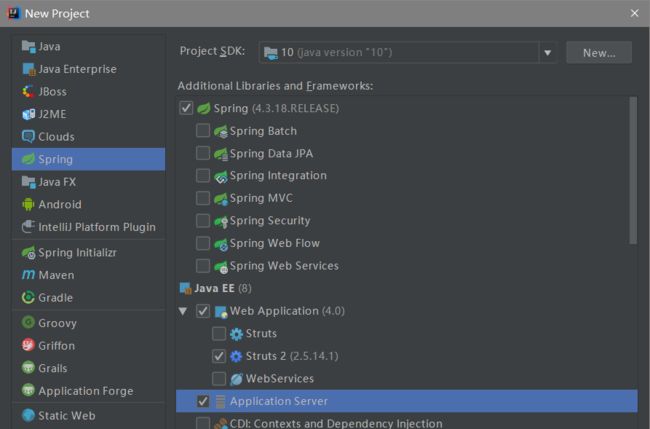
1.点击左侧spring模板然后选择 web Application、Struts2、ApplicationServer、Hibernate;
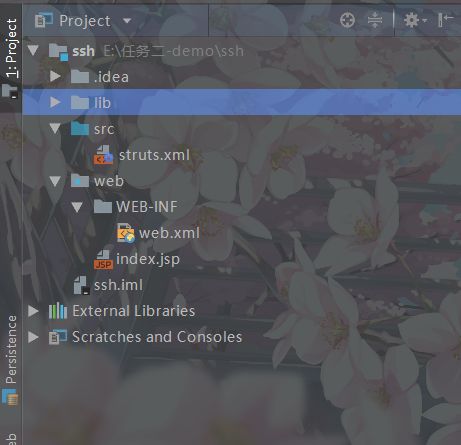
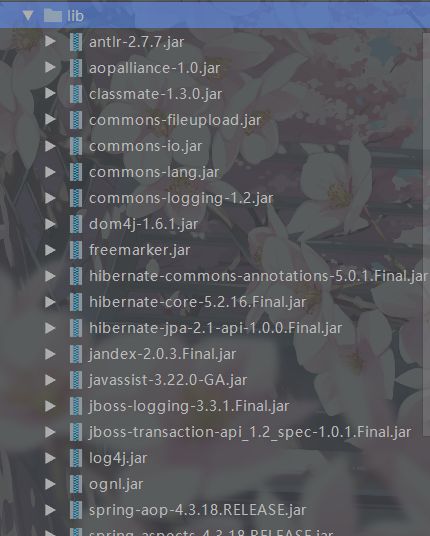
发现没有pom文件,只有lib文件夹。
二、spring的引入和测试
在src新建test
package test;

       */
public class TestService {
   private String name;
   public void setName(String name) {
       this.name = name;
   }
   public String getName() {
       return name;
   }
   public void hello()
   {
       System.out.println("hello "+ getName());
   }
同时新建一个bean,然后测试。
package test;

       import org.springframework.context.ApplicationContext;
       import org.springframework.context.support.FileSystemXmlApplicationContext;

/**
* Created by kinthon on 17-3-31.
*/
public class Test {
   public static void main(String[] args)
   {
       ApplicationContext ac = new FileSystemXmlApplicationContext("web/WEB-INF/applicationContext.xml");
       TestService ts = (TestService)ac.getBean("testService");
       ts.hello();
   }
然后输出 hello spring,即为成功。
Hinbernate引入与测试:
1.使用Hinbernate还需要额外的mysql、commons-dbcp、commons-pool
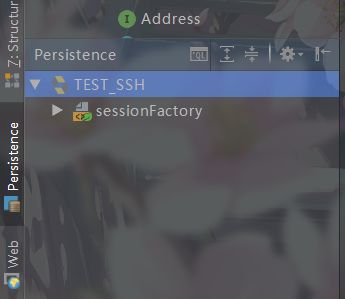
2.为了可以使用Persistence的sessionFactory进行生成持久化映射,需要先配置applicationContext.xml,让其接管Hibernate的配置;操作如下,在applicationContext.xml里面加入如下的内容(password的值根据自己的数据库进行配置)如果没有进行这一步的话,在Persistence界面是不会出现sessionFactory的。
           org.hibernate.dialect.MySQLDialect
           true
           jdbc:mysql://localhost:3306/TESTDB
           com.mysql.jdbc.Driver
3.进行持久化类生成,点击左下角的按钮, 选择Persistence; 在Persistence界面,选择下拉,右击sessionFactory->Generate Persistence Mapping; 相关截图如下;
4.建Service层,在src目录下建service包,在service包下新建一个接口类Address.java和实现类AddressImpl,代码如下
package Service;

       import bean.Addresslist;


public interface Address {
   public void add(Addresslist al);
}
AddressImpl.java
package Service;


import bean.Addresslist;
import org.hibernate.Session;
import org.hibernate.SessionFactory;
import org.hibernate.Transaction;
import org.springframework.beans.factory.annotation.Autowired;
import org.springframework.beans.factory.annotation.Qualifier;

public class AddressImpl implements Address {

   @Qualifier("sessionFactory")
   @Autowired
   private SessionFactory sessionFactory;

   @Override
   public void add(Addresslist al) {
       Session s = sessionFactory.openSession();
       Transaction tx= s.beginTransaction();
       s.save(al);
       tx.commit();
   }

   public void setSessionFactory(SessionFactory sessionFactory) {
       this.sessionFactory = sessionFactory;
   }
}
让Spring接管Hibernate的配置文件,同时建立address服务的bean;目前applicationContext.xml配置如下
               org.hibernate.dialect.MySQLDialect
               true
               jdbc:mysql://localhost:3306/TESTDB
               com.mysql.jdbc.Driver


               classpath:bean/Addresslist.hbm.xml
               classpath:bean/Addresslist.hbm.xml


               bean.Addresslist
5.struts2 引入并测试
修改web/WEB-INF/web.xml文件,引入struts2,配置如下
       struts2
       org.apache.struts2.dispatcher.ng.filter.StrutsPrepareAndExecuteFilter


       struts2
       /*


       org.springframework.web.context.ContextLoaderListener


       contextConfigLocation
       WEB-INF/applicationContext.xml
建一个action, 在src下加一个action包,然后新建一个AddressAction.java文件,代码如下
package action;

import Service.AddressImpl;
import bean.Addresslist;
import com.opensymphony.xwork2.ActionSupport;
import org.springframework.beans.factory.annotation.Autowired;


public class AddressAction extends ActionSupport {

   private String name;
   private String phone;
   @Autowired
   private AddressImpl address;


   public void setName(String name) {
       this.name = name;
   }

   public void setPhone(String phone) {
       this.phone = phone;
   }

   public String getName() {

       return name;
   }

   public String getPhone() {
       return phone;
   }

   public String add()
   {
       Addresslist al = new Addresslist();
       al.setName(getName());
       al.setPhone(getPhone());
       address.add(al);
       return SUCCESS;
   }

   public void setAddress(AddressImpl address) {
       this.address = address;
   }
}
测试
<%@ page contentType="text/html;charset=UTF-8" language="java" %>


   $Title$


success
SSH架构图
1. Struts负责Web层:
ActionFormBean接收网页中表单提交的数据,然后通过Action进行处理,再Forward到对应的网页,在Struts-config.xml中定义了
2. Spring负责业务层管理,即Service:
Service为Action提供统一的调用接口,封装持久层的DAO,并集成Hibernate,Spring可对JavaBean和事物进行统一管理。
3. Hibernate负责持久层,完成数据库的CRUD操作:
Hibernate有一组hbm.xml文件和PO,是与数据库中的表相对应的,然后定义DAO,这些是与数据库打交道的类。
4. 在Struts+Spring+Hibernate系统中,对象之间的调用流程如下: 
Struts——>Spring——>Hibernate
JSP——>Action——>Service——>DAO——>Hibernate


