Spring Cloud 进阶之路 -- 消息总线 Spring Cloud Bus 配置手动刷新和动态自动刷新
Spring Cloud Bus 配置步骤:
1、Spring Cloud Config 项目引入依赖,添加配置,配置暴露 endpoints
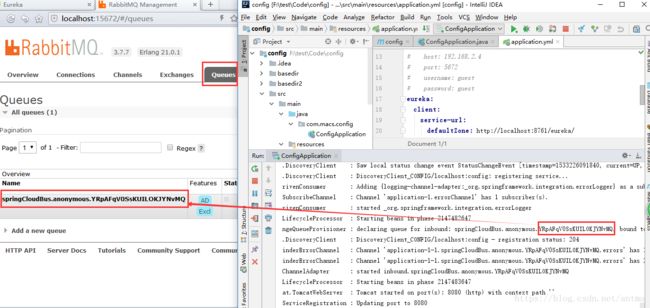
2、启动Config 项目,注册到Eureka,自动添加RabbitMQ队列
3、客户端的order应用引入依赖及配置,启动Config 项目,注册到Eureka,自动添加RabbitMQ队列
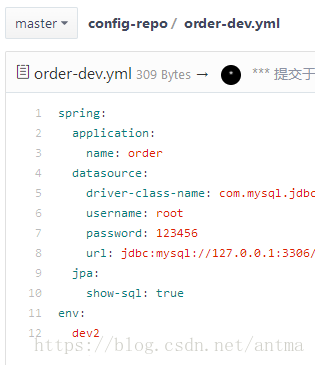
4、修改一下 git 上的配置
5、调用 /actuator/bus-refresh 手动刷新
6、访问 order 的 getEvn 地址,成功获取到修改后的值
7、自动刷新
详细如下:
1、Spring Cloud Config 项目引入依赖:
    org.springframework.cloud
    spring-cloud-starter-bus-amqp
添加配置,配置暴露 endpoints:
management:
  endpoints:
    web:
      exposure:
        include: "*"
include: "*" 表示暴露所有 endpoints 出去,默认是“health”,“info”
2、启动Config 项目,注册到Eureka,启动成功后会自动添加RabbitMQ队列
3、客户端的order应用引入依赖
    org.springframework.cloud
    spring-cloud-starter-bus-amqp
配置 bootstrap.yml 增加 cloud.config 相关配置:
spring:
  application:
    name: order
  cloud:
    config:
      discovery:
        enabled: true
        # 对应注册到Eureka中的配置中心应用名
        service-id: CONFIG
      profile: dev
eureka:
  client:
    service-url:
      defaultZone: http://localhost:8761/eureka/
启动Config 项目,注册到Eureka,启动成功后同样会自动添加RabbitMQ队列
4、修改 git 上的配置,将dev 改为 dev2
5、调用 /actuator/bus-refresh 手动刷新(POST请求)
http://localhost:8080/actuator/bus-refresh这里用了 Postman 做POST请求 bus-refresh:
6、访问 order 的 getEvn 地址,成功获取到 dev2
这里要注意使用配置时要加注解 @RefreshScope
7、配置自动刷新
7.1 CONFIG 应用添加 monitor 依赖:
    org.springframework.cloud
    spring-cloud-config-monitor
7.2 配置 WebHooks :
Gitee(码云) WebHooks 配置方法:
Github WebHooks 配置方法:
配置成功后,会在每次 push 代码后,都会给远程 HTTP URL 发送一个 POST 请求。
上面的URL需要使用外网可以访问到的地址,我是用了Natapp,之前写过一个有关Natapp内网穿透的,点这里看内网穿透
7.3 重启服务后,在git 上修改配置,修改提交后, Webhooks 就会自动发送一个POST请求到你配置的URL,也可以看到日志在跑了,说明调用成功,然后再访问之前测试配置文件更新的地址,可以拿到修改后的配置,完成。


