Tensorflow实战教程-实战谷歌深度学习框架
第2章
Protocol Buffer
谷歌开发的处理结构化数据的工具。
序列化:将结构化的数据变成数据流的格式,简单地说就是变成一个字符串。如何将结构化的数据系列化,并将序列化之后的数据流还原为原来的结构化数据结构,统称为处理结构化数据,这就是Protocol Buffer解决的主要问题。
除Protocol Buffer以外,XML和JSON是两种比较常用的结构化数据处理工具。
Protocol Buffer定义的数据格式文件一般保存在.proto文件中。
第3章 TensorFlow入门
TensorFlow的三要素:计算模型,数据模型,运行模型
TensorFlow计算模型-计算图
Tensor:张量,可以被简单的理解为多维数组
Flow:流
TensorFlow程序一般可以分为两个阶段。在第一个阶段需要定义计算图中所有的计算。第二个阶段为执行阶段。
定义阶段样例:
import tensorflow as tf
a = tf.constant([1.0,2.0],name="a")
b = tf.constant([2.0,3.0],name="b")
result = a + b
在这个过程中,TensorFlow会自动将定义的计算转化为计算图上的节点。在TensorFlow程序中,系统会自动维护一个默认的计算图。
通过tf.get_default_graph函数可以获取当前默认的计算图。
print(a.graph is tf.get_default_graph())#查看运算是否属于默认计算图除了使用默认的计算图,TensorFlow支持通过tf.Graph函数来生成新的计算图。不同计算图上的张量和运算都不会共享。以下代码示意了如何在不同计算图上定义和使用变量。
import tensorflow as tf

g1 = tf.Graph()
with g1.as_default():
    #在计算图g1中定义变量"v",并设置初始值为0
    v = tf.get_variable("v",initializer=tf.zeros_initializer()(shape=[1]))

g2 = tf.Graph()
with g2.as_default():
    #在计算图g2中定义变量"v",并设置初始值为1
    v = tf.get_variable("v",initializer=tf.ones_initializer()(shape=[1]))

#在计算图g1中读取点亮"v"的值
with tf.Session(graph=g1) as sess:
    tf.global_variables_initializer().run()
    with tf.variable_scope("",reuse=True):
        #在计算图g1中,变量"v"的取值应该为0,所以下面这行输出[0.]
        print(sess.run(tf.get_variable("v")))

with tf.Session(graph=g2) as sess:
    tf.global_variables_initializer().run()
    with tf.variable_scope("",reuse=True):
        #在计算图g2中,变量"v"的取值应该为1,所以下面这行会输出[1.]
        print(sess.run(tf.get_variable("v")))
E:\python\python3.exe E:/TensorFlow/Tensorflow_combat/chapter_3/3_1_2the_use_of_calculate_graph.py
2018-05-09 14:44:33.513603: I C:\tf_jenkins\home\workspace\rel-win\M\windows-gpu\PY\36\tensorflow\core\platform\cpu_feature_guard.cc:137] Your CPU supports instructions that this TensorFlow binary was not compiled to use: AVX
2018-05-09 14:44:33.906939: I C:\tf_jenkins\home\workspace\rel-win\M\windows-gpu\PY\36\tensorflow\core\common_runtime\gpu\gpu_device.cc:1030] Found device 0 with properties:
name: GeForce 610M major: 2 minor: 1 memoryClockRate(GHz): 1.25
pciBusID: 0000:01:00.0
totalMemory: 1.00GiB freeMemory: 826.33MiB
2018-05-09 14:44:33.907504: I C:\tf_jenkins\home\workspace\rel-win\M\windows-gpu\PY\36\tensorflow\core\common_runtime\gpu\gpu_device.cc:1093] Ignoring visible gpu device (device: 0, name: GeForce 610M, pci bus id: 0000:01:00.0, compute capability: 2.1) with Cuda compute capability 2.1. The minimum required Cuda capability is 3.0.
[0.]
2018-05-09 14:44:34.106502: I C:\tf_jenkins\home\workspace\rel-win\M\windows-gpu\PY\36\tensorflow\core\common_runtime\gpu\gpu_device.cc:1093] Ignoring visible gpu device (device: 0, name: GeForce 610M, pci bus id: 0000:01:00.0, compute capability: 2.1) with Cuda compute capability 2.1. The minimum required Cuda capability is 3.0.
[1.]关于TypeError: __init__() got an unexpected keyword argument 'shape'错误
是因为TensorFlow更新导致的。
解决办法:https://blog.csdn.net/Li_haiyu/article/details/78474831?locationNum=9&fps=1
TensorFlow的计算图不仅仅可以用来隔离张量和计算,它还提供了管理张量和计算的机制。计算图可以通过tf.Graph.device函数来指定运行计算的设备
TensorFlow中维护的集合列表
1.TensorFlow中所有的变量会被自动加入tf.GraphKeys.VARIABLES集合中,通过tf.global_variables()函数可以拿到当前计算图上的所有变量。
2.TensorFlow中变量的trainable参数默认为True,所以也会自动加入tf.GraphKeys.TRAINABLE_VARIABLES,通过tf.trainable_variables()拿到当前计算图上可训练的所有变量。
import tensorflow as tf
a = tf.Variable(tf.constant([[1,2],[3,4]]),name="a",)
b = tf.Variable(tf.constant([[5,6],[7,8]]),name="b")
with tf.Session() as sess:
    sess.run(tf.global_variables_initializer())
    print(sess.run(tf.global_variables()))
    print(sess.run(tf.trainable_variables()))
TensorFlow数据模型-张量
张量是TensorFlow管理数据的形式
零阶张量表示标量(scalar),一阶张量表示向量(vector),也就是一个一维数组,n阶张量可以理解为一个n维数组。
张量在TensorFlow中的实现并不是直接采用数组的形式,它只是对TensorFlow中运算结果的引用。在张量中并没有真正保存数字,它保存的是如何得到这些数字的计算过程。
#张量保存结果的一个引用
import tensorflow as tf
#tf.constant是一个计算,这个计算的结果为一个张量,保存在变量a中
a = tf.constant([1.0,2.0],name="a")#这里的a表示的是计算图上的输入名
b = tf.constant([2.0,3.0],name="b")
result = tf.add(a,b,name="add")
print(result)#Tensor("add:0", shape=(2,), dtype=float32)
一个张量中主要保存了三个属性:名字(name)、维度(shape),类型(type)
名字
张量的命名可以通过“node:src_output”的形式给出
其中node为节点的名称,src_output表示当前张量来自节点的第几个输出
“add:0“说明result这个张量是计算节点“add”输出的第一个结果(编号从0开始)
类型:
每一个张量会有一个唯一的类型。TensorFlow会对参与运算的所有张量进行类型的检查,当发现类型不匹配时会报错。
如果不指定类型,TensorFlow会给出默认的类型,比如不带小数点的数会被默认为Int32,带小数点的数会默认是float32。
所以一般建议通过指定dtype来明确指出变量或者常量的类型。
#张量类型不一致报错
import tensorflow as tf
a = tf.constant([1,2],name="a")
b = tf.constant([2.0,3.0],name="b")
result = a + b
ValueError: Tensor conversion requested dtype int32 for Tensor with dtype float32: 'Tensor("b:0", shape=(2,), dtype=float32)'TensorFlow中要求这么严,int32和float32都不能兼容呀。
import tensorflow as tf
a = tf.constant([1,2],name="a")#a是张量
b = tf.constant([2.0,3.0],name="b")
a
Out[3]:
a.dtype
Out[4]: tf.int32
张量的使用
1.对中间计算结果的引用
2.用来获得结果
tf.Session().run(a)
Out[7]: array([1, 2])
TensorFlow运行模型-会话
会话(session)用来执行定义好的运算
会话拥有并管理TensorFlow程序运行时的所有资源,当所有计算完成之后需要关闭会话来帮助系统回收资源,否则就可能出现资源泄露的问题。TensorFlow中使用会话的模式一般有两种,第一种需要明确调用会话生成函数和会话关闭函数。代码如下:
#tensorflow运行模型-会话,使用模式一
import tensorflow as tf
a = tf.constant([1.0,2.0],name="c",dtype=tf.float32)
b = tf.constant([2.0,3.0],name="d",dtype=tf.float32)
result = a + b
sess = tf.Session()#创建一个会话
print(sess.run(result))#运行,注意单独的sess.run(result)不会输出结果#[3. 5.]
sess.close()#关闭会话使得本次运行中是用到的资源可以被释放
# writer = tf.summary.FileWriter("E:\python\Scripts\log",tf.get_default_graph())
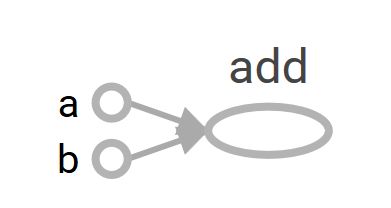
# writer.close()我们看一下计算图
代码中的+运算自动变成了add。
使用这种模式时,在完成所有计算之后,需要明确调用Session.close函数来关闭会话并释放资源。然而,当程序因为异常而退出时,关闭会话的函数可能就不会被执行从而导致资源泄露。为了解决异常退出时资源释放的问题,TensorFlow可以通过python的上下文管理器来使用会话。
方式二:
#tensorflow运行模型-会话,使用模式二
import tensorflow as tf
a = tf.constant([1.0,2.0],name="a",dtype=tf.float32)
b = tf.constant([2.0,3.0],name="b",dtype=tf.float32)
result = a + b
with tf.Session() as sess:#创建一个会话,并通过python中的上下文管理器来管理这个会话
    print(sess.run(result))
#不需要调用sess.close()来关闭会话
#当上下文退出时会话关闭和资源释放也自动完成了
通过python的上下文管理器的机制,只要将所有的计算放在"with"的内部就可以。当上下文管理器退出时就会自动释放所有资源。这样既解决了因为异常退出时资源释放的问题, 同时也解决了忘记调用Session.close函数而产生的资源泄露。
默认会话
TensorFlow会自动生成一个默认的计算图,如果没有特殊指定,运算会自动加入这个计算图中。TensorFlow中会话也有类似的机制,但TensorFlow不会自动生成默认的会话,而是需要手动指定。当默认的会话被指定之后,可以通过tf.Tensor.eval函数来计算一个张量的取值。也可以通过tf.InteractiveSession函数省去将产生的会话注册为默认会话的过程,它直接构建默认会话。
#四种方式得到张量结果
import tensorflow as tf
a = tf.constant([1.0,2.0],name="a",dtype=tf.float32)
b = tf.constant([2.0,3.0],name="b",dtype=tf.float32)
result = a + b
sess = tf.Session()
with sess.as_default():#创建一个会话,并通过python中的上下文管理器来管理这个会话
    print(result.eval())#方法一

print(sess.run(result))#方法二
print(result.eval(session=sess))#方法三
sess.close()

sess2 = tf.InteractiveSession()#方法四
print(result.eval())
sess2.close()
通过ConfigProto Protocol Buffer来配置会话
config = tf.ConfigProto(allow_soft_placement=True,log_device_placement=True)
sess1 = tf.InteractiveSession(config=config)
sess2 = tf.Session(config=config)
通过ConfigProto可以配置类似并行的线程数,GPU分配策略,运算超时时间等参数。这这些参数中,最常用的有两个。
allow_soft_placement:为True时,以下任意一个条件成立的时候,GPU上的运算可以放到CPU上运行:
1.运算无法再GPU上执行
2.没有GPU资源(比如运算被指定在第二个GPU上运行,但是机器只有一个GPU)
3.运算输入包含对CPU计算结果的引用。
这个参数的默认值为False,但是为了使代码的可移植性更强,在有GPU的环境下,这个参数一般会被设置为True。
log_device_placement:为True时,日志中将会记录每个节点被安排在了哪个设备上以方便调试。而在生产环境中将这个参数设置为False可以减少日志量。
矩阵乘法
a = tf.matmul(x,w1)
变量
通过tf.Variable声明,需要指定初始值。
TensorFlow中,一个变量的值在被使用之前,需要被显式的初始化。
#coding=utf-8
#声明一个2*3矩阵变量
import tensorflow as tf
weights = tf.Variable(tf.random_normal([2,3],stddev=2,mean=0))#矩阵元素时均值为0,标准差为2的随机数,满足正太分布
biases = tf.Variable(tf.zeros([1,3]))
print(weights)#
print(biases)
sess = tf.Session()
sess.run(weights.initializer)#变量使用前,必须显式初始化
sess.run(biases.initializer)
print(sess.run(weights))#变量和张量一样,也要用sess.run()运行
print(sess.run(biases))
sess.close()
通过变量实现前项传播
#通过变量实现前向传播过程
import tensorflow as tf
w1 = tf.Variable(tf.random_normal([2,3],stddev=1,seed=1))#声明w1,w2变量,通过seed参数设置了随机数种子,保证每次运行得到的结果一样
w2 = tf.Variable(tf.random_normal([3,1],stddev=1,seed=1))
x=tf.constant([[0.7,0.9]])#注意这里不是x=tf.constant([0.7,0.9])#这里x是1*2矩阵
a = tf.matmul(x,w1)
y = tf.matmul(a,w2)
sess = tf.Session()
# sess.run(w1.initializer)
# sess.run(w2.initializer)
init_op = tf.global_variables_initializer()#初始化所有变量
sess.run(init_op)
print(sess.run(y))
sess.close()
变量是特殊的张量
也有,名字,维度(shape),类型(等属性)
变量的类型是不可改变的,一个变量在构建之后,它的类型就不能再改变了。
w1=tf.Variable(tf.random_normal([2,3],stddev=1),name="w1")
w2=tf.Variable(tf.random_normal([2,3],stddev=1,dtype=tf.float64),name="w2")
w1.assign(w2)
ValueError: Incompatible type conversion requested to type 'float32' for variable of type 'float64_ref'
维度再程序运行中是有可能改变的,但是需要通过设置参数validate_shape=False。
tf.assign(ref, value, validate_shape = None, use_locking = None, name=None)
args:
- ref:一个可变的张量。应该来自变量节点,节点可能未初始化,参考下面的例子。
- value:张量。必须具有与 ref 相同的类型。是要分配给变量的值。
- validate_shape:一个可选的 bool。默认为 True。如果为 true, 则操作将验证 "value" 的形状是否与分配给的张量的形状相匹配;如果为 false, "ref" 将对 "值" 的形状进行引用。
- use_locking:一个可选的 bool。默认为 True。如果为 True, 则分配将受锁保护;否则, 该行为是未定义的, 但可能会显示较少的争用。
- name:操作的名称(可选)。
返回:
一个在赋值完成后将保留 "ref" 新值的张量。
w1=tf.Variable(tf.random_normal([2,3],stddev=1),name="w1")
w2=tf.Variable(tf.random_normal([2,2],stddev=1),name="w2")
tf.assign(w1,w2)
Dimension 1 in both shapes must be equal, but are 3 and 2 for 'Assign_1' (op: 'Assign') with input shapes: [2,3], [2,2].
import tensorflow as tf
w1=tf.Variable(tf.random_normal([2,3],stddev=1),name="w1")
w2=tf.Variable(tf.random_normal([2,2],stddev=1),name="w2")
sess = tf.Session()
sess.run(tf.global_variables_initializer())
print(sess.run(w1))
print(sess.run(w2))
w1=tf.assign(w1,w2,validate_shape=False)#注意这里写法
print(sess.run(w1))
sess.close()
虽然TensorFlow支持更改变量的维度,当是一般不要这样用。
通过TensorFlow训练神经网络模型
TensorFlow提供了placeholder机制用于提供输入数据。placeholder相当于定义了一个位置,这个位置中的数据在程序运行时再指定。这样在程序中就不需要生成大量的常量来提供数据,而值需要将数据通过placeholder传入TensorFlow计算图。
定义placeholder时,这个位置上的数据类型是需要指定的,而且placeholder的类型不可以改变,placeholder中数据的维度信息可以根据提供的数据推导出,所以不一定要给出。
#通过placeholder实现前向算法
import tensorflow as tf
w1 = tf.Variable(tf.random_normal([2,3],stddev=1,seed=1),name="w1")
w2 = tf.Variable(tf.random_normal([3,1],stddev=1,seed=1),name="w2")
x = tf.placeholder(tf.float32,name="input")#x为张量
a = tf.matmul(x,w1)
y = tf.matmul(a,w2)
sess = tf.Session()
sess.run(tf.global_variables_initializer())
print(sess.run(y,feed_dict={x:[[0.7,0.9]]}))#[[3.957578]]
print(sess.run(y,feed_dict={x:[[0.7,0.9],[0.1,0.4],[0.5,0.8]]}))#[[3.957578 ][1.1537654][3.1674924]]
sess.close()
完整的神经网络样例
下面给出了一个完整的程序来训练神经网络解决二分类问题。
小知识点:
#同时取出两个数
x = [[0,-1],[3,4],[5,6]]
y = [[int(x1 + x2 < 1)] for x1,x2 in x]
print(y)#[[1], [0], [0]]
np.random.RandomState类:
伪随机数类
import numpy as np
rdm = np.random.RandomState(1)#参数为伪随机数种子
dataset_size = 128
X = rdm.rand(dataset_size,2)#范围为[0,1)
完整代码
import tensorflow as tf
import numpy as np
batch_size = 8#批大小
w1 = tf.Variable(tf.random_normal([2,3],stddev=1,seed=1),name="w1")#参数定义
w2 = tf.Variable(tf.random_normal([3,1],stddev=1,seed=1),name="w2")
x = tf.placeholder(tf.float32,shape=(None,2),name="x-input")#这里可以不加shape,这样写只是为了表明x是一个n*2的数组
y_=tf.placeholder(tf.float32,shape=(None,1),name="y-input")#真实结果

a = tf.matmul(x,w1)
y = tf.matmul(a,w2)#前向传播

cross_entropy = -tf.reduce_mean(y_*tf.log(tf.clip_by_value(y,1e-10,1.0)))#交叉熵
train_step = tf.train.AdamOptimizer(0.001).minimize(cross_entropy)#目标函数

rdm = np.random.RandomState(1)
dataset_size = 128
X=rdm.rand(dataset_size,2)
Y = [[int(x1+x2<1)]for x1,x2 in X]#产生随机样本

with tf.Session() as sess:
    sess.run(tf.global_variables_initializer())#初始化变量
    print(sess.run(w1))
    print(sess.run(w2))

    STEPS=5000
    for i in range(STEPS):
        start = (i * batch_size)%dataset_size
        end = min(start+batch_size,dataset_size)
        sess.run(train_step,feed_dict={x:X[start:end],y_:Y[start:end]})#运行
        if i % 1000 ==0:
            total_cross_entropy = sess.run(cross_entropy,feed_dict={x:X,y_:Y})
            print("After %d trainging steps,cross_entropy on all data is %g"%(i,total_cross_entropy))
    print(sess.run(w1))
    print(sess.run(w2))
总结训练神经网络的过程可以分为三个步骤:
1.定义神经网络的结构和前向传播的结果
2.定义损失函数和选择反向传播优化的算法
3.生成会话,并且在训练数据上反复运行反向传播算法
第4章 深度学习与深层神经网络
线性模型的局限性:
只能解决线性可分问题,连亦或问题都不能解决
线性模型的组合还是线性模型。
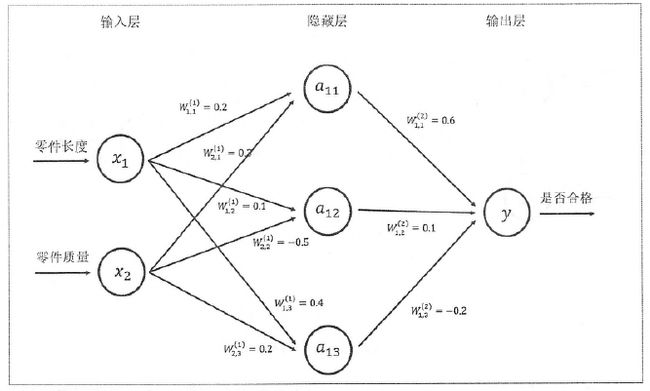
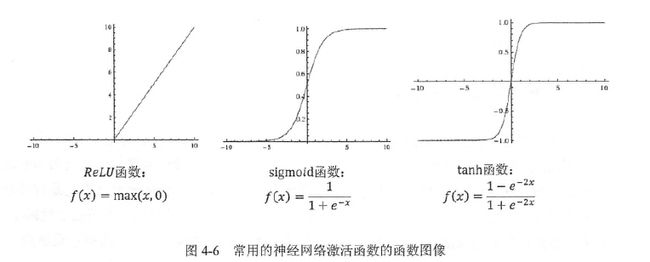
使用激活函数去线性化
TensorFlow提供了很多非线性激活函数,以Relu为例
a = tf.nn.relu(tf.matmul(x,w1)+biases1
y = tf.nn.relu(tf.matmul(a,w2)+biases2)
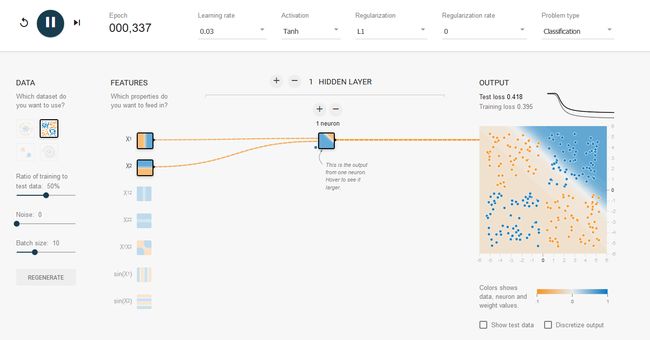
单层感知器无法解决亦或问题
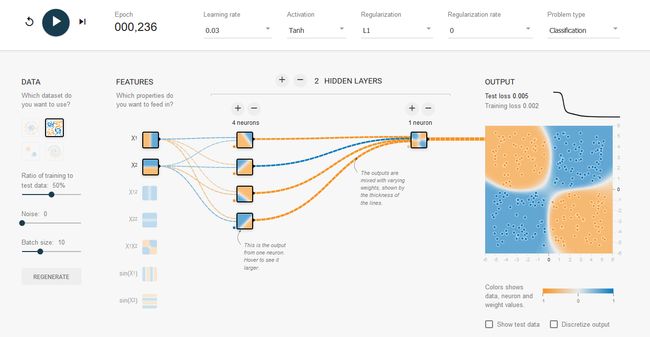
多层网络解决亦或问题
经典损失函数
交叉熵corss_entropy损失函数
给定概率分布p和q,通过q来表示p的交叉熵为
交叉熵是不对称的,![]() 它刻画的是通过概率分布q来表达概率p的困难程度。p代表正确答案,q代表预测值。交叉熵刻画的是两个概率分布的距离,也就是说交叉熵越小,两个概率分布越接近。
它刻画的是通过概率分布q来表达概率p的困难程度。p代表正确答案,q代表预测值。交叉熵刻画的是两个概率分布的距离,也就是说交叉熵越小,两个概率分布越接近。
softmax回归
假设原始神经网络输出为y1,y2,...yn,那么经过softmax回归处理之后的输出为
TensorFlow实现交叉熵
cross_entropy = -tf.reduce_mean(y_*tf.log(tf.clip_by_value(y,1e-10,1.0)))
1.tf.clip_by_value()
#coding=utf-8
#tf.clip_by_value,将一个张量中的数值限制在一个范围内,避免一些错误比如log0
import tensorflow as tf
v = tf.constant([[1,2,3],[4,5,6]],dtype=tf.float32)
with tf.Session() as sess:
    print(sess.run(tf.clip_by_value(v,2.5,4.5)))
# [[2.5 2.5 3. ]
#  [4.  4.5 4.5]]
2.tf.log()
这里是底数e
3.两个数组通过*相乘,是元素之间直接相乘,不是矩阵乘法。
#coding=utf-8
#元素相乘与矩阵乘法
import  tensorflow as tf
v1 = tf.constant([[1.0,2.0],[3.0,4.0]])
v2 = tf.constant([[5.0,6.0],[7.0,8.0]])
sess = tf.Session()
with sess.as_default():
    print((v1*v2).eval())#元素相乘
    print(tf.matmul(v1,v2).eval())#矩阵相乘
这里计算得到的是一个n*m的二位矩阵,其中n为一个batch中样本数量,m为分类的种数。根据交叉熵的公式,应该将每行中的m个结果相加得到所有样例的交叉熵,然后再对这n行取平均得到一个batch的平均交叉熵。但因为分类的种类是一定的,所以可以直接对整个矩阵做平均而不改变计算结果的意义。
计算的交叉熵=真实交叉熵的m分之一
4.tf.reduce_mean()
先简单理解为求平均值
cross_entropy = -tf.reduce_mean(y_*tf.log(tf.clip_by_value(y,1e-10,1.0)))
#tf.reduce_mean()
import  tensorflow as tf
v1 = tf.constant([[1.0,2.0],[3.0,4.0]])
sess = tf.Session()
with sess.as_default():
    print(tf.reduce_mean(v1).eval())#2.5
因为交叉熵一般会与softmax回归一起使用,所以tensorflow对这两个函数进行了封装:
cross_entropy = tf.nn.softmax_cross_entropy_with_logits(y,y_)
y为网络输出,y_为真实值。
均方误差(MSE)
均方误差一般应用于回归问题,解决回归问题的神经网络一般只有一个输出节点,这个节点的输出值就是预测值。
mse=tf.reduce_mean(tf.square(y-y_))
自定义损失函数
tf.greater(a,b),比较a,b的大小
tf.where(a,b,c):a为ture为b,否则为c。
#tf.greater
import tensorflow as tf
a = tf.constant([1,2,3,4])
b = tf.constant([0,3,4,1])
sess = tf.InteractiveSession()
print(tf.greater(a,b).eval())#[ True False False  True]
print(tf.where(tf.greater(a,b),a,b).eval())#[1,3,4,4]
loss=自定义的损失函数表达式
train_step = tf.train.AdamOptimizer(0.001).minimize(loss)#目标函数其他地方不变,tensorflow会自动帮我们更新参数。
学习率的设置
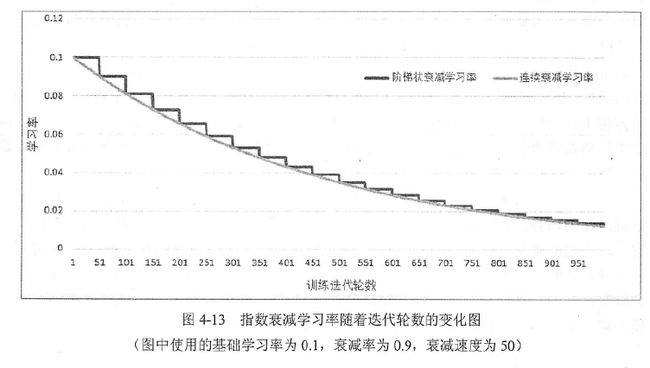
tensorflow提供了一中灵活的学习率设置方法----指数衰减法
tf.train_exponential_decay函数实现了指数衰减学习率
它实现了以下代码的功能:
decayed_learning_rate=learning_rate*decay_rate^(global_step/decay_steps)
decayed_learning_date:当前学习率
learning_rate:初始学习率
decay_rate:衰减速率
decay_steps:通常表示完整的使用一边训练数据所需的迭代次数,也就是总样本数/batch
global_step:当前是第几次训练
tf.train_exponential_decay中staircase参数:默认为False,这时学习率变化曲线如灰色曲线所示;当为True时,学习率为阶梯状,表示一个batch的学习率一样,global_step/decay_steps会被转化为整数。
之所以这样设置,是为了让学习率既可以每次训练后都变化,也可以一个batch后再变化。
tensorflow怎么使用tf.train_exponential_decay函数
#tf.train.exponential_decay()
import tensorflow as tf
global_step = tf.Variable(0)
#生成学习率
learning_rate = tf.train.exponential_decay(0.1,global_step,100,0.96,staircase=True)
#在minimize函数中传入global_step将自动更新global_step参数,从而更新学习率
learn_step = tf.train.GradientDescentOptimizer(learning_rate).minimize(..my loss..,global_step=global_step)
过拟合问题
为了避免过拟合,一个常用的 方法是正则化(regularization)
优化![]()
R(w)刻画模型复杂程度,![]() 表示模型复杂损失在总损失中的比例。
表示模型复杂损失在总损失中的比例。
R(w)常用有两种:
基本思想就是希望通过限制权重的大小,使得模型不能任意拟合训练参数中的随机噪声。
L1正则化会使参数变得更稀疏,就是参数中有很多为0
L2正则化不会使参数稀疏,原因:当参数很小,比如为0.001时,这个参数的平方就可以忽略了,于是模型不会进一步调整参数为0
L1正则化不可导,L2正则化可导,优化L2更简单。
带L2正则化的损失函数定义:
#带L2正则化的损失函数定义
import tensorflow as tf
w = tf.Variable(tf.random_normal([2,1],stddev=1,seed=1))
y = tf.matmul(x,w)
loss = tf.reduce_mean(tf.square(y,y_))+tf.contrib.layers.l2_regularizer(lambda)(w)
#L1正则化,L2正则化
import tensorflow as tf
weights = tf.constant([[1,-2],[-3,4]],dtype=tf.float32)
with tf.Session() as sess:
print(sess.run(tf.contrib.layers.l1_regularizer(0.5)(weights)))#5
print(sess.run(tf.contrib.layers.l2_regularizer(0.5)(weights)))#7.5通过集合计算一个5层神经网络带L2正则化损失函数的计算方法:
import tensorflow as tf

#获取一层神经网络上的权重,并将这个权重的l2正则化损失加入"losses"集合
def get_weights(shape,lamda):
    #生成一个变量
    var = tf.Variable(tf.random_normal(shape),dtype=tf.float32)
    #加入集合losses
    tf.add_to_collection("losses",tf.contrib.layer.l2_regularizer(lamda)(var))
    return var

x = tf.placeholder(tf.float32,shape=(None,2))
y_ = tf.placeholder(tf.float32,shape=(None,1))

batch_size = 8

#每一层网络中的节点数
layer_dimension = [2,10,20,20,1]
n_layers = len(layer_dimension)

cur_layer = x#当前输入层
in_dimension = layer_dimension[0]#当前输出层节点数

#通过循环生成一个5层神经网络
for i in range(1,n_layers):
    out_dimension = layer_dimension[i]#下一层节点数
    weight = get_weights([in_dimension,out_dimension],0.001)
    bias = tf.Variable(tf.constant(0.1,shape=[out_dimension]))#这里偏置维度?
    #使用Relu函数
    cur_layer = tf.nn.relu(tf.matmul(cur_layer,weight)+bias)
    in_dimension = layer_dimension[i]


mse_loss = tf.reduce_mean(tf.square(y_-cur_layer))
tf.add_to_collection("losses",mse_loss)
loss = tf.add_n(tf.get_collection("losses"))
第五章MNIST数字识别问题
MNIST数据处理
为了方便使用,TensorFlow提供了一个类来处理MNIST数据,这个类会自动下载并转化MNIST数据的格式,将数据从原始的数据包中解析成训练和测试神经网络时使用的格式。
#coding=utf-8
from tensorflow.examples.tutorials.mnist import input_data

#载入MNIST数据集,如果指定地址/path/to/MNIST_data下没有已经下载好的数据,那么TensorFlow会自动从默认的网址下载数据
mnist = input_data.read_data_sets("/path/to/MNIST_data",one_hot=True)#one_hot:是否把标签转换为一维向量
#one_hot为False时,标签为数字,例如7;one_hot为True时,标签为一维向量,例如[0,0,0,0,0,0,0,1,0,0]

#输出训练集,验证集,测试集的尺寸
print("Training data size:%d"%mnist.train.num_examples)#55000
print("Validating data size:%d"%mnist.validation.num_examples)#5000
print("Testing data size:%d"%mnist.test.num_examples)#10000

#打印一个训练数据样本
print("Example training data:",mnist.train.images[0])#长度为784维的一维向量

#打印一个训练数据标签
print("Example training data_label:",mnist.train.labels[0])


#mnist.train.next_batch函数,从所有的训练数据中读取一部分作为一个训练batch
batch_size = 100
xs,ys = mnist.train.next_batch(batch_size)
print("X shape",xs.shape)#(100,784)
print("Y shape",ys.shape)#(100,10)
import tensorflow as tf
from tensorflow.examples.tutorials.mnist import input_data

INPUT_NODE=784
OUTPUT_NODE=10

LAYER1_NODE = 500
BATCH_SIZE = 100

LEARNING_RATE_BASE = 0.8
LEARNING_RATE_DECAY = 0.99
REGULARIZATION_RATE = 0.0001
TRAINING_STEPS = 30000
MOVING_AVERAGE_DACEY = 0.99

def inference(input_tensor,avg_class,weights1,biases1,weights2,biases2):
    if avg_class == None:
        layer1 = tf.nn.relu(tf.matmul(input_tensor,weights1)+biases1)
        return tf.matmul(layer1,weights2)+biases2

    else:
        layer1 = tf.nn.relu(tf.matmul(input_tensor,avg_class.average(weights1))+avg_class.average(biases1))
        return tf.matmul(layer1,avg_class.average(weights2))+ avg_class.average(biases2)

def train(mnist):
    x = tf.placeholder(tf.float32,[None,INPUT_NODE],name="x-input")
    y_ = tf.placeholder(tf.float32,[None,OUTPUT_NODE],name="y-input")

    weights1 = tf.Variable(tf.truncated_normal([INPUT_NODE,LAYER1_NODE],stddev=0.1))
    biases1 = tf.Variable(tf.constant(0.1,shape=[LAYER1_NODE]))

    weights2 = tf.Variable(tf.truncated_normal([LAYER1_NODE,OUTPUT_NODE],stddev=0.1))
    biases2 = tf.Variable(tf.constant(0.1,shape=[OUTPUT_NODE]))

    y = inference(x,None,weights1,biases1,weights2,biases2)

    global_step = tf.Variable(0,trainable=False)

    variable_averages = tf.train.ExponentialMovingAverage(MOVING_AVERAGE_DACEY,global_step)

    variable_averages_op = variable_averages.apply(tf.trainable_variables())

    average_y = inference(x,variable_averages,weights1,biases1,weights2,biases2)
    cross_entropy = tf.nn.sparse_softmax_cross_entropy_with_logits(labels=tf.argmax(y_,1),logits=y)
    cross_entropy_mean = tf.reduce_mean(cross_entropy)

    regularizer = tf.contrib.layers.l2_regularizer(REGULARIZATION_RATE)
    regularization = regularizer(weights1) + regularizer(weights2)
    loss = cross_entropy_mean + regularization
    learning_rate = tf.train.exponential_decay(LEARNING_RATE_BASE,global_step,mnist.train.num_examples/BATCH_SIZE,LEARNING_RATE_DECAY)

    train_step = tf.train.GradientDescentOptimizer(learning_rate).minimize(loss,global_step=global_step)
    with tf.control_dependencies([train_step,variable_averages_op]):
        train_op = tf.no_op(name="train")

    correct_prediction = tf.equal(tf.argmax(average_y,1),tf.argmax(y_,1))
    accuracy = tf.reduce_mean(tf.cast(correct_prediction,tf.float32))

    with tf.Session() as sess:
        tf.global_variables_initializer().run()
        validate_feed = {x:mnist.validation.images,y_:mnist.validation.labels}
        test_feed = {x:mnist.test.images,y_:mnist.test.labels}
        for i in range(TRAINING_STEPS):
            if i%1000==0:
                validate_acc = sess.run(accuracy,feed_dict=validate_feed)
                test_acc = sess.run(accuracy, feed_dict=test_feed)
                print("After %d training step(s),validation accuracy using average model is %g"%(i,validate_acc))
                print("After %d training step(s),test accuracy using average model is %g" % (i, test_acc))
            xs,ys = mnist.train.next_batch(BATCH_SIZE)
            sess.run(train_op,feed_dict={x:xs,y_:ys})

        test_acc = sess.run(accuracy,feed_dict=test_feed)
        print("After %d training step(s),test accuracy using average model is %g" %(TRAINING_STEPS, test_acc))

def main(argv=None):
    mnist = input_data.read_data_sets("/tmp/data",one_hot=True)
    train(mnist)

if __name__ == "__main__":
    tf.app.run()
验证集的使用:
训练模型的目的是为了让模型在新的数据上有好的效果,如果直接在测试集上测试,通过测试集的正确率来判断模型好坏,可能出现过拟合问题,模型只在测试集上效果好,而在新的数据面前效果不佳。相反,加上验证集之后,通过验证集的准确率来训练模型,在测试集上的准确率来判断模型好坏,就很有说服力。
交叉验证(cross validation)?什么鬼,没有听说过
除了使用验证集,还可以使用交叉验证的方式来验证模型好坏。但因为神经网络模型的训练时间本身就很长,采用交叉验证会花费大量时间,所以在海量数据的情况下,一般采用验证集的形式。
变量管理
TensorFlow提供了通过变量名称来创建或者获取一个变量的机制。通过这个机制,在不同的函数中可以直接通过变量的名字来使用变量,而不需要奖变量通过参数的形式到处传递。
实现这一功能需要用到两个函数:tf.get_variable()和tf.variable_scope()
tf.get_variable():创建或者获取变量
当tf.get_variable()用来创建变量时,它和tf.Variable()的功能基本上是等价的。
#coding=utf-8
import tensorflow as tf
v = tf.Variable(tf.constant(1.0,shape=[1],dtype=tf.float32))
v2 = tf.get_variable("v2",shape=[1],initializer=tf.constant_initializer(1.0))
with tf.Session() as sess:
    sess.run(tf.global_variables_initializer())
    print(sess.run(v))
    print(sess.run(v2))
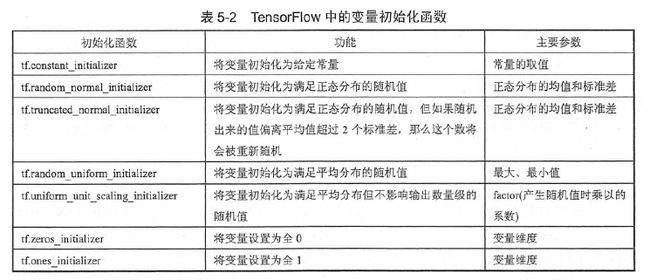
TensorFlow中提供的initializer函数和随机数及常量生成函数大部分是一一对应的。比如,tf.constant.initializer和tf.constant功能上就是一致的。
TensorFlow提供了7种不同的初始化函数
tf.get_variable()中必须指定变量的名称。tf.get_variable()会根据这个名字去创建或者获取变量。
tf.variable_scope()
tf.variable_scope函数可以控制tf.get_variable的语义,是获取变量还是创建变量
tf.variable_scope的参数reuse=True:tf.get_variable是获取变量,如果变量不存在,则报错
reuse=None或者reuse=False:tf.get_variable创建新的变量,如果同名变量已存在,则报错。
#tf.variable_scope()
import tensorflow as tf
#在名字为foo的命名空间内创建名字为v的变量
with tf.variable_scope("foo"):
    v = tf.get_variable("v",[1],initializer=tf.constant_initializer(1.0))

# #因为在命名空间foo中已经存在名字为v的变量,所有下面的代码将会报错:
# with tf.variable_scope("foo"):
#     v = tf.get_variable("v",[1])

#resuse=True,tf.get_variable()用于获取变量
with tf.variable_scope("foo",reuse=True):
    v1 = tf.get_variable("v",[1])
    print(v==v1)

#bar命名空间中,v不存在,报错
with tf.variable_scope("bar",reuse=True):
    v = tf.get_variable("v",[1])
tf.variable_scope函数的嵌套
#tf.variable_scope函数的嵌套
import tensorflow as tf
with tf.variable_scope("root"):
    print(tf.get_variable_scope().reuse)#False
    with tf.variable_scope("foo",reuse=True):
        print(tf.get_variable_scope().reuse)#True
        with tf.variable_scope("bar"):
            print(tf.get_variable_scope().reuse)#注意,这里不指定reuse时,和外层一样,True。
    print(tf.get_variable_scope().reuse)#False
tf.variable_scope()中创建的变量名称样式
#tf.variable_scope函数会创建一个TensorFlow中的命名空间,在命名空间中创建的变量名称都会带上这个命名空间的前缀
import tensorflow as tf
v1 = tf.get_variable("v",[1])
print(v1.name)

with tf.variable_scope("foo"):
    v2 = tf.get_variable("v",[1])
    print(v2.name)

with tf.variable_scope("foo"):
    with tf.variable_scope("bar"):
        v3 = tf.get_variable("v",[1])
        print(v3.name)

    v4 = tf.get_variable("v1",[1])
    print(v4.name)

with tf.variable_scope("",reuse=True):
    v5 = tf.get_variable("foo/bar/v",[1])
    print(v5==v3)
    print(v5.name)
#coding=utf-8
import tensorflow as tf
from tensorflow.examples.tutorials.mnist import input_data

INPUT_NODE=784
OUTPUT_NODE=10

LAYER1_NODE = 500
BATCH_SIZE = 100

LEARNING_RATE_BASE = 0.8
LEARNING_RATE_DECAY = 0.99
REGULARIZATION_RATE = 0.0001
TRAINING_STEPS = 30000
MOVING_AVERAGE_DACEY = 0.99

#生成权重变量,并加入L2正则化损失到losses集合里
def get_weight(shape,Lamada):
    weights = tf.get_variable("weights",shape,initializer=tf.truncated_normal_initializer(stddev=0.1))
    if Lamada!=None:
        tf.add_to_collection('losses',tf.contrib.layers.l2_regularizer(Lamada)(weights))
    return weights
#对神经网络进行前向计算,有两个版本,包含滑动平均以及不包含滑动平均
#使用了RELU激活函数实现了去线性化,函数支持传入计算参数平均的类,便于测试时使用滑动平均模型·
def inference(input_tensor,avg_class,reuse):
    with tf.variable_scope('layer1',reuse=reuse):
            weights1 = get_weight([INPUT_NODE,LAYER1_NODE],REGULARIZATION_RATE)
            biases1 = tf.get_variable("bias",[LAYER1_NODE],
                                     initializer=tf.truncated_normal_initializer(stddev=0.1))
    with tf.variable_scope('layer2',reuse=reuse):
        weights2 = get_weight([LAYER1_NODE,OUTPUT_NODE],REGULARIZATION_RATE)
        biases2 = tf.get_variable("bias",[OUTPUT_NODE],
                                     initializer=tf.truncated_normal_initializer(stddev=0.1))
    if avg_class == None:
            layer1 = tf.nn.relu(tf.matmul(input_tensor,weights1)+biases1)
            layer2 =tf.matmul(layer1,weights2)+biases2
    else:
        #首先需要使用avg_class.average函数计算变量的滑动平均值,然后再计算相应的神经网络前向传播结果
            layer1 = tf.nn.relu(
            tf.matmul(input_tensor,avg_class.average(weights1))+avg_class.average(biases1))
            layer2 = tf.matmul(layer1,avg_class.average(weights2))+avg_class.average(biases2)
    return layer2

    # if avg_class == None:
    #     layer1 = tf.nn.relu(tf.matmul(input_tensor,weights1)+biases1)
    #     return tf.matmul(layer1,weights2)+biases2
    #
    # else:
    #     layer1 = tf.nn.relu(tf.matmul(input_tensor,avg_class.average(weights1))+avg_class.average(biases1))
    #     return tf.matmul(layer1,avg_class.average(weights2))+ avg_class.average(biases2)

def train(mnist):
    x = tf.placeholder(tf.float32,[None,INPUT_NODE],name="x-input")
    y_ = tf.placeholder(tf.float32,[None,OUTPUT_NODE],name="y-input")


    y = inference(x,None,reuse=False)


    global_step = tf.Variable(0,trainable=False)

    variable_averages = tf.train.ExponentialMovingAverage(MOVING_AVERAGE_DACEY,global_step)

    variable_averages_op = variable_averages.apply(tf.trainable_variables())

    average_y = inference(x,variable_averages,reuse=True)
    cross_entropy = tf.nn.sparse_softmax_cross_entropy_with_logits(labels=tf.argmax(y_,1),logits=y)
    cross_entropy_mean = tf.reduce_mean(cross_entropy)

    tf.add_to_collection('losses', cross_entropy_mean)
    # get_collection返回一个列表,列表是所有这个集合的所有元素
    # 在本例中,元素代表了其他部分的损失,加起来就得到了所有的损失
    loss = tf.add_n(tf.get_collection('losses'))
    learning_rate = tf.train.exponential_decay(LEARNING_RATE_BASE,global_step,mnist.train.num_examples/BATCH_SIZE,LEARNING_RATE_DECAY)

    train_step = tf.train.GradientDescentOptimizer(learning_rate).minimize(loss,global_step=global_step)
    with tf.control_dependencies([train_step,variable_averages_op]):
        train_op = tf.no_op(name="train")

    correct_prediction = tf.equal(tf.argmax(average_y,1),tf.argmax(y_,1))
    accuracy = tf.reduce_mean(tf.cast(correct_prediction,tf.float32))

    with tf.Session() as sess:
        tf.global_variables_initializer().run()
        validate_feed = {x:mnist.validation.images,y_:mnist.validation.labels}
        test_feed = {x:mnist.test.images,y_:mnist.test.labels}
        for i in range(TRAINING_STEPS):
            if i%1000==0:
                validate_acc = sess.run(accuracy,feed_dict=validate_feed)
                test_acc = sess.run(accuracy, feed_dict=test_feed)
                print("After %d training step(s),validation accuracy using average model is %g"%(i,validate_acc))
                print("After %d training step(s),test accuracy using average model is %g" % (i, test_acc))
            xs,ys = mnist.train.next_batch(BATCH_SIZE)
            sess.run(train_op,feed_dict={x:xs,y_:ys})

        test_acc = sess.run(accuracy,feed_dict=test_feed)
        print("After %d training step(s),test accuracy using average model is %g" %(TRAINING_STEPS, test_acc))

def main(argv=None):
    mnist = input_data.read_data_sets("/tmp/data",one_hot=True)
    train(mnist)

if __name__ == "__main__":
    tf.app.run()
TensorFlow模型持久化
tf.train.Saver用于保存和还原一个模型
#保存模型
#coding=utf-8
import tensorflow as tf
v1 = tf.Variable(tf.constant(1.0,shape=[1]),name="v1")
v2 = tf.Variable(tf.constant(2.0,shape=[1]),name="v2")
result = v1 + v2
saver = tf.train.Saver()
with tf.Session() as sess:
    sess.run(tf.global_variables_initializer())
    saver.save(sess,"/path/to/model/model.ckpt")
虽然上面的程序只指定了一个文件路径,但是这个目录下会出现三个文件,我运行后出现了四个。
文件说明
model.ckpt.meta:它保存了TensorFlow计算图的结构,可以简单的理解为神经网络的网络结构。
model.ckpt:保存了程序中每一个变量的取值。
checkpoint:
#还原模型
import tensorflow as tf
#直接加载持久化的图
saver = tf.train.import_meta_graph("/path/to/model/model.ckpt.meta")
with tf.Session() as sess:
    saver.restore(sess,"/path/to/model/model.ckpt")
    #通过张量的名称来获取张量
    print(sess.run(tf.get_default_graph().get_tensor_by_name("add:0")))#[3]
    print(sess.run(tf.get_default_graph().get_tensor_by_name("v1:0")))#[1]
tensorflow默认保存和加载了计算图上定义的全部变量,如何保存和加载部分变量?
tf.train.Saver()中提供一个列表来指定需要保存或者加载的变量。
saver=tf.train.Saver([v1]):只保存v1
import tensorflow as tf
v1 = tf.Variable(tf.constant(1.0,shape=[1]),name="v1")
v2 = tf.Variable(tf.constant(2.0,shape=[1]),name="v2")
result = v1 + v2
saver = tf.train.Saver([v1])#只保存v1
with tf.Session() as sess:
    sess.run(tf.global_variables_initializer())
    saver.save(sess,"/path/to/model/model.ckpt")
import tensorflow as tf
#直接加载持久化的图
saver = tf.train.import_meta_graph("/path/to/model/model.ckpt.meta")
with tf.Session() as sess:
saver.restore(sess,"/path/to/model/model.ckpt")
#通过张量的名称来获取张量
# print(sess.run(tf.get_default_graph().get_tensor_by_name("add:0")))#[3]
print(sess.run(tf.get_default_graph().get_tensor_by_name("v1:0")))#[1]
print(sess.run(tf.get_default_graph().get_tensor_by_name("v2:0")))#报错,提示v2没有初始化加载模型时重命名
import tensorflow as tf

# 声明的变量名称name与已保存的模型中的变量名称name不一致
u1 = tf.Variable(tf.constant(2.0, shape=[1]), name="other-v1")
u2 = tf.Variable(tf.constant(2.0, shape=[1]), name="other-v2")
result = u1 + u2

# 若直接生命Saver类对象,会报错变量找不到
# 使用一个字典dict重命名变量即可,{"已保存的变量的名称name": 重命名变量名}
# 原来名称name为v1的变量现在加载到变量u1(名称name为other-v1)中
saver = tf.train.Saver({"v1": u1, "v2": u2})

with tf.Session() as sess:
    saver.restore(sess, "/path/to/model/model.ckpt")
    print(sess.run(result)) # [ 3.]
保存滑动平均模型样例
import tensorflow as tf
v = tf.Variable(0,dtype=tf.float32,name="v")
for variable in tf.global_variables():
    print(variable.name)#v:0

ema = tf.train.ExponentialMovingAverage(0.99)
maintain_average_op = ema.apply(tf.global_variables())#在什么滑动平均模型后,TensorFlow会自动生成一个影子变量
for variable in tf.global_variables():
    print(variable.name)#v:0   v/ExponentialMovingAverage:0

saver = tf.train.Saver()
with tf.Session() as sess:
    sess.run(tf.global_variables_initializer())

    sess.run(tf.assign(v,10))
    sess.run(maintain_average_op)
    saver.save(sess,"/path/to/model/model,ckpt")
    print(sess.run([v,ema.average(v)]))#[10.0, 0.099999905]

v = tf.Variable(0,dtype=tf.float32,name="v")
saver = tf.train.Saver({"v/ExponentialMovingAverage":v})#通过变量重命名将原来变量v的滑动平均值直接赋值给v
with tf.Session() as sess:
    saver.restore(sess,"/path/to/model/model,ckpt")
    print(sess.run(v))#0.099999905
tf.train.ExponentialMovingAverage类提供了variables_to_restore来生成tf.train.Saver类所需要的变量重命名字典
import tensorflow as tf
v = tf.Variable(1.0,dtype=tf.float32,name="v")
#v1 = tf.Variable(1.0,dtype=tf.float32,name="v1")

ema = tf.train.ExponentialMovingAverage(0.99)
print(ema.variables_to_restore())

saver = tf.train.Saver(ema.variables_to_restore())
with tf.Session() as sess:
    saver.restore(sess, "/path/to/model/model.ckpt")
    print(sess.run(v))
TensorFlow最佳实践样例程序
pycharm中可以同时运行两个程序,一个程序运行时,直接再运行另外一个程序就可以了。
第7章图像数据处理
图像编码处理
tf.gfile.FastGFile(path,decodestyle)
函数功能:实现对图片的读取
函数参数:(1)path:图片所在路径(2)decodestyle:图片的解码方式。(r:UTF-8编码,rb:非UTF-8编码)
#coding=utf-8
import tensorflow as tf
import matplotlib.pyplot as plt

#读取图像的原始数据
image_raw_data = tf.gfile.FastGFile("E:/TensorFlow/Practice/chapter7/test","rb").read()

with tf.Session() as sess:
    #将图像使用jpeg的格式解码
    img_data = tf.image.decode_jpeg(image_raw_data)
    #img_data.dtype=uint8
    print(img_data.eval())
    plt.imshow(img_data.eval())
    plt.show()
    # img_data = tf.image.convert_image_dtype(img_data,dtype=tf.float32)
    #将表示一张图像的三维矩阵重新按照jpeg格式编码并存入文件中
    encoded_image = tf.image.encode_jpeg(img_data)
    with tf.gfile.FastGFile("E:/TensorFlow/Practice/chapter7/testoutput","wb") as f:
        f.write(encoded_image.eval())
图像大小调整
图像调整有两种方式,第一种是通过算法使得新的图像尽量保存原始图像上的所有信息,使用tf.image.resize_images函数实现
#图像大小调整
import tensorflow as tf
import matplotlib.pyplot as plt
import numpy as np

#读取图像的原始数据
image_raw_data = tf.gfile.FastGFile("E:/TensorFlow/Practice/chapter7/test","rb").read()

with tf.Session() as sess:
    #将图像使用jpeg的格式解码
    img_data = tf.image.decode_jpeg(image_raw_data)
    #显示原图
    plt.figure(1)
    plt.imshow(img_data.eval())
    #显示使用双线性插值法处理过后的图像
    resized_0 = tf.image.resize_images(img_data,[300,300],method=0)
    print(resized_0.dtype)#
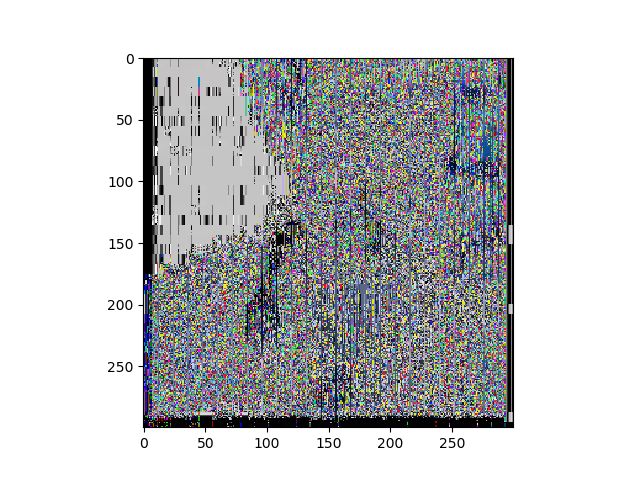
    #这里处理过后图像类型为float32,所以需要转换为unit8类型,不然图像显示会很怪
    plt.figure(2)
    plt.imshow(resized_0.eval())
    resized_0= np.asarray(resized_0.eval(), dtype='uint8')
    plt.figure(3)
    plt.imshow(resized_0)
    plt.show()
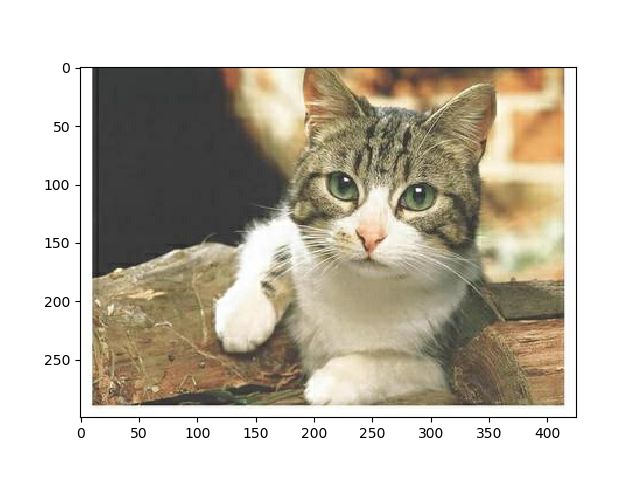
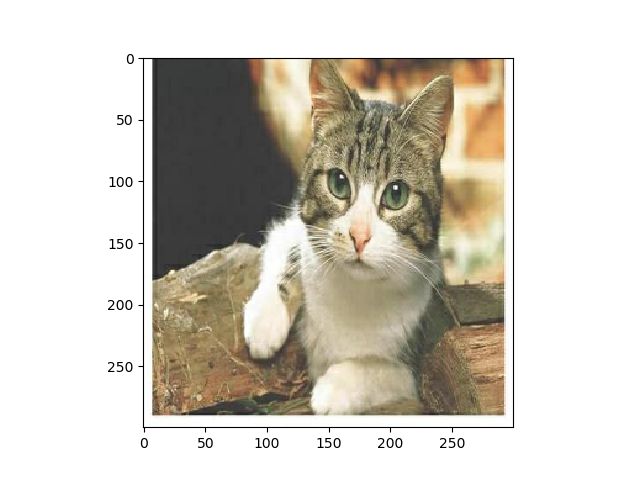
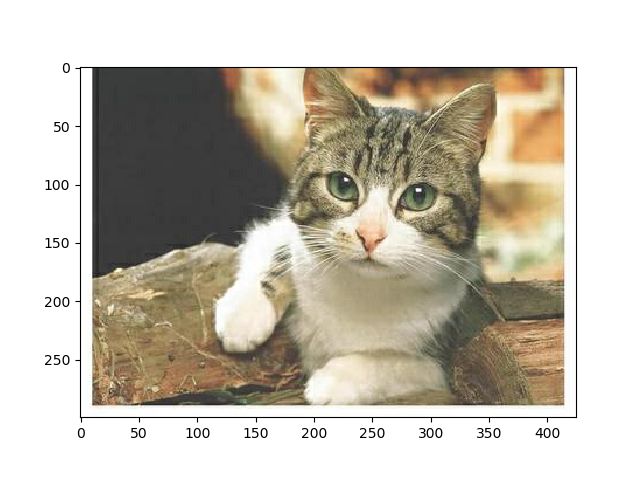
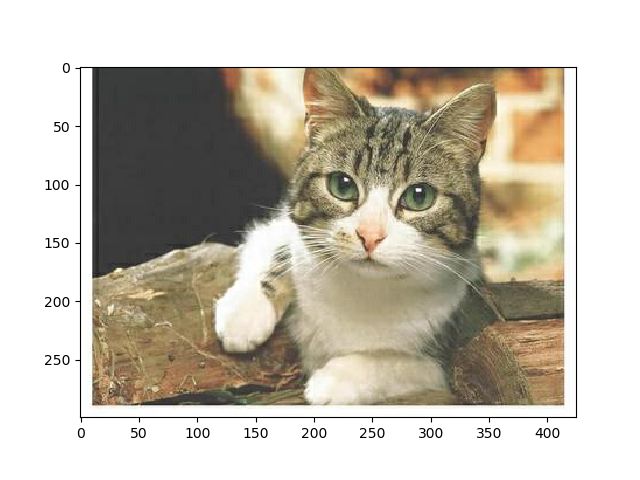
原图
没有进行类型转换的显示效果
类型转换后的正常显示效果
tf.image.resize_image_with_crop_or_pad:调整图像大小
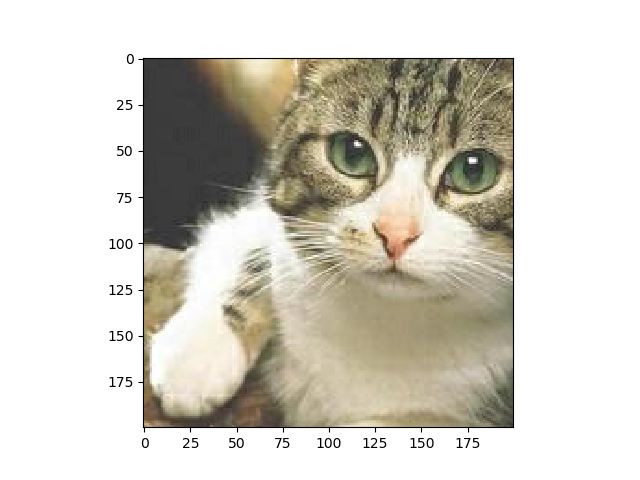
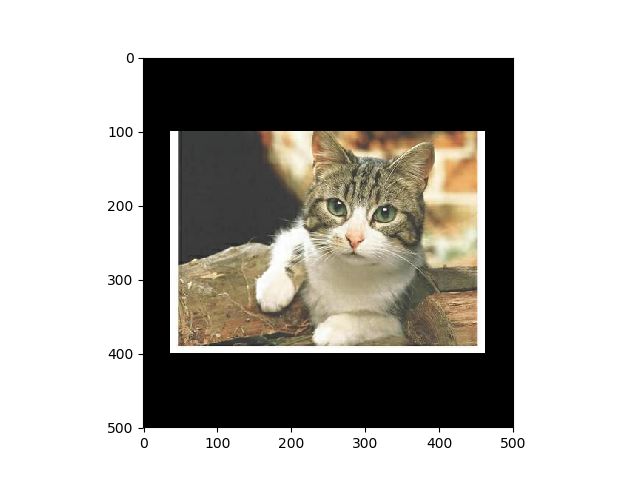
第一个参数为原始图像,第二个参数为目标图像大小。如果原始图像的尺寸大于目标图像,那么这个函数会自动截取原始图像中居中的部分,如果目标图像大于原始图像,这个函数会自动在原始图像的四周填充全0背景。
#图像大小调整tf.image.resize_image_with_crop_or_pad()
import tensorflow as tf
import matplotlib.pyplot as plt
import numpy as np

#读取图像的原始数据
image_raw_data = tf.gfile.FastGFile("E:/TensorFlow/Practice/chapter7/test","rb").read()

with tf.Session() as sess:
    #将图像使用jpeg的格式解码
    img_data = tf.image.decode_jpeg(image_raw_data)#425*300
    #显示原图
    plt.figure(1)
    plt.imshow(img_data.eval())

    #裁剪
    croped = tf.image.resize_image_with_crop_or_pad(img_data,200,200)
    #填充
    padded = tf.image.resize_image_with_crop_or_pad(img_data,500,500)
    plt.figure(2)
    plt.imshow(croped.eval())
    plt.figure(3)
    plt.imshow(padded.eval())
    plt.show()
裁剪
填充
通过比例调整图像大小
central_cropped = tf.image.central_crop(img_data,0.5)#第二个参数范围为(0,1]截取中间50%的图像
图像翻转
#图像翻转
import tensorflow as tf
import matplotlib.pyplot as plt
import numpy as np

#读取图像的原始数据
image_raw_data = tf.gfile.FastGFile("E:/TensorFlow/Practice/chapter7/test","rb").read()

with tf.Session() as sess:
    #将图像使用jpeg的格式解码
    img_data = tf.image.decode_jpeg(image_raw_data)#425*300
    #显示原图
    plt.figure(1)
    plt.imshow(img_data.eval())

    #上下翻转
    flipped_up_down = tf.image.flip_up_down(img_data)
    #左右翻转
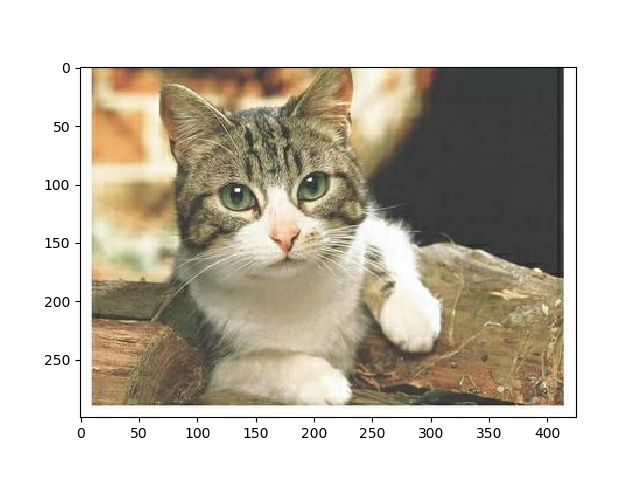
    flipped_left_right = tf.image.flip_left_right(img_data)
    #沿对角线翻转
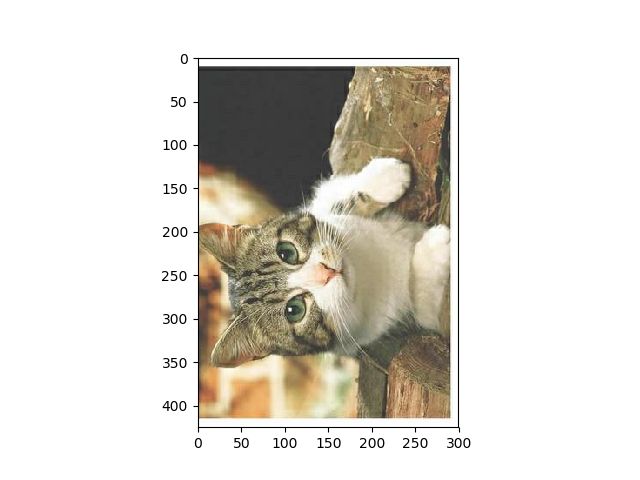
    transposed = tf.image.transpose_image(img_data)
    plt.figure(2)
    plt.imshow(flipped_up_down.eval())
    plt.figure(3)
    plt.imshow(flipped_left_right.eval())
    plt.figure(4)
    plt.imshow(transposed.eval())
    plt.show()
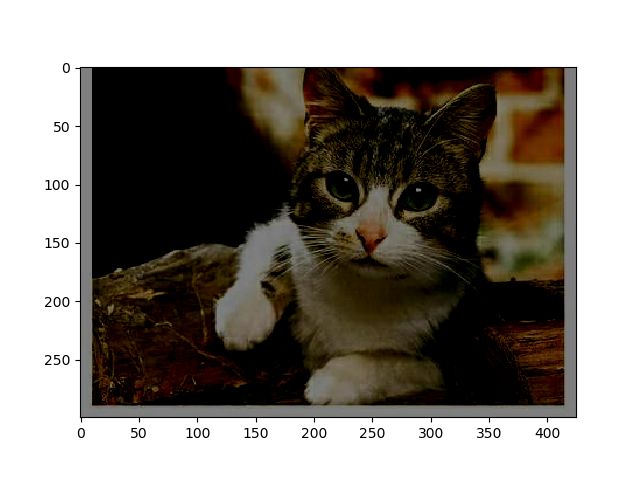
在训练数据中如果所有的猫头都是向右的,那么训练出来的模型可能就无法很好地识别猫头向左的猫。
TensorFlow提供了方便的API完成随机图像翻转的过程
#以一定概率上下翻转图像
flipped = tf.image.random_flip_up_down(img_data)
#以一定概率左右翻转图像
flipped = tf.image.random_flip_left_right(img_data)
图像色彩调整
#图像色彩调整
import tensorflow as tf
import matplotlib.pyplot as plt
import numpy as np

#读取图像的原始数据
image_raw_data = tf.gfile.FastGFile("E:/TensorFlow/Practice/chapter7/test","rb").read()

with tf.Session() as sess:
    #将图像使用jpeg的格式解码
    img_data = tf.image.decode_jpeg(image_raw_data)#425*300
    #显示原图
    plt.figure(1)
    plt.imshow(img_data.eval())

    #将图像的亮度-0.5,参数范围为[0,1)
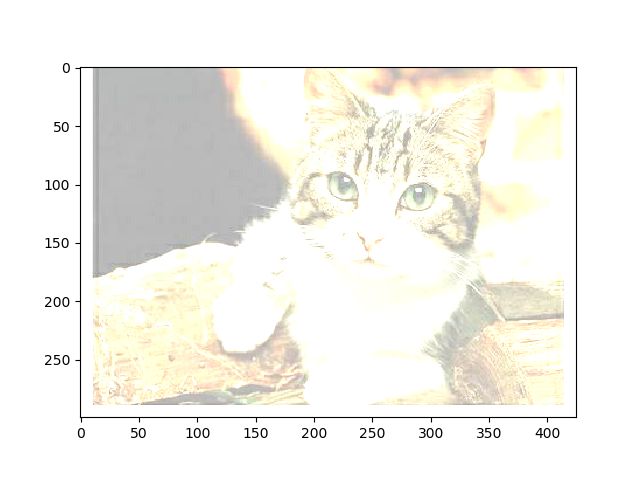
    brightness_down = tf.image.adjust_brightness(img_data,-0.5)
    #将图像的亮度+0.5
    brightness_up = tf.image.adjust_brightness(img_data,0.5)
    #将图像的对比度减小,感觉这里有一个倍数的关系,不是单纯的-1,因为参数为1时,和原图是一样的
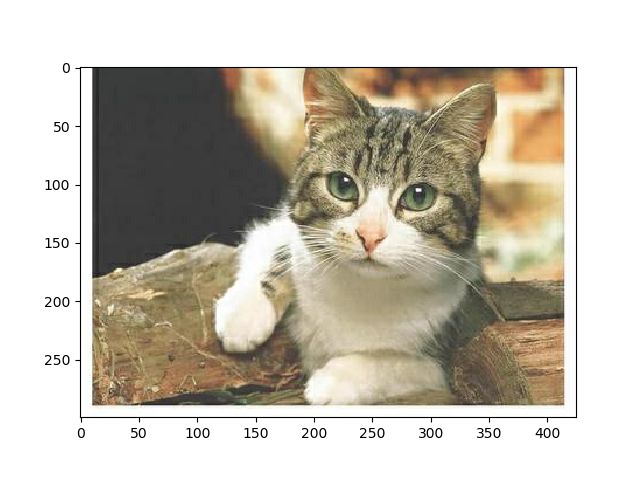
    contrast_down = tf.image.adjust_contrast(img_data,1)
    #将图像的对比度增大2倍。
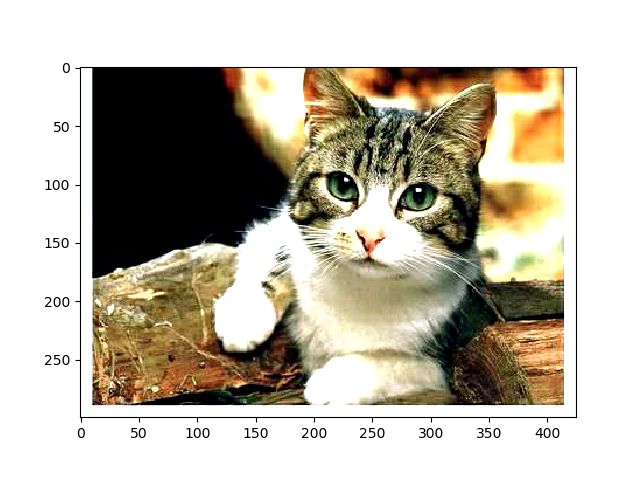
    contrast_up = tf.image.adjust_contrast(img_data,2)
    plt.figure(2)
    plt.imshow(brightness_down.eval())
    plt.figure(3)
    plt.imshow(brightness_up.eval())
    plt.figure(4)
    plt.imshow(contrast_down.eval())
    plt.figure(5)
    plt.imshow(contrast_up.eval())
    plt.show()
第9章TensorBoard可视化
1.生成log文件
#简单实例
import tensorflow as tf
#tf.constant是一个计算,这个计算的结果为一个张量,保存在变量a中
a = tf.constant([1.0,2.0],name="a")
b = tf.constant([2.0,3.0],name="b")
result = tf.add(a,b,name="add")
#print(result)
writer = tf.summary.FileWriter("E:\python\Scripts\log",tf.get_default_graph())
writer.close()"E:\python\Scripts\log"这是一个路径,存放log文件的。
运行后会生成一个文件存放在E:\python\Scripts\log下,
![]()
2.进入终端,执行log文件
3.
根据提示,浏览器中进入http://desktop-cuf1kni:6006,查看结果
命名空间与TensorBoard图上节点
tf.variable_scope:管理变量的命名空间
tf.name_scope:命名空间管理
这两个函数在大部分情况下是等价的,区别?
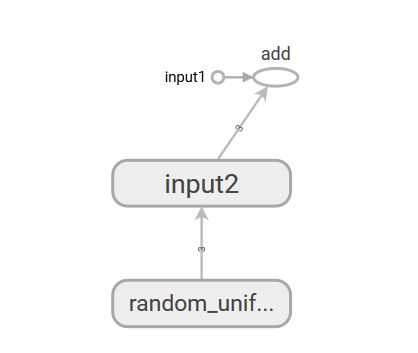
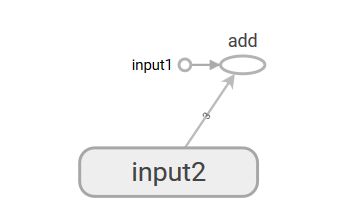
tf.name_scope使用与否与可视图效果
#不适用tf.name_scope
#coding=utf-8
import tensorflow as tf

input1 = tf.constant([1.0,2.0,3.0],name="input1")

input2 = tf.Variable(tf.random_uniform([3]),name="input2")
output = tf.add_n([input1,input2],name="add")

writer = tf.summary.FileWriter("/path/to/log",tf.get_default_graph())
writer.close()
#使用tf.name_scope
import tensorflow as tf
with tf.name_scope("input1"):
input1 = tf.constant([1.0,2.0,3.0],name="input1")
with tf.name_scope("input2"):
input2 = tf.Variable(tf.random_uniform([3]),name="input2")
output = tf.add_n([input1,input2],name="add")
writer = tf.summary.FileWriter("/path/to/log",tf.get_default_graph())
writer.close()左边为不使用,右边为使用。


