【python基础教程笔记(六)】数据库操作
数据库操作
Python3中连接数据库的方式有很多,而且十分的方便简单。在《python基础教程(第三版)》中关于这一节使用了SQLite数据库,而在我们实际使用过程中,可能更加倾向于使用SqlServer,MySQL等,本文将以MySQL为例,另外书中只提到了python官方的python DB API,而实际上我们有很多方式可以选择,本文将介绍两种种连接操作MySQL的方式:1,python DB API;2,MySQL官方连接器;
因为我们后续需要安装一些库,此处给出笔者的测试环境:win7 64位,python3.6.7
-
python DB API
在使用python DB API连接MySQL时,如果是python2的版本,你需要执行下面的命令来安装库。
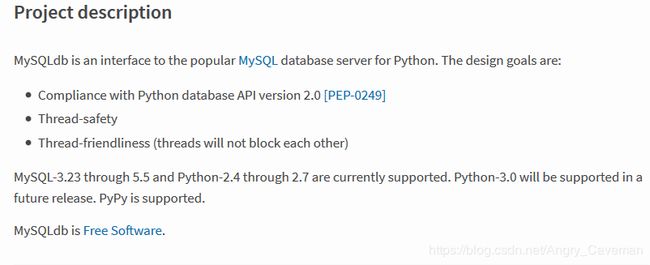
pip install MySQL-python我们可以进入官网查看这个库的描述。
目前python3还没有得到支持。
事实上如果你使用python3我们已经有新的选择了,我们可以执行下面的命令来安装新库。
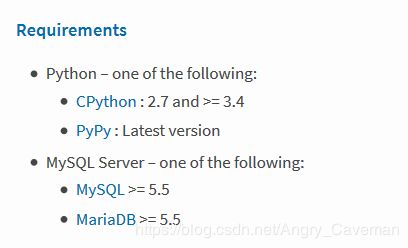
pip3 install PyMySQL查看官网的信息显示:
综上所述,我们接下来将使用pymysql库来操作,还有,如果你想连接SqlServer的话,那你就需要使用pymssql库,两者有一字之差。
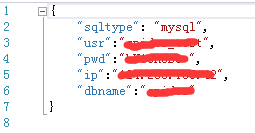
我在远程服务器上安装了MySql数据库,并且新增了一个测试用的库,在里面添加了一张mission表。现在的要求是,我们将数据库的配置文件放在json文件中,通过pymysql库来连接Mysql,查询测试数据的ID。
配置文件如下图:
源码如下:
import pymysql

import json

class Mission:

    #初始化

    def __init__(self):

        path='./sqlconfig.json'

        with open(path,'r',encoding='utf-8') as f:

            configs=json.loads(f.read())

        self.usr=configs['usr']

        self.pwd=configs['pwd']

        self.ip=configs['ip']

        self.dbname=configs['dbname']


    # 打开数据库连接

    def connect(self):

        self.db = pymysql.connect(self.ip,self.usr,self.pwd,self.dbname)


    #更新语句

    def update(self,sentence):

        # 使用cursor()方法获取操作游标

        cursor = self.db.cursor()

        try:

            # 执行SQL语句

            cursor.execute(sentence)

            # 提交到数据库执行

            self.db.commit()

            result='ok'

        except Exception as e:

            print (e)

            result=None

            # 发生错误时回滚

            self.db.rollback()

        return result


    def select(self,sentence):

        # 使用cursor()方法获取操作游标

        cursor = self.db.cursor()

        # SQL 查询语句

        try:

            # 执行SQL语句

            cursor.execute(sentence)

            # 获取所有记录列表

            results = cursor.fetchall()

        except Exception as e:

           results=None

           print (e)

        return results


    #查找spidername的任务id

    def _select_ID(self,spidername):

        self.connect()

        sentence ="SELECT  id FROM mission where spidername='%s';"%(spidername)

        results=self.select(sentence)

        self.close()

        return results


    def close(self):

        # 关闭数据库连接

        self.db.close()


if __name__ =="__main__":

    mi=Mission()

    print(mi._select_ID('test01'))
运行结果:
结果与我表中的id是符合的。插入和删除的代码和update()函数一致,只不过传入的语句不一样而已。为什么不在Select()中直接写查询语句?首先在实际的运用中,可能不只是查询id,还会查询其他的一些东西,所以Select()中的代码会被多次调用。其次,当在其他类中调用该类的查询ID方法时,更加直观方便。
-
mysql-connector
接下来我们使用mysql-connector来连接mysql数据库,mysql-connector是由mysql官方提供的驱动器,同样,如果要在python中使用它,也需要进行安装。
pip3 install mysql-connector我们对上文提到的Mission类进行一些变形。
import mysql.connector

import json

class Mission:

    #初始化

    def __init__(self):

        path='./sqlconfig.json'

        with open(path,'r',encoding='utf-8') as f:

            configs=json.loads(f.read())

        self.usr=configs['usr']

        self.pwd=configs['pwd']

        self.ip=configs['ip']

        self.dbname=configs['dbname']


    # 打开数据库连接

    def connect(self):

        self.db = mydb = mysql.connector.connect(host=self.ip,user=self.usr,passwd=self.pwd,database=self.dbname)


    #更新语句

    def update(self,sentence):

        # 使用cursor()方法获取操作游标

        cursor = self.db.cursor()

        try:

            # 执行SQL语句

            cursor.execute(sentence)

            # 提交到数据库执行

            self.db.commit()

            result='ok'

        except Exception as e:

            print (e)

            result=None

            # 发生错误时回滚

            self.db.rollback()

        return result


    def select(self,sentence):

        # 使用cursor()方法获取操作游标

        cursor = self.db.cursor()

        # SQL 查询语句

        try:

            # 执行SQL语句

            cursor.execute(sentence)

            # 获取所有记录列表

            results = cursor.fetchall()

        except Exception as e:

           results=None

           print (e)

        return results


    #查找spidername的任务id

    def _select_ID(self,spidername):

        self.connect()

        sentence ="SELECT  id FROM mission where spidername='%s';"%(spidername)

        results=self.select(sentence)

        self.close()

        return results


    def close(self):

        # 关闭数据库连接

        self.db.close()


if __name__ =="__main__":

    mi=Mission()

    print(mi._select_ID('test01'))
执行结果如下:
我们的代码基本上没有发生什么变化,只不过是将连接对象换成了mysql.connector。另外就是返回的内容不一样,之前是元祖,现在是列表。
当然还有一些其他有用的方法,比如:
mycursor = self.db.cursor()

sql = "INSERT INTO sites (name, url) VALUES (%s, %s)"

val = [ ('Google', 'https://www.google.com'), ('Github', 'https://www.github.com'), ('Taobao', 'https://www.taobao.com'), ('stackoverflow', 'https://www.stackoverflow.com/') ]

 mycursor.executemany(sql, val)
像这样一次插入多条语句。
-
总结
上述的内容并不足以将两种方法的特性描述明白,他们还有很多有用且有趣的方法,有相关需求的可以去查阅这方面相关的详细资料,此处为抛砖引玉。


