redis4.0主从及哨兵配置
一:实战环境:
cat /etc/redhat‐release
CentOS Linux release 7.4.1708 (Core)
二:源码下载并安装redis4.0:
wget http://download.redis.io/releases/redis‐4.0.1.tar.gz
tar xf redis‐4.0.1.tar.gz
make && make install
cat redis.conf|egrep ‐v "^#|^$" > src/redis1.conf
三、主从配置
修改redis{1-3}.conf,这四个地方需要修改
port 1379
pidfile /var/run/redis_1379.pid
requirepass redis111
dir /usr/local/src/redis‐4.0.1/data/redis1
其中redis{2-3}.conf添加
slaveof 127.0.0.1 1379
master auth redis111
简单测试一下:
/usr/local/src/redis‐4.0.1/src/redis‐cli ‐p 1379
127.0.0.1:1379> auth redis111
OK
127.0.0.1:1379> info Replication
# Replication
role:master
connected_slaves:2
slave0:ip=127.0.0.1,port=1380,state=online,offset=336,lag=1
slave1:ip=127.0.0.1,port=1381,state=online,offset=336,lag=0
master_replid:4e47c61ad7bb99aa8fa0718d3232687ea6ef228a
master_replid2:0000000000000000000000000000000000000000
master_repl_offset:336
second_repl_offset:‐1
repl_backlog_active:1
repl_backlog_size:1048576
repl_backlog_first_byte_offset:1
repl_backlog_histlen:336
四:哨兵配置
cat sentinel.conf |egrep ‐v "^#|^$" > data/sentinel1.conf
修改成如下配置:
cat sentinel1.conf
port 26379
dir "/usr/local/src/redis‐4.0.1/data/sentinel1"
logfile "/usr/local/src/redis‐4.0.1/data/logs/sentinel1.log"
daemonize yes
sentinel myid 767b240c2ab4783d66db392189ff54d248a93259
sentinel monitor mymaster 127.0.0.1 1379 2
sentinel auth‐pass mymaster redis111
sentinel parallel‐syncs mymaster 2
sentinel{2-3}分别改一下端口和dir以及log位置:
启动:
[root@registry data]# /usr/local/src/redis‐4.0.1/src/redis‐sentinel senti
nel1.conf
[root@registry data]# /usr/local/src/redis‐4.0.1/src/redis‐sentinel senti
nel2.conf
[root@registry data]# /usr/local/src/redis‐4.0.1/src/redis‐sentinel senti
nel3.conf
[root@registry data]# netstat ‐ntpl|grep sent
tcp 0 0 0.0.0.0:26379 0.0.0.0:* LISTEN 29853/redis‐sentine
tcp 0 0 0.0.0.0:26380 0.0.0.0:* LISTEN 29858/redis‐sentine
tcp 0 0 0.0.0.0:26381 0.0.0.0:* LISTEN 29988/redis‐sentine
tcp6 0 0 :::26379 :::* LISTEN 29853/redis‐sentine
tcp6 0 0 :::26380 :::* LISTEN 29858/redis‐sentine
tcp6 0 0 :::26381 :::* LISTEN 29988/redis‐sentine
查看集群状态:
sentinel master mymaster//查看master的状态
SENTINEL slaves mymaster //查看salves的状态
SENTINEL sentinels mymaster //查看哨兵的状态
SENTINEL get‐master‐addr‐by‐name mymaster//获取当前master的地址
info sentinel//查看哨兵信息
五:哨兵测试
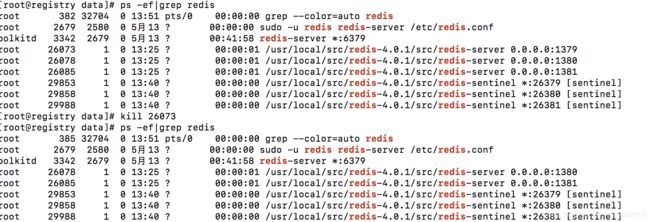
将redis的master进程kill
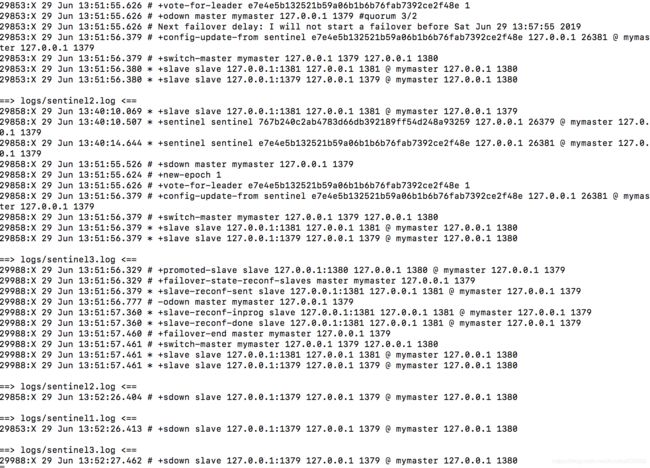
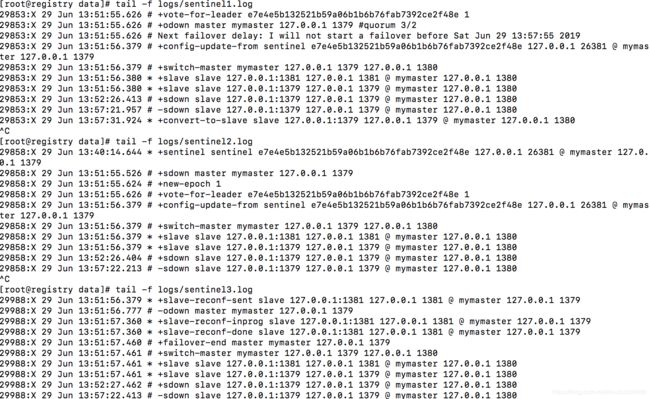
查看log
然后登陆哨兵客户端查看
127.0.0.1:26379> SENTINEL get‐master‐addr‐by‐name mymaster
1) "127.0.0.1"
2) "1380"
127.0.0.1:26379> SENTINEL slaves mymaster
1)  1) "name"
    2) "127.0.0.1:1381"
    3) "ip"
    4) "127.0.0.1"
    5) "port"
    6) "1381"
    7) "runid"
    8) "97a3501e274cce7f79b16e2231d788b4fd1c126a"
    9) "flags"
   10) "slave"
   11) "link‐pending‐commands"
2)  1) "name"
    2) "127.0.0.1:1379"
    3) "ip"
    4) "127.0.0.1"
    5) "port"
    6) "1379"
    7) "runid"
    8) ""
    9) "flags"
   10) "s_down,slave,disconnected"
然后重新启动原来的主
/usr/local/src/redis‐4.0.1/src/redis‐server redis1.conf原来的主已经成了从
这时再查看哨兵的状态
127.0.0.1:26379> SENTINEL slaves mymaster
1)  1) "name"
    2) "127.0.0.1:1381"
    3) "ip"
    4) "127.0.0.1"
    5) "port"
    6) "1381"
    7) "runid"
    8) "97a3501e274cce7f79b16e2231d788b4fd1c126a"
    9) "flags"
   10) "slave"
2)  1) "name"
    2) "127.0.0.1:1379"
    3) "ip"
    4) "127.0.0.1"
    5) "port"
    6) "1379"
    7) "runid"
    8) "544a66893b675c4ddb40b6befc53e3bba8fa52ff"
    9) "flags"
   10) "slave"


