Java + 原生MongoDB驱动 API 使用案例详说(两种方式)
前不久,博主利用spring-boot结合spring-data-mongodb包,搞了一把mongodb的集成 -- 增删改查
这种方式,比较固执,使用起来虽然方便,但是太依赖spring,我想创建自己的dbname,都无从下手(可能我还没探究到),只能使用配置文件里面一开始就默认的url
很烦,我不知道我要创建数据库A、B、C.....什么的,要怎么做? 而且查询也非常繁琐,so,本篇打算用原生的MongoDB API进行mongodb的使用,不难,看了后,就可以举一反三了,好了,我们开始吧!
一、pom依赖
注:由于博主习惯使用Spring-Boot框架写demo,因此,下面贴出来的pom符合Spring-Boot的依赖规范,但是,明眼人一眼就可以看出MongoDB API 用到的两个依赖是什么
pom.xml
	4.0.0
	com.appleyk
	Spring-Boot-MongoAPI
	0.0.1-SNAPSHOT
	MongoDB-API
	使用Java原生MongoDB_API进行数据的存储和访问


		org.springframework.boot
		spring-boot-starter-parent
		1.5.9.RELEASE


		1.8
		3.6.3


			org.springframework.boot
			spring-boot-starter-web


			org.springframework.boot
			spring-boot-starter-test
			test


			junit
			junit


			org.springframework.boot
			spring-boot-devtools


			true


			org.mongodb
			mongo-java-driver
			${mongodb.version}


			org.mongodb
			bson
			${mongodb.version}
注意两个地方
1、版本一定要统一,否则,出现未知的异常(比如说:‘’为什么我的数据保存不上,博主你的却可以呢? ”)我可不管
2、关键的两个依赖包
下面开始,只贴代码,说明都在注释里面了,希望需要的朋友对照自己的项目进行拷贝改造,别往运行看效果!!!
二、API使用快速入门 ☞ Document对象
QuickStartTest.java
import static com.mongodb.client.model.Filters.*;
import static com.mongodb.client.model.Updates.*;

import java.util.Arrays;
import java.util.HashMap;
import java.util.Map;

import org.bson.Document;
import org.junit.Test;

import com.mongodb.MongoClient;
import com.mongodb.client.MongoCollection;
import com.mongodb.client.MongoCursor;
import com.mongodb.client.MongoDatabase;
import com.mongodb.client.result.DeleteResult;
import com.mongodb.client.result.UpdateResult;

public class QuickStartTest {


	MongoClient mongoClient = new MongoClient("localhost" , 27017);

	//或者使用下面的方法,使用连接字符串进行构建Mongo客户端实例
//	 MongoClientURI connectionString = new MongoClientURI("mongodb://localhost:27017");
//	 MongoClient mongoClient = new MongoClient(connectionString);

	/**
	 * 一旦有了连接到MongoDB部署的MongoClient实例,就可以使用MongoClient.getdatabase()方法来访问数据库。
	 * 将数据库的名称指定到getDatabase()方法。如果数据库不存在,MongoDB将在您第一次为该数据库存储数据时创建数据库
	 * 数据库实例不可变
	 */
	MongoDatabase database = mongoClient.getDatabase("mydb");

	/**
	 *
	 * 一旦有了DB实例后,就使用它的getCollection()方法来访问一个集合。
	 * 将集合的名称指定到getCollection()方法。如果一个集合不存在,MongoDB将在您第一次为该集合存储数据时创建集合。
	 */

	/**
	 * 例如,使用数据库实例,下面的语句访问mydb数据库中的名为test的集合
	 * 集合不可变
	 */
	MongoCollection collection = database.getCollection("test");


	/**
	 * 存入一条数据【插入一个文档对象】
	 */

	@Test
	public void SaveOne(){


		/**
		 * 有了DB实例、Collection集合后,就该存储文档(数据)了
		 * 要使用Java驱动程序创建文档,请使用Document(文档)类 --org.bson.Document
		 * 要使用Java驱动程序创建文档,实例化一个具有字段和值的文档对象
		 * new Document(Map) 或者  new Document(key,value)
		 * 并使用其append()方法将其他字段和值包含到文档对象中
		 * 该值可以是另一个文档对象,以指定嵌入的文档
		 */

		/**
		 * 数据(含文档套文档) :
{
   "name" : "MongoDB",
   "type" : "nosqlDB",
   "count" : 1,
   "versions": [ "v3.6", "v3.0", "v2.6" ],
   "info" : { x : 203, y : 102 }
}
		 */
		Map map = new HashMap<>();
		map.put("x", 203);
		map.put("y", 102);
		Document document = new Document("name","MongoDB")
				.append("type", "nosqlDB")
				.append("count", 1)
				.append("versions", Arrays.asList("v3.6","v3.0","v2.6"))
				.append("info", new Document(map));

		/**
		 * 有了文档对象后,就是向集合collection中保存了
		 * 也可以批量插入List,方法为collection.insertMany(documents);
		 */

		collection.insertOne(document);

		/**
		 * 要计算集合中的文档数,可以使用集合的count()方法。
		 */

		System.err.println("count of documents from collection is :"+collection.count());

	}

	/**
	 * 无条件取出(查询)第一个文档对象(第一条数据)
	 */
	@Test
	public void findOne(){

		Document doc = collection.find().first();
		System.err.println("只取【test】集合中的第一个文档对象:"+doc.toJson());
	}

	/**
	 * 无条件取出(查询)所有的文档对象(所有数据)
	 */
	@Test
	public void findAll(){

		/**
		 * 要检索集合中的所有文档,我们将使用find()方法,而不需要任何参数。
		 * 为了遍历结果,将iterator()方法链接到find()中。
		 * 迭代器类似SQL的游标cursor
		 */
		MongoCursor cursor = collection.find().iterator();
		try {
			/**
			 * 如果迭代到下一个对象等于false,退出迭代,并关闭迭代器
			 */
			int index = 0;
		    while (cursor.hasNext()) {
		        System.err.println((index+1)+":"+cursor.next().toJson());
		        index++;
		    }
		} finally {
			cursor.close();
		}

		System.err.println("=======不推荐下面的遍历法");
		/**
		 * 虽然可以允许迭代使用下面的习惯用法,但避免使用它,因为如果循环提前终止,应用程序可能会泄漏一个游标:
		 */
		for (Document cur : collection.find()) {
		    System.err.println(cur.toJson());
		}
	}


	/**
	 * 带条件查询文档对象
	 */
	@Test
	public void queryOne(){

		/**
		 * 要查询匹配某些条件的文档,请将filter对象传递给find()方法。
		 * 为了方便创建过滤器对象,Mongo-Java驱动程序提供了过滤器帮助器。
		 */

		/**
		 * 查询count == 1 的文档对象
		 */
		Document doc = collection.find(eq("count", 1)).first();
		if(doc!=null){
			System.err.println("条件1查询结果:"+doc.toJson());
		}else{
			System.err.println("条件1查询结果:无");
		}


		/**
		 * 查询count<2  且 name.equals("Mongo")的文档对象,显然不存在
		 * 如果查询全部符合条件的文档集合,请使用find(*).iterator()
		 */
		doc = collection.find(and(lt("count",2),eq("name", "Mongo"))).first();
		if(doc!=null){
			System.err.println("条件2查询结果:"+doc.toJson());
		}else{
			System.err.println("条件2查询结果:无");
		}

		/**
		 * Filters
		 * gt gte  === >  >=
		 * lt lte  === <  <=
		 * eq      === ==
		 * and     === 相当于 sql语句的 where xxx  and xxx
		 * or      === 相当于 sql语句的 where xxx  or  xxx
		 */

	}

	/**
	 * 更新文档 -- ByOne
	 */
	@Test
	public void updateOne(){

		/**
		 * 要更新集合中的文档,使用集合的updateOne方法更新单个文档对象
		 *
		 * $set  相当于 sql语句的 update collection set type = "database" where name = "MongoDB" limit 1
		 */
		UpdateResult result = collection.updateOne(eq("name", "MongoDB"), new Document("$set", new Document("type", "database")));
		System.err.println("更新影响的行数:"+result.getModifiedCount());

	}

	/**
	 * 批量更新文档 -- ByMany
	 */
	@Test
	public void updateMany(){

		/**
		 * 要更新集合中的文档,使用集合的updateMany方法更新所有符合条件的文档对象
		 * 下面更新所有name等于"MongoDB"的文档对象的count属性 +100
		 */
		UpdateResult result = collection.updateMany(eq("name", "MongoDB"), inc("count", 100));
		System.err.println("更新影响的行数:"+result.getModifiedCount());

	}


	/**
	 * 删除文档 -- ByOne
	 */
	@Test
	public void deleteOne(){
		/**
		 * 删除第一个type.equals("nosqlDB")的文档对象
		 */
		DeleteResult result = collection.deleteOne(eq("type", "nosqlDB"));
		System.err.println("删除影响的行数:"+result.getDeletedCount());
	}

	/**
	 * 批量删除文档 -- ByMany
	 */
	@Test
	public void deleteMany(){

		/**
		 * 删除所有count>=100的文档对象
		 */
		DeleteResult result = collection.deleteMany(gte("count", 100));
		System.err.println("删除影响的行数:"+result.getDeletedCount());
	}

}
注意一个地方
Mongo查询和更新的过滤器,需要引入这两个静态包,别忘啦(除非你拷贝了整个demo)
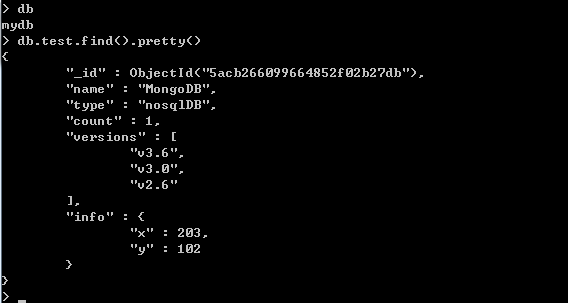
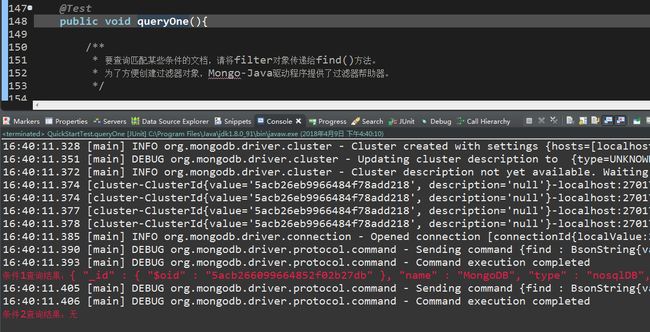
来几个测试效果图
1、保存单条文档
查询
2、按条件查询
其余不在演示
三、API使用快速入门 ☞ Pojos对象
Country.java
public final class Country {

	private String name;
	private String province;
	private String city;

	public Country() {
	}

	public Country(String name , String pro, String city) {
	   this.name = name ;
	   this.province = pro;
	   this.city = city;
	}

	public String getName() {
		return name;
	}

	public void setName(String name) {
		this.name = name;
	}

	public String getProvince() {
		return province;
	}

	public void setProvince(String province) {
		this.province = province;
	}

	public String getCity() {
		return city;
	}

	public void setCity(String city) {
		this.city = city;
	}

}
Person.java
import org.bson.types.ObjectId;

public final class Person {

	/**
	 * MongoDB自动分配的ID
	 */
	private ObjectId id;
    private String name;
    private int age;
    private Country country;

    public Person() {
    }

    public Person(String name , int age,Country country){
    	this.name = name ;
    	this.age  = age  ;
    	this.country = country;
    }
    public ObjectId getId() {
        return id;
    }

    public void setId(final ObjectId id) {
        this.id = id;
    }

    public String getName() {
        return name;
    }

    public void setName(final String name) {
        this.name = name;
    }

    public int getAge() {
        return age;
    }

    public void setAge(final int age) {
        this.age = age;
    }

	public Country getCountry() {
		return country;
	}

	public void setCountry(Country country) {
		this.country = country;
	}

	@Override
    public String toString(){
    	return "name:"+name+",age:"+age+",国家:"+country.getName()+",省/州:"
    			+country.getProvince()+",市:"+country.getCity();
    }
}
再来个测试用例类
QuickStartPojosTest.java
import static org.bson.codecs.configuration.CodecRegistries.fromProviders;
import static org.bson.codecs.configuration.CodecRegistries.fromRegistries;
import static com.mongodb.client.model.Filters.*;

import java.util.Arrays;
import java.util.List;

import org.bson.codecs.configuration.CodecProvider;
import org.bson.codecs.configuration.CodecRegistry;
import org.bson.codecs.pojo.PojoCodecProvider;
import org.junit.Test;

import com.appleyk.entity.Country;
import com.appleyk.entity.Person;
import com.mongodb.MongoClient;
import com.mongodb.client.MongoCollection;
import com.mongodb.client.MongoDatabase;


public class QuickStartPojosTest {

	/**
	 * 在使用驱动程序使用POJO之前,您需要配置CodecRegistry以包含一个codecs来处理从bson到POJO的转换
	 * 要做到这一点,最简单的方法是使用PojoCodecProvider.builder()来创建和配置一个CodecProvider
	 * 下面的示例将合并默认的codec注册表,并将PojoCodecProvider配置为自动创建PojoCodecs
	 */

	CodecProvider pojoCodecProvider = PojoCodecProvider.builder().automatic(true).build();
	CodecRegistry pojoCodecRegistry = fromRegistries(MongoClient.getDefaultCodecRegistry(),
			fromProviders(pojoCodecProvider));

	/**
	 * 设置pojoCodecRegistry的方法有多种 可以在实例化MongoClient对象时设置它
	 * 1.MongoClient mongoClient = new MongoClient("localhost", MongoClientOptions.builder().codecRegistry(pojoCodecRegistry).build());
	 * 也可以在创建database的时候使用它
	 * 2.database = database.withCodecRegistry(pojoCodecRegistry);
	 * 3.也可以在使用集合的时候使用它
	 * collection = collection.withCodecRegistry(pojoCodecRegistry);
	 */

	/**
	 * 客户端实例不可变
	 */
	MongoClient mongoClient = new MongoClient("localhost", 27017);

	/**
	 * 数据库实例不可变
	 */
	MongoDatabase database = mongoClient.getDatabase("mydb").withCodecRegistry(pojoCodecRegistry);


	/**
	 * 集合不可变
	 */
	MongoCollection collection = database.getCollection("people", Person.class);


	/**
	 * 插入单个Person实体对象
	 */
	@Test
	public void SaveOne() {

		Person person = new Person("appleyk", 20, new Country("中国", "河南省", "郑州市"));
		collection.insertOne(person);
		System.err.println("保存成功!");

	}

	/**
	 * 批量插入
	 */
	@Test
	public void SaveMany() {


		List persons = Arrays.asList(
				 new Person("kobe", 38, new Country("美国", "加利福尼亚州", "洛杉矶市"))
				,new Person("刘翔", 33, new Country("中国", "上海", "上海市")));

		collection.insertMany(persons);
		System.err.println("保存成功!");

	}

	/**
	 * 查询集合中的第一个pojo对象  === pojos的查询 等同于 documents的查询
	 */
	@Test
	public void findOne(){
		Person person = collection.find().first();
		System.err.println(person);
	}

	/**
	 * 根据过滤条件进行单个Person实体对象的查询
	 */
	@Test
	public void queryOne(){
		Person person = collection.find(eq("name","kobe")).first();
		System.err.println(person);
	}


	/**
	 * ..............此处省略100行代码,自己补充
	 */
}
同理,注意一个地方 --- 静态包的手动引入
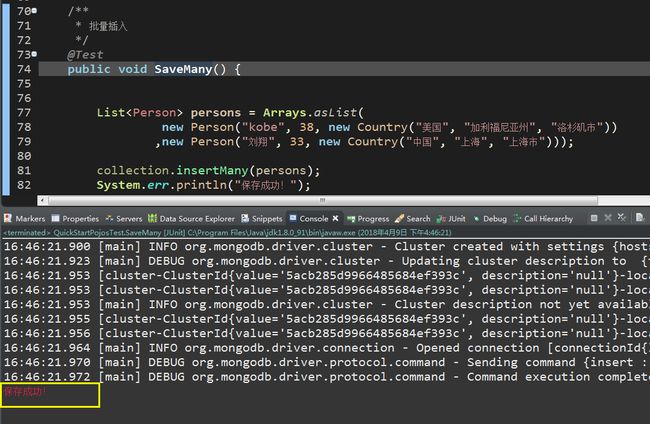
效果演示
1、保存多条
其余不再演示
有问题请留言
喜欢的给个赞
------------------------------------------------学习使人快乐!


