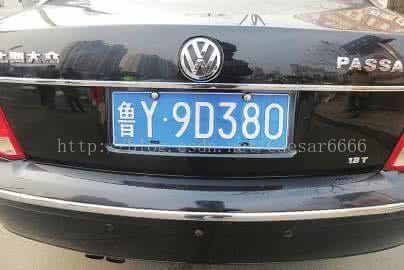
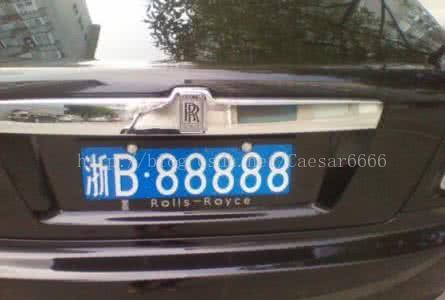
用opencv3写的超详细注释的车牌检测
#include"iostream"
#include"opencv2/opencv.hpp"
#include"opencv2/highgui/highgui.hpp"
#include"opencv2/core/core.hpp"
#include"opencv2/imgproc/imgproc.hpp"
using namespace std;
using namespace cv;
#include"opencv2/opencv.hpp"
#include"opencv2/highgui/highgui.hpp"
#include"opencv2/core/core.hpp"
#include"opencv2/imgproc/imgproc.hpp"
using namespace std;
using namespace cv;
Mat grayimage, gaussianimage, threshimage;
int cols_start = 0, cols_end = 0;//记录车牌开始、结束列
int rows_start = 0, rows_end = 0;//记录车牌开始、结束行
const int row_thresh = 27;//判断一行是不是车牌有效值的阈值
const int col_thresh = 2;//判断一列是不是车牌有效值的阈值
int row[200];//存放含有车牌有效信息的第j行,把所有有效行放在一个数组里,统一管理,便于判断
int col[30];//存放含有车牌有效信息的第j列
int cols_start = 0, cols_end = 0;//记录车牌开始、结束列
int rows_start = 0, rows_end = 0;//记录车牌开始、结束行
const int row_thresh = 27;//判断一行是不是车牌有效值的阈值
const int col_thresh = 2;//判断一列是不是车牌有效值的阈值
int row[200];//存放含有车牌有效信息的第j行,把所有有效行放在一个数组里,统一管理,便于判断
int col[30];//存放含有车牌有效信息的第j列
int main()
{
Mat srcimage = imread("E://opencv//car_plate1.jpg");
if (!srcimage.data)
{
cerr << "Read picture error!" << endl;
return 0;
}
cout << "输入图片的size为" << "(" << srcimage.rows << "," << srcimage.cols << ")" << endl << endl;
grayimage.create(srcimage.size(), CV_8UC1);
threshimage.create(srcimage.size(), CV_8UC1);
gaussianimage.create(srcimage.size(), CV_8UC1);
threshimage.create(srcimage.size(), CV_8UC1);
gaussianimage.create(srcimage.size(), CV_8UC1);
void find_UpandDown_row(Mat_ dstimage,Mat src);//查找车牌的上边线和下边线
void find_LeftandRight_col(Mat_ dstimage, Mat src);//查找车牌的左边线和右边线
void find_ROI(Mat src);//查找车牌区域
void find_LeftandRight_col(Mat_
void find_ROI(Mat src);//查找车牌区域
cvtColor(srcimage, grayimage, COLOR_BGR2GRAY);//灰度化
GaussianBlur(grayimage, gaussianimage, Size(5, 5), 0, 0);//高斯滤波
Canny(gaussianimage, threshimage, 200, 100);//Canny边缘检测
GaussianBlur(grayimage, gaussianimage, Size(5, 5), 0, 0);//高斯滤波
Canny(gaussianimage, threshimage, 200, 100);//Canny边缘检测
imshow("canny", threshimage);
find_UpandDown_row(threshimage,srcimage);
find_LeftandRight_col(threshimage, srcimage);
find_ROI(srcimage);
waitKey(0);
return 0;
}
find_UpandDown_row(threshimage,srcimage);
find_LeftandRight_col(threshimage, srcimage);
find_ROI(srcimage);
waitKey(0);
return 0;
}
void find_UpandDown_row(Mat_ dstimage,Mat src)
{
int k = 0;//统计符合车牌信息的行数
/*判断每行是否是含有车牌信息的行,通过查看白点黑点交换的次数来决定的*/
for (int j = 100; j < dstimage.rows -10; j++)//一般车牌位于中下方,而且图像上方和下方环境复杂,所以不去检查
{
int count = 0;//记录每行白点的个数
for (int i = 0; i < dstimage.cols - 1; i++)
{
if (dstimage.at(j, i) != dstimage.at(j, i + 1))//比较同一行相邻两个像素值
count++;
if (count > row_thresh)
{
row[k++] = j;
break;
}
}
}
cout <<"符合阈值的行数有:"<< k+1 << endl;
{
int k = 0;//统计符合车牌信息的行数
/*判断每行是否是含有车牌信息的行,通过查看白点黑点交换的次数来决定的*/
for (int j = 100; j < dstimage.rows -10; j++)//一般车牌位于中下方,而且图像上方和下方环境复杂,所以不去检查
{
int count = 0;//记录每行白点的个数
for (int i = 0; i < dstimage.cols - 1; i++)
{
if (dstimage.at
count++;
if (count > row_thresh)
{
row[k++] = j;
break;
}
}
}
cout <<"符合阈值的行数有:"<< k+1 << endl;
/*从上边开始,三行连续时认为是起始行*/
for (int i = 0; i < k-2; i++)
{
if ((row[i] == row[i + 1] - 1) && (row[i] == row[i + 2] - 2))
{
rows_start = row[i];
cout << "上划线所在的行数:" << rows_start << endl;
break;
}
}
line(src, Point(0, rows_start), Point(dstimage.cols - 1, rows_start), Scalar(0, 0, 255));
for (int i = 0; i < k-2; i++)
{
if ((row[i] == row[i + 1] - 1) && (row[i] == row[i + 2] - 2))
{
rows_start = row[i];
cout << "上划线所在的行数:" << rows_start << endl;
break;
}
}
line(src, Point(0, rows_start), Point(dstimage.cols - 1, rows_start), Scalar(0, 0, 255));
/*从下边开始,三行连续时认为是起始行*/
for (int i = k - 1; i > 1; i--)
{
if ((row[i] == row[i - 1] + 1) && (row[i] == row[i - 2] + 2))
{
rows_end = row[i];
cout << "下划线所在的行数:"< break;
}
}
line(src, Point(0, rows_end), Point(dstimage.cols - 1, rows_end), Scalar(0, 0, 255));
for (int i = k - 1; i > 1; i--)
{
if ((row[i] == row[i - 1] + 1) && (row[i] == row[i - 2] + 2))
{
rows_end = row[i];
cout << "下划线所在的行数:"<
}
}
line(src, Point(0, rows_end), Point(dstimage.cols - 1, rows_end), Scalar(0, 0, 255));
imshow("原图", src);
}
}
void find_LeftandRight_col(Mat_ dstimage, Mat src)
{
int k = 0;//统计符合车牌信息的列数
/*判断每行是否是含有车牌信息的列,通过查看白点像素的个数*/
for (int j = 10; j < dstimage.cols -10; j++)
{
int count = 0;//记录每列白点的个数
for (int i = rows_start; i < rows_end; i++)
{
if (dstimage.at(i, j) != dstimage.at(i+1, j))
count++;
if (count > 2)
{
col[k++] = j;
break;
}
}
}
cout << "符合阈值的列数有:" << k + 1 << endl;
{
int k = 0;//统计符合车牌信息的列数
/*判断每行是否是含有车牌信息的列,通过查看白点像素的个数*/
for (int j = 10; j < dstimage.cols -10; j++)
{
int count = 0;//记录每列白点的个数
for (int i = rows_start; i < rows_end; i++)
{
if (dstimage.at
count++;
if (count > 2)
{
col[k++] = j;
break;
}
}
}
cout << "符合阈值的列数有:" << k + 1 << endl;
/*从左边开始,三行连续时认为是起始行*/
for (int i = 0; i < k - 2; i++)
{
if ((col[i] == col[i + 1] - 1) && (col[i] == col[i + 2] - 2))
{
cols_start = col[i];
cout << "左划线所在的列数:" << cols_start << endl;
break;
}
}
line(src, Point(cols_start, rows_start), Point(cols_start, rows_end), Scalar(0, 0, 255));
for (int i = 0; i < k - 2; i++)
{
if ((col[i] == col[i + 1] - 1) && (col[i] == col[i + 2] - 2))
{
cols_start = col[i];
cout << "左划线所在的列数:" << cols_start << endl;
break;
}
}
line(src, Point(cols_start, rows_start), Point(cols_start, rows_end), Scalar(0, 0, 255));
/*从右边开始,三行连续时认为是起始行*/
for (int i = k - 1; i > 1; i--)
{
if ((col[i] == col[i - 1] + 1) && (col[i] == col[i - 2] + 2))
{
cols_end = col[i];
cout << "右划线所在的列数:" << cols_end << endl;
break;
}
}
line(src, Point(cols_end, rows_start), Point(cols_end, rows_end), Scalar(0, 0, 255));
for (int i = k - 1; i > 1; i--)
{
if ((col[i] == col[i - 1] + 1) && (col[i] == col[i - 2] + 2))
{
cols_end = col[i];
cout << "右划线所在的列数:" << cols_end << endl;
break;
}
}
line(src, Point(cols_end, rows_start), Point(cols_end, rows_end), Scalar(0, 0, 255));
imshow("原图", src);
}
}
void find_ROI(Mat src)
{
/*构建以(cols_start,rows_start)为左上角,长为cols_end - cols_start,宽为rows_end - rows_start的矩阵*/
Rect rect=Rect(cols_start, rows_start, cols_end - cols_start, rows_end - rows_start);
Mat ROI=src(rect);//建立车牌的图像
imshow("car_plate", ROI);
}


{
/*构建以(cols_start,rows_start)为左上角,长为cols_end - cols_start,宽为rows_end - rows_start的矩阵*/
Rect rect=Rect(cols_start, rows_start, cols_end - cols_start, rows_end - rows_start);
Mat ROI=src(rect);//建立车牌的图像
imshow("car_plate", ROI);
}


该代码只能从图片中找出车牌位置并分割出来,还不可以识别车牌字符;还有该代码只能识别图片内容比较简单和清晰的图片,不能识别模糊、环境复杂的图片,还有车牌倾斜的也不行,只适合供初学者参考学习,遇到不明白的地方可以在评论中提出问题;同样也希望大神们指点一下,让我有所改进。