Jetson-TX1 基本开发环境配置
简单记录Jetson-TX1开发配置过程,以便之后查阅,如有错误,请及时指正!
1、NFS服务搭建
1.1 在host主机(Ubuntu14.04)上安装nfs组件:
$ sudo apt-get install nfs-common nfs-kernel-server1.2 在host主机上配置etc/exports,指出需要mount出的目录:
打开etc/exports文件:
$ sudo gedit /etc/exports修改etc/exports文件如下:
/home/chen/host/nfsroot *(rw,nohide,insecure,no_subtree_check,async,no_root_squash)其中,/home/chen/host/nfsroot 是博主自己需要共享目录的绝对路径,可以相应的改成自己的路径;
1.3 重启NFS服务
$ sudo /etc/init.d/nfs-kernel-server restart1.4 在target(Jetson-TX1)上安装nfs-common
$ sudo apt-get install nfs-common -y1.5 从target上mount到host的nfs挂载路径
$sudo mount -t nfs -o nolock : 例子:
sudo mount -t nfs -o nolock 192.168.0.104:/home/chen/host/nfsroot /home/nvidia/target/nfsroot
2、配置远程桌面
Ubuntu实现远程桌面的方法较多,本文只选取了较为简单的一种方式,即使用VNC来操作;
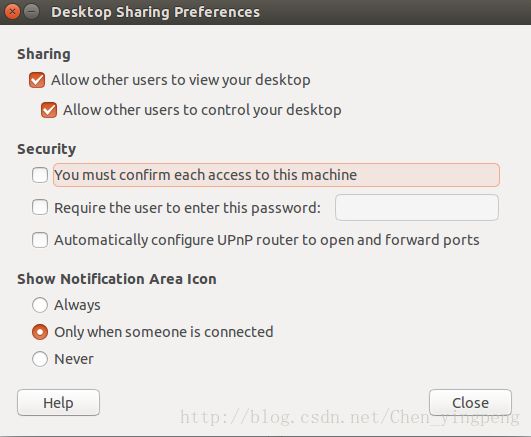
2.1 设置Desktop Sharing
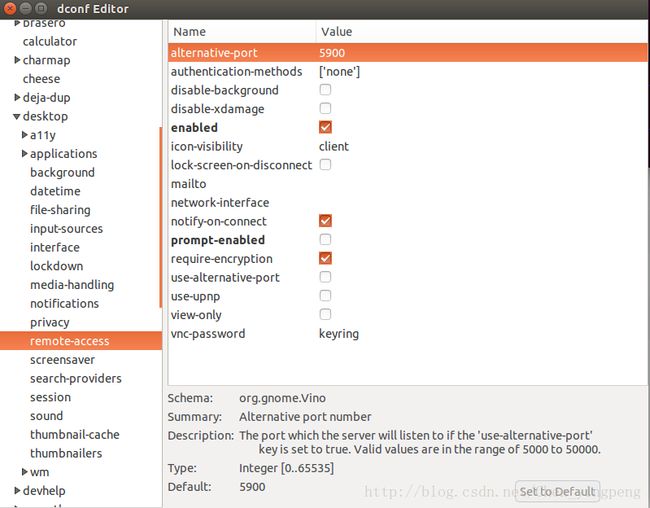
2.2 修改dconf-editor选项
终端输入如下命令安装dconf-editor工具:
$ sudo apt-get install dconf-editor -y然后打开dconf-editor
$ dconf-editor依次展开org->gnome->desktop->remote-access,取消选择requre-encryption(下图第三个勾)
2.3 下载VNC Viewer
下载官网:https://www.realvnc.com/en/connect/download/viewer/windows/
想要使用VNC进行远程连接,必须保证这些设备在同一个局域网之下,客户端的配置过程比较简单,输入TX1的IP地址(终端命令为ifconfig)。


