LNMP编译安装+环境搭建+Discuz论坛安装
一、LNMP介绍
1、简介
LNMP代表的就是:Linux系统下Nginx+MySQL+PHP这种网站服务器架构。
Linux是一类Unix计算机操作系统的统称,是目前最流行的免费操作系统。代表版本有:debian、centos、ubuntu、fedora、gentoo等。
Nginx是一个高性能的HTTP和反向代理服务器,也是一个IMAP/POP3/SMTP代理服务器。
Mysql是一个小型关系型数据库管理系统。
PHP是一种在服务器端执行的嵌入HTML文档的脚本语言。
2、LNMP和LAMP的区别
LAMP是指:linux、Apache、mysql,php。LNMP是指:linux,Nginx、mysql,php 。
Nginx属于轻量型服务器,Apache属于重量型服务器。因此LNMP占用的资源比LAMP的少,利用fast-cgi的方式动态解析PHP脚本。但php-fpm组件的负载能力有限,在访问量巨大的时候,容易down掉。
LAMP 是最强大的动态网站解决方案,Apache处理动态网页比Nginx强了不少。
3、网盘下载地址
百度网盘地址: https://pan.baidu.com/s/1NJiPYioi_843WfqMAI4PsA 密码: wdf8
二、编译安装MySQL
1、解决依赖
[root@server1 ~]# yum install -y gcc gcc-c++ ncurses-devel
[root@server1 ~]# yum install -y /root/cmake-2.8.12.2-4.el6.x86_64.rpm         ###通过cmake来编译mysql
2、编译安装
[root@server1 ~]# tar xf /root/mysql-boost-5.7.17.tar.gz
[root@server1 ~]# cd /root/mysql-5.7.17/
###执行失败的话可以把CMakeCache.txt删除重新执行,或者删除重新解压
[root@server1 mysql-5.7.17]# cmake -DCMAKE_INSTALL_PREFIX=/usr/local/lnmp/mysql -DMYSQL_DATADIR=/usr/local/lnmp/mysql/data -DMYSQL_UNIX_ADDR=/usr/local/lnmp/mysql/data/mysql.sock -DWITH_MYISAM_STORAGE_ENGINE=1 -DWITH_INNOBASE_STORAGE_ENGINE=1 -DDEFAULT_CHARSET=utf8 -DDEFAULT_COLLATION=utf8_general_ci -DEXTRA_CHARSETS=all -DWITH_BOOST=./boost/boost_1_59_0/
[root@server1 mysql-5.7.17]# make && make install           ###此步骤会很慢,虚拟机把内存给大点
3、复制配置
[root@server1 mysql-5.7.17]# mv /etc/my.cnf /etc/my.cnf.back
[root@server1 mysql-5.7.17]# cp /usr/local/lnmp/mysql/support-files/my-default.cnf /etc/my.cnf
[root@server1 mysql-5.7.17]# cp /usr/local/lnmp/mysql/support-files/mysql.server /etc/init.d/mysqld
4、声明环境变量
[root@server1 ~]# vim ~/.bash_profile
PATH=$PATH:$HOME/bin:/usr/local/lnmp/mysql/bin

[root@server1 ~]# . ~/.bash_profile
5、初始化并生成密码
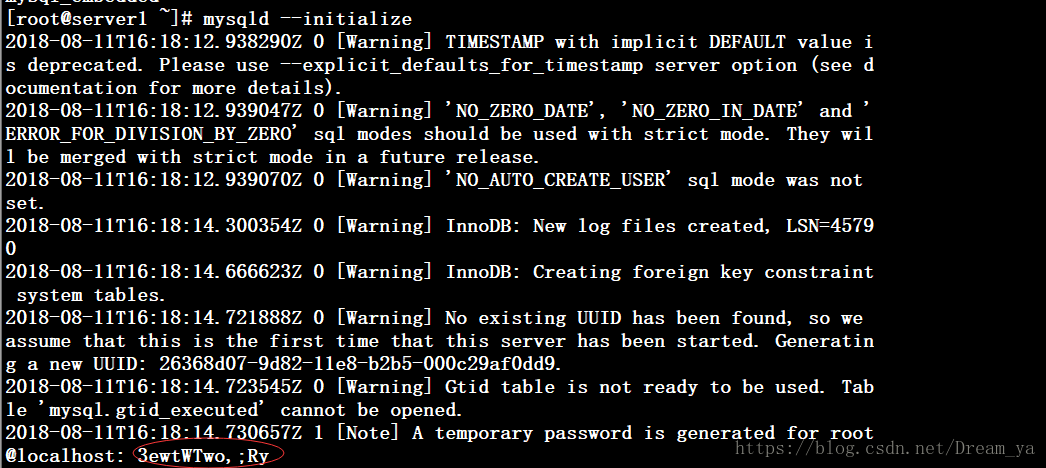
[root@server1 ~]# mysqld --initialize6、授权目录并启动
[root@server1 ~]# useradd mysql
[root@server1 ~]# chown -R root.mysql /usr/local/lnmp/mysql
[root@server1 ~]# chown -R mysql.mysql /usr/local/lnmp/mysql/data
[root@server1 ~]# /etc/init.d/mysqld start
7、修改密码
[root@server1 ~]# mysql -p
mysql> show plugins;                                  ###报错让我们修改密码
mysql> alter user root@localhost identified by '1';   ###修改密码为1
三、MySQL忘记root密码
1、关闭数据库
[root@server1 ~]# /etc/init.d/mysqld stop2、跳过授权表并在后台运行
[root@server1 ~]# mysqld_safe --skip-grant-tables &3、登陆并查看密码位置
[root@server1 ~]# mysql
mysql> use mysql;
mysql> select * from user\G;             ###查询密码位置
4、修改密码
dream就是修改后的密码!!!
mysql> update user set authentication_string=password('dream') where user='root';5、重启查看结果
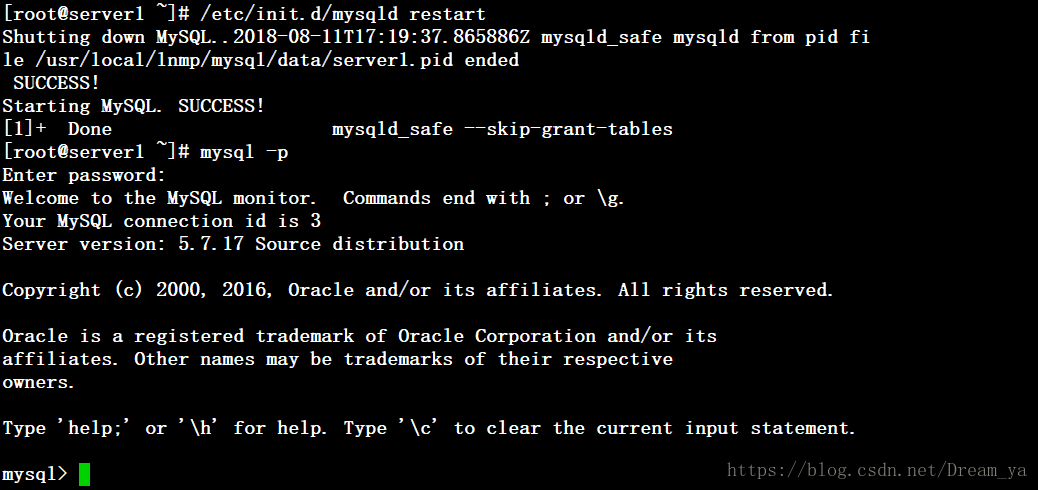
[root@server1 ~]# /etc/init.d/mysqld restart
[root@server1 ~]# mysql -p
四、编译安装PHP
1、下载PHP
PHP官网下载地址:http://php.net/downloads.php
[root@server1 fpm]# wget http://php.net/get/php-5.6.37.tar.bz2/from/a/mirror2、解压tar包
[root@server1 ~]# tar xf /root/php-5.6.37.tar.bz2 3、解决依赖
(1)解决方法
编译安装会发生报错,因为依赖问题,一边编译一边查看所需要的包。编译安装所需要的包需要加上devel参数!!!
[root@server1 php-5.6.37]# yum provides */xml2-config         ###查看安装包
[root@server1 php-5.6.37]# yum install -y libxml2-devel       ###这样下载就好
(2)安装所需依赖
[root@server1 php-5.6.37]# yum install -y libxml2-devel openssl-devel libcurl-devel libjpeg-turbo-devel libpng-devel freetype-devel gmp-devel
[root@server1 ~]# ls
cmake-2.8.12.2-4.el6.x86_64.rpm   libmcrypt-devel-2.5.8-9.el6.x86_64.rpm  mysql-boost-5.7.17.tar.gz  php-5.6.37.tar.bz2
libmcrypt-2.5.8-9.el6.x86_64.rpm  mysql-5.7.17                 php-5.6.37

[root@server1 ~]# yum install -y libmcrypt-*
[root@server1 php-5.6.37]# yum install -y net-snmp-devel
4、编译安装
[root@server1 php-5.6.37]# ./configure --prefix=/usr/local/lnmp/php --with-config-file-path=/usr/local/lnmp/php/etc --enable-mysqlnd --with-mysql=mysqlnd --with-mysqli=mysqlnd --with-pdo-mysql=mysqlnd --with-openssl --with-snmp --with-gd --with-zlib --with-curl --with-libxml-dir --with-png-dir --with-jpeg-dir --with-freetype-dir --with-pear --with-gettext --with-gmp --enable-inline-optimization --enable-soap --enable-ftp --enable-sockets --enable-mbstring --enable-fpm --with-fpm-user=nginx --with-fpm-group=nginx --with-mcrypt --with-mhash
[root@server1 php-5.6.37]# make && make install
5、配置PHP
(1)创建启动账号
[root@server1 ~]# useradd nginx(2)复制配置文件
[root@server1 ~]# cp /usr/local/lnmp/php/etc/php-fpm.conf.default /usr/local/lnmp/php/etc/php-fpm.conf
[root@server1 ~]# cp /root/php-5.6.37/php.ini-production /usr/local/lnmp/php/etc/php.ini
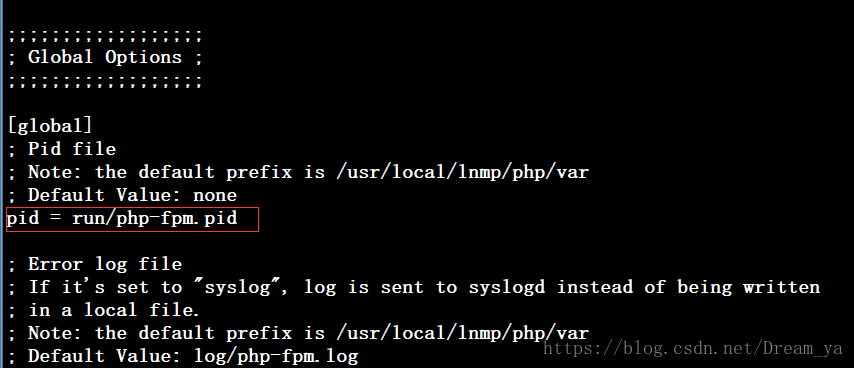
(3)添加pid
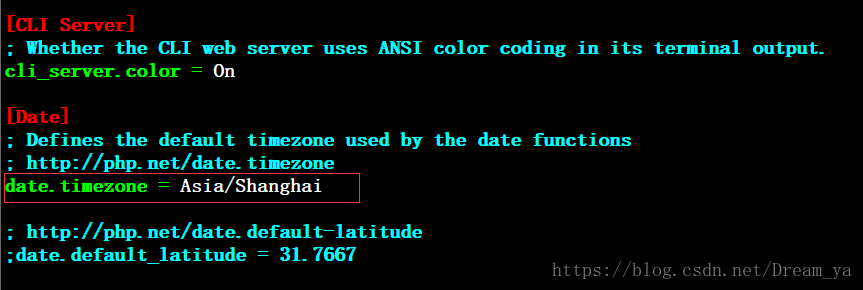
[root@server1 ~]# vim /usr/local/lnmp/php/etc/php-fpm.conf(4)配置时区
[root@server1 ~]# vim /usr/local/lnmp/php/etc/php.ini(5)启动PHP
[root@server1 ~]# cp /root/php-5.6.37/sapi/fpm/init.d.php-fpm /etc/init.d/php-fpm
[root@server1 ~]# chmod +x /etc/init.d/php-fpm
[root@server1 ~]# /etc/init.d/php-fpm restart
(6)查看是否启动成功
[root@server1 ~]# netstat -lntup|grep 9000
tcp        0      0 127.0.0.1:9000              0.0.0.0:*                   LISTEN      7569/php-fpm
五、编译安装Nginx
**Nginx RPM包下载地址:http://nginx.org/packages/rhel/6/x86_64
1、解压tar包
[root@server1 ~]# tar xf /root/nginx-1.14.0.tar.gz2、优化安装
(1)关闭版本显示
[root@server1 ~]# vim /root/nginx-1.14.0/src/core/nginx.h
#define nginx_version      1014000
#define NGINX_VERSION      "1.14.0"
#define NGINX_VER          "nginx"
(2)关闭调试环境
[root@server1 ~]# vim /root/nginx-1.14.0/auto/cc/gcc
# debug
#CFLAGS="$CFLAGS -g"
3、编译安装
[root@server1 ~]# yum install -y pcre-devel                  ###安装依赖
[root@server1 ~]# tar xf nginx-sticky-module-ng.tar.gz       ###sticky模块
[root@server1 ~]# cd nginx-1.14.0
[root@server1 nginx-1.14.0]# ./configure --prefix=/usr/local/lnmp/nginx --with-http_ssl_module --with-http_stub_status_module --add-module=/root/nginx-sticky-module-ng
[root@server1 nginx-1.14.0]# make && make install
[root@server1 nginx-1.14.0]# ln -s /usr/local/lnmp/nginx/sbin/nginx /usr/local/sbin/          ###进行链接
4、基础配置设置
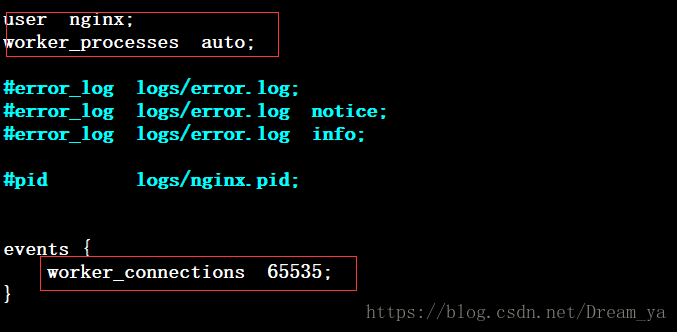
(1)设置用户和设置连接数
[root@server1 ~]# vim /usr/local/lnmp/nginx/conf/nginx.conf(2)设置用户打开文件数目
[root@server1 ~]# vim /etc/security/limits.conf
nginx           -       nofile          65535
5、启动Nginx
[root@server1 ~]# nginx -t                    ###检测语法是否有错误
nginx: the configuration file /usr/local/lnmp/nginx/conf/nginx.conf syntax is ok
nginx: configuration file /usr/local/lnmp/nginx/conf/nginx.conf test is successful
[root@server1 ~]# nginx                       ###启动nginx
[root@server1 ~]# netstat -lntup|grep nginx
6、配置Nginx支持PHP动态页面
(1)配置nginx.conf
配置index.php为默认访问主页,在通过配置fastcgi_pass模块传给php模块,所以php此时必须要启动,端口也可以根据php的端口进行自我设置!!!
[root@server1 ~]# vim /usr/local/lnmp/nginx/conf/nginx.conf(2)配置index.php发布文件
[root@server1 ~]# vim /usr/local/lnmp/nginx/html/index.php

phpinfo()
?>
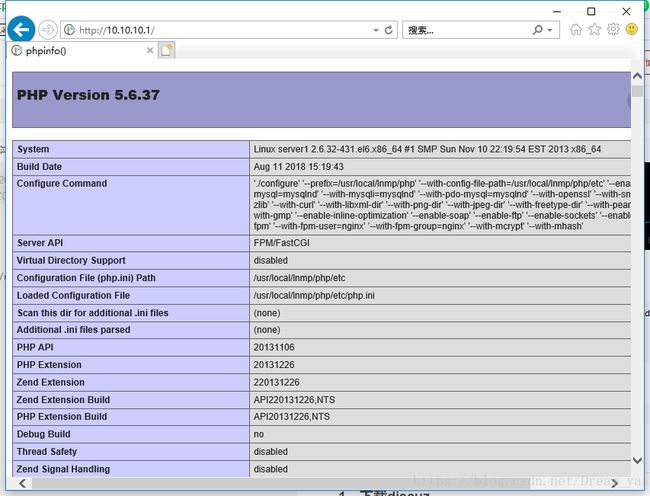
(3)测试
[root@server1 ~]# nginx -s reload

http://10.10.10.1/
六、安装论坛discuz
1、下载discuz
在官网首页的程序发布中可以查找不同的版本!!!
discuz下载地址:http://www.discuz.net/thread-3796882-1-1.html
[root@server1 ~]# wget http://download.comsenz.com/DiscuzX/3.3/Discuz_X3.3_SC_UTF8.zip[root@server1 ~]# unzip /root/Discuz_X3.3_SC_UTF8.zip
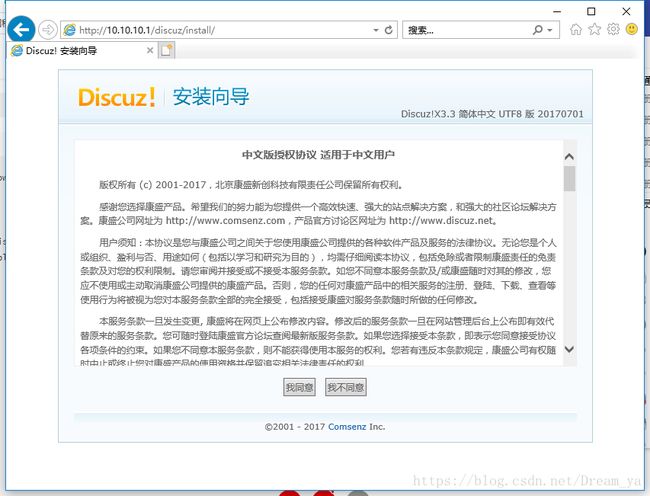
[root@server1 ~]# cp -r /root/upload/ /usr/local/lnmp/nginx/html/discuz2、进行页面访问
http://10.10.10.1/discuz3、发现访问权限不够
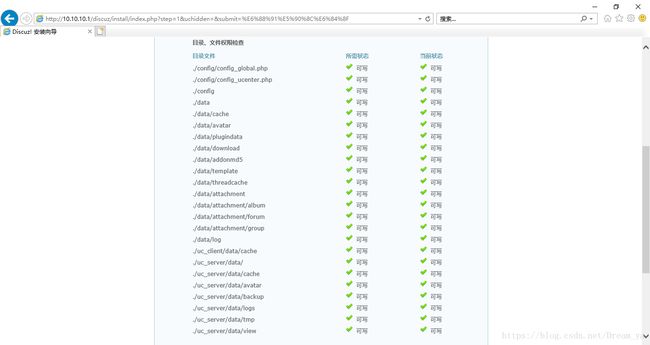
4、解决权限问题
(1)把目录权限给nginx
[root@server1 ~]# chown -R nginx.nginx /usr/local/lnmp/nginx/html/discuz/(2)刷新页面查看结果
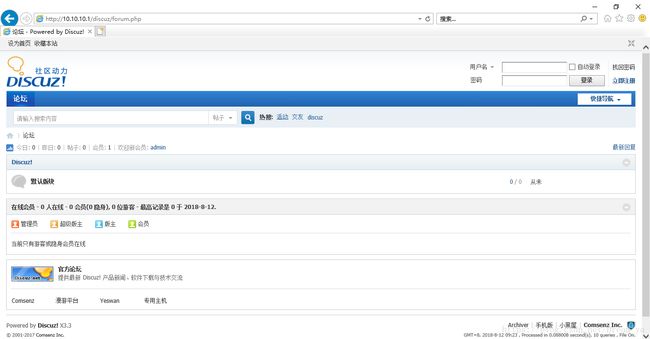
5、设置数据库和admin密码
6、数据库连接报错
(1)报错
由于此时我们的php并没有和数据库进行连接,php找不到数据库从而报错!!!
(2)设置PHP连接MySQL
通过在php中设置/usr/local/lnmp/mysql/data/mysql.sock及socket从而实现php与MySQL的连接!!!
[root@server1 ~]# vim /usr/local/lnmp/php/etc/php.ini [root@server1 ~]# /etc/init.d/php-fpm reload ###重新加载配置(3)刷新查看结果
<1> 如果还是发生数据库连接报错Permission denied:
[root@server1 mysql]# chmod +x /usr/local/lnmp/mysql/data/至此,一个Discuz论坛就安装完毕!!!
