熔断器Hystrix
前言
在上几篇文章的基础上,我们使用熔断器完善微服务
0.学习目标
- 会配置Hystrix熔断
- 会使用Feign进行远程调用
- 能独立搭建Zuul网关
- 能编写Zuul的拦截器
1.Hystrix
为什么要学习Hystrix呢?
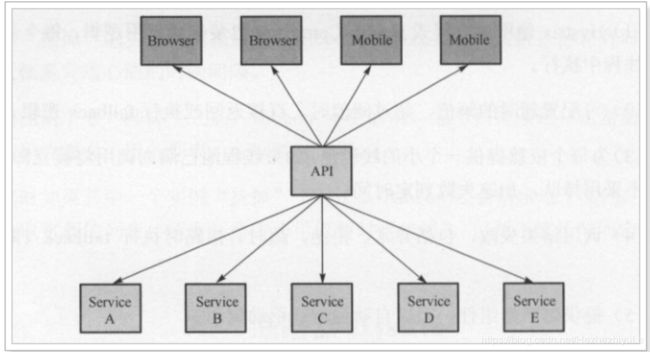
在高并发领域,在分布式系统中,可能因为一个小小的功能扛不住压力,宕机了,导致其他服务也跟随宕机,最终导致整个系统宕机,所以在SpringCloud中采用Hystrix进行处理。
1.1.简介
Hystrix,即熔断器。
主页:https://github.com/Netflix/Hystrix/
Hystrix是Netflix开源的一个延迟和容错库,用于隔离访问远程服务、第三方库,防止出现级联失败。
1.2.熔断器的工作机制:
当服务繁忙时,如果服务出现异常,不是粗暴的直接报错,而是返回一个友好的提示,虽然拒绝了用户的访问,但是会返回一个结果。
这就好比去买鱼,平常超市买鱼会额外赠送杀鱼的服务。等到逢年过节,超市繁忙时,可能就不提供杀鱼服务了,这就是服务的降级。
系统特别繁忙时,一些次要服务暂时中断,优先保证主要服务的畅通,一切资源优先让给主要服务来使用,在双十一、618时,京东天猫都会采用这样的策略。
1.3.动手实践
1.3.1.引入依赖
首先在user-consumer(服务消费者)中引入Hystix依赖:
<dependency>
    <groupId>org.springframework.cloudgroupId>
    <artifactId>spring-cloud-starter-netflix-hystrixartifactId>
dependency>
1.3.2.开启熔断
@EnableHystrix //开启熔断器Hystrix
1.3.2.改造消费者
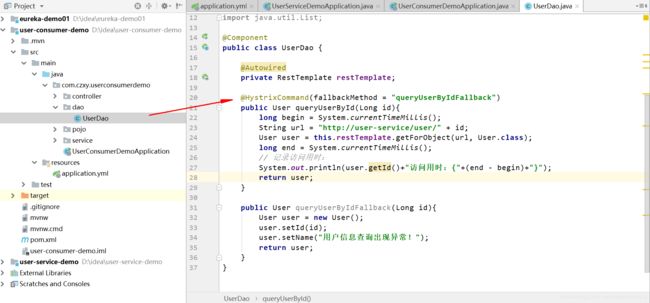
我们改造user-consumer,添加一个用来访问的user服务的DAO,并且声明一个失败时的回滚处理函数:

@Component
public class UserDao {

    @Autowired
    private RestTemplate restTemplate;

    @HystrixCommand(fallbackMethod = "queryUserByIdFallback")
    public User queryUserById(Long id){
        long begin = System.currentTimeMillis();
        String url = "http://user-service/user/" + id;
        User user = this.restTemplate.getForObject(url, User.class);
        long end = System.currentTimeMillis();
        // 记录访问用时:
       System.out.println(user.getId()+"访问用时:{"+(end - begin)+"}");
        return user;
    }

    public User queryUserByIdFallback(Long id){
        User user = new User();
        user.setId(id);
        user.setName("用户信息查询出现异常!");
        return user;
    }
}
@HystrixCommand(fallbackMethod="queryUserByIdFallback"):声明一个失败回滚处理函数queryUserByIdFallback,当queryUserById执行超时(默认是1000毫秒),就会执行fallback函数,返回错误提示。- 为了方便查看熔断的触发时机,我们记录请求访问时间。
在原来的业务逻辑中调用这个DAO:
@Service
public class UserService {

    @Autowired
    private UserDao userDao;

    public List<User> queryUserByIds(List<Long> ids) {
        List<User> users = new ArrayList<>();
        ids.forEach(id -> {
            // 我们测试多次查询,
            users.add(this.userDao.queryUserById(id));
        });
        return users;
    }
}
1.3.3.改造服务提供者
改造服务提供者,随机休眠一段时间,以触发熔断:(服务调用超过一秒就会触发,熔断器超时默认,利用随机函数,使得线程随机沉睡)

@Service
public class UserService {

    @Autowired
    private UserMapper userMapper;

    public User queryById(Long id) {

        try {
            Thread.sleep(new Random().nextInt(2000));
        } catch (InterruptedException e) {
            e.printStackTrace();
        }
        return this.userMapper.selectByPrimaryKey(id);
    }
}
1.3.4.启动测试
运行 模拟九次访问,触发随机熔断
![]()
查看日志:

注:(因为我们只是伪造的线程超时,实际上服务器并没有挂,查询数据依旧可以返回,所以ID是可以取出来的,但是熔断器把超时的查询返回了假数据,我们超时的数据并不会显示)
因此,2,5,9是正常访问,其它都会触发熔断,我们来查看结果:

访问结果
[
  {
    "id": 1,
    "userName": null,
    "password": null,
    "name": "用户信息查询出现异常!",
    "age": null,
    "sex": null,
    "birthday": null,
    "created": null,
    "updated": null,
    "note": null
  },
  {
    "id": 2,
    "userName": "lucy",
    "password": "123456",
    "name": "lucy",
    "age": 20,
    "sex": 2,
    "birthday": "2018-11-28T16:00:00.000+0000",
    "created": "2018-11-28T16:00:00.000+0000",
    "updated": "2018-11-28T16:00:00.000+0000",
    "note": null
  },
  {
    "id": 3,
    "userName": null,
    "password": null,
    "name": "用户信息查询出现异常!",
    "age": null,
    "sex": null,
    "birthday": null,
    "created": null,
    "updated": null,
    "note": null
  },
  {
    "id": 4,
    "userName": null,
    "password": null,
    "name": "用户信息查询出现异常!",
    "age": null,
    "sex": null,
    "birthday": null,
    "created": null,
    "updated": null,
    "note": null
  },
  {
    "id": 5,
    "userName": "shi",
    "password": "123456",
    "name": "guangbao",
    "age": 20,
    "sex": 5,
    "birthday": "2018-12-04T16:00:00.000+0000",
    "created": "2018-12-04T16:00:00.000+0000",
    "updated": "2018-12-04T16:00:00.000+0000",
    "note": null
  },
  {
    "id": 6,
    "userName": null,
    "password": null,
    "name": "用户信息查询出现异常!",
    "age": null,
    "sex": null,
    "birthday": null,
    "created": null,
    "updated": null,
    "note": null
  },
  {
    "id": 7,
    "userName": null,
    "password": null,
    "name": "用户信息查询出现异常!",
    "age": null,
    "sex": null,
    "birthday": null,
    "created": null,
    "updated": null,
    "note": null
  },
  {
    "id": 8,
    "userName": null,
    "password": null,
    "name": "用户信息查询出现异常!",
    "age": null,
    "sex": null,
    "birthday": null,
    "created": null,
    "updated": null,
    "note": null
  },
  {
    "id": 9,
    "userName": "zhang",
    "password": "123456",
    "name": "zai",
    "age": 29,
    "sex": 9,
    "birthday": "2018-12-04T16:00:00.000+0000",
    "created": "2018-12-04T16:00:00.000+0000",
    "updated": "2018-12-04T16:00:00.000+0000",
    "note": null
  }
]
1.3.5.优化
虽然熔断实现了,但是我们的重试机制似乎没有生效,是这样吗?
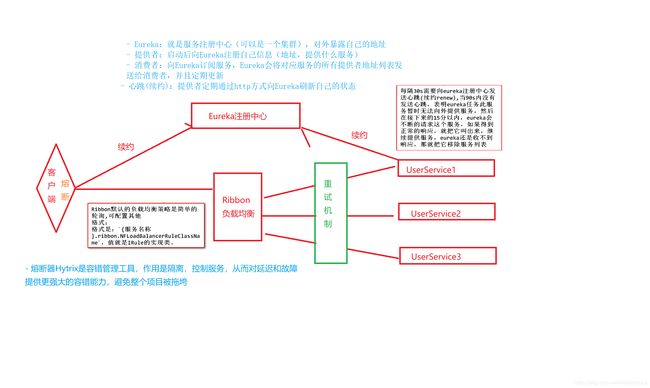
其实这里是因为我们的Ribbon超时时间设置的是1000ms:
而Hystix的超时时间默认也是1000ms,因此重试机制没有被触发,而是先触发了熔断。
所以,Ribbon的超时时间一定要小于Hystix的超时时间。
我们可以通过hystrix.command.default.execution.isolation.thread.timeoutInMilliseconds来设置Hystrix超时时间。
hystrix:
  command:
  	default:
        execution:
          isolation:
            thread:
              timeoutInMilliseconds: 6000 # 设置hystrix的超时时间为6000ms
祝你幸福
送你一首歌《忽然之间》莫文蔚
附图:小爱同学(哈尔滨红博呷哺呷哺)


