OpenCV3——matchTemplate图像模板匹配
参考文章:
官方介绍:http://www.opencv.org.cn/opencvdoc/2.3.2/html/doc/tutorials/imgproc/histograms/template_matching/template_matching.html
镜像不敏感:https://blog.csdn.net/abcvincent/article/details/79265549
多目标检测:https://blog.csdn.net/w946995383_02/article/details/79081598
https://blog.csdn.net/x454045816/article/details/52638528?utm_source=blogxgwz7
https://blog.csdn.net/abc8730866/article/details/68487029
https://blog.csdn.net/c20081052/article/details/26092209
https://blog.csdn.net/Lu597203933/article/details/14548523?utm_source=blogxgwz2
限定区域检测:http://www.cnblogs.com/ssyfj/p/9271883.html
其他:
https://blog.csdn.net/liyuanbhu/article/details/49837661?utm_source=blogxgwz3
https://blog.csdn.net/guduruyu/article/details/69231259
https://blog.csdn.net/keith_bb/article/details/70050080?utm_source=blogxgwz3
1,功能介绍
matchTemplate函数主要应用于,寻找一张图片在另一张图片中的位置。
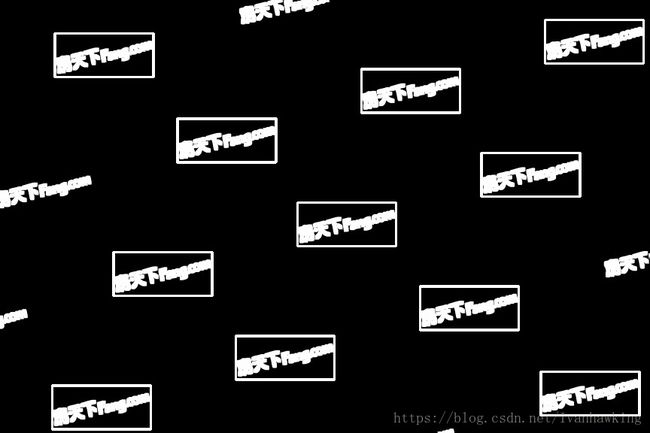
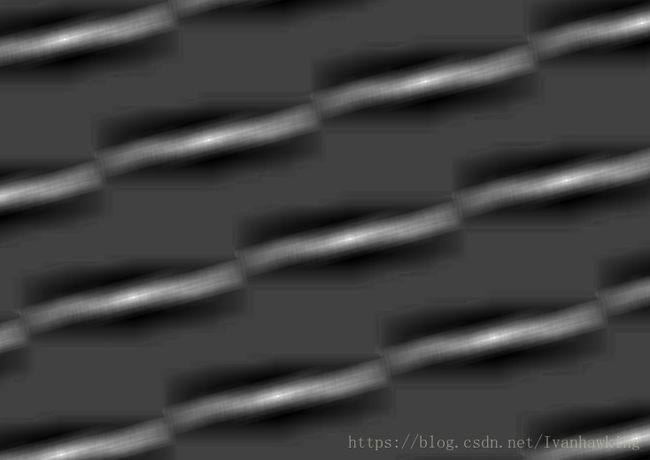
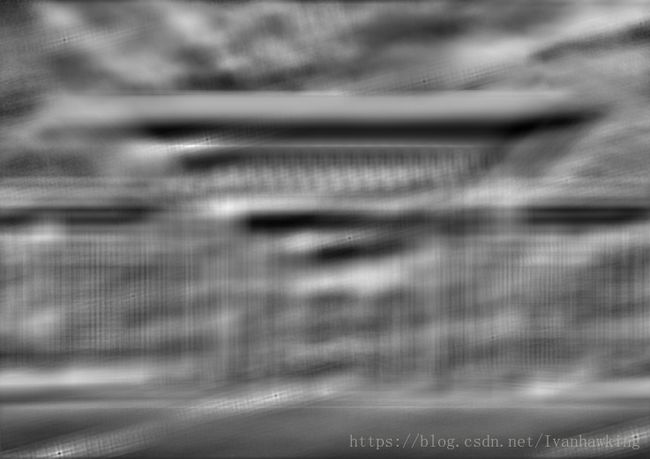
先看一个实际测试示例,在一张普通图片中找到其中的水印位置。下图依次为水印template图——图1,测试图——图2,在原图中根据结果画出的水印位置图——图3。
图1:
图2:
图3:
2,函数分析
2.1参数分析
该函数第一个参数是源图像,第二个参数是模板图像,第三个参数是匹配的结果图像,第四个参数是用于指定比较的方法。
2.2实现原理
-
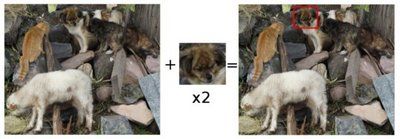
我们需要2幅图像:
- 原图像 (I): 在这幅图像里,我们希望找到一块和模板匹配的区域
- 模板 (T): 将和原图像比照的图像块
我们的目标是检测最匹配的区域:
-
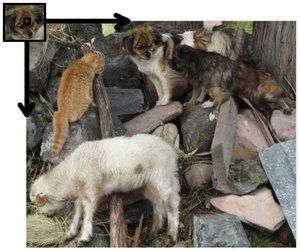
为了确定匹配区域, 我们不得不滑动模板图像和原图像进行 比较 :
-
通过 滑动, 我们的意思是图像块一次移动一个像素 (从左往右,从上往下). 在每一个位置, 都进行一次度量计算来表明它是 “好” 或 “坏” 地与那个位置匹配 (或者说块图像和原图像的特定区域有多么相似).
-
对于 T 覆盖在 I 上的每个位置,你把度量值 保存 到 结果图像矩阵 (R) 中. 在 R 中的每个位置
 都包含匹配度量值:
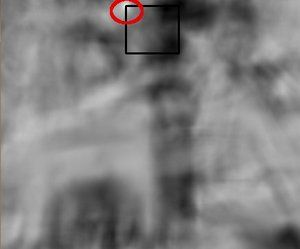
上图就是 TM_CCORR_NORMED 方法处理后的结果图像 R . 最白的位置代表最高的匹配. 正如您所见, 红色椭圆框住的位置很可能是结果图像矩阵中的最大数值, 所以这个区域 (以这个点为顶点,长宽和模板图像一样大小的矩阵) 被认为是匹配的.
-
实际上, 我们使用函数 minMaxLoc 来定位在矩阵 R 中的最大值点 (或者最小值, 根据函数输入的匹配参数) .
2.3 支持的算法
OpenCV通过函数 matchTemplate 实现了模板匹配算法. 可用的方法有6个。通常,随着从简单的测量(平方差)到更复杂的测量(相关系数),我们可获得越来越准确的匹配(同时也意味着越来越大的计算代价). 最好的办法是对所有这些设置多做一些测试实验,以便为自己的应用选择同时兼顾速度和精度的最佳方案.
1、cv::TM_SQDIFF:该方法使用平方差进行匹配,因此最佳的匹配结果在结果为0处,值越大匹配结果越差。
2、cv::TM_SQDIFF_NORMED:该方法使用归一化的平方差进行匹配,最佳匹配也在结果为0处。
3、cv::TM_CCORR:相关性匹配方法,该方法使用源图像与模板图像的卷积结果进行匹配,因此,最佳匹配位置在值最大处,值越小匹配结果越差。
4、cv::TM_CCORR_NORMED:归一化的相关性匹配方法,与相关性匹配方法类似,最佳匹配位置也是在值最大处。
5、cv::TM_CCOEFF:相关性系数匹配方法,该方法使用源图像与其均值的差、模板与其均值的差二者之间的相关性进行匹配,最佳匹配结果在值等于1处,最差匹配结果在值等于-1处,值等于0直接表示二者不相关。
在这里
6、cv::TM_CCOEFF_NORMED:归一化的相关性系数匹配方法,正值表示匹配的结果较好,负值则表示匹配的效果较差,也是值越大,匹配效果也好。
匹配方法的选取根据实际情况而定,这里我们选择的方法是cv::TM_CCOEFF_NORMED,源图像和匹配的相似度图如下:
因此,我们若想找到最佳匹配位置,只需要找到匹配结果图像的最大值点即可,这里我们使用cv::minMaxLoc()函数(具体请参考cv::Mat中最值和均值的求解)来找这个最大值点。找到结果后,将其绘制到原图像上,效果如下图所示(圆等图形的绘制请参考OpenCV3中的绘图详解),这里注意匹配结果图像与原图像之间的大小关系,他们之间差了一个模板大小。
测试代码:
1.匹配单个对象
def MatchOne(image,template):
    # w, h = template.shape[::-1]
    h ,w = template.shape[0],template.shape[1]
    res = cv2.matchTemplate(image, template, cv2.TM_CCOEFF_NORMED)
    print(type(res), res.shape)
    # print(res)
    min_val, max_val, min_loc, max_loc = cv2.minMaxLoc(res)
    print(type(max_loc), type(max_val))
    top_left = max_loc
    bottom_right = (top_left[0] + w, top_left[1] + h)

    cv2.rectangle(image, top_left, bottom_right, 255, 2)

    cv2.imshow('res', res)
    cv2.imshow('result', image)
    cv2.waitKey(0)
    if 0xFF == ord('q'):
        cv2.destroyAllWindows()
2,匹配多个对象
def MultiObjMatch1(image,template):
    print(type(image), image.shape)
    print(type(template), template.shape)
    # image = cv2.cvtColor(image,cv2.COLOR_BGR2GRAY)
    # template = cv2.cvtColor(template,cv2.COLOR_BGR2GRAY)
    res = cv2.matchTemplate(image, template, cv2.TM_CCOEFF_NORMED)
    h, w = template.shape[0], template.shape[1]
    # res = cv2.resize(res,(image.shape[1],image.shape[0]))
    min_val, max_val, min_loc, max_loc = cv2.minMaxLoc(res)


    print('maxval:',max_val,'max_loc_val:',res[max_loc[1]][max_loc[0]])
    # print(len(res),len(res[0]))
    print('type of res value:',type(res[0][0]), res.shape)
    print('type of min_val:',type(min_val))
    print('type of min_val convert to numpy:',type(np.float32(min_val)))
    # print('min:', min_val, 'max:', max_val)

    top_left = max_loc
    bottom_right = (top_left[0] + w, top_left[1] + h)
    cv2.rectangle(image, top_left, bottom_right, 255, 2)

    res = (res - min_val) / (max_val - min_val)
    for i in range(len(res)):
        for j in range(len(res[i])):
            if res[i][j] >0.95:
                print(i,j,res[i][j])
                top_left = (j,i)
                bottom_right = (top_left[0] + w, top_left[1] + h)
                cv2.rectangle(image, top_left, bottom_right, 255, 2)

    cv2.imshow('res', res)
    cv2.imshow('compare', image)
    res = res*255
    cv2.imwrite('./images/fangmaskreslut_'+str(int(time.time()))+'.jpg',image)
    cv2.imwrite('./images/fangmaskreslut_res_'+str(int(time.time()))+'.jpg',res)
    cv2.waitKey(0)
    if 0xFF == ord('q'):
        cv2.destroyAllWindows()
    pass
方法2
#将上一个max位置矩阵内的值都置为最小值,然后重新找最大值及其位置
def getNextMax(res,max_loc,min_val,h, w):
    for i in range(max_loc[0],min(max_loc[0]+w,res.shape[1])):
        for j in range(max_loc[1],min(max_loc[1]+h,res.shape[0])):
            res[j][i]=min_val
            # print('change value')
    res = np.float32(res)
    min_val, max_val, min_loc, max_loc = cv2.minMaxLoc(res)
    # print('max_val:',max_val)
    return min_val, max_val, min_loc, max_loc,res
    pass


def MultiObjMatch2(image,template):
    print(type(image), image.shape)
    print(type(template), template.shape)
    # image = cv2.cvtColor(image,cv2.COLOR_BGR2GRAY)
    # template = cv2.cvtColor(template,cv2.COLOR_BGR2GRAY)
    res = cv2.matchTemplate(image, template, cv2.TM_CCOEFF_NORMED)
    h, w = template.shape[0], template.shape[1]
    min_val, max_val, min_loc, max_loc = cv2.minMaxLoc(res)
    print('start while')
    while max_val>0.6:
        top_left = max_loc
        bottom_right = (top_left[0] + w, top_left[1] + h)
        cv2.rectangle(image, top_left, bottom_right, 255, 2)
        min_val, max_val, min_loc, max_loc ,res= getNextMax(res,max_loc,min_val,h, w)
        print(max_val)

    cv2.imshow('res', res)
    cv2.imshow('compare', image)
    # cv2.imwrite('./images/fangmaskreslut.jpg',image)
    # cv2.imwrite('./images/fangmaskreslut_res.jpg',res)
    cv2.waitKey(0)
    if 0xFF == ord('q'):
        cv2.destroyAllWindows()
    pass
效果图:
实景图测试效果:


