Docker学习记录
docker 简介
Docker 是 Docker.Inc 公司开源的一个基于 LXC技术之上构建的
Container容器引擎, 源代码托管在 GitHub 上, 基于Go语言并遵从
Apache2.0协议开源。
Docker是通过内核虚拟化技术(namespaces及cgroups等)
来提供容器的资源隔离与安全保障等。由于Docker通过操作系
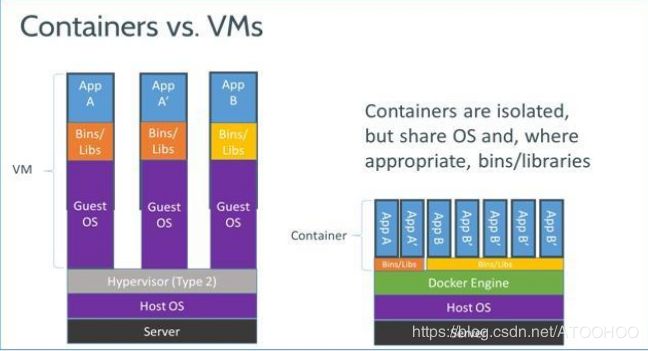
统层的虚拟化实现隔离,所以Docker容器在运行时,不需要类
似虚拟机(VM)额外的操作系统开销,提高资源利用率。
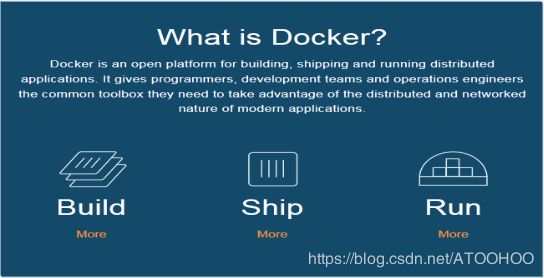
docker理念
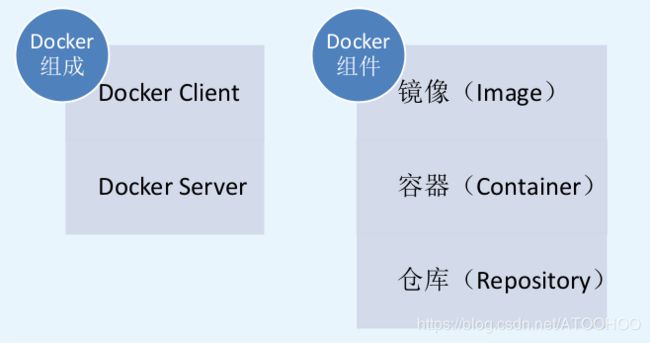
docker组成
容器和虚拟化的对比
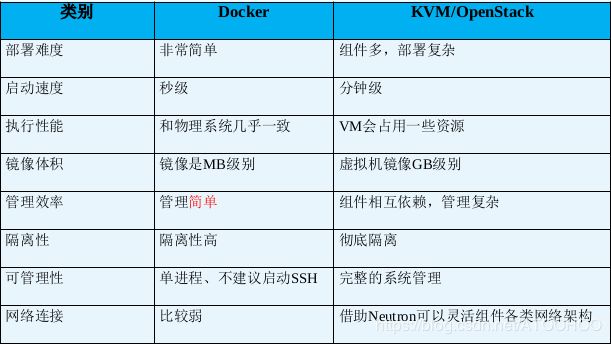
docker和KVM对比
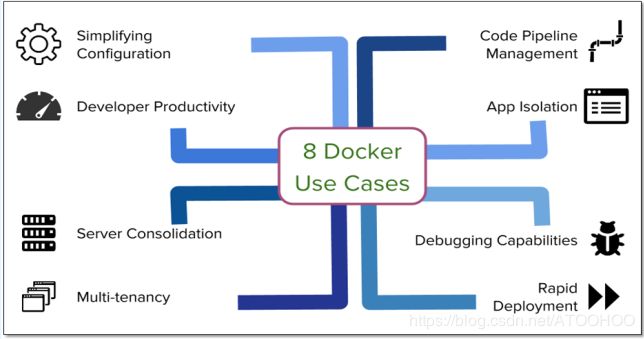
docker能干些什么
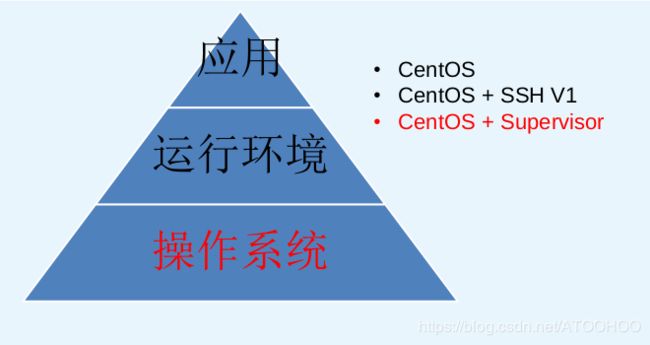
docker改变了什么
docker镜像管理命令
搜索镜像:docker search ubuntu
下载一个镜像:docker pull ubuntu
列出本地已经下载的镜像:$ docker images
将已经存在的镜像打包导出:docker save -o ubuntu.tar ubuntu
导入别人已经构建好打包的镜像:docker load --input ubuntu.tar
另外使用重定向导入:docker load < ubuntu.tar
删除镜像:docker rmi +镜像的id
$ docker rmi -f 25bce0f7f3aa
Untagged: toohoo/ubuntu:v2
Deleted: sha256:25bce0f7f3aaf09ce74e4d00717d9f053c4b395cd392d5e6a8784cba96e8c0d8
删除一个镜像时会删除依赖于其的其他镜像
$ docker rmi -f ffc099019bd0
Untagged: toohoo/ubuntu:18.04
Untagged: toohoo/ubuntu:dev
Deleted: sha256:ffc099019bd0a77036d3c5ae4e80469c636b199986d3333cb2e3b343ae289ff8
Deleted: sha256:33f16e9bbcc6f80d5717d3f66ec0c8808c28c71f4d4ec2602e31456ef1c4153f
Deleted: sha256:03978bfaac9301fb9b318758ca7a4497d98269984458588e156305ebb965b7a0
Deleted: sha256:1c056a306ca7a2b588f2e3a10f2b95020199fcfb382afc2352f57bc37a24c1a3
Deleted: sha256:d7d338693fb6ac124f9969e960d54a5816207af15160fb27d3d4bf8eb4dfac1c
Deleted: sha256:0515aedbc96a01eb3a8e328df309136f7ee081fb68a221b66a95087ffe0d43de
Deleted: sha256:50e17c4a7fd7c06f2284c8312f58439fbf9a4a06d4d81fb54e198fc0e080edbb
Deleted: sha256:33b12033efe3f200d2d0d1d9a2228a4c0e1d59b4620a0f3e5e743e65706ccadb
docker容器管理命令
输出Hello World(不加标签会自动选择latest的)
$ docker run ubuntu /bin/echo "Hello world"
Unable to find image 'ubuntu:latest' locally
latest: Pulling from library/ubuntu
898c46f3b1a1: Pulling fs layer
63366dfa0a50: Pulling fs layer
041d4cd74a92: Downloading
6e1bee0f8701: Waiting
latest: Pulling from library/ubuntu
898c46f3b1a1: Pull complete
63366dfa0a50: Pull complete
041d4cd74a92: Pull complete
6e1bee0f8701: Pull complete
Digest: sha256:017eef0b616011647b269b5c65826e2e2ebddbe5d1f8c1e56b3599fb14fabec8
Status: Downloaded newer image for ubuntu:latest
Hello world
加上标签之后会在本地查找(例如本地已经有Ubuntu:18.04)
$ docker run ubuntu:18.04 /bin/echo "Hello world"
Hello world
意思:Docker 以 ubuntu18.04 镜像创建一个新容器,然后在容器里执行 bin/echo “Hello world”,然后输出结果
查看已经退出的容器:docker ps -a
$ docker ps -a
CONTAINER ID        IMAGE                                                        COMMAND                  CREATED             STATUS                         PORTS                                NAMES
fa6494a88e0d        ubuntu:18.04                                                 "/bin/echo 'Hello wo…"   4 minutes ago       Exited (0) 4 minutes ago                                            stupefied_yalow
edce69937e8c        ubuntu                                                       "/bin/echo 'Hello wo…"   22 minutes ago      Exited (0) 22 minutes ago                                           musing_euler
运行一个指定名称的容器:
$ docker run --name mydocker -t -i ubuntu:18.04 /bin/bash
root@a13bfaf7b0b9:/# ls /
bin  boot  dev  etc  home  lib  lib64  media  mnt  opt  proc  root  run  sbin  srv  sys  tmp  usr  var
root@a13bfaf7b0b9:/# ps aux
USER        PID %CPU %MEM    VSZ   RSS TTY      STAT START   TIME COMMAND
root          1  0.0  0.0  18504  3244 pts/0    Ss   01:15   0:00 /bin/bash
root         11  0.0  0.0  34400  2684 pts/0    R+   01:17   0:00 ps aux
解析:
docker: Docker 的二进制执行文件。
run:与前面的 docker 组合来运行一个容器。
–name mydocker:指定容器的名称(默认为空会自动分配)
-t:在新容器内指定一个伪终端或终端
-i:允许你对容器内的标准输入 (STDIN) 进行交互(打开标准输入,我要访问)
ubuntu:18.04指定要运行的镜像,Docker首先从本地主机上查找镜像是否存在,如果不存在,Docker 就会从镜像仓库 Docker Hub 下载公共镜像。
/bin/bash:是需要运行的前台指定的命令,对应的 PID=1
里面很多命令没有,如果命令执行完毕,容器就退出
需要在后台运行时:加 -d
$ docker run --name mydocker -t -i -d ubuntu:18.04 /bin/bash
docker: Error response from daemon: Conflict. The container name "/mydocker" is already in use by container "a13bfaf7b0b99eeeb7f8ad376c0b2e7716547957896e66da03e0ed7e896516fc". You have to remove (or rename) that container to be able to reuse that name.
See 'docker run --help'.
toohoo@ubuntu:~/learnDocker$ docker run --name mydocker-demo -t -i -d ubuntu:18.04 /bin/bash
6eb16def1e2e30b70c5b20a9e4d08221d3659c340be6f548618d4a05b9f481e1
toohoo@ubuntu:~/learnDocker$ docker ps -a
CONTAINER ID        IMAGE                                                        COMMAND                  CREATED             STATUS                          PORTS                                NAMES
6eb16def1e2e        ubuntu:18.04                                                 "/bin/bash"              24 seconds ago      Up 23 seconds                                                        mydocker-demo
a13bfaf7b0b9        ubuntu:18.04                                                 "/bin/bash"              13 minutes ago      Exited (0) About a minute ago                                        mydocker
fa6494a88e0d        ubuntu:18.04                                                 "/bin/echo 'Hello wo…"   32 minutes ago      Exited (0) 32 minutes ago                                            stupefied_yalow
edce69937e8c        ubuntu                                                       "/bin/echo 'Hello wo…"   About an hour ago   Exited (0) About an hour ago                                         musing_euler
6eb16def1e2e30b70c5b20a9e4d08221d3659c340be6f548618d4a05b9f481e1:表示容器的ID,什么都没有输出就是后台执行/bin/bash之后就退出了
另外注意的是,名字不能是mydocker了,换一个名字:mydocker-demo,没有的话会自动分配一个
查看后台运行的容器:
toohoo@ubuntu:~/learnDocker$ docker run  -t -i -d ubuntu:18.04 /bin/sh -c "while true; do echo hello world; sleep 1; done"
0dc2c820071a4b8379e8a5f9ce4c045fddfdaf1d94808b85e82312c50fdba10e
toohoo@ubuntu:~/learnDocker$ docker ps
CONTAINER ID        IMAGE                                                        COMMAND                  CREATED              STATUS                   PORTS               NAMES
0dc2c820071a        ubuntu:18.04                                                 "/bin/sh -c 'while t…"   About a minute ago   Up About a minute                            hopeful_goodall
6eb16def1e2e        ubuntu:18.04                                                 "/bin/bash"              10 minutes ago       Up 10 minutes                                mydocker-demo
hopeful_goodall:就是自动分配的名字
在容器内使用docker logs命令,查看容器内的标准输出
hello world
hello world
hello world
hello world
hello world
hello world
hello world
hello world
hello world
hello world
hello world
...
期待的hello world在容器后台输出。
启动一个容器:docker start +容器ID
停止一个容器:docker stop +容器ID/名称
再pull一个nginx
$ docker images
REPOSITORY                                                   TAG                 IMAGE ID            CREATED             SIZE
ubuntu                                                       latest              94e814e2efa8        11 days ago         88.9MB
nginx                                                        latest              881bd08c0b08        2 weeks ago         109MB
httpd                                                        latest              d3a13ec4a0f1        5 weeks ago         132MB
ubuntu                                                       18.04               47b19964fb50        6 weeks ago         88.1MB
创建一个容器
$ docker run --name mynginx -d nginx
f4912a75756b5ae4bc4dd4c2a3379c6cb4a9b133ebaa00a85767e5da16c621d7
toohoo@ubuntu:~/learnDocker$ docker ps
CONTAINER ID        IMAGE               COMMAND                  CREATED             STATUS              PORTS               NAMES
f4912a75756b        nginx               "nginx -g 'daemon of…"   11 seconds ago      Up 9 seconds        80/tcp              mynginx
docker run --name mynginx -d nginx 后面是没有带启动命令的,因为由docker ps 知道镜像里面已经自带启动命令了,自己做一个镜像可以添加这个命令,也可以让用户进行手动输入,。nginx -g 'daemon off ’ 的意思就是放在前台运行,避免一运行玩就退出。
进入已经启动正在运行的容器中:$ docker attach +容器ID
attach的缺点是,命令行的显示是同步的,其他人也进入到容器的时候也会显示相应的信息,同一个窗口卡住,其他人也没办法操作,生产不用这个。
进入的非常慢,当你使用ctl+c退出时候,也会发现容器也退出了。
使用nsenter进入到容器:(默认的LInux发行版都有的ns:namespace)
1、获取pid:docker inspect --format “{{ .State.Pid }}” f4912a75756b(容器PID)
2、执行命令进入到容器里面:
toohoo@ubuntu:~/learnDocker$ docker inspect --format "{{ .State.Pid }}" f4912a75756b
81852
toohoo@ubuntu:~/learnDocker$ nsenter --help

Usage:
 nsenter [options] [<program> [<argument>...]]

Run a program with namespaces of other processes.

Options:
 -a, --all              enter all namespaces
 -t, --target <pid>     target process to get namespaces from
 -m, --mount[=<file>]   enter mount namespace
 -u, --uts[=<file>]     enter UTS namespace (hostname etc)
 -i, --ipc[=<file>]     enter System V IPC namespace
 -n, --net[=<file>]     enter network namespace
 -p, --pid[=<file>]     enter pid namespace
 -C, --cgroup[=<file>]  enter cgroup namespace
 -U, --user[=<file>]    enter user namespace
 -S, --setuid <uid>     set uid in entered namespace
 -G, --setgid <gid>     set gid in entered namespace
     --preserve-credentials do not touch uids or gids
 -r, --root[=<dir>]     set the root directory
 -w, --wd[=<dir>]       set the working directory
 -F, --no-fork          do not fork before exec'ing <program>
 -Z, --follow-context   set SELinux context according to --target PID

 -h, --help             display this help
 -V, --version          display version

For more details see nsenter(1).
toohoo@ubuntu:~/learnDocker$ nsenter -t 81852 -m -u -i -n -p
nsenter: cannot open /proc/81852/ns/ipc: Permission denied
toohoo@ubuntu:~/learnDocker$ sudo nsenter -t 81852 -m -u -i -n -p
[sudo] password for toohoo:
root@f4912a75756b:/#
查看nginx的位置,查看版本和退出:
root@f4912a75756b:/# ps aux
-bash: ps: command not found
root@f4912a75756b:/# ls
bin  boot  dev	etc  home  lib	lib64  media  mnt  opt	proc  root  run  sbin  srv  sys  tmp  usr  var
root@f4912a75756b:/# whereis nginx
nginx: /usr/sbin/nginx /usr/lib/nginx /etc/nginx /usr/share/nginx
root@f4912a75756b:/# uname -a
Linux f4912a75756b 4.15.0-46-generic #49-Ubuntu SMP Wed Feb 6 09:33:07 UTC 2019 x86_64 GNU/Linux
root@f4912a75756b:/# exit
logout
由上可知此nginx是基于Ubuntu构建的
使用脚本进入到容器:
#!/bin/bash

# Use nsenter to access docker

docker_in(){
    NAME_ID=$1
    PID=$(docker inspect --format "{{ .State.Pid }}" $NAME_ID)
    nsenter -t $PID -m -u -i -n -p
}

docker_in $1
进入容器并退出容器
$ chmod +x docker_in.sh
toohoo@ubuntu:~/learnDocker$ sudo ./docker_in.sh  mynginx
[sudo] password for toohoo:
root@f4912a75756b:/# ps aux
-bash: ps: command not found
root@f4912a75756b:/# exit
logout
使用exec进入到容器
不是真的向进入到这个容器里面,而是想让容器运行一个命令:
toohoo@ubuntu:~/learnDocker$ docker ps
CONTAINER ID        IMAGE               COMMAND                  CREATED             STATUS              PORTS               NAMES
f4912a75756b        nginx               "nginx -g 'daemon of…"   About an hour ago   Up 41 minutes       80/tcp              mynginx
toohoo@ubuntu:~/learnDocker$ docker exec mynginx whoami
root
toohoo@ubuntu:~/learnDocker$ docker exec mynginx uptime
OCI runtime exec failed: exec failed: container_linux.go:344: starting container process caused "exec: \"uptime\": executable file not found in $PATH": unknown # 容器里面极度缺少命令啊!
docker 运行一个命令,如果PID=1的进程挂了,容器也就挂了。
如果容器挂掉了,在docker 里面是可以允许的,这也是使用docker的优点。
删除容器:docker rm 容器名/容器ID
开启一个容器,运行一个测试命令,运行完之后删除容器(小技巧)
toohoo@ubuntu:~/learnDocker$ docker run --rm ubuntu:18.04 /bin/echo "haha"
haha
docker访问网络命令
本例使用两个例子:一个是创建一个nginx-test1容器,一个是不指定名称的基于training/webapp镜像的容器。
首先是nginx-test1:容器例子
运行一个web应用
toohoo@ubuntu:~/learnDocker$ docker run -d -P --name nginx-test1 nginx
e441198c9cbf9bce83c4c2aefc32f230c7b53a9100f66cca30ebe522798f8216
root@ubuntu:/home/toohoo/learnDocker# docker ps -l
CONTAINER ID        IMAGE               COMMAND                  CREATED             STATUS              PORTS                   NAMES
e441198c9cbf        nginx               "nginx -g 'daemon of…"   4 minutes ago       Up 4 minutes        0.0.0.0:32771->80/tcp   nginx-test1
# 过滤一下端口
root@ubuntu:/home/toohoo/learnDocker# netstat -ntlp |grep 32771
tcp6       0      0 :::32771                :::*                    LISTEN      115854/docker-proxy
可以使用curl --head + URL侦听一下端口:200通过!
root@ubuntu:/home/toohoo/learnDocker# curl --head http://172.19.229.242:32771
HTTP/1.1 200 OK
Server: nginx/1.15.9
Date: Sun, 24 Mar 2019 01:18:33 GMT
Content-Type: text/html
Content-Length: 612
Last-Modified: Tue, 26 Feb 2019 14:13:39 GMT
Connection: keep-alive
ETag: "5c754993-264"
Accept-Ranges: bytes
浏览器访问:http://172.19.229.242:32771:成功!
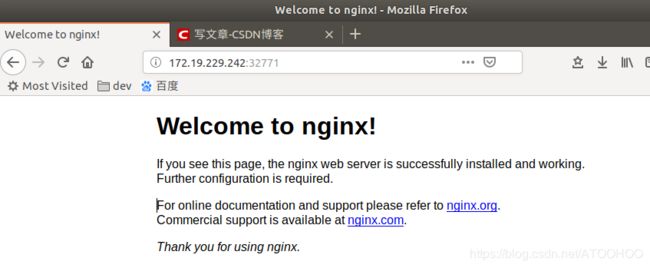 也可以看一下日志:
root@ubuntu:/home/toohoo/learnDocker# docker logs nginx-test1
172.19.229.242 - - [24/Mar/2019:01:18:33 +0000] "HEAD / HTTP/1.1" 200 0 "-" "curl/7.58.0" "-"
172.19.229.242 - - [24/Mar/2019:01:19:59 +0000] "GET / HTTP/1.1" 200 612 "-" "Mozilla/5.0 (X11; Ubuntu; Linux x86_64; rv:65.0) Gecko/20100101 Firefox/65.0" "-"
2019/03/24 01:20:00 [error] 6#6: *2 open() "/usr/share/nginx/html/favicon.ico" failed (2: No such file or directory), client: 172.19.229.242, server: localhost, request: "GET /favicon.ico HTTP/1.1", host: "172.19.229.242:32771"
172.19.229.242 - - [24/Mar/2019:01:20:00 +0000] "GET /favicon.ico HTTP/1.1" 404 153 "-" "Mozilla/5.0 (X11; Ubuntu; Linux x86_64; rv:65.0) Gecko/20100101 Firefox/65.0" "-"
2019/03/24 01:20:29 [error] 6#6: *2 open() "/usr/share/nginx/html/favicon.ico" failed (2: No such file or directory), client: 172.19.229.242, server: localhost, request: "GET /favicon.ico HTTP/1.1", host: "172.19.229.242:32771"
172.19.229.242 - - [24/Mar/2019:01:20:29 +0000] "GET /favicon.ico HTTP/1.1" 404 153 "-" "Mozilla/5.0 (X11; Ubuntu; Linux x86_64; rv:65.0) Gecko/20100101 Firefox/65.0" "-"
172.19.229.242 - - [24/Mar/2019:01:23:51 +0000] "GET / HTTP/1.1" 304 0 "-" "Mozilla/5.0 (X11; Ubuntu; Linux x86_64; rv:65.0) Gecko/20100101 Firefox/65.0" "-"
172.19.229.242 - - [24/Mar/2019:01:23:53 +0000] "GET / HTTP/1.1" 304 0 "-" "Mozilla/5.0 (X11; Ubuntu; Linux x86_64; rv:65.0) Gecko/20100101 Firefox/65.0" "-"
172.19.229.242 - - [24/Mar/2019:01:23:55 +0000] "GET / HTTP/1.1" 304 0 "-" "Mozilla/5.0 (X11; Ubuntu; Linux x86_64; rv:65.0) Gecko/20100101 Firefox/65.0" "-"
172.19.229.242 - - [24/Mar/2019:01:23:56 +0000] "GET / HTTP/1.1" 304 0 "-" "Mozilla/5.0 (X11; Ubuntu; Linux x86_64; rv:65.0) Gecko/20100101 Firefox/65.0" "-"
172.19.229.242 - - [24/Mar/2019:01:24:07 +0000] "GET / HTTP/1.1" 304 0 "-" "Mozilla/5.0 (X11; Ubuntu; Linux x86_64; rv:65.0) Gecko/20100101 Firefox/65.0" "-"
-P方式的优缺点:
缺点:不知道容器真正映射的端口
优点:端口不会重复,docker会自动处理
-p的方式:
root@ubuntu:/home/toohoo/learnDocker# docker run -d -p 88:80 --name nginx-test2 nginx
922fa3e273e2c767107de83fabb27671822f626affb08297f65a182c95439869
root@ubuntu:/home/toohoo/learnDocker# docker ps -l
CONTAINER ID        IMAGE               COMMAND                  CREATED             STATUS              PORTS                NAMES
922fa3e273e2        nginx               "nginx -g 'daemon of…"   13 seconds ago      Up 11 seconds       0.0.0.0:88->80/tcp   nginx-test2
root@ubuntu:/home/toohoo/learnDocker# docker run -d -p 172.19.229.242:89:80 --name nginx-test3 nginx
82b08b62a147b950bcee2f72217d60705e1f3de2172accde0b50e4eb45f81bf0
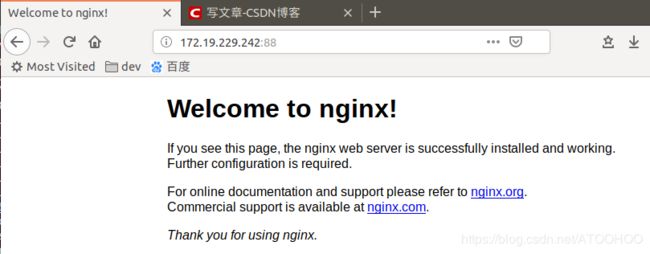
浏览器访问89端口:成功!
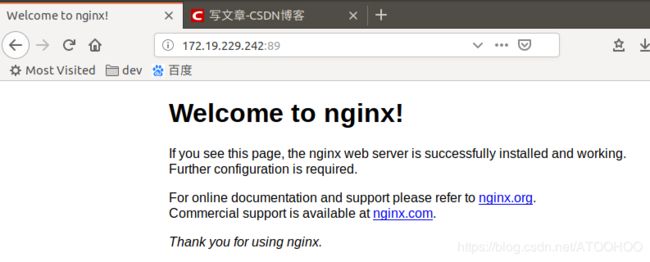 另外的映射的方式还有:-p hostPort:containerPort:udp,就是在后面指定UDP的方式,因为默认是使用tcp的方式的。
可以查看防火墙,了解映射的原理:看DNAT部分。
root@ubuntu:/home/toohoo/learnDocker# iptables -t nat -vnL
Chain PREROUTING (policy ACCEPT 36 packets, 5442 bytes)
 pkts bytes target     prot opt in     out     source               destination
10846 5432K DOCKER     all  --  *      *       0.0.0.0/0            0.0.0.0/0            ADDRTYPE match dst-type LOCAL

Chain INPUT (policy ACCEPT 36 packets, 5442 bytes)
 pkts bytes target     prot opt in     out     source               destination

Chain OUTPUT (policy ACCEPT 52 packets, 3897 bytes)
 pkts bytes target     prot opt in     out     source               destination
   10   600 DOCKER     all  --  *      *       0.0.0.0/0           !127.0.0.0/8          ADDRTYPE match dst-type LOCAL

Chain POSTROUTING (policy ACCEPT 53 packets, 3957 bytes)
 pkts bytes target     prot opt in     out     source               destination
   95  5817 MASQUERADE  all  --  *      !docker0  172.17.0.0/16        0.0.0.0/0
 2589  145K MASQUERADE  all  --  *      !br-80cc5fc8ced4  172.18.0.0/16        0.0.0.0/0
    0     0 MASQUERADE  tcp  --  *      *       172.17.0.6           172.17.0.6           tcp dpt:80
    0     0 MASQUERADE  tcp  --  *      *       172.17.0.2           172.17.0.2           tcp dpt:80
    0     0 MASQUERADE  tcp  --  *      *       172.17.0.3           172.17.0.3           tcp dpt:80

Chain DOCKER (2 references)
 pkts bytes target     prot opt in     out     source               destination
    0     0 RETURN     all  --  docker0 *       0.0.0.0/0            0.0.0.0/0
    0     0 RETURN     all  --  br-80cc5fc8ced4 *       0.0.0.0/0            0.0.0.0/0
    3   180 DNAT       tcp  --  !docker0 *       0.0.0.0/0            0.0.0.0/0            tcp dpt:32771 to:172.17.0.6:80
    1    60 DNAT       tcp  --  !docker0 *       0.0.0.0/0            0.0.0.0/0            tcp dpt:88 to:172.17.0.2:80
    1    60 DNAT       tcp  --  !docker0 *       0.0.0.0/0            172.19.229.242       tcp dpt:89 to:172.17.0.3:80
其次是:training/webapp例子:
$docker pull training/webapp  # 载入镜像
toohoo@ubuntu:~/learnDocker$ docker run -d -P training/webapp python app.py
d0352edcf52e84a456d9ce3d345c54677811cf546a10e3d3882778aeb49377a9
说明:
-d:让容器在后台运行
-P:将容器的内部使用的网络端口映射到我们使用的主机上
–name:指定容器的名称。
查看web应用容器
toohoo@ubuntu:~/learnDocker$ docker ps
CONTAINER ID        IMAGE               COMMAND                  CREATED             STATUS              PORTS                     NAMES
d0352edcf52e        training/webapp     "python app.py"          4 minutes ago       Up 4 minutes        0.0.0.0:32768->5000/tcp   eager_neumann
f4912a75756b        nginx               "nginx -g 'daemon of…"   4 hours ago         Up 4 hours          80/tcp                    mynginx
这里多了端口信息。
PORTS
0.0.0.0:32768->5000/tcp
Docker开放了5000端口(默认Python Flask端口)映射到主机的32768上,通过浏览器访问如下

也可以通过-p参数来设置不一样的端口:
toohoo@ubuntu:~/learnDocker$ docker run -d -p 5000:5000 training/webapp python app.py
c224029ce3303df33d185698018e91a8347154c9689879754b8db7e58ce7baa4
toohoo@ubuntu:~/learnDocker$ docker ps
CONTAINER ID        IMAGE               COMMAND             CREATED             STATUS              PORTS                     NAMES
c224029ce330        training/webapp     "python app.py"     4 seconds ago       Up 2 seconds        0.0.0.0:5000->5000/tcp    frosty_leakey
d0352edcf52e        training/webapp     "python app.py"     9 minutes ago       Up 9 minutes        0.0.0.0:32768->5000/tcp   eager_neumann
容器内部的5000端口映射到本地主机的5000端口上。
网络端口的快捷方式
通过 docker ps 命令可以查看到容器的端口映射,docker 还提供了另一个快捷方式 docker port,使用 docker port 可以查看指定 (ID 或者名字)容器的某个确定端口映射到宿主机的端口号。
toohoo@ubuntu:~/learnDocker$ docker port c224029ce330
5000/tcp -> 0.0.0.0:5000
toohoo@ubuntu:~/learnDocker$ docker port frosty_leakey
5000/tcp -> 0.0.0.0:5000
查看WEB应用程序日志
docker logs [ID或者名字] 可以查看容器内部的标准输出。
toohoo@ubuntu:~/learnDocker$ docker logs -f d0352edcf52e
 * Running on http://0.0.0.0:5000/ (Press CTRL+C to quit)
172.19.229.242 - - [23/Mar/2019 06:49:53] "GET / HTTP/1.1" 200 -
172.19.229.242 - - [23/Mar/2019 06:49:53] "GET /favicon.ico HTTP/1.1" 404 -
-f:让docker logs 像使用tail -f 一样来输出容器内部的标准输出
从上面,我们可以看到应用程序使用的是 5000 端口并且能够查看到应用程序的访问日志。
查看WEB应用程序容器的进程
我们还可以使用 docker top 来查看容器内部运行的进程
toohoo@ubuntu:~/learnDocker$ docker top frosty_leakey
UID                 PID                 PPID                C                   STIME               TTY                 TIME                CMD
root                89545               89518               0                   14:49               ?                   00:00:00            python app.py
检查WEB应用程序它会返回一个 JSON 文件记录着 Docker 容器的配置和状态信息
使用docker inspect来查看Docker的底层信息。
toohoo@ubuntu:~/learnDocker$ docker inspect  frosty_leakey
[
    {
        "Id": "c224029ce3303df33d185698018e91a8347154c9689879754b8db7e58ce7baa4",
        "Created": "2019-03-23T06:49:53.926025652Z",
        "Path": "python",
        "Args": [
            "app.py"
        ],
        "State": {
            "Status": "running",
            "Running": true,
            "Paused": false,
            "Restarting": false,
            "OOMKilled": false,
            "Dead": false,
            "Pid": 89545,
            "ExitCode": 0,
            "Error": "",
            "StartedAt": "2019-03-23T06:49:54.826979939Z",
            "FinishedAt": "0001-01-01T00:00:00Z"
        },
        "Image": "sha256:6fae60ef344644649a39240b94d73b8ba9c67f898ede85cf8e947a887b3e6557",
        "ResolvConfPath": "/var/lib/docker/containers/c224029ce3303df33d185698018e91a8347154c9689879754b8db7e58ce7baa4/resolv.conf",
        "HostnamePath": "/var/lib/docker/containers/c224029ce3303df33d185698018e91a8347154c9689879754b8db7e58ce7baa4/hostname",
        "HostsPath": "/var/lib/docker/containers/c224029ce3303df33d185698018e91a8347154c9689879754b8db7e58ce7baa4/hosts",
        "LogPath": "/var/lib/docker/containers/c224029ce3303df33d185698018e91a8347154c9689879754b8db7e58ce7baa4/c224029ce3303df33d185698018e91a8347154c9689879754b8db7e58ce7baa4-json.log",
        "Name": "/frosty_leakey",
        "RestartCount": 0,
        "Driver": "overlay2",
        "Platform": "linux",
        "MountLabel": "",
        "ProcessLabel": "",
        "AppArmorProfile": "docker-default",
        "ExecIDs": null,
        "HostConfig": {
...
停止和启动WEB应用容器
toohoo@ubuntu:~/learnDocker$ docker stop frosty_leakey
frosty_leakey
toohoo@ubuntu:~/learnDocker$ docker start frosty_leakey
frosty_leakey
使用docker ps -l 查询最后一次创建的容器:
toohoo@ubuntu:~/learnDocker$ docker ps -l
CONTAINER ID        IMAGE               COMMAND             CREATED             STATUS              PORTS                    NAMES
c224029ce330        training/webapp     "python app.py"     22 minutes ago      Up About a minute   0.0.0.0:5000->5000/tcp   frosty_leakey
移除WEB应用容器
使用docker rm 来删除不需要的容器
不能删除正在运行的容器:
toohoo@ubuntu:~/learnDocker$ docker rm frosty_leakey
Error response from daemon: You cannot remove a running container c224029ce3303df33d185698018e91a8347154c9689879754b8db7e58ce7baa4. Stop the container before attempting removal or force remove
需要将容器停止之后在进行删除
toohoo@ubuntu:~/learnDocker$ docker stop frosty_leakey
frosty_leakey
toohoo@ubuntu:~/learnDocker$ docker rm frosty_leakey
frosty_leakey
容器的连接
在前面实现了通过网络端口来访问运行在 docker 容器内的服务的基础上。下面来实现通过端口连接到一个 docker 容器
网络端口的映射:
创建一个python应用的容器
toohoo@ubuntu:~/learnDocker$ docker run -d -P training/webapp python app.py
c0936426920ba07e9eb3e0d3fe72db64841017df40d1f5acebd2cca9be248504
由上可知可以指定容器绑定的网络地址,比如绑定 127.0.0.1。
我们使用 -P 参数创建一个容器,使用 docker ps 来看到端口 5000 绑定主机端口 32770
toohoo@ubuntu:~/learnDocker$ docker ps
CONTAINER ID        IMAGE               COMMAND             CREATED             STATUS              PORTS                     NAMES
c0936426920b        training/webapp     "python app.py"     10 seconds ago      Up 8 seconds        0.0.0.0:32770->5000/tcp   kind_galois
我们也可以使用 -p 标识来指定容器端口绑定到主机端口。
两种方式的区别是:
- -P :是容器内部端口随机映射到主机的高端口。
- -p : 是容器内部端口绑定到指定的主机端口。
toohoo@ubuntu:~/learnDocker$ docker run -d -p 5000:5000 training/webapp python app.py
2f026317ba35d082883f15afc681f3ed0041b893948c52e655c35a0dfb4263b5
toohoo@ubuntu:~/learnDocker$ docker ps
CONTAINER ID        IMAGE               COMMAND             CREATED             STATUS              PORTS                     NAMES
2f026317ba35        training/webapp     "python app.py"     10 seconds ago      Up 8 seconds        0.0.0.0:5000->5000/tcp    thirsty_hertz
c0936426920b        training/webapp     "python app.py"     7 minutes ago       Up 7 minutes        0.0.0.0:32770->5000/tcp   kind_galois
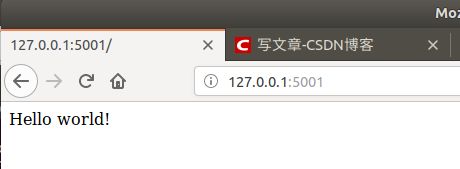
另外,还可以指定容器的绑定的网络地址,比如绑定127.0.0.1
toohoo@ubuntu:~/learnDocker$ docker run -d -p 127.0.0.1:5001:5000 training/webapp python app.py
f786f1a335883acb6b1cdce6b85e97614dfd8000d4727b52036e067481560f57
toohoo@ubuntu:~/learnDocker$ docker ps
CONTAINER ID        IMAGE               COMMAND             CREATED             STATUS              PORTS                      NAMES
f786f1a33588        training/webapp     "python app.py"     9 seconds ago       Up 7 seconds        127.0.0.1:5001->5000/tcp   jolly_hamilton
2f026317ba35        training/webapp     "python app.py"     2 minutes ago       Up 2 minutes        0.0.0.0:5000->5000/tcp     thirsty_hertz
c0936426920b        training/webapp     "python app.py"     10 minutes ago      Up 10 minutes       0.0.0.0:32770->5000/tcp    kind_galois
浏览器通过127.0.0.1:5001来访问5000端口为:
 上面的例子中,默认都是绑定 tcp 端口,如果要绑定 UDP 端口,可以在端口后面加上 /udp
toohoo@ubuntu:~/learnDocker$ docker run -d -p 127.0.0.1:5000:5000/udp training/webapp python app.py
61f35f61d5757ec9d2c25e91173c90b31a24e6fbd55aa7eae076c7990b86b5b8
toohoo@ubuntu:~/learnDocker$ docker ps
CONTAINER ID        IMAGE               COMMAND             CREATED             STATUS              PORTS                                NAMES
61f35f61d575        training/webapp     "python app.py"     3 seconds ago       Up 2 seconds        5000/tcp, 127.0.0.1:5000->5000/udp   silly_sinoussi
f786f1a33588        training/webapp     "python app.py"     5 minutes ago       Up 5 minutes        127.0.0.1:5001->5000/tcp             jolly_hamilton
2f026317ba35        training/webapp     "python app.py"     7 minutes ago       Up 7 minutes        0.0.0.0:5000->5000/tcp               thirsty_hertz
c0936426920b        training/webapp     "python app.py"     15 minutes ago      Up 15 minutes       0.0.0.0:32770->5000/tcp              kind_galois
docker port 命令可以让我们快捷地查看端口的绑定情况。
toohoo@ubuntu:~/learnDocker$ docker port silly_sinoussi
5000/udp -> 127.0.0.1:5000
Docker容器的连接:
端口映射并不是唯一把 docker 连接到另一个容器的方法。
docker 有一个连接系统允许将多个容器连接在一起,共享连接信息。
docker 连接会创建一个父子关系,其中父容器可以看到子容器的信息。
docker数据存储
主要是有两种方案:
方案一:数据卷:
- -v /data
- -v src:dst
方案二:数据卷容器
- –volumes-from
不建议直接在docker容器里面直接写数据,生产环境里面应该使用数据卷或者数据卷容器。
方案一:数据卷:
数据卷:是一种特殊的目录,它可以绕过docker文件这一层,在数据卷里面写什么东西和docher容器没有关系,数据卷会一直存在,相当与Linux的mount,可以对文件或目录进行mount。
实例:创建新容器并进入到里面发现数据为空
root@ubuntu:/home/toohoo/learnDocker# docker run -d  --name nginx-volume-test1 -v /data nginx
438bf118410b4bf6a1c7566a9f77c1c4dcee63f6c7e0cfdd1506bd11f49c2e3a
root@ubuntu:/home/toohoo/learnDocker# ls
Dockerfile  docker_in.sh
root@ubuntu:/home/toohoo/learnDocker# ./docker_in.sh nginx-volume-test1
mesg: ttyname failed: No such file or directory
root@438bf118410b:/# ls -l /data
total 0
应该要在主机上的一个目录,然后才挂在到数据卷上面的:
root@438bf118410b:/# cd /data
root@438bf118410b:/data# ls
root@438bf118410b:/data# touch haha
root@438bf118410b:/data# ls -l
total 0
-rw-r--r-- 1 root root 0 Mar 24 01:57 haha
使用类似mount的挂载方式,挂载到上面,在容器nginx-volumes-test1里面使用mount是看不到具体的位置的,只知道它是映射了一个位置,但是在宿主机外面却可以看到。
新开窗口,查看docker文件位置:
root@ubuntu:/home/toohoo/learnDocker# cd /var/lib/docker/
root@ubuntu:/var/lib/docker# ls
builder  buildkit  containers  image  network  overlay2  plugins  runtimes  swarm  tmp  trust  volumes
root@ubuntu:/var/lib/docker# ll
total 84
drwx--x--x  14 root root  4096 3月  23 07:58 ./
drwxr-xr-x  72 root root  4096 3月   4 22:10 ../
drwx------   2 root root  4096 1月  14 11:14 builder/
drwx------   4 root root  4096 1月  14 11:14 buildkit/
drwx------  15 root root  4096 3月  24 09:51 containers/
drwx------   3 root root  4096 1月  14 11:13 image/
drwxr-x---   3 root root  4096 1月  14 11:13 network/
drwx------ 110 root root 28672 3月  24 09:51 overlay2/
drwx------   4 root root  4096 1月  14 11:13 plugins/
drwx------   2 root root  4096 3月  23 07:58 runtimes/
drwx------   2 root root  4096 1月  14 11:14 swarm/
drwx------   2 root root  4096 3月  23 17:24 tmp/
drwx------   2 root root  4096 1月  14 11:13 trust/
drwx------   5 root root  4096 3月  24 09:51 volumes/
root@ubuntu:/var/lib/docker# cd volumes/
可以看到volumes的文件夹进入到该文件夹:
尝试找到存放文件的自动生成的ID:
ffa3a943a3dd185c9b0bcd64919803cf1defcc84ed0268b592bc182bb8b26ba4,进入里面去,会发现有docker自动生成的文件_data,该文件加下面有文件夹haha,数据就存放在这里。
root@ubuntu:/var/lib/docker/volumes# ls
6a536abe5facb1960413af510b7a765fac581d1991777d687380f16d852c630c
cf8231b75e549421364af511c8978ae37d78c9ecb73f8a874217b36f8950df0c
ffa3a943a3dd185c9b0bcd64919803cf1defcc84ed0268b592bc182bb8b26ba4
metadata.db
root@ubuntu:/var/lib/docker/volumes# cd ffa3a943a3dd185c9b0bcd64919803cf1defcc84ed0268b592bc182bb8b26ba4/
root@ubuntu:/var/lib/docker/volumes/ffa3a943a3dd185c9b0bcd64919803cf1defcc84ed0268b592bc182bb8b26ba4# ls
_data
root@ubuntu:/var/lib/docker/volumes/ffa3a943a3dd185c9b0bcd64919803cf1defcc84ed0268b592bc182bb8b26ba4# cd _data/
root@ubuntu:/var/lib/docker/volumes/ffa3a943a3dd185c9b0bcd64919803cf1defcc84ed0268b592bc182bb8b26ba4/_data# ls
haha
root@ubuntu:/var/lib/docker/volumes/ffa3a943a3dd185c9b0bcd64919803cf1defcc84ed0268b592bc182bb8b26ba4/_data# ls -ltotal 0
-rw-r--r-- 1 root root 0 3月  24 09:57 haha
验证:
把外面的haha文件夹删除:
root@ubuntu:/var/lib/docker/volumes/ffa3a943a3dd185c9b0bcd64919803cf1defcc84ed0268b592bc182bb8b26ba4/_data# rm haha
root@ubuntu:/var/lib/docker/volumes/ffa3a943a3dd185c9b0bcd64919803cf1defcc84ed0268b592bc182bb8b26ba4/_data# ll
total 8
drwxr-xr-x 2 root root 4096 3月  24 10:15 ./
drwxr-xr-x 3 root root 4096 3月  24 09:51 ../
再观察容器里面的haha文件夹也消失了,可知是同步的:
root@438bf118410b:/data# ls -l
total 0
在外面创建一个test目录,在里面也可以找到test目录:
#外面
root@ubuntu:/var/lib/docker/volumes/ffa3a943a3dd185c9b0bcd64919803cf1defcc84ed0268b592bc182bb8b26ba4/_data# mkdir test
root@ubuntu:/var/lib/docker/volumes/ffa3a943a3dd185c9b0bcd64919803cf1defcc84ed0268b592bc182bb8b26ba4/_data# ls
test
#里面
root@438bf118410b:/data# ls -l
total 4
drwxr-xr-x 2 root root 4096 Mar 24 02:20 test
生产上推荐使用这种方法:使用-v指定一个目录,默认创建容器的时候如果没指定,就是上面的这种默认指定,也可以使用命令自己指定位置,退出容器返回学习目录:
#外面:
root@ubuntu:/home/toohoo/learnDocker# mkdir /data/mysql -p
#里面:
root@ubuntu:/home/toohoo/learnDocker# docker run -d --name nginx-vlumes-test2 -v /data/mysql:/mysql nginx
aedf685815d6085bd3b600b865707512268cbd7aad525c528e80120ec9d2fb0d
root@ubuntu:/home/toohoo/learnDocker# ./docker_in.sh nginx-vlumes-test2
mesg: ttyname failed: No such file or directory
root@aedf685815d6:/# cd mysql/
root@aedf685815d6:/mysql# ls -l
total 0
说明:docker run -d --name nginx-vlumes-test2 -v /data/mysql:/mysql nginx
-v:指定外面的数据存放目录 /data/mysql为容器根目录下的mysql数据存放目录。
验证:使用类似的方法,在外面创建一个文件加haha,在容器里面也会产生一个对应的haha目录,也就是同步的。
在开发环境中的实践:
比如说做好了一个开发环境的镜像,现在想要让它run起来。
在外面创建一个文件加为:/data/webroot,并且使用 -v /data/webroot:/data/webroot 参数指定对应的关系,这样就可以很方便的调试,解析性的语言如php,python,html5等等就可以在不用重启容器的情况下实现同步调试。
在生产环境中的实践:
比如说写日志,设置物理主机上存放日志的路径为:/data/logs,然后使用 -v /data/logs:/data/logs 参数设置宿主机和所有容器对应的关系,在宿主机上开启收集日志的工具:logstash flume进行对所有容器的日志进行收集。
方案二:数据卷容器
数据卷容器就是挂载一个容器。
root@ubuntu:/home/toohoo/learnDocker# docker run -d --name nginx-volume -v /data/mysql:/mysql nginx
5740d9b8d99d6173d22eb9fd9c10fb966ebe8c5f907151527397b5bf854d51ad
root@ubuntu:/home/toohoo/learnDocker# docker ps -l
CONTAINER ID        IMAGE               COMMAND                  CREATED             STATUS              PORTS               NAMES
5740d9b8d99d        nginx               "nginx -g 'daemon of…"   18 seconds ago      Up 16 seconds       80/tcp              nginx-volume
root@ubuntu:/home/toohoo/learnDocker# docker run -d --name web-node1 --volumes-from nginx-volume nginx
ae5ec51e0314bbdc7b90ef6b92fe63f4b74d71baf911da229b2f4294855886af
root@ubuntu:/home/toohoo/learnDocker#
解析:
首先是创建一个新的容器nginx-volume,它的文件映射还是使用 /data/mysql:/mysql ,另外再创建一个容器web-node1 ,使它可以访问容器nginx-volume中的数据卷,使用的命令就是–volumes-from ,而数据卷容器的名称正是这样来。
另外还可以创建多个容器,这样这几个容器中的数据卷就是共享的同步的:
root@ubuntu:/home/toohoo/learnDocker# docker run -d --name web-node2 --volumes-from nginx-volume nginx
e101c9ecf342b16932b5cd69588d059679bdc4f5be8af6fad08ae3158cb94dfd
^[[Aroot@ubuntu:/home/toohoo/learnDockdocker run -d --name web-node3 --volumes-from nginx-volume nginx
04e9f1e2ac25909a14dae587ed6b1bb82cde4ad3ea06674db52363e5cb063ba6
root@ubuntu:/home/toohoo/learnDocker# ./docker_in.sh nginx-volume
mesg: ttyname failed: No such file or directory
root@5740d9b8d99d:/# cd /mysql/
root@5740d9b8d99d:/mysql# ls -l
total 0
root@5740d9b8d99d:/mysql# mkdir haha
root@5740d9b8d99d:/mysql# exit
logout
root@ubuntu:/home/toohoo/learnDocker# ./docker_in.sh web-node1
mesg: ttyname failed: No such file or directory
root@ae5ec51e0314:/# cd /mysql/
root@ae5ec51e0314:/mysql# ls
haha
root@ae5ec51e0314:/mysql# mkdir web-node1
root@ae5ec51e0314:/mysql# ls
haha  web-node1
root@ae5ec51e0314:/mysql# exit
logout
root@ubuntu:/home/toohoo/learnDocker# ./docker_in.sh web-node2
mesg: ttyname failed: No such file or directory
root@e101c9ecf342:/# cd /mysql/
root@e101c9ecf342:/mysql# ls
haha  web-node1
root@e101c9ecf342:/mysql# mkdir web-node2
root@e101c9ecf342:/mysql# ls
haha  web-node1  web-node2
root@e101c9ecf342:/mysql# exit
logout
root@ubuntu:/home/toohoo/learnDocker# ./docker_in.sh web-node3
mesg: ttyname failed: No such file or directory
root@04e9f1e2ac25:/# cd /mysql/
root@04e9f1e2ac25:/mysql# ls
haha  web-node1  web-node2
root@04e9f1e2ac25:/mysql# mkdir web-node3
root@04e9f1e2ac25:/mysql# ls
haha  web-node1  web-node2  web-node3
root@04e9f1e2ac25:/mysql# exit
logout
root@ubuntu:/home/toohoo/learnDocker# ./docker_in.sh nginx-volume
mesg: ttyname failed: No such file or directory
root@5740d9b8d99d:/# cd mysql/
root@5740d9b8d99d:/mysql# ls -l
total 16
drwxr-xr-x 2 root root 4096 Mar 24 03:10 haha
drwxr-xr-x 2 root root 4096 Mar 24 03:10 web-node1
drwxr-xr-x 2 root root 4096 Mar 24 03:11 web-node2
drwxr-xr-x 2 root root 4096 Mar 24 03:12 web-node3
而且即使是数据卷容器停了,数据卷容器的数据也不会被删除,其他的数据卷容器也可以正常登录到容器里面去的,可以正常使用容器。
root@ubuntu:/home/toohoo/learnDocker# docker stop 5740d9b8d99d
5740d9b8d99d
root@ubuntu:/home/toohoo/learnDocker# ./docker_in.sh web-node3
mesg: ttyname failed: No such file or directory
root@04e9f1e2ac25:/# cd mysql/
root@04e9f1e2ac25:/mysql# ls -l
total 16
drwxr-xr-x 2 root root 4096 Mar 24 03:10 haha
drwxr-xr-x 2 root root 4096 Mar 24 03:10 web-node1
drwxr-xr-x 2 root root 4096 Mar 24 03:11 web-node2
drwxr-xr-x 2 root root 4096 Mar 24 03:12 web-node3
root@04e9f1e2ac25:/mysql# mkdir test
root@04e9f1e2ac25:/mysql# ls
haha  test  web-node1  web-node2  web-node3
数据卷容器的实践意义:日日志收集
首先是启动一个数据卷容器volume -v /data/logs:/data/logs
使用参数 --volume-from volume来指定容器,可以有多个
然后在volume容器里面使用工具logstash flume进行日志的搜集即可
这个仅仅是两个方案而已,另外还有其他方法。
docker镜像构建
构建镜像
镜像的构造主要方式有两种
-
第一种就是手动构建,例如当我们从docker镜像仓库中下载的镜像不能满足我们的需求时,在创建一个虚拟的容器之后,由于在容器里面很多工具没更新和安装,进行apt-get update 进行更新和安装,将需要的都装上,然后使用docker commit 命令提交镜像,这样就是手动构建的含义。
-
第二种就是使用Dockerfile来创建一个镜像
#在运行的容器内使用 apt-get update 命令进行更新。在完成操作之后,将一些常见的软件装上。
- 注意:如果是CentOS ,有一个源叫做 EPEL (Extra Packages for Enterprise),里面有1万多个软件,一般在容器里面先安装这个源,再使用yum进行安装,把该装的都装上就可以了。
下面以更新镜像并安装nginx,手动构建一个mynginx镜像为例:
在更新镜像之前,需要使用镜像来创建一个容器
root@ubuntu:/home/toohoo/learnDocker# docker run -it --name mynginx -it ubuntu:18.04
root@11394a3a9999:/# apt-get update
root@11394a3a9999:/# apt-get install vim net-tools nginx nmap netcat-traditional
修改nginx配置文件,让它在前台运行,在文件头添加一句:
daemon off;
root@11394a3a9999:/# vim /etc/nginx/nginx.conf
daemon off;
user www-data;
worker_processes auto;
pid /run/nginx.pid;
include /etc/nginx/modules-enabled/*.conf;

events {
        worker_connections 768;
        # multi_accept on;
}
...
这样就手动构建完ID为11394a3a9999的容器副本了,输入exit退出之后,使用docker commit 命令提交,就如同使用版本控制工具一样:
root@ubuntu:/home/toohoo/learnDocker# docker ps -a
CONTAINER ID        IMAGE                                                        COMMAND                  CREATED             STATUS                      PORTS                       NAMES
11394a3a9999        ubuntu:18.04                                                 "/bin/bash"              3 hours ago         Exited (0) 14 seconds ago                               mynginx
root@ubuntu:/home/toohoo/learnDocker# docker commit -m "My Nginx" 11394a3a9999 mynginx:v1
sha256:93b4008eb3e75f7316d1330f6a1f6e276bc70c316afba87724f9d730fe6589e8
root@ubuntu:/home/toohoo/learnDocker# docker images
REPOSITORY                                                   TAG                 IMAGE ID            CREATED             SIZE
mynginx                                                      v1                  93b4008eb3e7        21 seconds ago      300MB
提交参数说明:
-m:提交的描述信息
-a:指定镜像的作者
11394a3a9999:容器的ID
mynginx:指定要创建的目标镜像名
使用新的镜像创建一个容器,并进入到容器里面,查看到PID=1的进程就是nginx,因为刚刚改好的nginx配置文件,使得它能够运行在前台,:
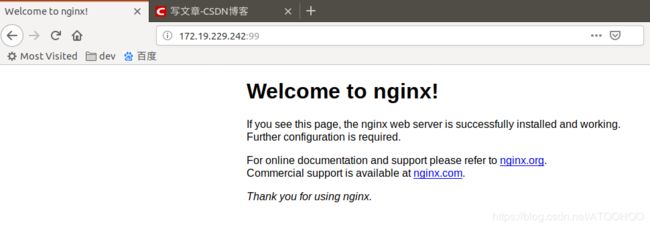
root@ubuntu:/home/toohoo/learnDocker# docker run -d -p 99:80 mynginx:v1 nginx
e3c8f304517570d754f7e0cb27b6b85295a979686f9b9d73e79d01c77ef5ff53
root@ubuntu:/home/toohoo/learnDocker# docker ps -l
CONTAINER ID        IMAGE               COMMAND             CREATED             STATUS              PORTS                NAMES
e3c8f3045175        mynginx:v1          "nginx"             23 seconds ago      Up 19 seconds       0.0.0.0:99->80/tcp   agitated_gates
root@ubuntu:/home/toohoo/learnDocker# ./docker_in.sh e3c8f3045175
mesg: ttyname failed: No such device
root@e3c8f3045175:/# ps aux
USER        PID %CPU %MEM    VSZ   RSS TTY      STAT START   TIME COMMAND
root          1  0.1  0.2 140624 10388 ?        Ss   07:18   0:00 nginx: master process nginx
www-data      6  0.0  0.0 141000  3468 ?        S    07:18   0:00 nginx: worker process
root          7  0.0  0.0  20256  3804 ?        S    07:20   0:00 -bash
root         15  0.0  0.0  36148  3136 ?        R+   07:20   0:00 ps aux
- 注意:PID=1的进程运行在前台,如果PID=1这个进程结束,那么这个容器也会结束了。
浏览器访问99端口:显示成功!
 修改数据卷挂载
进入构建好的容器mynginx,找到nginx的配置文件:
由/etc/nginx/nginx.conf配置文件找到包含网页目录include /etc/nginx/sites-enabled/*; 然后进入打开/etc/nginx/sites-enabled/default 文件,查看并得到到网页文件存放位置:root /var/www/html; 从而将其更改为:/data/webroot;
在根目录创建/data 目录,并退出。
root@e3c8f3045175:~# mkdir /data
root@e3c8f3045175:~# exit
logout
停掉该容器,再次提交更改
root@ubuntu:/home/toohoo/learnDocker# docker ps  -l
CONTAINER ID        IMAGE               COMMAND             CREATED             STATUS              PORTS                NAMES
e3c8f3045175        mynginx:v1          "nginx"             40 minutes ago      Up 40 minutes       0.0.0.0:99->80/tcp   agitated_gates
root@ubuntu:/home/toohoo/learnDocker# docker stop e3c8f3045175
e3c8f3045175
root@ubuntu:/home/toohoo/learnDocker# docker commit -m "Nginx v2" e3c8f3045175 mynginx:v2
sha256:9cce43317e59151d3e55c0b97f24f178a92be56222ab8ee9ff9de6838db531a9
在外层设置/data/webroot 目录,并创建一个index.html文件
root@ubuntu:/home/toohoo/learnDocker# cd /data
root@ubuntu:/data# ls
mysql
root@ubuntu:/data# mkdir webroot
root@ubuntu:/data# cd webroot/
root@ubuntu:/data/webroot# vim index.html
root@ubuntu:/data/webroot# cat index.html
<h1>HAHA</h1>
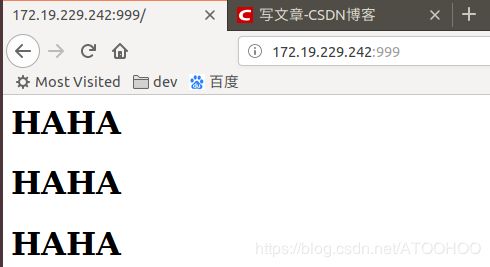
使用新提交的镜像v2开启一个新的容器并设置容器的访问端口为999:
root@ubuntu:/data/webroot# docker run -d -p 999:80 -v /data/webroot:/data/webroot mynginx:v2 nginx
5f6cc4d3bde65f1f26faa88cf3671d414435545b4dafb8ffe1806aa30de449bb
浏览器访问999端口:成功!
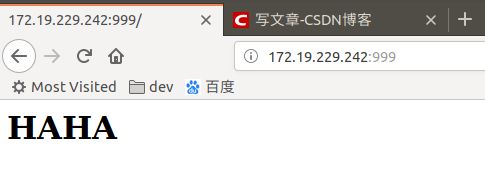
在外边的物理机上/data/webroot/index.html中添加内容并保存,然后刷新页面:成功显示内容!
- 注意:使用的语言要是非编译型的。
dockerfile介绍与使用Dockerfile构建镜像
实例一:添加新用户镜像构造
构建镜像:
我们使用命令 docker build , 从零开始来创建一个新的镜像。为此,我们需要创建一个 Dockerfile 文件,其中包含一组指令来告诉 Docker 如何构建我们的镜像。
FROM    ubuntu:18.04
MAINTAINER      Toohoo "[email protected]"
RUN     /bin/echo 'root:123456' |chpasswd
RUN     useradd toohoo
RUN     /bin/echo 'toohoo:123456' |chpasswd
RUN     /bin/echo -e "LANG=\"en_US.UTF-8\"" > /etc/default/local
EXPOSE  22
EXPOSE  80
CMD     /usr/sbin/sshd -D
说明:
每一个指令都会在镜像上创建一个新的层,每一个指令的前缀都必须要大写的。
第一条FROM,指定使用那个镜像源,父亲是谁
MAINTAINER:指定维护者信息
RUN:指令告诉docker在镜像内执行命令,安装什么,要它干什么
ADD:给他一点创业基金(COPY文件,如果是压缩文件会自动解压)
WORKDIR:就是cd,化个妆,改了名字(设置当前的工作目录)
VOLUME:给他一个存放行李的地方(设置卷,挂载主机目录)
EXPOSE:它要打开,暴露出对应访问端口
CMD:指定容器启动后的要干的事情
然后,我们使用 Dockerfile 文件,通过 docker build 命令来构建一个镜像。
toohoo@ubuntu:~/learnDocker$ docker build -t toohoo/ubuntu:18.04 .
Sending build context to Docker daemon  3.072kB
Step 1/9 : FROM	ubuntu:18.04
 ---> 47b19964fb50
Step 2/9 : MAINTAINER	Fish "[email protected]"
 ---> Running in 91d19f978729
Removing intermediate container 91d19f978729
 ---> b84c4502b66e
Step 3/9 : RUN	/bin/echo 'root:123456' |chpasswd
 ---> Running in 9b2ace0fa522
Removing intermediate container 9b2ace0fa522
 ---> a150e66177ad
Step 4/9 : RUN	useradd toohoo
 ---> Running in 65a4bee26b5a
Removing intermediate container 65a4bee26b5a
 ---> 29f1c6c2f5a3
Step 5/9 : RUN	/bin/echo 'toohoo:123456' |chpasswd
 ---> Running in 6b5f9220a3a4
Removing intermediate container 6b5f9220a3a4
 ---> 1b48e94d2653
Step 6/9 : RUN	/bin/echo -e "LANG=\"en_US.UTF-8\"" > /etc/default/local
 ---> Running in eaeb507b6bb5
Removing intermediate container eaeb507b6bb5
 ---> c7863ee87169
Step 7/9 : EXPOSE	22
 ---> Running in 50c0f0e2ecc1
Removing intermediate container 50c0f0e2ecc1
 ---> 453e0332f9f5
Step 8/9 : EXPOSE	80
 ---> Running in 313fe4c9b5af
Removing intermediate container 313fe4c9b5af
 ---> 8a680664d6fd
Step 9/9 : CMD	/usr/sbin/sshd -D
 ---> Running in 6921b81ffb7c
Removing intermediate container 6921b81ffb7c
 ---> 4ca036d42743
Successfully built 4ca036d42743
Successfully tagged toohoo/ubuntu:18.04
参数说明:
- -t:指定要创建的目标镜像名
- . :Dockerfile文件所在的目录,也可以指定Dockerfile的绝对路径
使用docker images 查看创建的镜像已经在列表中存在,镜像ID为4ca036d42743
toohoo@ubuntu:~/learnDocker$ docker images
REPOSITORY                                                   TAG                 IMAGE ID            CREATED             SIZE
toohoo/ubuntu                                                18.04               4ca036d42743        3 minutes ago       88.5MB
toohoo/ubuntu                                                v2                  087f6ada2d0c        26 minutes ago      113MB
ubuntu                                                       latest              94e814e2efa8        11 days ago         88.9MB
nginx                                                        latest              881bd08c0b08        2 weeks ago         109MB
httpd                                                        latest              d3a13ec4a0f1        5 weeks ago         132MB
ubuntu                                                       18.04               47b19964fb50        6 weeks ago         88.1MB
我们可以使用新的镜像来创建容器
toohoo@ubuntu:~/learnDocker$ docker run -t -i toohoo/ubuntu:18.04 /bin/bash
root@47a79736600b:/# id toohoo
uid=1000(toohoo) gid=1000(toohoo) groups=1000(toohoo)
从上面看到新镜像已经包含我们创建的用户toohoo
设置镜像的标签
我们可以使用 docker tag 命令,为镜像添加一个新的标签
toohoo@ubuntu:~/learnDocker$ docker tag 4ca036d42743 toohoo/ubuntu:dev
toohoo@ubuntu:~/learnDocker$ docker images
REPOSITORY                                                   TAG                 IMAGE ID            CREATED             SIZE
toohoo/ubuntu                                                18.04               4ca036d42743        12 minutes ago      88.5MB
toohoo/ubuntu                                                dev                 4ca036d42743        12 minutes ago      88.5MB
toohoo/ubuntu                                                v2                  087f6ada2d0c        35 minutes ago      113MB
ubuntu                                                       latest              94e814e2efa8        11 days ago         88.9MB
nginx                                                        latest              881bd08c0b08        2 weeks ago         109MB
httpd                                                        latest              d3a13ec4a0f1        5 weeks ago         132MB
ubuntu                                                       18.04               47b19964fb50        6 weeks ago         88.1MB
jwilder/nginx-proxy                                          latest              60f01f8052f5        7 weeks ago         148MB
registry.cn-hangzhou.aliyuncs.com/onlinejudge/oj_backend     latest              cabe088080b3        2 months ago        213MB
postgres                                                     10-alpine           5c289b84676b        2 months ago        71.6MB
hello-world                                                  latest              fce289e99eb9        2 months ago        1.84kB
redis                                                        4.0-alpine          37abb58bfd68        3 months ago        30MB
registry.cn-hangzhou.aliyuncs.com/onlinejudge/judge_server   latest              3b384f969396        4 months ago        683MB
training/webapp                                              latest              6fae60ef3446        3 years ago         349MB
docker tag 镜像ID,这里是 4ca036d42743 ,用户名称、镜像源名(repository name)和新的标签名(tag)。
使用 docker images 命令可以看到,ID为4ca036d42743的镜像多一个标签。
实例二:nginx镜像构造
切换工作目录,并创建Dockerfile:
root@ubuntu:/home/toohoo/learnDocker# mkdir -p /opt/dockerfile/nginx
root@ubuntu:/home/toohoo/learnDocker# cd /opt/dockerfile/nginx/
root@ubuntu:/opt/dockerfile/nginx# vim Dockerfile
Dockerfile的内容为:
# This docker file use the ubuntu:18.04
# Version 1.0
# Author:toohoo

# base image
FROM ubuntu:18.04

# maintainer
MAINTAINER Toohoo "[email protected]"

# update
RUN apt-get update
# insatll nginx
RUN apt-get install -y nginx vim
RUN echo "daemon off;" >> /etc/nginx/nginx.conf
ADD index.html /var/www/html/index.html

expose 80

# start to run
CMD ["nginx"]
先在同级目录编写index.html文件:
root@ubuntu:/home/toohoo/learnDocker/nginx# cat index.html
nginx in docker
然后使用命令实行Dockerfile:
docker build -t mynginx:v3 .
注意:出现的问题
1、记得添加 -y,确认安装,这样就不会被询问是否安装打断。
2、安装时候会出现一个警告信息,影响不大,可以采用apt-get的一个选项–assume-yes,即忽略掉警告信息:
debconf: delaying package configuration, since apt-utils is not installed
Dockerfile补全添加:
ARG DEBIAN_FRONTEND=noninteractive
RUN apt-get update && apt-get install --assume-yes apt-utils
参考自:https://www.jianshu.com/p/99fd61e6aa29,不过我重新构建这个镜像时发现,警告并不能消除。
3、可能出现报错信息,原因是安装的过程中会有对话框
debconf: unable to initialize frontend: Dialog
debconf: (TERM is not set, so the dialog frontend is not usable.)
debconf: falling back to frontend: Readline
debconf: unable to initialize frontend: Readline
debconf: (Can't locate Term/ReadLine.pm in @INC (you may need to install the Term::ReadLine module) (@INC contains: /etc/perl /usr/local/lib/x86_64-linux-gnu/perl/5.26.1 /usr/local/share/perl/5.26.1 /usr/lib/x86_64-linux-gnu/perl5/5.26 /usr/share/perl5 /usr/lib/x86_64-linux-gnu/perl/5.26 /usr/share/perl/5.26 /usr/local/lib/site_perl /usr/lib/x86_64-linux-gnu/perl-base) at /usr/share/perl5/Debconf/FrontEnd/Readline.pm line 7, <> line 57.)
debconf: falling back to frontend: Teletype
dpkg-preconfigure: unable to re-open stdin:
解决方案,Dockerfile添加一句:
ENV DEBIAN_FRONTEND noninteractive
这句类似于上面的ARG DEBIAN_FRONTEND=noninteractive吧,个人添加这个之后不在出现错误3,下面的这一句还没有试。
参考:https://blog.csdn.net/a19891024/article/details/78250967
按照步骤来走,构建成功了:
root@ubuntu:/opt/dockerfile/nginx# docker images
REPOSITORY                                                   TAG                 IMAGE ID            CREATED             SIZE
mynginx                                                      v3                  feacb910f215        8 minutes ago       234MB
mynginx                                                      v2                  9cce43317e59        2 hours ago         300MB
mynginx                                                      v1                  93b4008eb3e7        3 hours ago         300MB
开启一个容器:
root@ubuntu:/opt/dockerfile/nginx# docker run -d -p 888:80 mynginx:v3 nginx
157ea70de52d9eb6140afb5ab64c881d63b400598527818e1751ebc18e7b70e1
root@ubuntu:/opt/dockerfile/nginx# docker ps -l
CONTAINER ID        IMAGE               COMMAND             CREATED             STATUS              PORTS                 NAMES
157ea70de52d        mynginx:v3          "nginx"             25 seconds ago      Up 21 seconds       0.0.0.0:888->80/tcp   angry_nightingale
- Dockerfile的其他命令解析:
- ENV:设置环境变量,可以在RUN之前指定
- COPY:也是往容器里面放东西,缺点是不能自动解压
- CMD:容器启动的时候启动什么命令,每个Dockerfile里面只能有一条CMD命令,如果指定多条就只能执行最后一条,在启动容器的时候,如果指定了命令,是会覆盖dockerfile里面的CMD命令的,例如在启动容器的时候添加nginx命令,会覆盖Dockerfile里面CMD的nginx命令的,所以在外面可以不指定命令。
- ENTRYPOIN:和CMD指令很像,功能差不多,问题:它没有CMD的指定命令替换的效果
参考中文官方文档
docker镜像分层设计
最终的目录结构如下所示:
root@ubuntu:/opt/dockerfile# tree
.
├── app
│   └── jenkins
│       ├── Dockerfile
│       └── jenkins.war
├── runtime
│   ├── java
│   │   └── Dockerfile
│   └── tomcat
│       ├── apache-tomcat-8.5.39.tar.gz
│       ├── Dockerfile
│       └── tomcat.conf
└── system
    ├── ubuntu
    │   └── Dockerfile
    └── ubuntu-ssh
        ├── Dockerfile
        ├── sshd.conf
        └── supervisord.conf

8 directories, 10 files
基于操作系统层基础镜像构建
首先是在ubuntu目录的纯的基础镜像,在操作系统的基础上将需要的软件都装上,其Dockerfile文件内容为:
# Dockerfile for Ubuntu
# Base images
FROM ubuntu
# maintainer
MAINTAINER Toohoo<[email protected]>
# Base Pkg
RUN \
    apt-get update && \
    apt-get install -y wget libmysqld-dev git redis tree net-tools sudo psmisc && \
#    rm -rf /var/lib/apt/lists/*
构建镜像示例:
root@ubuntu:/opt/dockerfile/system/ubuntu# docker build -t toohoo/ubuntu:base .
构建容器实例并进入容器(使用本文的脚本),可以进入容器里面看一下东西的安装情况,再退出,至此基础镜像构建结束。:
 docker run -d --name myubuntu -it toohoo/ubuntu:base /bin/bash
 docker ps -l
 /home/toohoo/learnDocker/docker_in.sh cd9df104ecee
- 注意:
1、ubuntu 上 mysql-devel 库的名字叫 libmysqld-dev。sudo apt-get install libmysqld-dev。
2、最好是将rm -rf /var/lib/apt/lists/*加上,因为这个会应为镜像的构建,系统的内存存放的东西软件越来越多,可以清除一下下载的东西,在Centos下面是yum clean all,使用的命令是yum,但是因为现在是测试的情况,节省等待时间可以先将其注释。
接着创建一个ubuntu-ssh目录,在系统的镜像层面上安装上一个ssh服务,用于root用户或者创建普通用户登录,Dockerfile内容为:
# Dockerfile for Ubuntu
# Base images
FROM ubuntu
# maintainer
MAINTAINER Toohoo<[email protected]>
# Base Pkg
RUN \
    apt-get update && \
    apt-get install -y wget libmysqld-dev git redis tree net-tools sudo psmisc && \
    # For SSHD
    apt-get install -y openssh-server && \
    mkdir /var/run/sshd && \
    # Set Root Password
    /bin/echo 'root:123456'|chpasswd  && \
    # add user,pwd and encoding
    useradd toohoo && \
    /bin/echo 'toohoo:123456'|chpasswd && \
    /bin/echo -e "LANG=\"en_US.UTF-8\"" > /etc/default/local && \
    #使用sed替换,使得root用户可以使用sshd登录
    sed -ri 's/^#PermitRootLogin\s+.*/PermitRootLogin yes/' /etc/ssh/sshd_config && \
    #先取消pam限制
    sed -ri 's/UsePAM yes/#UsePAM yes/g' /etc/ssh/sshd_config
#    rm -rf /var/lib/apt/lists/*
#  expose port 将22号端口暴露出来
EXPOSE 22
# start to run  构建完成之后的启动命令
CMD ["/usr/sbin/sshd", "-D"]
- 注意几个坑:说一下Ubuntu和Centos的区别:
1、安装的软件不同:在centos下开启ssh服务一般安装这三个软件:openssh-clients openssl-devel openssh-server,而在Ubuntu中只需要安装openssh-server即可。
2、这些软件在两个平台的拼写不同:安装openssl-devel时,在Ubuntu系统里这是分开的两个,需要分开来安装, RedHat、centos才是openssl-devel:
sudo apt-get install openssl
sudo apt-get install libssl-dev
openssh-clients 在Ubuntu里面是openssh-client,没有s,openssh-server不变。
3、Ubuntu中/etc/ssh/sshd_config文件中的PermitRootLogin前面是有#的,所以,使用sed替换的时候要写成:sed -ri 's/^#PermitRootLogin\s+.*/PermitRootLogin yes/' /etc/ssh/sshd_config,否则使用root登录时候,登不上的(坑)。
4、Linux有一个pam_tally2.so的PAM模块,来限定用户的登录失败次数,如果次数达到设置的阈值,则锁定用户,这里先取消这个限制。
编写Dockerfile前的实践过程:
构建镜像时候,先使用基础镜像开一个容器,在容器里面将ssh先装上,实践开启ssh服务都需要什么样的命令,最终将命令迁移到Dockerfile中即可,上面的ssh对应的Dockerfile由如下过程得出。
root@82539e5105b3:/# apt-get  update
root@82539e5105b3:/# apt-get install -y openssh-client openssh-server openssl libssl-dev
安装成功之后,转到对应的目录:
root@82539e5105b3:/# cd /etc/ssh/
root@82539e5105b3:/etc/ssh# ls
moduli      ssh_host_ecdsa_key      ssh_host_ed25519_key      ssh_host_rsa_key      ssh_import_id
ssh_config  ssh_host_ecdsa_key.pub  ssh_host_ed25519_key.pub  ssh_host_rsa_key.pub  sshd_config
root@82539e5105b3:/etc/ssh# ll
total 592
drwxr-xr-x 1 root root   4096 Mar 24 13:12 ./
drwxr-xr-x 1 root root   4096 Mar 24 13:12 ../
-rw-r--r-- 1 root root 553122 Mar  4 12:17 moduli
-rw-r--r-- 1 root root   1580 Mar  4 12:17 ssh_config
-rw------- 1 root root    227 Mar 24 13:12 ssh_host_ecdsa_key
-rw-r--r-- 1 root root    179 Mar 24 13:12 ssh_host_ecdsa_key.pub
-rw------- 1 root root    411 Mar 24 13:12 ssh_host_ed25519_key
-rw-r--r-- 1 root root     99 Mar 24 13:12 ssh_host_ed25519_key.pub
-rw------- 1 root root   1675 Mar 24 13:12 ssh_host_rsa_key
-rw-r--r-- 1 root root    399 Mar 24 13:12 ssh_host_rsa_key.pub
-rw-r--r-- 1 root root    338 Mar 24 13:12 ssh_import_id
-rw-r--r-- 1 root root   3264 Mar  4 12:17 sshd_config
这样装上之后对应的key会存在,在centos构造的容器里面安装之后反而没有,要另外使用命令生成,这是Ubuntu一个优点吧。
在centos容器里面生成key的方法如下:
# ssh-keygen -t rsa -f /etc/ssh/ssh_host_ras_key
# ssh-keygen -t ecdsa -f /etc/ssh/ssh_host_ecdsa_key
# ssh-keygen -A -t dsa -f /etc/ssh/ssh_host_das_key
所以在Centos能够启动ssh的镜像(加上相应的key创建)的Dockerfile为:
# Dockerfile for Ubuntu
# Base images
FROM  centos
# maintainer
MAINTAINER Toohoo "[email protected]"
# Base Pkg
RUN \
    apt-get update && \
    apt-get install -y wget libmysqld-dev git redis tree net-tools sudo psmisc && \
    rm -rf /var/lib/apt/lists/*

# For SSHD, 不行就 apt-get update 一下
RUN \
    apt-get update && \
    apt-get install -y openssh-clients openssh-server openssl-devel && \
    ssh-keygen -t rsa -f /etc/ssh/ssh_host_ras_key && \
    ssh-keygen -t ecdsa -f /etc/ssh/ssh_host_ecdsa_key && \
    ssh-keygen -A -t dsa -f /etc/ssh/ssh_host_das_key && \
    rm -rf /var/lib/apt/lists/*

# Set Root Password 使用管道设置用户名和密码
RUN \
    echo "root:123" | chpasswd
但是在Ubuntu里面就不用,要将生成key的那几行命令去掉。
docker在构建镜像的时候使用了分层的概念,如果前面已经执行过了,有缓存,就使用缓存,执行的很快。例如开始 执行构建:
root@ubuntu:/opt/dockerfile/system/ubuntu-ssh# docker build -t toohoo/ubuntu-ssh:v1 .
Sending build context to Docker daemon  2.048kB
Step 1/5 : FROM ubuntu
 ---> 94e814e2efa8
Step 2/5 : MAINTAINER Toohoo "[email protected]"
 ---> Using cache
 ---> d4a98668c25a
Step 3/5 : RUN     apt-get update &&     apt-get install -y wget libmysqld-dev git redis tree net-tools sudo psmisc &&     rm -rf /var/lib/apt/lists/*
 ---> Using cache
 ---> cf852d5a9b91
Step 4/5 : RUN     apt-get update &&     apt-get install -y openssh-client  openssh-server  openssl libssl-dev &&     rm -rf /var/lib/apt/lists/*
 ---> Running in 425e667925ac
...
Removing intermediate container 425e667925ac
 ---> 3c70f4b854ff
Step 5/5 : RUN     echo "root:123" | chpasswd
 ---> Running in 2bfc85bfddde
Removing intermediate container 2bfc85bfddde
 ---> 1ea516fe488e
Successfully built 1ea516fe488e
Successfully tagged toohoo/ubuntu-ssh:v1
构建成功之后,使用新的镜像创建一个容器,可以使用docker ps -l查看最后创建的容器的情况:
现在开启一个容器,映射端口为8022,映射到ssh的22端口:
root@ubuntu:/opt/dockerfile/system/ubuntu-ssh# docker run -d --name ubuntu-ssh-demo -p 8022:22 toohoo/ubuntu-ssh:v1 /usr/sbin/sshd -D
865561e552a4b4ad8bd3679c6021884248576995dc8f69dc31926882e21f1cd6
root@ubuntu:/opt/dockerfile/system/ubuntu-ssh# docker ps -l
CONTAINER ID        IMAGE                   COMMAND               CREATED             STATUS              PORTS                  NAMES
14bf688a27f9        toohoo/ubuntu-sshd:v1   "/usr/sbin/sshd -D"   30 minutes ago      Up 30 minutes       0.0.0.0:8022->22/tcp   ubuntu-sshd-demo
构建完成之后出现了想要的端口映射,接着登录:
root@ubuntu:/opt/dockerfile/system/ubuntu-ssh# ssh -p 8022 [email protected]
The authenticity of host '[172.19.229.242]:8022 ([172.19.229.242]:8022)' can't be established.
ECDSA key fingerprint is SHA256:6fCfOuskzNQc5SgAu+t/HLpPcfWl33yhmmwHbc1H3xg.
Are you sure you want to continue connecting (yes/no)? yes
Warning: Permanently added '[172.19.229.242]:8022' (ECDSA) to the list of known hosts.
[email protected]'s password:
root@14bf688a27f9:/# ps
   PID TTY          TIME CMD
    63 pts/0    00:00:00 su
    64 pts/0    00:00:00 bash
    74 pts/0    00:00:00 ps
root@14bf688a27f9:/# tree
root@14bf688a27f9:/# whereis ssh
ssh: /usr/bin/ssh /etc/ssh
root@14bf688a27f9:/# whereis sshd
sshd: /usr/sbin/sshd
使用普通用户登录:登录成功!
root@ubuntu:/opt/dockerfile/system/ubuntu-ssh# ssh -p 8022 [email protected]
[email protected]'s password:
Last login: Mon Mar 25 03:19:51 2019 from 172.19.229.242
Could not chdir to home directory /home/toohoo: No such file or directory
$ ls
bin  boot  dev	etc  home  lib	lib64  media  mnt  opt	proc  root  run  sbin  srv  sys  tmp  usr  var
- 注意几个坑:
1、 如果没有在dockerfile里面指定容器干什么,所以就要加上/usr/sbin/sshd -D这个启动ssh的命令,如果dockerfile里面使用CMD指定了,外面的会覆盖里面的命令。
2、如果没用更改sed -ri 's/^PermitRootLogin\s+.*/PermitRootLogin yes/' /etc/ssh/sshd_config中的PermitRootLogin为#PermitRootLogin的话,sed替换是不会成功的,root登录会被拒绝到崩溃。
3、不过你也而已使用nsenter脚本进入容器,手动更改文件:sudo vi /etc/ssh/sshd_config,找到#PermitRootLogin prohibit-password调整PermitRootLogin参数值为yes,sshd需要重启一下:使用命令ps -e | grep sshd,如果当执行上述指令后未发现sshd服务在运行,可尝试如下命令重启一下sshd命令为:
sudo service ssh restart或者sudo /etc/init.d/ssh restart
如果尝试上述命令还为起作用时,则可尝试关闭容器重新登录,因为这个容器的PID=1对应的进程就是sshd,所以重启时是会自动退出容器的,重新登录一下就可以了。
4、ssh登录命令格式为,端口写在前面或后面都可以
# ssh -p 8022 [email protected]
或者
# ssh [email protected] -p 8022
使用supervisor在docker容器里面进行进程管理
supervisor是采用Python写的一个进程管理工具,官网:supervisord.org。
使用supervisor的需求是什么,因为一个容器只能在前台运行一个进程,如果关闭了,容器就退出了,所以需要使用进程管理工具进行进程管理,除了写循环脚本之外,两一个好选择就是用supervisor。
使用supervisor是基于上面创建好的toohoo/ubuntu-sshd:v1镜像的。
先打开一个容器作为测试,然后拷贝命令,编写dockerfile,测试玩之后自动删除:
命令如下:
root@ubuntu:/opt/dockerfile/system/ubuntu-ssh# docker run --rm -it toohoo/ubuntu-sshd:v1 /bin/bash
apt-get install supervisor
cd /etc/supervisor/
配置:修改supervisor的配置文件:
vim /etc/supervisor/supervisord.conf
添加nodaemon=true ,意思是只让supervisor一个运行在前台,其他的进程归他管理,并且确保文件下面包含有
[include]
files = /etc/supervisor/conf.d/*.conf
[supervisord]
logfile=/var/log/supervisor/supervisord.log ; (main log file;default $CWD/supervisord.log)
nodaemon=true                               ; (start in foreground if true,default false)
pidfile=/var/run/supervisord.pid ; (supervisord pidfile;default supervisord.pid)
childlogdir=/var/log/supervisor            ; ('AUTO' child log dir, default $TEMP)
...
[include]
files = /etc/supervisor/conf.d/*.conf
然后在/etc/supervisor/conf.d/路径下添加supervisor管理进程的配置文件,这里就是使用上面的sshd进行举例(不要注释):
root@9e1b142b67fc:/etc/supervisor/conf.d# vim sshd.conf
[program:sshd]               	                    #管理进程的命名
command=/usr/sbin/sshd  -D      			   #执行的命令
stderr_logfile=/var/log/supervisor/sshd.log     #错误日志输出路径
stdout_logfile=/var/log/supervisor/sshd.log     #日志输出路径
directory=/home/sshd_test                	#命令执行的工作空间
autostart=true                  		#自动启动
autorestart=true                		#自动重启
user=root                    		#指定用户
stopsignal=INT										#停止信号
应为现在是在测试容器里面,先令nodaemon=false,等到真正构建的时候,一定要启动在前台!
下面会启动supervisor:
root@9e1b142b67fc:/etc/supervisor# /usr/bin/supervisord -c /etc/supervisor/supervisord.conf
root@9e1b142b67fc:/etc/supervisor# supervisorctl status
sshd                             FATAL     Exited too quickly (process log may have details)
出现FATAL,打开/var/log/supervisor/sshd.log看之后知道是:
supervisor: couldn't chdir to /home/sshd_test: ENOENT
打不开/home/sshd_test文件夹,于是就创建一个:mkdir -p /home/sshd_test,然后重启一下就成功了,22端口在被监听。
root@9e1b142b67fc:/home# supervisorctl reload
Restarted supervisord
root@9e1b142b67fc:/home# supervisorctl status
sshd                             RUNNING   pid 665, uptime 0:00:03
root@9e1b142b67fc:/home# netstat -ntlp
Active Internet connections (only servers)
Proto Recv-Q Send-Q Local Address           Foreign Address         State       PID/Program name
tcp        0      0 0.0.0.0:22              0.0.0.0:*               LISTEN      665/sshd
tcp6       0      0 :::22                   :::*                    LISTEN      665/sshd
- 注意:
supervisor有supervisord和supervisorctl两种命令类型,supervisord是服务相关的命令,supervisorctl是客户端相关的命令,它们的使用方法如下所示
查看supervisorctl和启动子进程方式:
supervisorctl status #查看supervisorctl状态
supervisorctl start sshd #启动子进程sshd
supervisorctl stop sshd  #关闭子进程sshd
supervisorctl restart sshd #重启子进程sshd
Supervisor管理进程状态转换图
说明:
running:进程处于运行状态
starting:Supervisor 收到启动请求后,进程处于正在启动过程中
stopped:进程处于关闭状态
stopping:Supervisor 收到关闭请求后,进程处于正在关闭过程中
backoff:进程进入 starting 状态后,由于马上就退出导致没能进入 running 状态
fatal:进程没有正常启动
exited:进程从 running 状态退出
常用命令:
supervisorctl start programxxx,启动某个进程
supervisorctl restart programxxx,重启某个进程
supervisorctl stop groupworker: ,重启所有属于名为groupworker这个分组的进程(start,restart同理)
supervisorctl stop all,停止全部进程,注:start、restart、stop都不会载入最新的配置文件。
supervisorctl reload,载入最新的配置文件,停止原有进程并按新的配置启动、管理所有进程。
supervisorctl update,根据最新的配置文件,启动新配置或有改动的进程,配置没有改动的进程不会受影响而重启。
supervisor启动和停止的日志文件存放在/var/log/supervisor/supervisord.log
注意:显式用stop停止掉的进程,用reload或者update都不会自动重启
参考文章:https://www.jianshu.com/p/68605ac9d06a
一切测试都成功之后,就是将命令写入Dockerfile,开始构建镜像了:
首先将容器中的配置文件拷贝过来:使用scp
- 注意:scp是secure copy的简写,用于在Linux下进行远程拷贝文件的命令,scp传输是加密的,可能会稍微影响一下速度其占用的系统资源非常小。非常适合远程文件的拷贝。
root@9e1b142b67fc:~# scp /etc/supervisor/supervisord.conf 172.19.229.242:/opt/dockerfile/system/ubuntu-ssh/
[email protected]'s password:
Permission denied, please try again.
没有远程访问的权利,因为这个容器是因为#PermitRootLogin prohibit-password
还没有改成#PermitRootLogin yes,所以干脆先复制好了。目录如下:
root@ubuntu:/opt/dockerfile/system/ubuntu-ssh# tree
.
├── Dockerfile
├── sshd.conf
└── supervisord.conf

0 directories, 3 files
然后打开supervisord.conf文件,把nodaemon=false,改成nodaemon=true.完成之后就是编写Dockerfile了,新的Dockerfile如下所示:
# Dockerfile for Ubuntu

# Base images
FROM ubuntu:18.04

# maintainer
MAINTAINER Toohoo<[email protected]>

# Base Pkg
RUN \
    apt-get update && \
    apt-get install -y wget libmysqld-dev git redis tree net-tools sudo psmisc vim  && \
    # For SSHD and supervisor
    apt-get install -y openssh-server supervisor && \
    mkdir /var/run/sshd && \
    echo 'root:123456' |chpasswd &&\
    sed -ri 's/^#PermitRootLogin\s+.*/PermitRootLogin yes/' /etc/ssh/sshd_config && \
    sed -ri 's/UsePAM yes/#UsePAM yes/g' /etc/ssh/sshd_config && \
    # For sshd directory
    mkdir -p /home/sshd_test && \
    # add user,pwd and encoding
    useradd toohoo && \
    mkdir -p /home/toohoo && \
    /bin/echo 'toohoo:123456'|chpasswd && \
    /bin/echo -e "LANG=\"en_US.UTF-8\"" > /etc/default/local
#    rm -rf /var/lib/apt/lists/*

# For supervisor
ADD supervisord.conf  /etc/supervisor/supervisord.conf
ADD sshd.conf  /etc/supervisor/conf.d/sshd.conf

#  expose sshd port
EXPOSE 22

# start to run
CMD ["/usr/bin/supervisord","-c","/etc/supervisor/supervisord.conf"]
使用命令开始构建镜像:
root@ubuntu:/opt/dockerfile/system/ubuntu-ssh# docker build -t toohoo/ubuntu-sshd:v2 .
...
root@ubuntu:/opt/dockerfile/system/ubuntu-ssh# docker images
REPOSITORY                                                   TAG                 IMAGE ID            CREATED             SIZE
toohoo/ubuntu-sshd                                           v2                  10febd7834f7        7 minutes ago       427MB
toohoo/ubuntu-sshd                                           v1                  6243de6e6b5e        10 hours ago        365MB
toohoo/ubuntu                                                base                cf852d5a9b91        24 hours ago        271MB
可以看到镜像toohoo/ubuntu-sshd:v2,下面使用此镜像构建一个容器,例如已经构建好的容器:
root@ubuntu:/opt/dockerfile/system/ubuntu-ssh# docker ps -a|grep ubuntu-sshd-supervisor
bdfd0332749c        toohoo/ubuntu-sshd:v1                                        "/usr/bin/supervisor…"   10 hours ago        Exited (255) 3 hours ago    0.0.0.0:9922->22/tcp                         ubuntu-sshd-supervisor
运行环境的镜像构建
镜像一:构建Java的运行环境
直接编写Dockerfile,注意的是,镜像使用的是上文的sshd基础镜像toohoo/ubuntu-sshd:v2,直接编写的Dockerfile如下:
# Dockerfile for Ubuntu

# Base images
FROM toohoo/ubuntu-sshd:v1

# maintainer
MAINTAINER Toohoo<[email protected]>

# JDK
RUN apt-get update && \
    apt-get install -y openjdk-8-jdk
#    rm -rf /var/lib/apt/lists/*

# ENV环境变量关键字在这里使用上了
ENV JAVA_HOME /usr/lib/jvm/java-8-openjdk-amd64

#  expose sshd port
EXPOSE 22

# start to run
CMD ["/usr/bin/supervisord","-c","/etc/supervisor/supervisord.conf"]
然后进行构建:
root@ubuntu:/opt/dockerfile/runtime# docker build -t toohoo/runtime-java .
然后等着,他就是帮忙将jdk装上而已,生产一般需要使用JAVA_HOME ,也需要配置加上。
-注意:centos里面的openjdk的软件名称和Ubuntu的不同,当然安装的文件位置也会不同。
镜像二:构建Tomcat的运行环境
不建议在构建Tomcat的时候基于以上的Java环境,因为版本问题,可能会出现版本不匹配问题,分开写会更好,但是也可以,下面就利用构建好runtime-java镜像构建Tomcat镜像,同样道理,为了知道安装了什么,也可以创建一个容器进行实验,然后将命令转移到dockerfile中即可,下面是构建Tomcat的运行环境的Dockerfile文件的内容:
# Dockerfile for Ubuntu
# Base images
FROM toohoo/ubuntu-sshd:v1
# maintainer
MAINTAINER Toohoo<[email protected]>
# JDK
RUN apt-get update && \
    apt-get install -y openjdk-8-jdk
#    rm -rf /var/lib/apt/lists/*
# ENV环境变量关键字在这里使用上了
ENV JAVA_HOME /usr/lib/jvm/java-1.8.0-openjdk-amd64
# Tomcat 自动解压
ADD apache-tomcat-8.5.39.tar.gz /usr/local
RUN ln -s /usr/local/apache-tomcat-8.5.39/ /usr/local/tomcat
ADD tomcat.conf  /etc/supervisor/conf.d
ENV TOMCAT_HOME /usr/local/tomcat
#  expose sshd port
EXPOSE 22
# start to run
CMD ["/usr/bin/supervisord","-c","/etc/supervisor/supervisord.conf"]
同样的,使用supervisor启动tomcat要创建一个配置文件:tomcat.conf,文件内容如下所示:
[program:tomcat]
command=/usr/local/tomcat/bin/catalina.sh run
directory=/home
autostart=true
autorestart=true
stderr_logfile=/var/log/supervisor/sshd.log
stdout_logfile=/var/log/supervisor/sshd.log
user=root
stopsignal=INT
- 注意:不能直接使用/usr/local/tomcat/bin/catalina.sh运行,需要使用supervisor加载运行命令:/usr/local/tomcat/bin/catalina.sh run。
应用层业务的镜像构建
以下使用Jenkins的镜像构建为例,dockerfile的主要内容为:
# Dockerfile for jenkins

# Base images
FROM toohoo/runtime-tomcat

# maintainer
MAINTAINER Toohoo<[email protected]>

# Jenkins
ADD jenkins.war /usr/local/tomcat/webapps/

#  expose sshd port
EXPOSE 22 8080

# start to run
CMD ["/usr/bin/supervisord","-c","/etc/supervisor/supervisord.conf"]
就是只是添加war包到webapps目录,使用ADD会帮助自动解压。接着就是构建一个容器,进行Jenkins的安装。最后打包提交已经设置好用户名和密码的容器为最新的镜像即可。
本来可以更详细的,无奈CSND的md不会自动保存!
