Spring+ActiveMQ+Flex- 智慧公交
转载请注明出处
智能公交调度系统-系统结合了GPS GIS GPRS 等,将车辆的状态信息实时传到调度中心,调度中心可以自动调度和监控车辆。通过将GPS接入后台在通过消息中间件将消息发送到前端,前端可以实时看到车辆运行状态、运行轨迹等信息。该县的公交数量有280辆,我们采用BlazeDS(免费)完全可以胜任,LCDS(商业)比较昂贵,但性能好。
那就简单介绍一下是以Flex为前台,结合BlazeDS和ActiveMQ以及Spring实现接收JMS消息的方法(publish/subscribe模式)。在消息订阅上采用UDP还是TCP根据具体情况具体选择,UDP传输速度快,TCP传输速度不如UDP,但可靠性好。视频传输、聊天软件大多采用的都是UDP。
具体的实现方式是:
1.用Spring中配置的Sender bean的send()方法向ActiveMQ发送JMS消息;
2.用Spring中配置的Receiver bean 的receive()方法从ActiveMQ接收消息;
3.然后通过BlazeDS的messaging模式将消息发送到Flex的消息订阅者上(推送到客户端)。
本例需要用到的环境包括:FlexPlugin、MyEclipse、ActiveMQ、BlazeDS
一.Blazeds
blazeDS采用amf协议。该协议可以传输Object,Array, Date, XML。由于AMF采用二进制编码,这种方式可以高度压缩数据,因此非常适合用来传递大量的资料。数据量越大,FlashRemoting的传输效能就越高,远远超过WebService。至于XML,LoadVars和loadVariables(),它们使用纯文本的传输方式,效能就更不能与FlashRemoting相提并论了。
将下载的blazeds.war 拷贝到tomcat webapp目录下,运行tomcat。Tomcat webapp目录下会生成blazeds文件夹。
二.ActiveMQ
ActiveMQ是Apache出品,最流行的、功能强大的即时通讯和集成模式的开源服务器。ActiveMQ 是一个完全支持JMS1.1和J2EE 1.4规范的 JMS Provider实现。提供客户端支持跨语言和协议,带有易于在充分支持JMS 1.1和1.4使用J2EE企业集成模式和许多先进的功能。
到官网下载activeMQ5.9 修改activeMQ conf文件夹下activemq.xml配置文件,加入UDP传输方式(
activemq.xml
-
-
-
-
-
-
file:${activemq.conf}/credentials.properties
-
-
-
-
-
-
-
-
-
-
-
-
-
-
-
-
-
-
-
-
-
-
-
-
三.创建 web project(j2ee 5.0)

将tomcat blazeds文件夹中的文件覆盖掉 工程SpringFlexMQ WebRoot下的文件。
四.Web.xml配置
-
-
  index.jsp

-
  flex.messaging.HttpFlexSession

-
  flex
  org.springframework.web.servlet.DispatcherServlet
-
  contextConfigLocation
  classpath*:applicationContext.xml

  1

-
  flex
  /messagebroker/*

-
  MessageBrokerServlet
  flex.messaging.MessageBrokerServlet
-
  services.configuration.file
  /WEB-INF/flex/services-config.xml

  1

-
  ControlServlet1
  com.test.jms.servlet.ControlServlet1

-
  ControlServlet1
  /ControlServlet1
SSH整合的时候会注册spring 的ContextLoaderListene,但在这里给去掉了。似乎不是完美,这些问题以后会慢慢解决。
五.工程建好以后可以看到flex文件夹里的四个配置文件,修改配置文件。
1.messaging-config.xml
-
-

-

-
-
-
100
2
true
-
-


-
-
-
-


-
-
-
-
-
-
-
false
-
true
4
-
0
100
5000
-
-
-
-
[BlazeDS]
false
false
false
false
-
Endpoint.*
Service.*
Configuration
-
-
false
六.Spring的配置文件applicationContext.xml
-
-
-
-
七.Java后台代码
1. Sender.java
package com.test.jms.util;


import javax.jms.Connection;
import javax.jms.ConnectionFactory;
import javax.jms.Destination;
import javax.jms.JMSException;
import javax.jms.MessageProducer;
import javax.jms.Session;
import org.apache.activemq.ActiveMQConnection;
import org.apache.activemq.ActiveMQConnectionFactory;
public class Sender {


	public void send(String s) {

		try {
		// 连接工厂,负责创建Connection
		ConnectionFactory connectionFactory = null;
		// 负责创建 Session
		Connection connection = null;
		// 创建 MessageProducer(用来发消息) 和 MessageConsumer(用来接收消息)
		Session session = null;
		// 消息的目的地
		Destination destination = null;
		connectionFactory = new ActiveMQConnectionFactory(ActiveMQConnection.DEFAULT_USER,ActiveMQConnection.DEFAULT_PASSWORD, "udp://192.168.1.22:8123");
		connection = connectionFactory.createConnection();
		connection.start();
		session = connection.createSession(Boolean.FALSE,Session.AUTO_ACKNOWLEDGE);
		// 创建Topic,名字为myTopic
		destination = session.createTopic("myTopic");
		MessageProducer message_producer = session.createProducer(destination);
		// 通过消息生产者发出消息
		message_producer.send(session.createTextMessage(s));

		} catch (JMSException e) {
			e.printStackTrace();
		}
	}
}
2. Receive.java
package com.test.jms.util;


import javax.jms.Connection;
import javax.jms.ConnectionFactory;
import javax.jms.Destination;
import javax.jms.JMSException;
import javax.jms.Message;
import javax.jms.MessageConsumer;
import javax.jms.MessageListener;
import javax.jms.TextMessage;
import javax.jms.Session;
import flex.messaging.MessageBroker;
import flex.messaging.messages.AsyncMessage;
import flex.messaging.messages.AcknowledgeMessage;
import flex.messaging.messages.CommandMessage;
import flex.messaging.util.UUIDUtils;
import org.apache.activemq.ActiveMQConnection;
import org.apache.activemq.ActiveMQConnectionFactory;
import flex.messaging.endpoints.Endpoint;

public class Receive {

	private static ConnectionFactory connectionFactory = null;
	private static Connection connection = null;
	private static Session session = null;
	private static Destination destination = null;
    private static MessageConsumer messageConsumer = null;

	public void doReceive() {

		try {
		connectionFactory = new ActiveMQConnectionFactory(ActiveMQConnection.DEFAULT_USER,ActiveMQConnection.DEFAULT_PASSWORD, "udp://192.168.1.22:8123");
		connection = connectionFactory.createConnection();
		connection.start();
		session = connection.createSession(Boolean.FALSE,Session.AUTO_ACKNOWLEDGE);
		destination = session.createTopic("myTopic");
		if (messageConsumer == null) {

			messageConsumer = session.createConsumer(destination);
		    //重写MessageListener类的onMessage方法
			messageConsumer.setMessageListener(new MessageListener() {

				public void onMessage(Message message) {

					try {
					TextMessage textMessage = (TextMessage) message;
					String msg = null;
					msg = textMessage.getText();
					System.out.println(msg);
			        // 获取消息代理,此处的参数就是Spring配置文件中配置的messagebroker的id
					MessageBroker messageBroker = MessageBroker.getMessageBroker("_messageBroker");
				    String clientID = UUIDUtils.createUUID();
			        //创建AsyncMessage类的对象是为了Flex端用Messaging模式接收消息
				    AsyncMessage asynMsg = new AsyncMessage();
	                // 设置消息的地址,这个必须跟Spring配置文件中信道的destination一致
	 		    	asynMsg.setDestination("market-data-feed");
	 		    	//flex 可以通过header过滤消息
					asynMsg.setHeader("msg","new");
					asynMsg.setClientId(clientID);
			        asynMsg.setMessageId(UUIDUtils.createUUID());
					asynMsg.setTimestamp(System.currentTimeMillis());
					asynMsg.setBody(msg);
				    messageBroker.routeMessageToService(asynMsg, null);

					} catch (JMSException e) {
			             e.printStackTrace();
					try {
					        connection.close();
					    } catch (JMSException e1) {
					       e1.printStackTrace();
					    }
					}

			    }
		   });
	    }
	    } catch (Exception e) {

	    }
    }
}
3. ControlServlet1.java
package com.test.jms.servlet;


import java.io.IOException;
import java.io.PrintWriter;

import javax.servlet.ServletContext;
import javax.servlet.ServletException;
import javax.servlet.http.HttpServlet;
import javax.servlet.http.HttpServletRequest;
import javax.servlet.http.HttpServletResponse;

import org.springframework.context.ApplicationContext;
import org.springframework.web.context.WebApplicationContext;
import org.springframework.web.context.support.WebApplicationContextUtils;


public class ControlServlet1 extends HttpServlet {


	public void init() throws ServletException {


	}

	public void doGet(HttpServletRequest request, HttpServletResponse response)
			throws ServletException, IOException {

		     doPost(request,response);
	}


	public void doPost(HttpServletRequest request, HttpServletResponse response)
			throws ServletException, IOException {


	}

}
八.前台Flex的代码
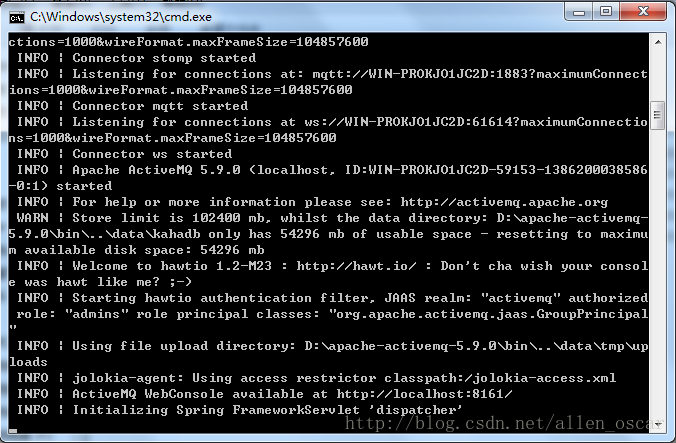
九.启动ActiveMQ
十.启动程序

十一.总结
1. ActiveMQ如何将对象推送到前端,前端又是如何接受对象?
2. Spring如何更有效地管理ActiveMQ?
3. 如何实现订阅的信息筛选?
4. jar包下载地址http://download.csdn.net/detail/allen_gang/6659767