Linux(Ubuntu)安装和完美卸载Apache详细教程和配置多域名、端口映射
Linux(Ubuntu)安装,卸载Apache详细教程
第一种方法–软件包安装(简单便捷)
sudo apt-get update
sudo apt-get install apache2
参考博客:update命令的说明
这样安装的话:
apache2的文件:
- /etc/apache2/apache2.conf 是主要配置文件(这个文件的末尾可以看到,include了其它所有的配置文件)。
- /etc/apache2/ports.conf始终包含在主配置文件中。它用于确定传入连接的侦听端口。
- 其它配置文件在/etc/apache2/sites-enabled,/etc/apache2/conf-enabled,/etc/apache2/mods-enabled目录下。
- apache2的默认web目录:/var/www/html。(在/etc/apache2/sites-enabled/000-default.conf里可以看到这个DocumentRoot /var/www/html配置)
- apache2的默认用户是www-data,定义在/etc/apache2/envvars文件中。
- 设置默认主页的配置文件/etc/apache2/mods-enabled/dir.conf
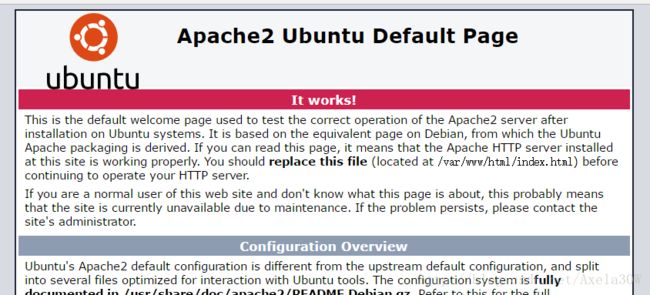
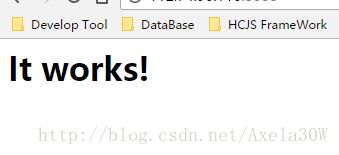
访问:http://你机器的ip。就会看到:It works!这个页面就是放在/var/www/html目录下的index.html。
第二种方法–源码安装(CentOS和Ubuntu都适用,但是挺麻烦)
一、安装gcc/gcc-c++(要确保系统上有编译环境 C )
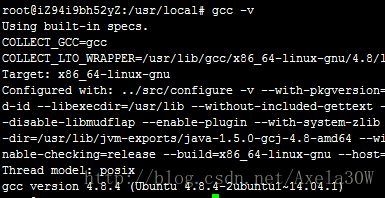
查看是否已安装gcc:(下图是已安装,显示了版本信息)
没有安装的话必须先安装:
yum install gcc-c++
二、下载相关包
下载在/usr/local目录下(也可以下载在电脑上,上传到服务器):
apr:wget http://mirrors.hust.edu.cn/apache/apr/apr-1.6.3.tar.gz
apr-util:wget http://mirrors.hust.edu.cn/apache//apr/apr-util-1.6.1.tar.gz
pcre:wget https://sourceforge.net/projects/pcre/files/pcre/8.32/pcre-8.32.tar.gz
httpd:wget http://mirrors.shuosc.org/apache//httpd/httpd-2.4.29.tar.gz
解压:
提个这里容易报的错:发现怎么也解压不了文件,报这个错:
这个时候用file命令看一看文件是否真的是压缩文件就知道了:
竟然是一个HTML document,这是由于使用wget命令时链接地址不正确导致的,可以试试,例如你用这个地址来下载apr就会是HTML:wget http://apr.apache.org/download.cgi/apr-1.5.2.tar.gz
使用正确链接下载apr显示的就是一个压缩文件:
解压四个压缩文件:
tar -zxvf apr-1.6.3.tar.gz
tar -zxvf apr-util-1.6.1.tar.gz
tar -zxvf pcre-8.32.tar.gz
tar -zxvf httpd-2.4.29.tar.gz
三、安装
1、创建文件夹
2、依次安装
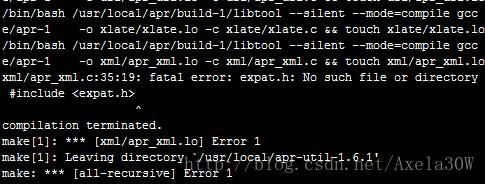
这里安装的时候我遇到一个错误,就是执行make命令的时候:
xml/apr_xml.c:35:19: fatal error: expat.h: No such file or directory。看提示应该是没安装解析xml文件的expat。
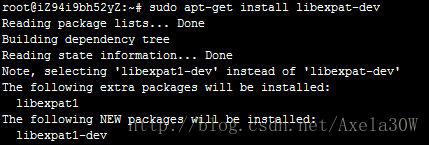
解决办法:cd到root目录下执行:$sudo apt-get install libexpat-dev 安装完就可以了。
apr :
- cd apr-1.6.3
- ./configure –prefix=/usr/local/apr
- make
- make install
apr-util:
- cd /usr/local/apr-util-1.6.1
- ./configure –prefix=/usr/local/apr-util –with-apr=/usr/local/apr/bin/apr-1-config
- make
- make install
pcre:
- cd /usr/local/pcre-8.32
- ./configure –prefix=/usr/local/pcre –with-apr=/usr/local/apr/bin/apr-1-config
- make
- make install
httpd:
- cd /usr/local/httpd-2.4.29
- –prefix=/usr/local/apache2 –sysconfdir=/etc/httpd –enable-so –enable-rewirte –enable-ssl –enable-cgi –enable-cgid –enable-modules=most –enable-mods-shared=most –enable-mpms-shared=all –with-apr=/usr/local/apr –with-apr-util=/usr/local/apr-util
- make
- make install
这里是把配置文件httpd.conf放在/etc/httpd下面的。
启动:/usr/local/apache2/bin/apachectl start
停止:/usr/local/apache2/bin/apachectl stop
重启:/usr/local/apache2/bin/apachectl restart
浏览器访问:http://localhost:80 看到It works!就是启动ok了。可能会遇到许多问题,根据提示一个一个百度都是可以搞定的。
源码安装软件configure时可能会报错:configure: error: xml2-config not found. Please check your libxml2 installation.
解决办法:方法:apt-get install libxml2-dev
三、卸载
sudo apt-get –purge remove apache2
sudo apt-get –purge remove apache2-common
sudo apt-get –purge remove apache2-utils
sudo apt-get autoremove apache2
–purge是不保留配置文件的意思
删掉/etc/apache2文件夹: sudo rm -rf /etc/apache2
删掉/var/www文件夹: sudo rm -rf /var/www
删掉/etc/init.d/apache2文件: sudo rm -rf /etc/init.d/apache2
四、配置多域名、端口映射
Listen 80
Listen 8080
