PXE远程服务器(192.168.1.10)所需准备:
安装源(系统盘文件);
TFTP服务;
DHCP服务;
Linux内核;
能够向客户机裸机发送PXE引导程序;
启动菜单及无人应答文件;
客户端要具备:
客户端的网卡支持PXE协议,且主板支持网络引导(现在大多数都支持);
设置BIOS允许从Network或LAN启动;
配置 yum 仓库源,并安装 ftp 服务:
[root@localhost /]# rm -rf /etc/yum.repos.d/*                     #  个人自定义 yum 仓库,如果觉得还有用的话把它复制到另一个目录中备份起来
[root@localhost /]# vim /etc/yum.repos.d/a.repo

[yum]                                                                // 仓库类别,自定义名称
name=yum                                                       //仓库名称(说明)
baseurl=file:///media                                        // URL 访问路径,可以是 ftp 、http
gpgcheck=0                                                    // 不验证软件包的签名    1为验证
enabled=1                                                      // 启用此软件仓库,可省略
gpgkey=file:///                                                 // GPG 公钥的位置,可省略
[root@localhost /]# yum -y install vsftpd*
准备 centos 安装源
[root@localhost /]# mkdir  /var/ftp/centos7
[root@localhost /]# cp /media/*  /var/ftp/centos7/                   # 将软件源复制到 ftp 目录下
[root@localhost /]# systemctl start vsftpd
[root@localhost /]# systemctl enable vsftpd
安装并启动 TFTP 服务:
[root@localhost /]# yum -y install tftp-server
[root@localhost /]# vim /etc/xinetd.d/tftp                       # 编辑配置文件
........     省略部分
service tftp
{
        socket_type             = dgram
        protocol                = udp                                // TFTP 采用 udp 传输
        wait                    = yes
        user                    = root
        server                  = /usr/sbin/in.tftpd
        server_args             = -s /var/lib/tftpboot       // 指定 TFTP 根目录
        disable                 = no                                  // 将 yes 改为 no
        per_source              = 11
        cps                     = 100 2
        flags                   = IPv4
}
[root@localhost /]# systemctl start tftp.socket                     # 启动服务
[root@localhost /]# systemctl enable tftp.socket                    # 设为开机自启
准备 Linux 内核,初始化镜像文件:
[root@localhost /]# cd /media/images/pxeboot/                 # 系统光盘中自带
[root@localhost pxeboot]# cp vmlinuz initrd.img /var/lib/tftpboot/           # 复制到 TFTP 根目录
准备 PXE 引导程序:
[root@localhost /]# yum -y install syslinux              # PXE 的引导程序由 syslinux 提供
[root@localhost /]# cp /usr/share/syslinux/pxelinux.0 /var/lib/tftpboot/       # 将引导程序复制到 TFTP 根目录下
准备启动菜单文件:
典型的启动菜单,无法实现无人值守安装:
[root@localhost /]# mkdir /var/lib/tftpboot/pxelinux.cfg                # 创建子目录,用于存放启动菜单文件
[root@localhost /]# vim /var/lib/tftpboot/pxelinux.cfg/default              # 启动菜单默认为 default
default auto
prompt 1
label auto
        kernel vmlinuz
        append initrd=initrd.img method=ftp://192.168.1.10/centos7
label linux text
        kernel vmlinuz
        append text initrd=initrd.img method=ftp://192.168.1.10/centos7
label rescue
        kernel vmlinuz
        append rescue initrd=initrd.img method=ftp://192.168.1.10/centos7
无人值守安装的启动菜单:
default auto
prompt 0
label auto
        kernel vmlinuz
        append initrd=initrd.img method=ftp://192.168.1.10/centos7 ks=ftp://192.168.1.1
0/ks.cfg
这里我选择的是无人值守安装,典型安装和正常安装无区别,安装一个 DHCP 服务即可实现安装
安装 DHCP 服务(可参考:https://blog.51cto.com/14227204/2367796):
[root@localhost /]# yum -y install dhcp
subnet 192.168.1.0 netmask 255.255.255.0 {
  range 192.168.1.100 192.168.1.200;
  option domain-name-servers 192.168.1.10;
  option domain-name "internal.example.org";
  option routers 192.168.1.1;
  option broadcast-address 192.168.1.255;
  default-lease-time 21600;
  max-lease-time 43200;
  next-server 192.168.1.10;                        // 指定 TFTP 服务器的地址
  filename "pxelinux.0";                              // 指定 PXE 引导程序的文件名
}
准备安装应答文件:
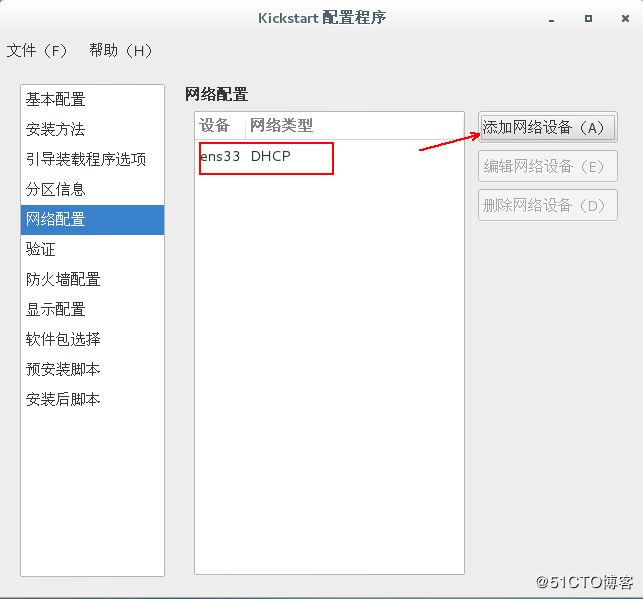
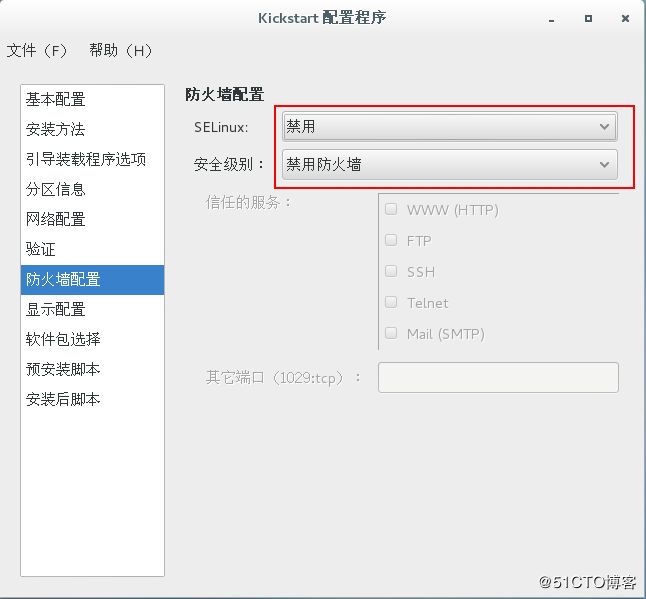
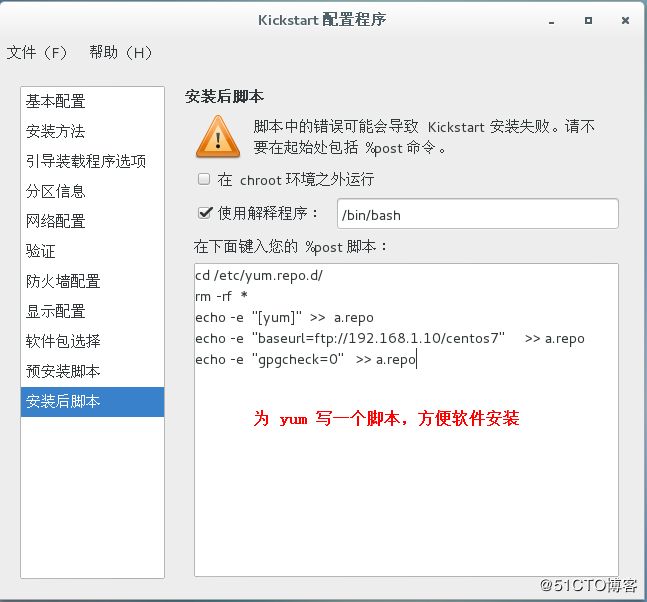
在centos 7 系统中如果安装了system-config-kickstart工具后,可通过图形化向导工具来配置安装应答文件。如果大佬对自动应答文件的配置比较熟悉,也可以直接编辑centos 7 安装后自动创建的应答文件(/root/anaconda-ks.cfg),根据需要适当修改后使用(本人不才,还是老老实实的使用图形化吧):
[root@localhost /]# yum -y install system-config-kickstart # 安装所需工具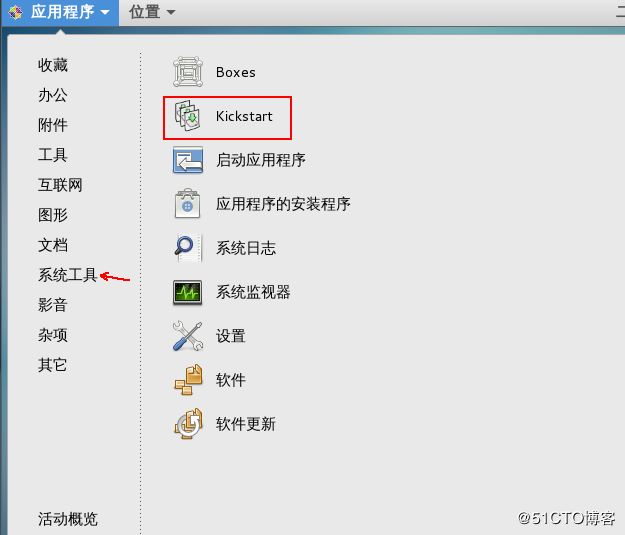
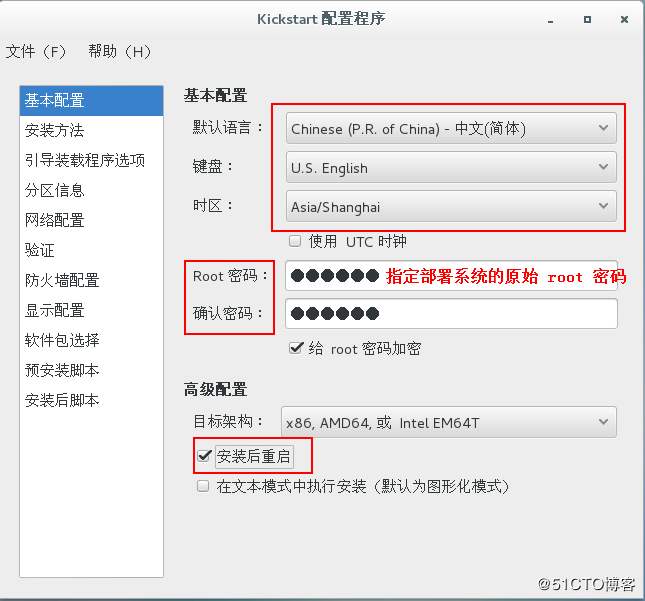

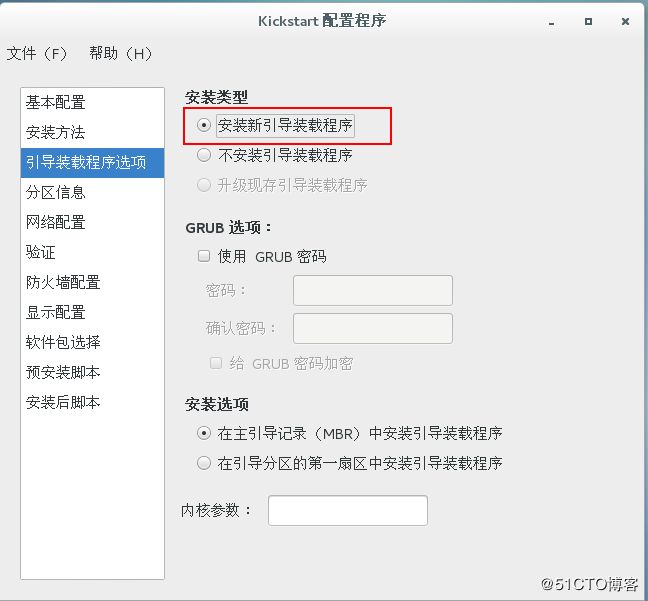
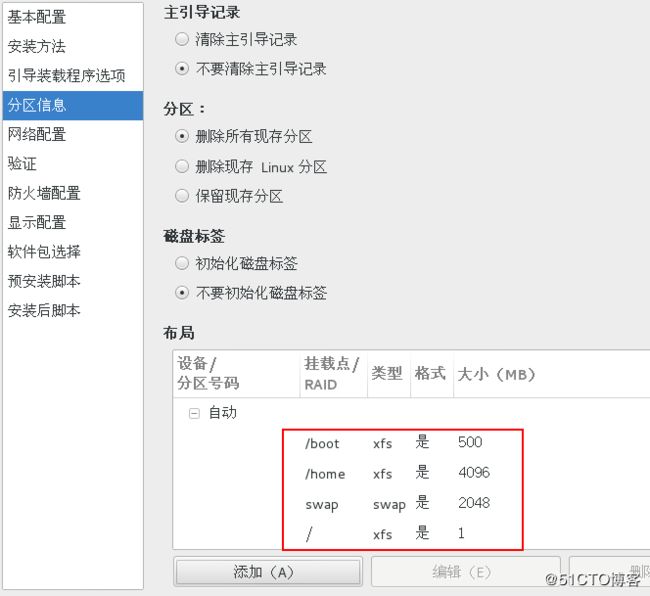

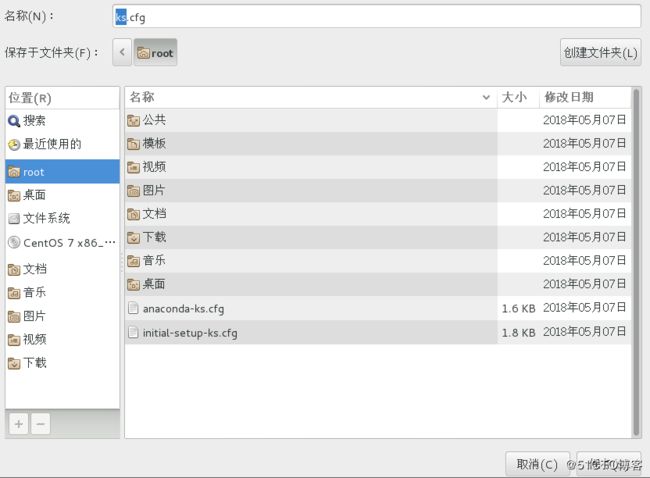
保存后的应答文件:
[root@localhost ~]# vim ks.cfg                         # 生成的应答文件如下
#platform=x86, AMD64, 或 Intel EM64T
#version=DEVEL
# Install OS instead of upgrade
install
# Keyboard layouts
keyboard 'us'
# Root password
rootpw --iscrypted $1$XHDL7LDe$1v1aHaY5Lq2ulgyyPxn/
# Use network installation
url --url="ftp://192.168.1.10/centos7"
# System language
lang zh_CN
# Firewall configuration
firewall --disabled
# System authorization information
auth  --useshadow  --passalgo=sha512
# Use graphical install
graphical
firstboot --disable
# SELinux configuration
selinux --disabled

# Network information

network  --bootproto=dhcp --device=ens33
# Reboot after installation
reboot
# System timezone
timezone Asia/Shanghai
# System bootloader configuration
bootloader --location=mbr
# Partition clearing information
clearpart --all
# Disk partitioning information
part /boot --fstype="xfs" --size=500
part /home --fstype="xfs" --size=4096
part swap --fstype="swap" --size=2048
part / --fstype="xfs" --grow --size=1

%post --interpreter=/bin/bash
cd /etc/yum.repo.d/
rm -rf  *
echo -e  "[yum]"  >>  a.repo
echo -e  "baseurl=ftp://192.168.1.10/centos7"     >> a.repo
echo -e  "gpgcheck=0"   >> a.repo
%end
在如上配置文件末尾添加如下三行,可选择最小安装:
%packages
@^minimal
%end
[root@localhost ~]# cp ks.cfg /var/ftp/ 复制到 ftp 目录下
打开客户机: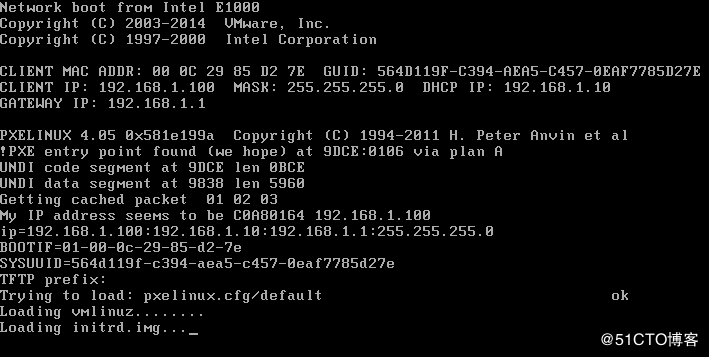
安装完成: