目录
1、memadmin工具简介
2、nginx及php环境安装
3、memadmin工具部署
4、memadmin工具的简单运用
5、额外的配置优化
6、总结
1、memadmin工具简介
MemAdmin是一款可视化的Memcached管理与监控工具,使用PHP开发,体积小,操作简单。
主要功能:
服务器参数监控:STATS、SETTINGS、ITEMS、SLABS、SIZES实时刷新
服务器性能监控:GET、DELETE、INCR、DECR、CAS等常用操作命中率实时监控
支持数据遍历,方便对存储内容进行监视
支持条件查询,筛选出满足条件的KEY或VALUE
数组、JSON等序列化字符反序列显示
兼容memcache协议的其他服务,如Tokyo Tyrant (遍历功能除外)
支持服务器连接池,多服务器管理切换方便简洁
2、nginx及php环境安装
2.1、安装nginx
root@com:~# uname -r
3.16.0-4-amd64
root@com:~# cat /etc/issue
Debian GNU/Linux 8 \n \l
root@test1:~# apt-get install nginx
root@test1:~# chkconfig --list nginx
nginx                     0:off  1:off  2:on   3:on   4:on   5:on   6:off
浏览器访问可见nginx的默认页面,如下:
2.2、php环境部署
root@test1:~# apt-get install php5-fpm
root@test1:~# dpkg -L php5-fpm
/.
/etc
/etc/php5
/etc/php5/fpm
/etc/php5/fpm/conf.d
/etc/php5/fpm/pool.d
/etc/php5/fpm/pool.d/www.conf     #这个是php5-fpm的配置文件
/etc/php5/fpm/php-fpm.conf
/etc/logrotate.d
/etc/logrotate.d/php5-fpm
/etc/init
/etc/init/php5-fpm.conf
/etc/init.d
/etc/init.d/php5-fpm
/usr
/usr/sbin
/usr/sbin/php5-fpm
/usr/lib
/usr/lib/php5
/usr/lib/php5/20131226
/usr/lib/php5/php5-fpm-checkconf
/usr/lib/php5/php5-fpm-reopenlogs
/usr/share
/usr/share/man
/usr/share/man/man8
/usr/share/man/man8/php5-fpm.8.gz
/usr/share/lintian
/usr/share/lintian/overrides
/usr/share/lintian/overrides/php5-fpm
/usr/share/php5
/usr/share/php5/sapi
/usr/share/php5/sapi/fpm
/usr/share/bug
/usr/share/bug/php5-fpm
/usr/share/bug/php5-fpm/script
/usr/share/bug/php5-fpm/control
/usr/share/doc
/lib
/lib/systemd
/lib/systemd/system
/lib/systemd/system/php5-fpm.service
/usr/share/doc/php5-fpm
root@test1:~# vim /etc/php5/fpm/pool.d/www.conf
#listen = /var/run/php5-fpm.sock      注释此行,这不是必须的,只是我习惯让php5-fpm监听在一个端口而不是sock上
listen = 9000                                     增加此行使php5-fpm监听在9000端口
root@test1:~# /etc/init.d/php5-fpm restart
[ ok ] Restarting php5-fpm (via systemctl): php5-fpm.service.
root@test1:~# ss -tnl | grep 9000
LISTEN     0      128                       *:9000                     *:*
root@test1:~# vim /etc/nginx/sites-enabled/default
#修改nginx配置,使其能把php的请求转发到php5-fpm,在“#location ~ \.php$ {”代码块的下方增加如下代码:
       location ~ \.php$ {
                fastcgi_pass   127.0.0.1:9000;
                fastcgi_index  index.php;
                fastcgi_param  SCRIPT_FILENAME  /var/www/html$fastcgi_script_name;
                include        fastcgi_params;
        }
nginx: the configuration file /etc/nginx/nginx.conf syntax is ok
nginx: configuration file /etc/nginx/nginx.conf test is successful
root@test1:~# vim /var/www/html/info.php

root@test1:~# nginx -t
root@test1:~# /etc/init.d/nginx restart
[ ok ] Restarting nginx (via systemctl): nginx.service.
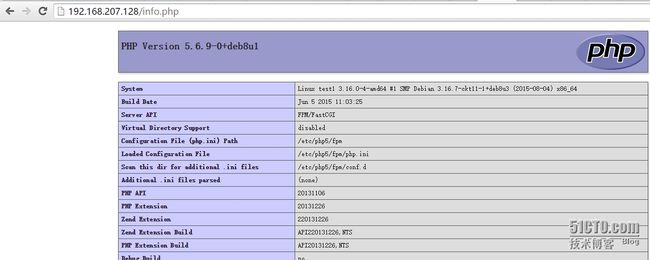
浏览器打开php的测试面试,如下:
3、memadmin工具部署及简单运用
root@test1:~# ls
memadmin-1.0.12.tar.gz
root@test1:~# tar xf memadmin-1.0.12.tar.gz -C /var/www/html/
root@test1:~# cd /var/www/html/
root@test1:/var/www/html# ls
index.nginx-debian.html  info.php  memadmin
访问memadmin测试,如下:
报错了,根据错误提示安装memcache的扩展支持:
root@test1:/var/www/html# apt-get install php5-memcache
root@test1:/var/www/html# dpkg -L php5-memcache
/.
/usr
/usr/lib
/usr/lib/php5
/usr/lib/php5/20131226
/usr/lib/php5/20131226/memcache.so      #库文件在这里
/usr/share
/usr/share/doc
/usr/share/doc/php5-memcache
/usr/share/doc/php5-memcache/examples
/usr/share/doc/php5-memcache/examples/memcache.php.gz
/usr/share/doc/php5-memcache/examples/example.php
/usr/share/doc/php5-memcache/changelog.Debian.gz
/usr/share/doc/php5-memcache/copyright
/usr/share/doc/php5-memcache/memcache.php.gz
/usr/share/doc/php5-memcache/changelog.gz
/usr/share/doc/php5-memcache/package.xml.gz
/usr/share/doc/php5-memcache/README.gz
/usr/share/doc/php5-memcache/CREDITS
/usr/share/doc/php5-memcache/example.php
/usr/share/php
/usr/share/php/.registry
/usr/share/php/.registry/.channel.pecl.php.net
/usr/share/php/.registry/.channel.pecl.php.net/memcache.reg
/etc
/etc/php5
/etc/php5/mods-available
/etc/php5/mods-available/memcache.ini
root@test1:/var/www/html# vim /etc/php5/fpm/php.ini
#搜索“extension”关键字,在“; extension_dir = "ext" ”下增加下边的代码
extension_dir = "/usr/lib/php5/20131226"
extension = memcache.so
root@test1:/var/www/html# /etc/init.d/php5-fpm restart
[ ok ] Restarting php5-fpm (via systemctl): php5-fpm.service.
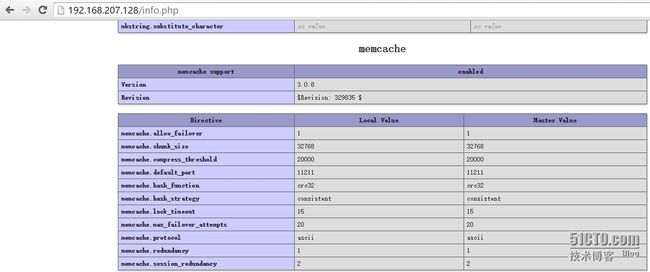
再次访问测试页面,如下,有memcache的相关信息:
至此,memadmin工具部署完成。
4、memadmin工具的简单运用
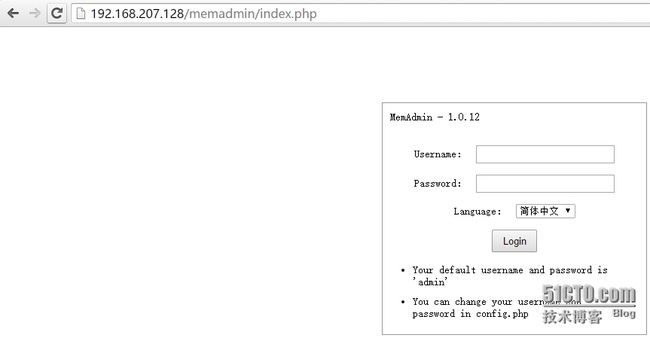
默认时memadmin工具的登陆用户名及密码都为admin,可以在配置文件中进行更改,如下:
root@test1:/var/www/html# pwd /var/www/html root@test1:/var/www/html# vim memadmin/config.php登陆memadmin后是如下页面:
点击“添加”后,memcached就被添加到“服务器连接列表”中,如下:
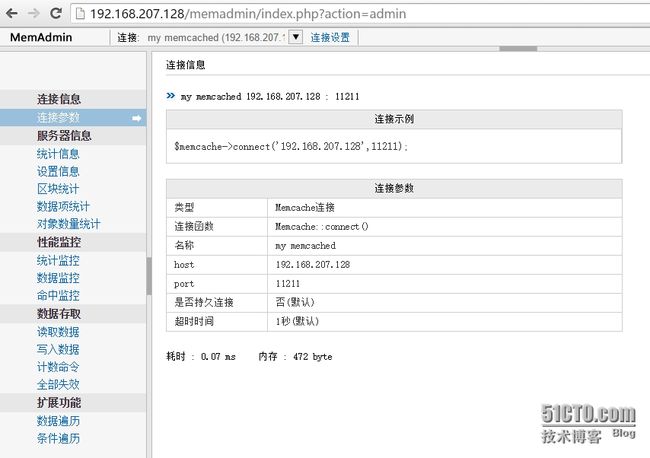
再点击“开始管理”后,就可察看memcached服务器的监控信息,如下图:
接下来就摸索着使用这工具吧!
5、额外的配置优化
现在,我们是可以尽情的使用memadmin这工具了,但此服务器的主要功能是提供memcached服务,而memadmin只是一个对memcached的管理工具而已,使用频率并不是特别高,所以,分配给nginx,php5-fpm的资源只需要一点即可,特别是在你服务器资源很紧张的情况下更应该对nginx和php5-fpm这两个服务进行优化。
5.1、nginx优化
先来看看默认时nginx的工作特性,如下:
root@test1:~# pgrep nginx 11748 11750 11751 11752 11753 root@test1:~# ps aux | grep nginx root 11748 0.0 0.3 91172 3064 ? Ss 12:25 0:00 nginx: master process /usr/sbin/nginx -g daemon on; master_process on; www-data 11750 0.0 0.4 91816 4776 ? S 12:25 0:01 nginx: worker process www-data 11751 0.0 0.4 91828 5028 ? S 12:25 0:00 nginx: worker process www-data 11752 0.0 0.3 91476 3752 ? S 12:25 0:01 nginx: worker process www-data 11753 0.0 0.3 91476 3752 ? S 12:25 0:01 nginx: worker process root 12909 0.0 0.2 12948 2196 pts/1 S+ 15:53 0:00 grep nginx #默认时,nginx有一个主进程,4个worker进程root@test1:~# ss -tnl | grep 80 LISTEN 0 128 *:80 *:* LISTEN 0 128 :::80 :::* #默认时,nginx监听了IPV6的地址针对我这里的环境,nginx只需要开启一个worker进程即可,对IPV6地址的监听也没有必要,所以做如下修改:
root@test1:~# find /etc/nginx/* -type f | xargs grep "worker_processes" /etc/nginx/nginx.conf:worker_processes 4; root@test1:~# vim /etc/nginx/nginx.conf worker_processes 1; #修改为“1” root@test1:~# find /etc/nginx/* -type f | xargs grep "listen 80" /etc/nginx/sites-available/default:listen 80 default_server; /etc/nginx/sites-available/default:#listen 80; root@test1:~# vim /etc/nginx/sites-available/default ..... server { listen 80 default_server; #listen [::]:80 default_server; #注释此行 root@test1:~# nginx -t nginx: the configuration file /etc/nginx/nginx.conf syntax is ok nginx: configuration file /etc/nginx/nginx.conf test is successful root@test1:~# /etc/init.d/nginx reload [ ok ] Reloading nginx configuration (via systemctl): nginx.service. 优化后的结果如下: root@test1:~# ps aux | grep nginx root 11748 0.0 0.4 91280 5000 ? Ss 12:25 0:00 nginx: master process /usr/sbin/nginx -g daemon on; master_process on; www-data 13031 0.0 0.3 91600 3808 ? S 16:00 0:00 nginx: worker process root 13052 0.0 0.2 12948 2064 pts/1 S+ 16:01 0:00 grep nginx root@test1:~# ss -tnl | grep 80 LISTEN 0 128 *:80 *:*5.2、php优化
在这里针对php的优化,我们可以控制php5-fpm的工作进程数来达到节约资源的目的,最开始在“/etc/php5/fpm/php-fpm.conf”文件是找了半天都没有找到相关的配置选项,最后还是动用强大的find命令找到了相关的配置文件。
先来看看默认时php的启动进程数:
root@test1:~# ps aux | grep php root 11946 0.0 1.3 93540 13996 ? Ss 12:32 0:01 php-fpm: master process (/etc/php5/fpm/php-fpm.conf) www-data 11949 0.0 1.0 94124 10720 ? S 12:32 0:00 php-fpm: pool www www-data 11950 0.0 1.1 93980 12088 ? S 12:32 0:00 php-fpm: pool www root 13124 0.0 0.2 12948 2204 pts/1 S+ 16:06 0:00 grep php默认时php也开启了两个工作进程,这里只需要一个即可,做如下操作:
root@test1:~# find /etc/php5/* -type f | xargs grep "max_children" #查找有"max_children"关键字的文件 /etc/php5/fpm/pool.d/www.conf:; static - a fixed number (pm.max_children) of child processes; /etc/php5/fpm/pool.d/www.conf:; pm.max_children - the maximum number of children that can /etc/php5/fpm/pool.d/www.conf:; pm.max_children - the maximum number of children that /etc/php5/fpm/pool.d/www.conf:pm.max_children = 5关于Php的优化参数有如下几个:
pm、pm.max_children、pm.start_servers、pm.min_spare_servers、pm.max_spare_servers
pm = dynamic #对于专用服务器,pm可以设置为static。
#如何控制子进程,选项有static和dynamic。如果选择static,则由pm.max_children指定固定的子进程数。如果选择dynamic,则由下开参数决定:
pm.max_children #,子进程最大数
pm.start_servers #,启动时的进程数
pm.min_spare_servers #,保证空闲进程数最小值,如果空闲进程小于此值,则创建新的子进程
pm.max_spare_servers #,保证空闲进程数最大值,如果空闲进程大于此值,此进行清理
在这里,我设置的取值如下:root@test1:~# vim /etc/php5/fpm/pool.d/www.conf ..... pm = static #把pm值改为static,默认是dynamic pm.max_children = 1 #把pm.max_clildren的值修改为“1”,默认是“5" root@test1:~# /etc/init.d/php5-fpm restart [ ok ] Restarting php5-fpm (via systemctl): php5-fpm.service. root@test1:~# ps aux | grep php-fpm root 13235 0.0 1.3 93524 14016 ? Ss 16:29 0:00 php-fpm: master process (/etc/php5/fpm/php-fpm.conf) www-data 13238 0.0 0.6 93524 6428 ? S 16:29 0:00 php-fpm: pool www root 13258 0.0 0.1 12944 1984 pts/1 S+ 16:29 0:00 grep php-fpm #现在就只有一个php-fpm的工作进程了通过观察,一个nginx的worker进程占用约4MB内存,一个php-fpm占用约6.5MB内存,通过计算优化后可节约内存=4MB*4+6.5=22.5MB的内存大小。
6、总结
现在公司的系统环境慢慢在从Centos向Debian上迁移,对从没有接触过Debian系统的我来说,还需要一个适应过程,通过这段时间的使用,发现Debian与Centos在使用上还是有许多的不同,这次搭建php环境时就遇到一些问题。
MemAdmin中文界面,操作十分简单,但我在使用中发现几个问题,比如:只能写入数据,而不能读取数据,对状态监控时的刷新时间间隔不生效等。
还有一款简洁的memcached的状态监视工具也不错,叫memcachephp-master,能实现获取KEY所对应的VALUE值,正好弥补我这里MemAdmin不能获取值的不足。此工具部署也很简单,此处就不再演示。


