Hadoop环境搭建详见此文章//www.jb51.net/article/33649.htm。
我们已经知道Hadoop能够通过Hadoop jar ***.jar input output的形式通过命令行来调用,那么如何将其封装成一个服务,让Java/Web来调用它?使得用户可以用方便的方式上传文件到Hadoop并进行处理,获得结果。首先,***.jar是一个Hadoop任务类的封装,我们可以在没有jar的情况下运行该类的main方法,将必要的参数传递给它。input 和output则将用户上传的文件使用Hadoop的JavaAPI put到Hadoop的文件系统中。然后再通过Hadoop的JavaAPI 从文件系统中取得结果文件。
搭建JavaWeb工程。本文使用Spring、SpringMVC、MyBatis框架, 当然,这不是重点,就算没有使用任何框架也能实现。
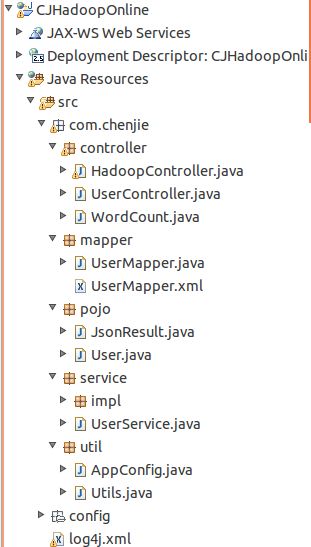
项目框架如下:
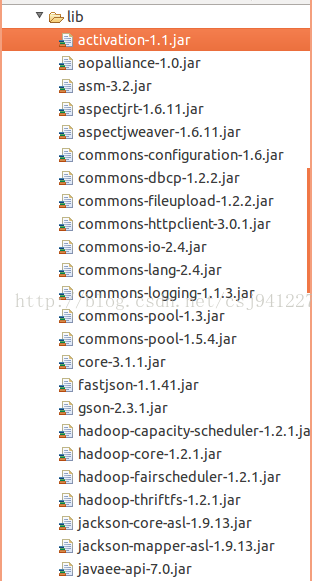
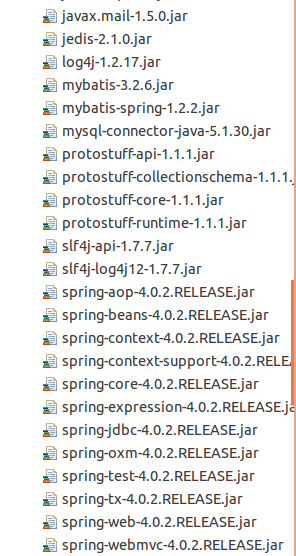
项目中使用到的jar包如下:
在Spring的配置文件中,加入
使得项目支持文件上传。
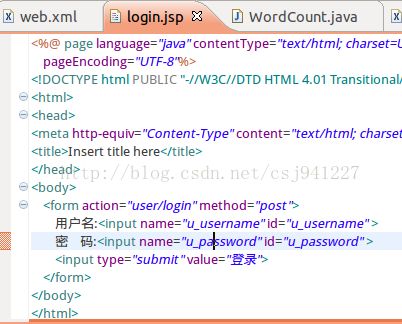
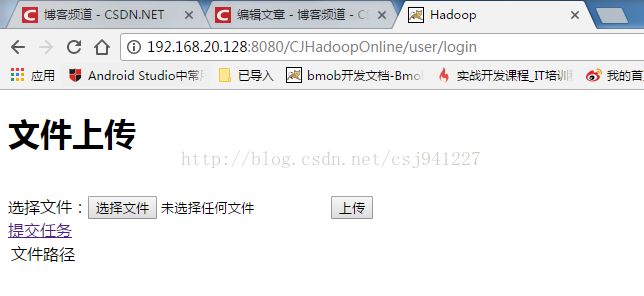
新建一个login.jsp 点击登录后进入user/login
user/login中处理登录,登录成功后,【在Hadoop文件系统中创建用户文件夹】,然后跳转到console.jsp
package com.chenjie.controller;

import java.io.IOException;

import javax.annotation.Resource;

import javax.servlet.http.HttpServletRequest;

import javax.servlet.http.HttpServletResponse;

import org.apache.hadoop.conf.Configuration;

import org.apache.hadoop.fs.FileSystem;

import org.apache.hadoop.fs.Path;

import org.springframework.stereotype.Controller;

import org.springframework.web.bind.annotation.RequestMapping;

import com.chenjie.pojo.JsonResult;

import com.chenjie.pojo.User;

import com.chenjie.service.UserService;

import com.chenjie.util.AppConfig;

import com.google.gson.Gson;
/**

 * 用户请求控制器

 *

 * @author Chen

 *

 */

@Controller

// 声明当前类为控制器

@RequestMapping("/user")

// 声明当前类的路径

public class UserController {

  @Resource(name = "userService")

  private UserService userService;// 由Spring容器注入一个UserService实例
  /**

   * 登录

   *

   * @param user

   *      用户

   * @param request

   * @param response

   * @throws IOException

   */

  @RequestMapping("/login")

  // 声明当前方法的路径

  public String login(User user, HttpServletRequest request,

      HttpServletResponse response) throws IOException {

    response.setContentType("application/json");// 设置响应内容格式为json

    User result = userService.login(user);// 调用UserService的登录方法

    request.getSession().setAttribute("user", result);

    if (result != null) {

      createHadoopFSFolder(result);

      return "console";

    }

    return "login";

  }

  public void createHadoopFSFolder(User user) throws IOException {

    Configuration conf = new Configuration();

    conf.addResource(new Path("/opt/hadoop-1.2.1/conf/core-site.xml"));

    conf.addResource(new Path("/opt/hadoop-1.2.1/conf/hdfs-site.xml"));


    FileSystem fileSystem = FileSystem.get(conf);

    System.out.println(fileSystem.getUri());


    Path file = new Path("/user/" + user.getU_username());

    if (fileSystem.exists(file)) {

      System.out.println("haddop hdfs user foler exists.");

      fileSystem.delete(file, true);

      System.out.println("haddop hdfs user foler delete success.");

    }

    fileSystem.mkdirs(file);

    System.out.println("haddop hdfs user foler creat success.");

  }
}
console.jsp中进行文件上传和任务提交、
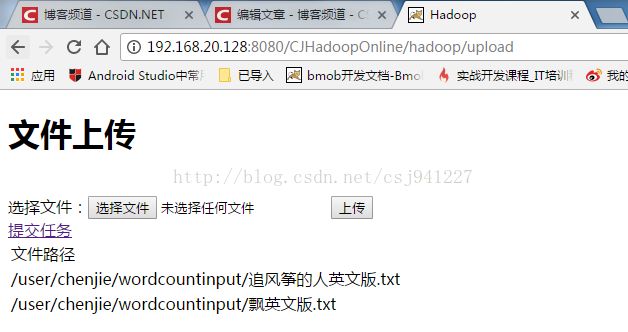
文件上传和任务提交:
package com.chenjie.controller;

import java.io.File;
import java.io.IOException;
import java.net.InetSocketAddress;
import java.net.URI;
import java.util.ArrayList;
import java.util.Iterator;
import java.util.List;

import javax.servlet.http.HttpServletRequest;
import javax.servlet.http.HttpServletResponse;

import org.apache.hadoop.conf.Configuration;
import org.apache.hadoop.fs.FSDataInputStream;
import org.apache.hadoop.fs.FileSystem;
import org.apache.hadoop.fs.Path;
import org.apache.hadoop.mapred.JobClient;
import org.apache.hadoop.mapred.JobConf;
import org.apache.hadoop.mapred.JobID;
import org.apache.hadoop.mapred.JobStatus;
import org.apache.hadoop.mapred.RunningJob;
import org.springframework.stereotype.Controller;
import org.springframework.web.bind.annotation.RequestMapping;
import org.springframework.web.multipart.MultipartFile;
import org.springframework.web.multipart.MultipartHttpServletRequest;
import org.springframework.web.multipart.commons.CommonsMultipartResolver;

import com.chenjie.pojo.User;
import com.chenjie.util.Utils;

@Controller
// 声明当前类为控制器
@RequestMapping("/hadoop")
// 声明当前类的路径
public class HadoopController {

  @RequestMapping("/upload")
  // 声明当前方法的路径
  //文件上传
  public String upload(HttpServletRequest request,
      HttpServletResponse response) throws IOException {
    List fileList = (List) request.getSession()
        .getAttribute("fileList");//得到用户已上传文件列表
    if (fileList == null)
      fileList = new ArrayList();//如果文件列表为空,则新建
    User user = (User) request.getSession().getAttribute("user");
    if (user == null)
      return "login";//如果用户未登录,则跳转登录页面
    CommonsMultipartResolver multipartResolver = new CommonsMultipartResolver(
        request.getSession().getServletContext());//得到在Spring配置文件中注入的文件上传组件
    if (multipartResolver.isMultipart(request)) {//如果请求是文件请求
      MultipartHttpServletRequest multiRequest = (MultipartHttpServletRequest) request;

      Iterator iter = multiRequest.getFileNames();//得到文件名迭代器
      while (iter.hasNext()) {
        MultipartFile file = multiRequest.getFile((String) iter.next());
        if (file != null) {
          String fileName = file.getOriginalFilename();
          File folder = new File("/home/chenjie/CJHadoopOnline/"
              + user.getU_username());
          if (!folder.exists()) {
            folder.mkdir();//如果文件不目录存在,则在服务器本地创建
          }
          String path = "/home/chenjie/CJHadoopOnline/"
              + user.getU_username() + "/" + fileName;

          File localFile = new File(path);

          file.transferTo(localFile);//将上传文件拷贝到服务器本地目录
          // fileList.add(path);
        }
        handleUploadFiles(user, fileList);//处理上传文件
      }

    }
    request.getSession().setAttribute("fileList", fileList);//将上传文件列表保存在Session中
    return "console";//返回console.jsp继续上传文件
  }

  @RequestMapping("/wordcount")
  //调用Hadoop进行mapreduce
  public void wordcount(HttpServletRequest request,
      HttpServletResponse response) {
    System.out.println("进入controller wordcount ");
    User user = (User) request.getSession().getAttribute("user");
    System.out.println(user);
    // if(user == null)
    // return "login";
    WordCount c = new WordCount();//新建单词统计任务
    String username = user.getU_username();
    String input = "hdfs://chenjie-virtual-machine:9000/user/" + username
        + "/wordcountinput";//指定Hadoop文件系统的输入文件夹
    String output = "hdfs://chenjie-virtual-machine:9000/user/" + username
        + "/wordcountoutput";//指定Hadoop文件系统的输出文件夹
    String reslt = output + "/part-r-00000";//默认输出文件
    try {
      Thread.sleep(3*1000);
      c.main(new String[] { input, output });//调用单词统计任务
      Configuration conf = new Configuration();//新建Hadoop配置
      conf.addResource(new Path("/opt/hadoop-1.2.1/conf/core-site.xml"));//添加Hadoop配置,找到Hadoop部署信息
      conf.addResource(new Path("/opt/hadoop-1.2.1/conf/hdfs-site.xml"));//Hadoop配置,找到文件系统

      FileSystem fileSystem = FileSystem.get(conf);//得打文件系统
      Path file = new Path(reslt);//找到输出结果文件
      FSDataInputStream inStream = fileSystem.open(file);//打开
      URI uri = file.toUri();//得到输出文件路径
      System.out.println(uri);
      String data = null;
      while ((data = inStream.readLine()) != null) {
        //System.out.println(data);
        response.getOutputStream().println(data);//讲结果文件写回用户网页
      }
//     InputStream in = fileSystem.open(file);
//     OutputStream out = new FileOutputStream("result.txt");
//     IOUtils.copyBytes(in, out, 4096, true);
      inStream.close();
    } catch (Exception e) {
      System.err.println(e.getMessage());
    }
  }

  @RequestMapping("/MapReduceStates")
  //得到MapReduce的状态
  public void mapreduce(HttpServletRequest request,
      HttpServletResponse response) {
    float[] progress=new float[2];
    try {
      Configuration conf1=new Configuration();
      conf1.set("mapred.job.tracker", Utils.JOBTRACKER);

      JobStatus jobStatus = Utils.getJobStatus(conf1);
//     while(!jobStatus.isJobComplete()){
//       progress = Utils.getMapReduceProgess(jobStatus);
//       response.getOutputStream().println("map:" + progress[0] + "reduce:" + progress[1]);
//       Thread.sleep(1000);
//     }
      JobConf jc = new JobConf(conf1);

      JobClient jobClient = new JobClient(jc);
      JobStatus[] jobsStatus = jobClient.getAllJobs();
      //这样就得到了一个JobStatus数组,随便取出一个元素取名叫jobStatus
      jobStatus = jobsStatus[0];
      JobID jobID = jobStatus.getJobID(); //通过JobStatus获取JobID
      RunningJob runningJob = jobClient.getJob(jobID); //通过JobID得到RunningJob对象
      runningJob.getJobState();//可以获取作业状态,状态有五种,为JobStatus.Failed 、JobStatus.KILLED、JobStatus.PREP、JobStatus.RUNNING、JobStatus.SUCCEEDED
      jobStatus.getUsername();//可以获取运行作业的用户名。
      runningJob.getJobName();//可以获取作业名。
      jobStatus.getStartTime();//可以获取作业的开始时间,为UTC毫秒数。
      float map = runningJob.mapProgress();//可以获取Map阶段完成的比例,0~1,
      System.out.println("map=" + map);
      float reduce = runningJob.reduceProgress();//可以获取Reduce阶段完成的比例。
      System.out.println("reduce="+reduce);
      runningJob.getFailureInfo();//可以获取失败信息。
      runningJob.getCounters();//可以获取作业相关的计数器,计数器的内容和作业监控页面上看到的计数器的值一样。


    } catch (IOException e) {
      progress[0] = 0;
      progress[1] = 0;
    }

    request.getSession().setAttribute("map", progress[0]);
    request.getSession().setAttribute("reduce", progress[1]);
  }

  //处理文件上传
  public void handleUploadFiles(User user, List fileList) {
    File folder = new File("/home/chenjie/CJHadoopOnline/"
        + user.getU_username());
    if (!folder.exists())
      return;
    if (folder.isDirectory()) {
      File[] files = folder.listFiles();
      for (File file : files) {
        System.out.println(file.getName());
        try {
          putFileToHadoopFSFolder(user, file, fileList);//将单个文件上传到Hadoop文件系统
        } catch (IOException e) {
          System.err.println(e.getMessage());
        }
      }
    }
  }

  //将单个文件上传到Hadoop文件系统
  private void putFileToHadoopFSFolder(User user, File file,
      List fileList) throws IOException {
    Configuration conf = new Configuration();
    conf.addResource(new Path("/opt/hadoop-1.2.1/conf/core-site.xml"));
    conf.addResource(new Path("/opt/hadoop-1.2.1/conf/hdfs-site.xml"));

    FileSystem fileSystem = FileSystem.get(conf);
    System.out.println(fileSystem.getUri());

    Path localFile = new Path(file.getAbsolutePath());
    Path foler = new Path("/user/" + user.getU_username()
        + "/wordcountinput");
    if (!fileSystem.exists(foler)) {
      fileSystem.mkdirs(foler);
    }

    Path hadoopFile = new Path("/user/" + user.getU_username()
        + "/wordcountinput/" + file.getName());
//   if (fileSystem.exists(hadoopFile)) {
//     System.out.println("File exists.");
//   } else {
//     fileSystem.mkdirs(hadoopFile);
//   }
    fileSystem.copyFromLocalFile(true, true, localFile, hadoopFile);
    fileList.add(hadoopFile.toUri().toString());

  }

}
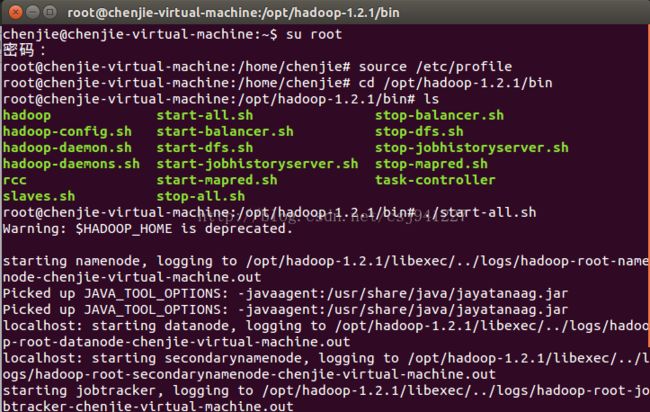
启动Hadoop:
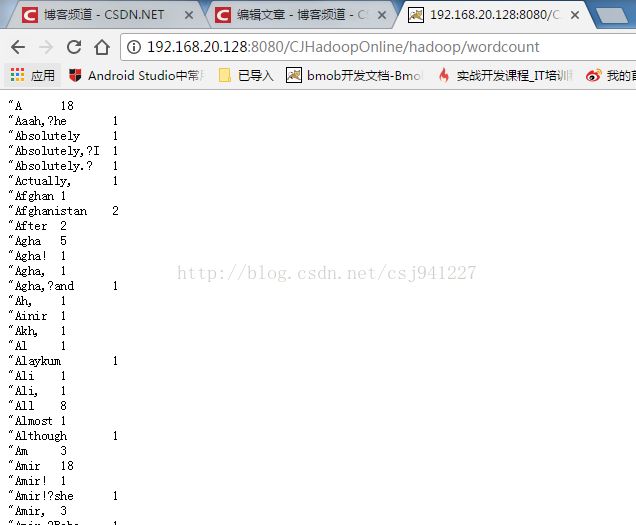
运行结果:
可以在任意平台下,登录该项目地址,上传文件,得到结果。
运行成功。
源代码:https://github.com/tudoupaisimalingshu/CJHadoopOnline
以上就是本文的全部内容,希望对大家的学习有所帮助,也希望大家多多支持脚本之家。
