LeakCanary源码分析
内存泄漏是每个android app都应当重视的东西,在检测内存泄漏这块大家应该都用过LeakCanary这款神器,直接自动检测并形成报告,非常方便查看,github上有直接的使用方式github地址
Demo使用介绍
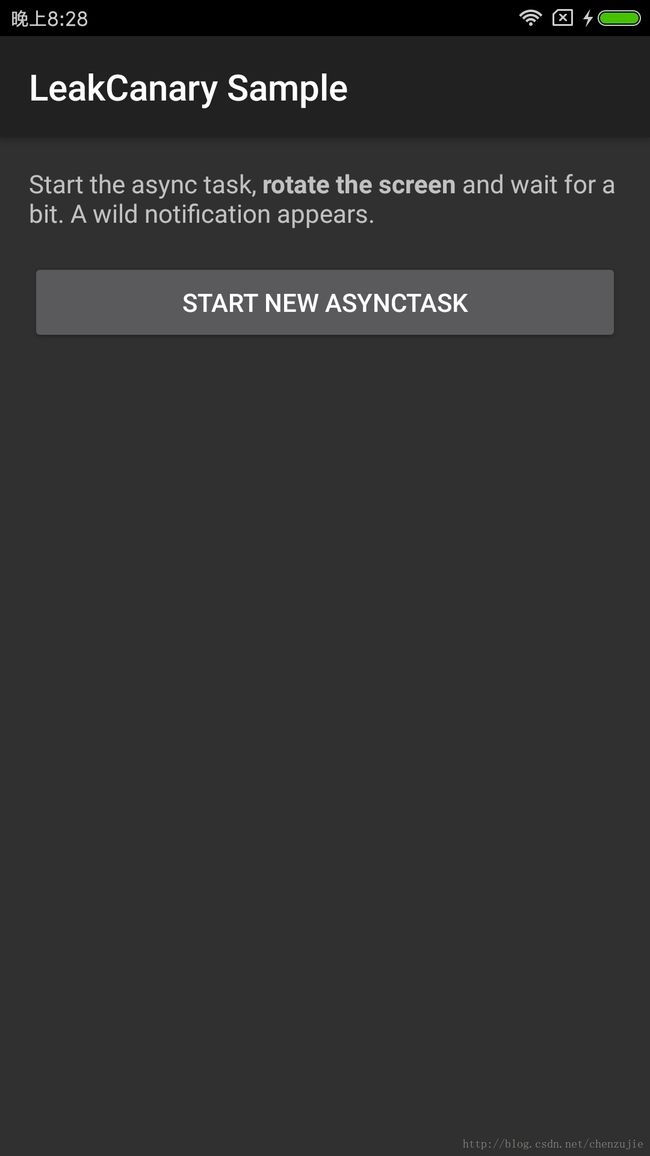
点击按钮,然后旋转屏幕,没一会就发现leakcanary弹内存泄漏的提示。
为什么内存泄漏了,看下demo代码就知道了
void startAsyncTask() {
    // This async task is an anonymous class and therefore has a hidden reference to the outer
    // class MainActivity. If the activity gets destroyed before the task finishes (e.g. rotation),
    // the activity instance will leak.
    new AsyncTask<Void, Void, Void>() {
      @Override protected Void doInBackground(Void... params) {
        // Do some slow work in background
        SystemClock.sleep(20000);
        return null;
      }
    }.execute();
  }
点击按钮会开启一个异步线程,异步线程休眠了20s,大家应该都知道这个异步线程是匿名内部类持有外部Activity的this引用,因此当我们旋转屏幕的时候,Activity destroy了,但这个Activity的引用被AsyncTask那个匿名类持有所以无法及时回收导致泄漏。
泄漏原理很简单,但leakcanary又是如何检测出来的呢?
原理浅析
LeakCanary的原理其实非常简单,了解之后对square的大神们简直膜拜,轻巧的设计搞定复杂的问题。正常情况下一个Activity在destroy之后就要销毁,LeakCanary做的就是在一个Activity destroy之后将它放在一个WeakReference中,然后将这个WeakReference关联到一个ReferenceQueue,然后去检测这个ReferenceQueue是否存在这个Queue,不存在就证明这个Activity泄漏了(WeakReference和ReferenceQueue的特性可以百度下,用这种方法检测内存泄漏确实精巧)。
代码剖析
原理大致了解了,该读源码了read the fucking code。
在Application做install操作
public static RefWatcher install(Application application) {
    return refWatcher(application).listenerServiceClass(DisplayLeakService.class)//内存泄漏的处理Service
        .excludedRefs(AndroidExcludedRefs.createAppDefaults().build())//不需要判断内存泄漏的对象
        .buildAndInstall();
  }
可以看到是一个比较明显的建造者模式,这里分别构造了发现内存泄漏的处理Service以及不要检测的内存泄漏的对象,这里一般是一些系统类,无需关注。直接看buildAndInstall操作。
 /**
   * Creates a {@link RefWatcher} instance and starts watching activity references (on ICS+).
   */
  public RefWatcher buildAndInstall() {
    RefWatcher refWatcher = build();
    if (refWatcher != DISABLED) {
      LeakCanary.enableDisplayLeakActivity(context);
      ActivityRefWatcher.install((Application) context, refWatcher);
    }
    return refWatcher;
  }
可以看到这里构造了一个RefWatch,这个是比较重要的一个类,ActivityRefWatcher会最终给Application注册一个生命周期函数回调
 private final Application.ActivityLifecycleCallbacks lifecycleCallbacks =
      new Application.ActivityLifecycleCallbacks() {
        @Override public void onActivityCreated(Activity activity, Bundle savedInstanceState) {
        }

        @Override public void onActivityStarted(Activity activity) {
        }

        @Override public void onActivityResumed(Activity activity) {
        }

        @Override public void onActivityPaused(Activity activity) {
        }

        @Override public void onActivityStopped(Activity activity) {
        }

        @Override public void onActivitySaveInstanceState(Activity activity, Bundle outState) {
        }

        @Override public void onActivityDestroyed(Activity activity) {
          ActivityRefWatcher.this.onActivityDestroyed(activity);
        }
      };
void onActivityDestroyed(Activity activity) {
refWatcher.watch(activity);
}最重点的watch方法来了。
Retryable.Result ensureGone(final KeyedWeakReference reference, final long watchStartNanoTime) {
    long gcStartNanoTime = System.nanoTime();
    long watchDurationMs = NANOSECONDS.toMillis(gcStartNanoTime - watchStartNanoTime);

    removeWeaklyReachableReferences();

    if (debuggerControl.isDebuggerAttached()) {
      // The debugger can create false leaks.
      return RETRY;
    }
    if (gone(reference)) {
      return DONE;
    }
    gcTrigger.runGc();
    removeWeaklyReachableReferences();
    if (!gone(reference)) {
      long startDumpHeap = System.nanoTime();
      long gcDurationMs = NANOSECONDS.toMillis(startDumpHeap - gcStartNanoTime);
    //获取dump文件
      File heapDumpFile = heapDumper.dumpHeap();
      if (heapDumpFile == RETRY_LATER) {
        // Could not dump the heap.
        return RETRY;
      }
      long heapDumpDurationMs = NANOSECONDS.toMillis(System.nanoTime() - startDumpHeap);
      //分析dump文件
      heapdumpListener.analyze(
          new HeapDump(heapDumpFile, reference.key, reference.name, excludedRefs, watchDurationMs,
              gcDurationMs, heapDumpDurationMs));
    }
    return DONE;
  }
会先进行一次是否被回收的判断(gone方法),没被回收,触发gc操作,再检测是否被回收,如果没被回收就dump内存快照,heapDumper.dumpHeap();
public File dumpHeap() {
    File heapDumpFile = leakDirectoryProvider.newHeapDumpFile();

    if (heapDumpFile == RETRY_LATER) {
      return RETRY_LATER;
    }

    FutureResult waitingForToast = new FutureResult<>();
    showToast(waitingForToast);

    if (!waitingForToast.wait(5, SECONDS)) {
      CanaryLog.d("Did not dump heap, too much time waiting for Toast.");
      return RETRY_LATER;
    }

    Toast toast = waitingForToast.get();
    try {
      Debug.dumpHprofData(heapDumpFile.getAbsolutePath());
      cancelToast(toast);
      return heapDumpFile;
    } catch (Exception e) {
      CanaryLog.d(e, "Could not dump heap");
      // Abort heap dump
      return RETRY_LATER;
    }
  }
dump出文件之后,会把结果交个一个IntentHandler处理
@Override protected void onHandleIntent(Intent intent) {
    if (intent == null) {
      CanaryLog.d("HeapAnalyzerService received a null intent, ignoring.");
      return;
    }
    String listenerClassName = intent.getStringExtra(LISTENER_CLASS_EXTRA);
    HeapDump heapDump = (HeapDump) intent.getSerializableExtra(HEAPDUMP_EXTRA);

    HeapAnalyzer heapAnalyzer = new HeapAnalyzer(heapDump.excludedRefs);
    //分析dump结果
    AnalysisResult result = heapAnalyzer.checkForLeak(heapDump.heapDumpFile, heapDump.referenceKey);
    AbstractAnalysisResultService.sendResultToListener(this, listenerClassName, heapDump, result);
  }
分析过程主要是使用一个haha库进行分析,这个库就不做分析了,将分析得到的可能泄漏的问题回调回去,整个leakcanary基本就这么分析的,原理还是蛮简单的。
功能扩展
了解了LeakCanary的原理之后,发现其实它就是在对象不可用的时候去判断对象是否被回收了,但leakcanary只检查了Activity,我们是否可以检查其他对象呢,毕竟Activity泄漏只是内存泄漏的一种,答案当然是可以的,我们只要需要进行如下操作
LeakCanary.install(app).watch(object)但调用这个方法有个前提就是,我们在调用这个方法的时候确定了这个object已经不需要了,可以被回收了才能调用这个方法,通过这种方式我们就可以对任何对象都进行检测了。
