一、项目说明
项目环境:jdk1.8+tomcat8+idea2018
源代码github地址:
实现目标:创建springBoot项目的方式有很多种方式,比如:(1)可以先创建maven项目,然后添加相关依赖实现(2)可以在快速构建springBoot项目上构建好项目后下载到本地,然后使用开发工具导入即可(3)可以通过开发工具快速创建,eclipse、idea等。这里通过idea快速创建springBoot项目,然后创建测试controller,使用相关注解实现controller的访问。
二、创建步骤
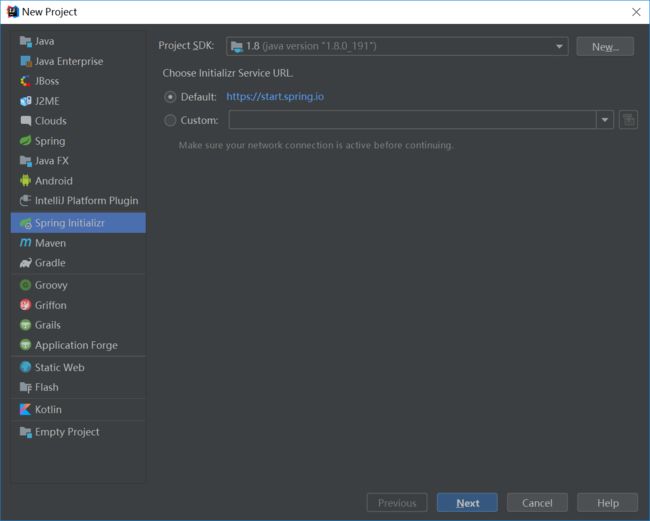
(1)打开idea->File->New->Project
(2)选择Spring initiaizr->Next
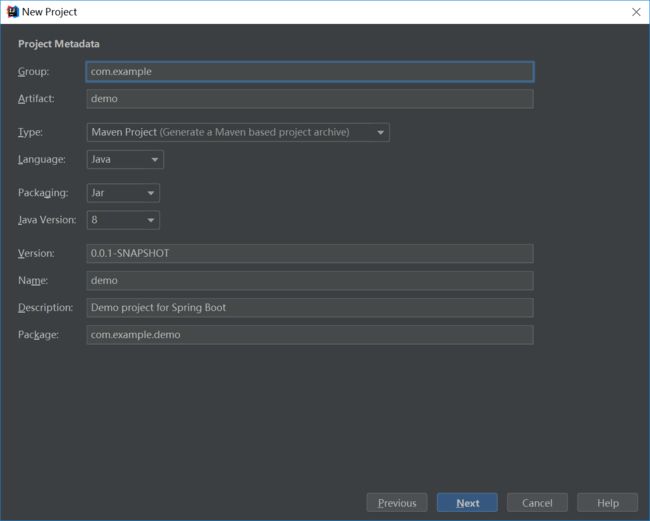
(3)填写项目相关信息->Next
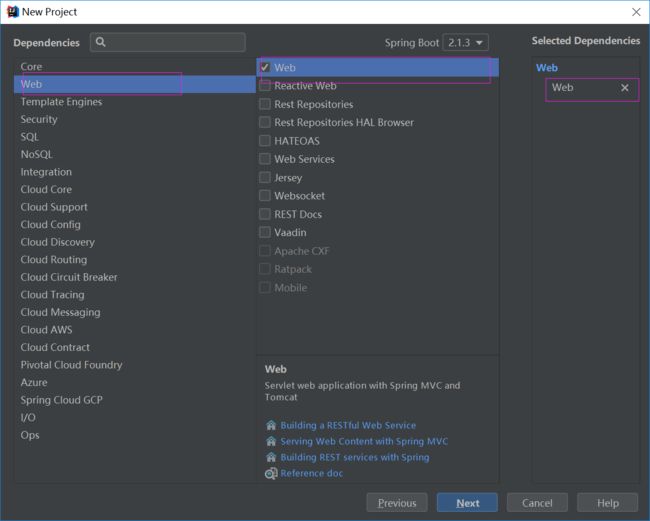
(4)添加web模块->Next
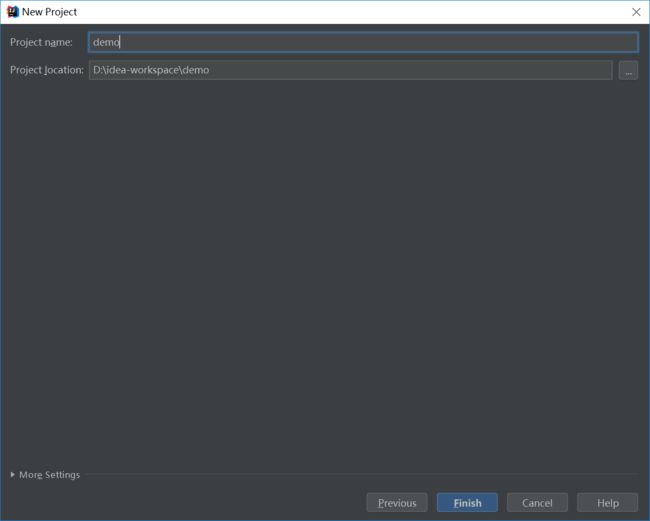
(5)填写项目名称->Finish
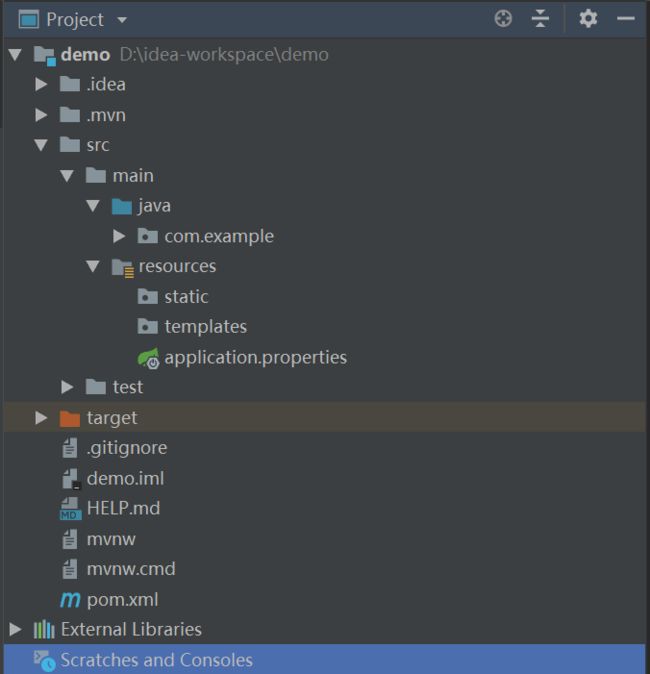
(6)构建好的项目结构如下所示,与一般的java项目结构没有太多区别
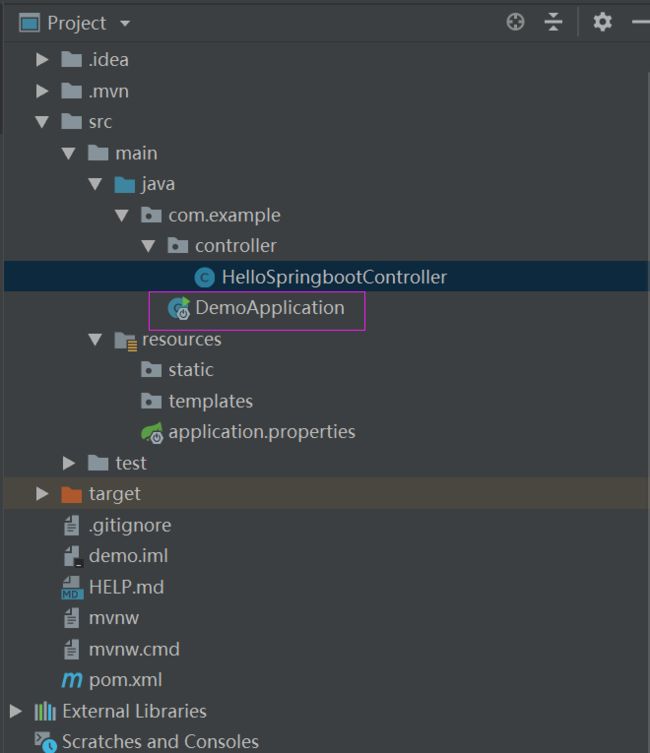
(7)创建controller,实现hello/springBoot接口
注:DemoApplication为项目的启动类,放的位置需与controller包在同一级,否在可能存在访问controller包中的接口访问不到,因为使用@ComponentScan默认扫描的类位于当前类所在的包下面,。
(8)代码说明
A:DemoApplication启动类
@EnableAutoConfiguration:开启自动配置
@ComponentScan:包扫描
@SpringBootApplication=@SpringBootApplication+@ComponentScan
package com.example;

import org.springframework.boot.SpringApplication;
import org.springframework.boot.autoconfigure.EnableAutoConfiguration;
import org.springframework.boot.autoconfigure.SpringBootApplication;
import org.springframework.context.annotation.ComponentScan;

/*
@EnableAutoConfiguration
@ComponentScan
*/
@SpringBootApplication
public class DemoApplication {

    public static void main(String[] args) {
        SpringApplication.run(DemoApplication.class, args);
    }

}
B:HelloSpringbootController控制器类
@RestController("hello"):@RestController是@ResponseBody和@Controller的组合注解
@GetMapping("/springBoot"):表示一个get请求
package com.example.controller;

import org.springframework.web.bind.annotation.GetMapping;
import org.springframework.web.bind.annotation.RestController;

@RestController
public class HelloSpringbootController {
    @GetMapping("/springBoot")
    public String sayHello(){
        return "Hello Springboot!";
    }
}
(9)启动项目,并访问

