Android EditText使用详解
Android EditText使用详解
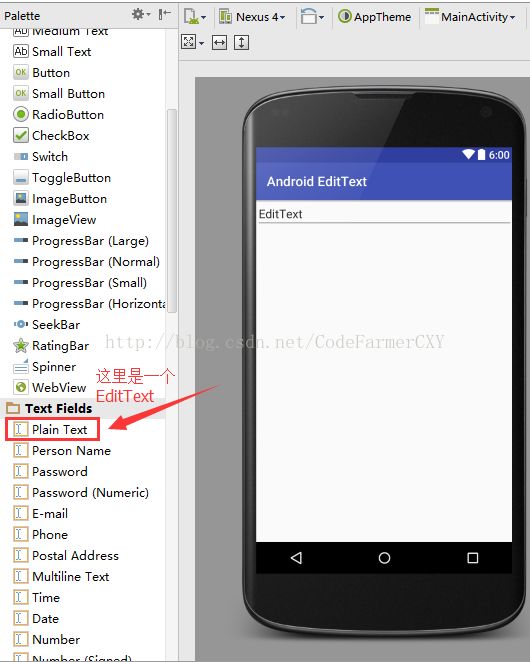
一:新建一个EditText文本
xml version="1.0" encoding="utf-8"?>
<RelativeLayout
    xmlns:android="http://schemas.android.com/apk/res/android"
    xmlns:tools="http://schemas.android.com/tools"
    android:layout_width="match_parent"
    android:layout_height="match_parent"
    tools:context="com.example.cxy.androidedittext.MainActivity">

    <EditText
        android:text="EditText"
        android:layout_width="match_parent"
        android:layout_height="wrap_content"
        android:id="@+id/editText"/>
RelativeLayout>
这里添加了一个id为"editText"的EditText,设置默认显示为本为“EditText”
二:EditText简介
EditText是一个非常重要的组件,它是用户和Android应用进行数据传输窗户,有了它就等于有了一扇和Android应用传输的门,通过它用户可以把数据传给Android应用,然后得到我们想要的数据。EditText是TextView的子类,所以TextView的方法和特性同样存在于EditText中。
三:EditText的常用属性
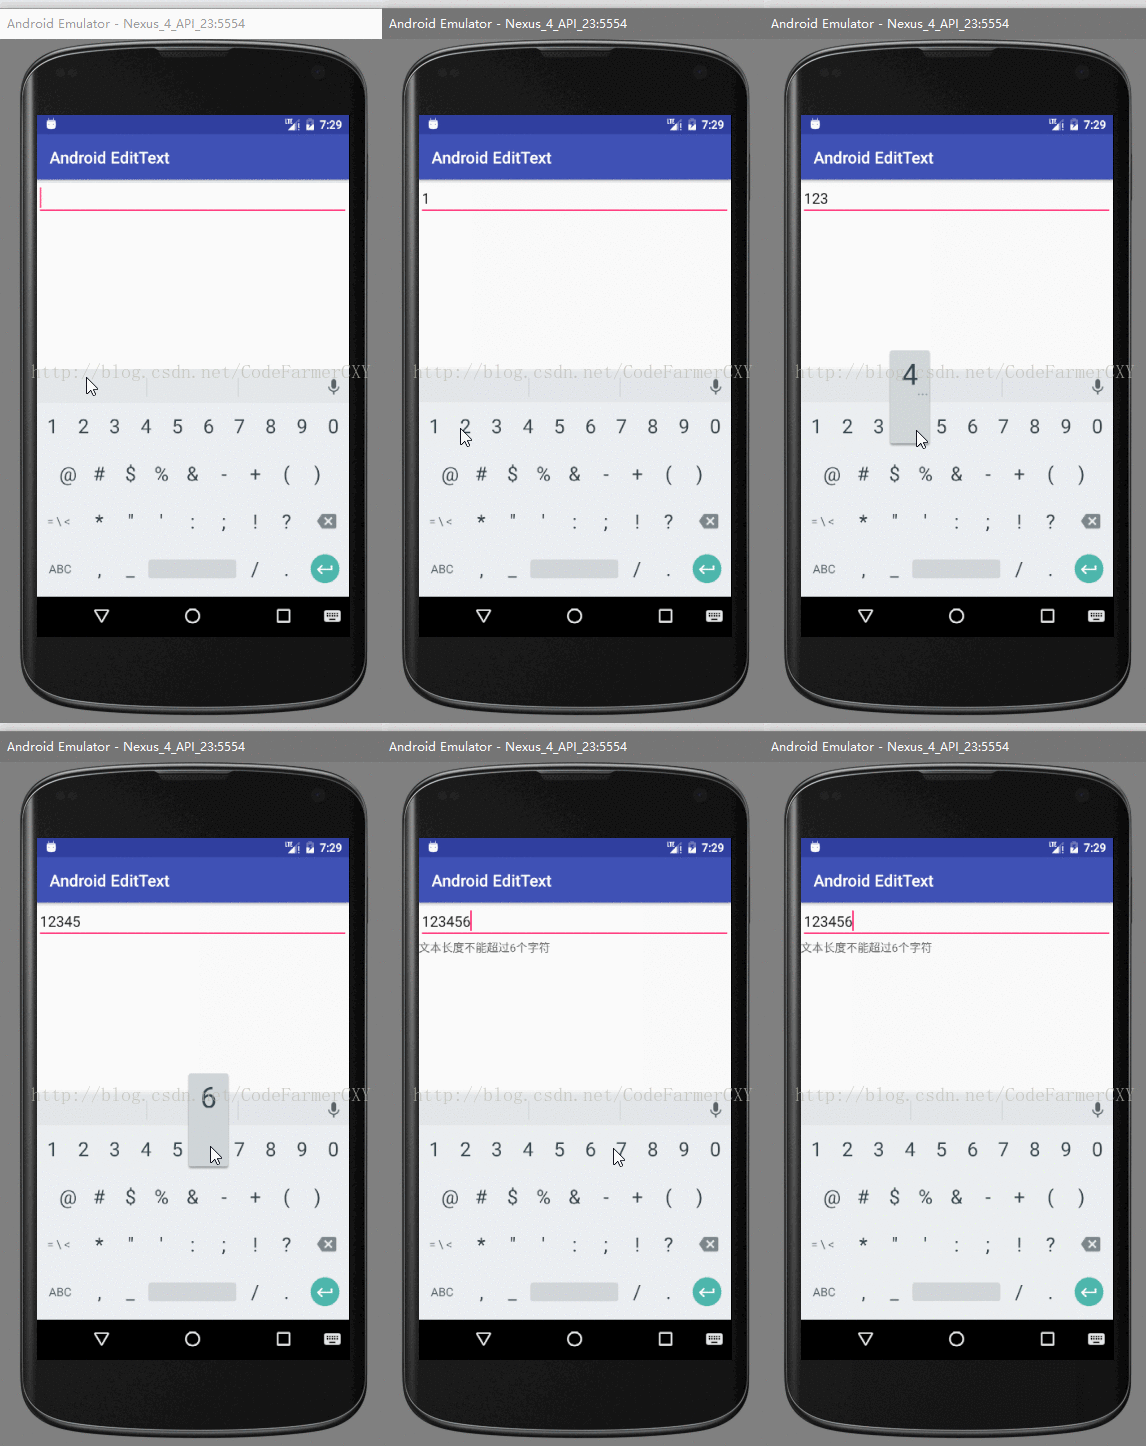
1.android:maxLength属性,用来设置最大输入字符个数,比如android:maxLength=“6”就表示最多能输入6个字符,再多了就输入不进去了。
xml version="1.0" encoding="utf-8"?>
<RelativeLayout
    xmlns:android="http://schemas.android.com/apk/res/android"
    xmlns:tools="http://schemas.android.com/tools"
    android:layout_width="match_parent"
    android:layout_height="match_parent"
    tools:context="com.example.cxy.androidedittext.MainActivity">

    <EditText
        android:maxLength="6"
        android:layout_width="match_parent"
        android:layout_height="wrap_content"
        android:id="@+id/editText"/>
RelativeLayout>
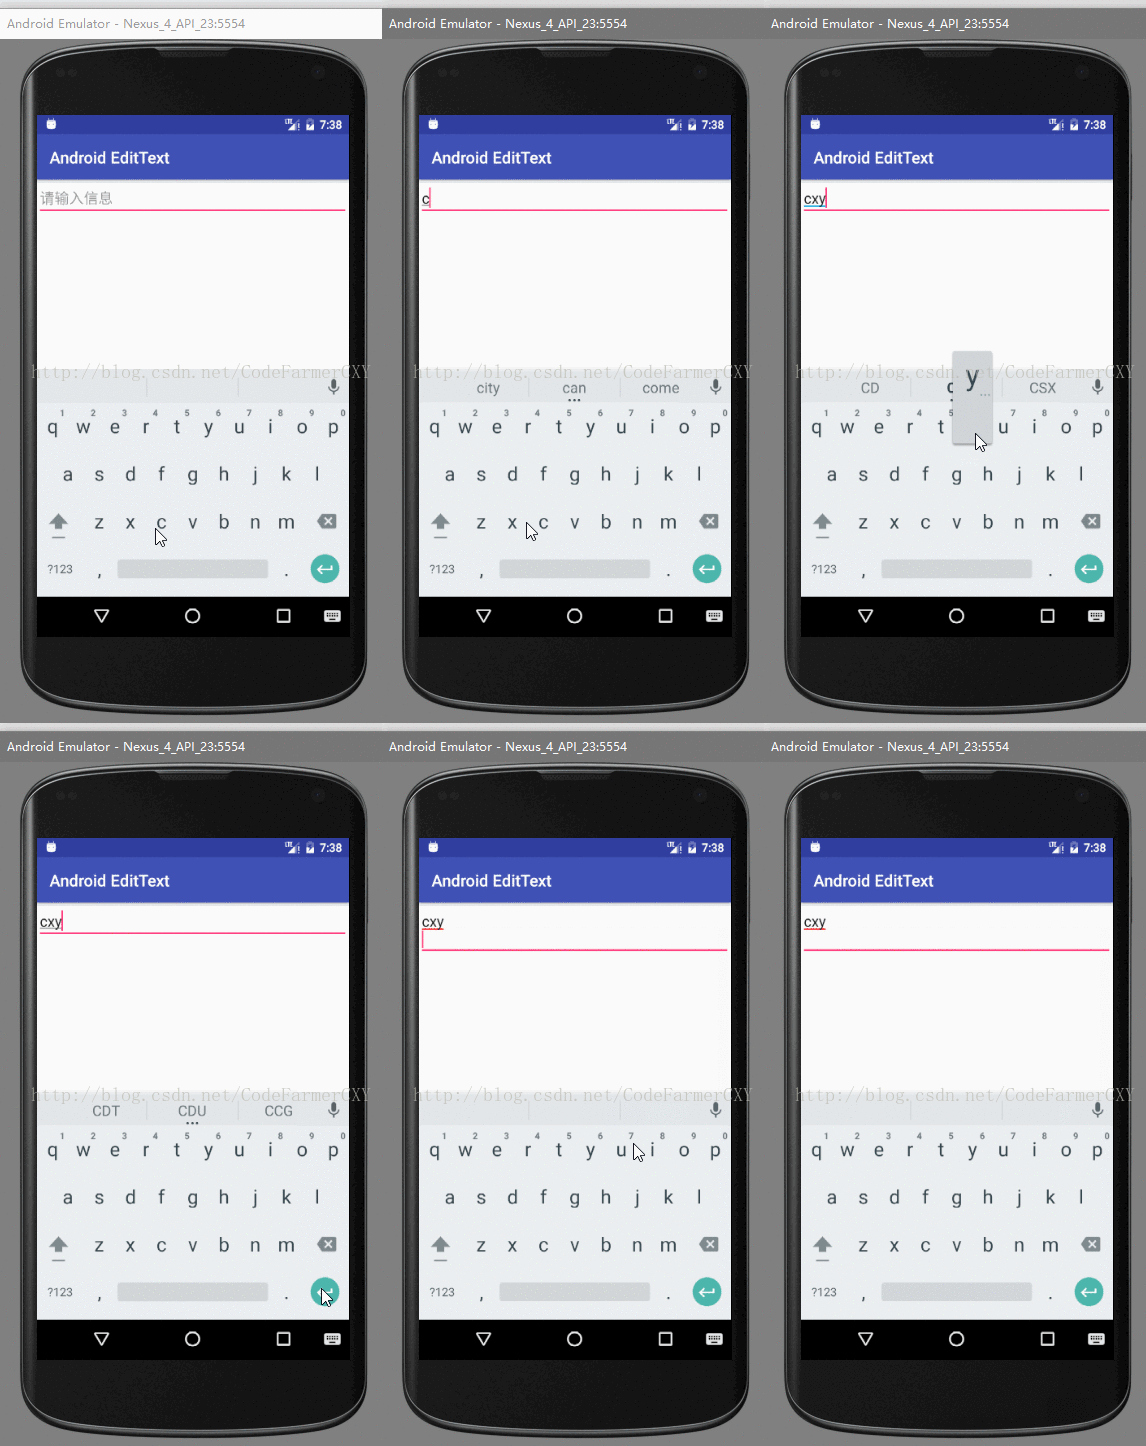
2.android:hint属性,用来设置显示在EditText上的提示信息,输入信息后并隐藏
(比如让输入“用户名”,或者输入“电话号码”等,但是你又不想在EditText前面加一个TextView来说明这是输入“用户名”的,因为这会使用一个TextView,EditText为我们提供了android:hint来设置当EditText内容为空时显示的文本,这个文本只在EditText为空时显示,你输入字符的时候就消失了,不影响你的EditText的文本)
xml version="1.0" encoding="utf-8"?>
<RelativeLayout
    xmlns:android="http://schemas.android.com/apk/res/android"
    xmlns:tools="http://schemas.android.com/tools"
    android:layout_width="match_parent"
    android:layout_height="match_parent"
    tools:context="com.example.cxy.androidedittext.MainActivity">

    <EditText
        android:hint="请输入信息"
        android:layout_width="match_parent"
        android:layout_height="wrap_content"
        android:id="@+id/editText"/>
RelativeLayout>
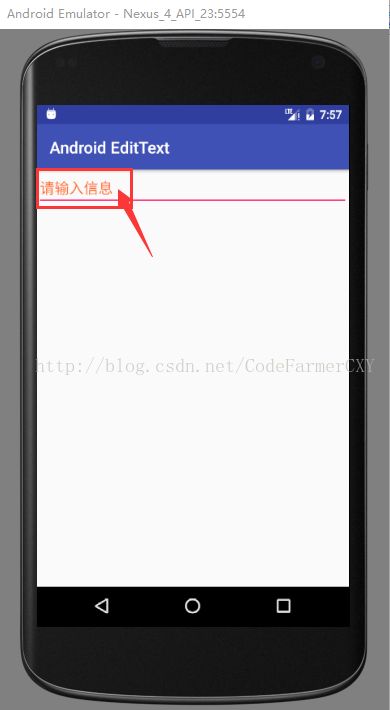
3.android:textColorHint属性,用来改变提示文字颜色
(上面是空白时的提示文字,如果不想要这个黑色的提示文字,觉得和自己的应用整体风格不协调,可以换颜色,就是通过android:textColorHint属性设置你想要的颜色)
xml version="1.0" encoding="utf-8"?>
<RelativeLayout
    xmlns:android="http://schemas.android.com/apk/res/android"
    xmlns:tools="http://schemas.android.com/tools"
    android:layout_width="match_parent"
    android:layout_height="match_parent"
    tools:context="com.example.cxy.androidedittext.MainActivity">

    <EditText
        android:textColorHint="#FF7334"
        android:hint="请输入信息"
        android:layout_width="match_parent"
        android:layout_height="wrap_content"
        android:id="@+id/editText"/>
RelativeLayout>
4.android:enabled属性,用来设置
EditText为不可编辑
(一个实用的功能,就是设置EditText为不可编辑。设置android:enabled="false"可以实现不可编辑,可以获得焦点。这时候我们看到EditText和一个TextView差不多)
xml version="1.0" encoding="utf-8"?>
<RelativeLayout
    xmlns:android="http://schemas.android.com/apk/res/android"
    xmlns:tools="http://schemas.android.com/tools"
    android:layout_width="match_parent"
    android:layout_height="match_parent"
    tools:context="com.example.cxy.androidedittext.MainActivity">

    <EditText
        android:text="设置EditText为不可编辑"
        android:enabled="false"
        android:layout_width="match_parent"
        android:layout_height="wrap_content"
        android:id="@+id/editText"/>
RelativeLayout>
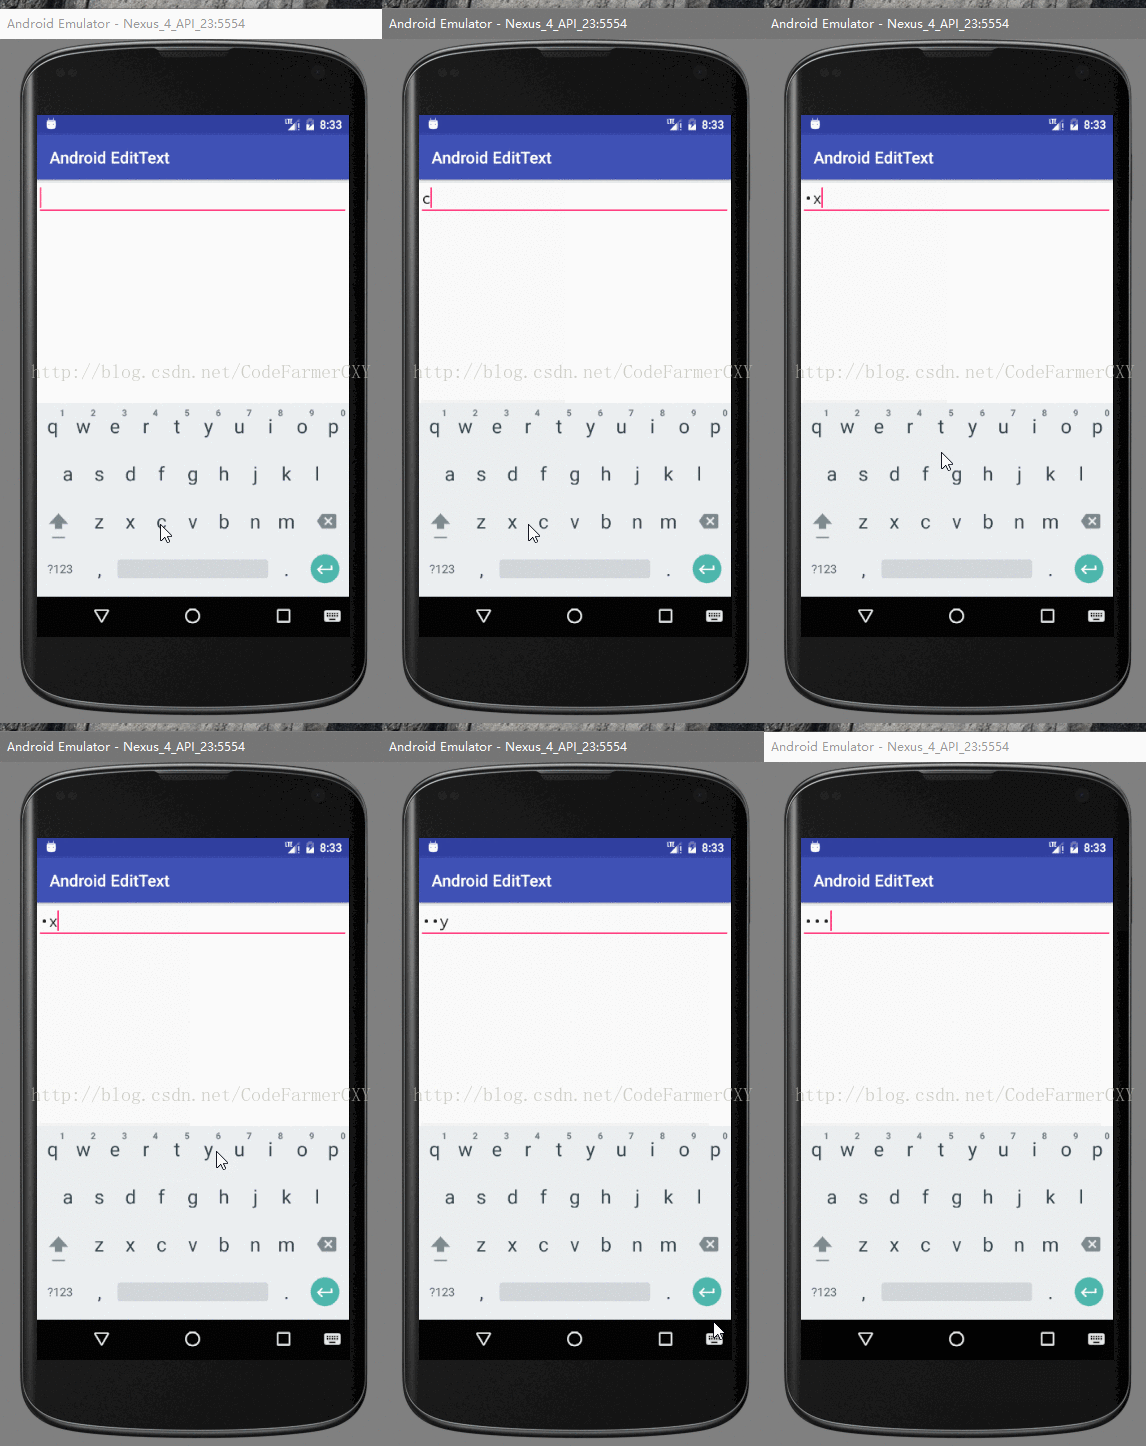
5.android:password属性,设置EditText以输入密码模式来显示
xml version="1.0" encoding="utf-8"?>
<RelativeLayout
    xmlns:android="http://schemas.android.com/apk/res/android"
    xmlns:tools="http://schemas.android.com/tools"
    android:layout_width="match_parent"
    android:layout_height="match_parent"
    tools:context="com.example.cxy.androidedittext.MainActivity">

    <EditText
        android:password="true"
        android:layout_width="match_parent"
        android:layout_height="wrap_content"
        android:id="@+id/editText"/>
RelativeLayout>
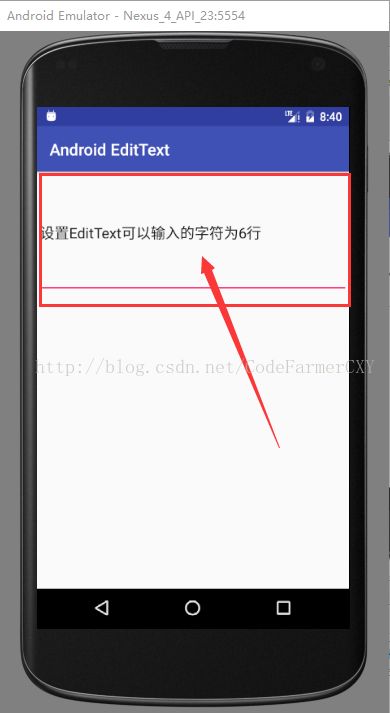
6.android:lines属性,设置EditText可以输入的字符行数
xml version="1.0" encoding="utf-8"?>
<RelativeLayout
    xmlns:android="http://schemas.android.com/apk/res/android"
    xmlns:tools="http://schemas.android.com/tools"
    android:layout_width="match_parent"
    android:layout_height="match_parent"
    tools:context="com.example.cxy.androidedittext.MainActivity">

    <EditText
        android:text="设置EditText可以输入的字符为6行"
        android:lines="6"
        android:layout_width="match_parent"
        android:layout_height="wrap_content"
        android:id="@+id/editText"/>
RelativeLayout>
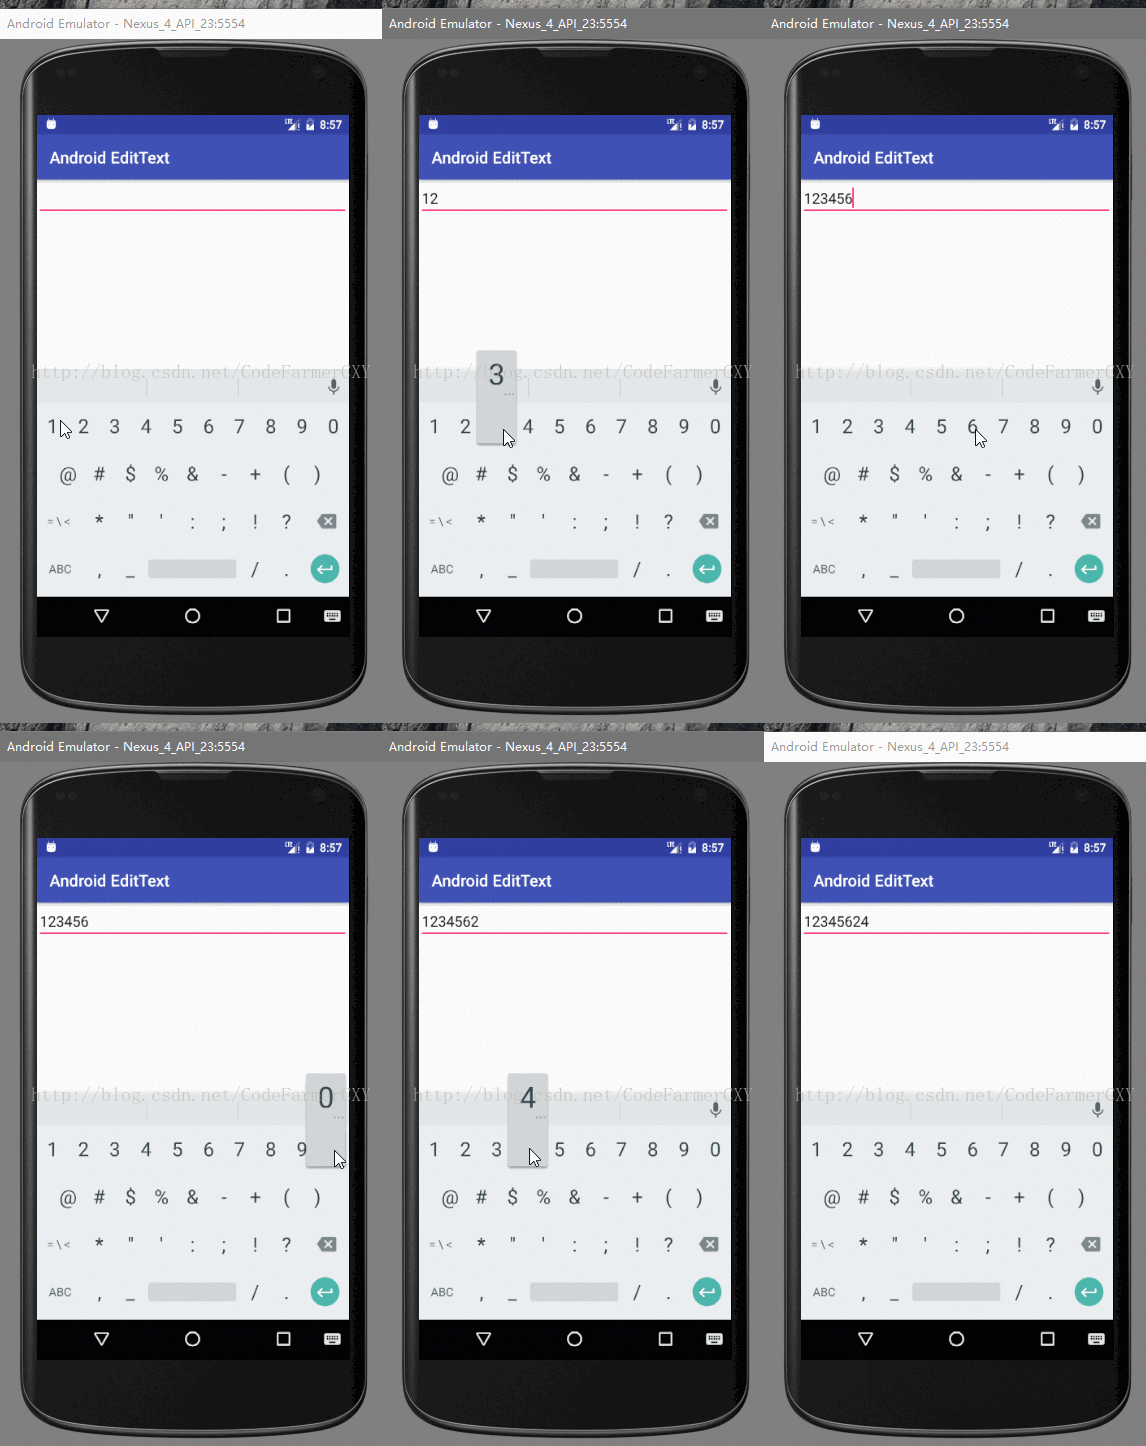
7.android:digits属性,用来设置EditText中
限制只能输入指定的字符
(例如设置android:digits=“123456”故EditText中只能 输入123456不能输入别的
)
xml version="1.0" encoding="utf-8"?>
<RelativeLayout
    xmlns:android="http://schemas.android.com/apk/res/android"
    xmlns:tools="http://schemas.android.com/tools"
    android:layout_width="match_parent"
    android:layout_height="match_parent"
    tools:context="com.example.cxy.androidedittext.MainActivity">

    <EditText
        android:digits="123456"
        android:layout_width="match_parent"
        android:layout_height="wrap_content"
        android:id="@+id/editText"/>
RelativeLayout>
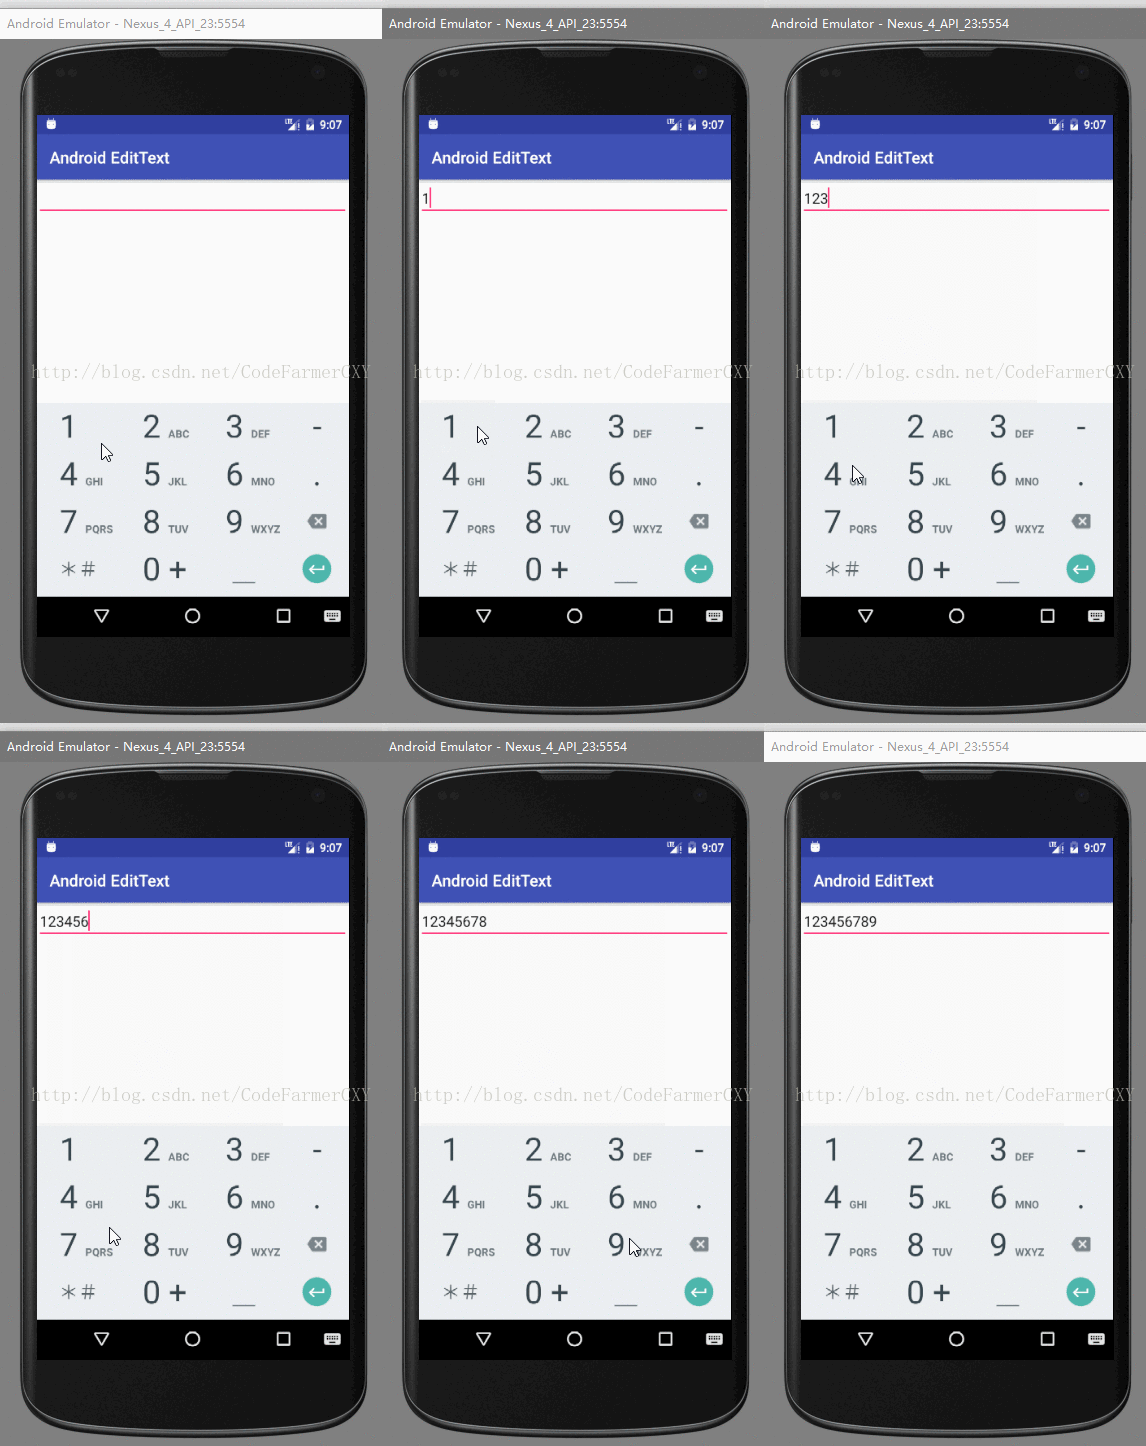
8.android:phoneNumber属性,用来把EditText变成只接受电话号码输入的文本框
(手机中发短信打电话,用于专门输入电话号码的文本框也是大有用途,有了他我们对是否是电话号码的校验就容易的多了.通过设置android:phoneNumber="true"就可以把EditText变成只接受电话号码输入的文本框,连软键盘都已经变成拨号专用软键盘了,所以不用再担心输入其他字符了)
xml version="1.0" encoding="utf-8"?>
<RelativeLayout
    xmlns:android="http://schemas.android.com/apk/res/android"
    xmlns:tools="http://schemas.android.com/tools"
    android:layout_width="match_parent"
    android:layout_height="match_parent"
    tools:context="com.example.cxy.androidedittext.MainActivity">

    <EditText
        android:phoneNumber="true"
        android:layout_width="match_parent"
        android:layout_height="wrap_content"
        android:id="@+id/editText"/>
RelativeLayout>
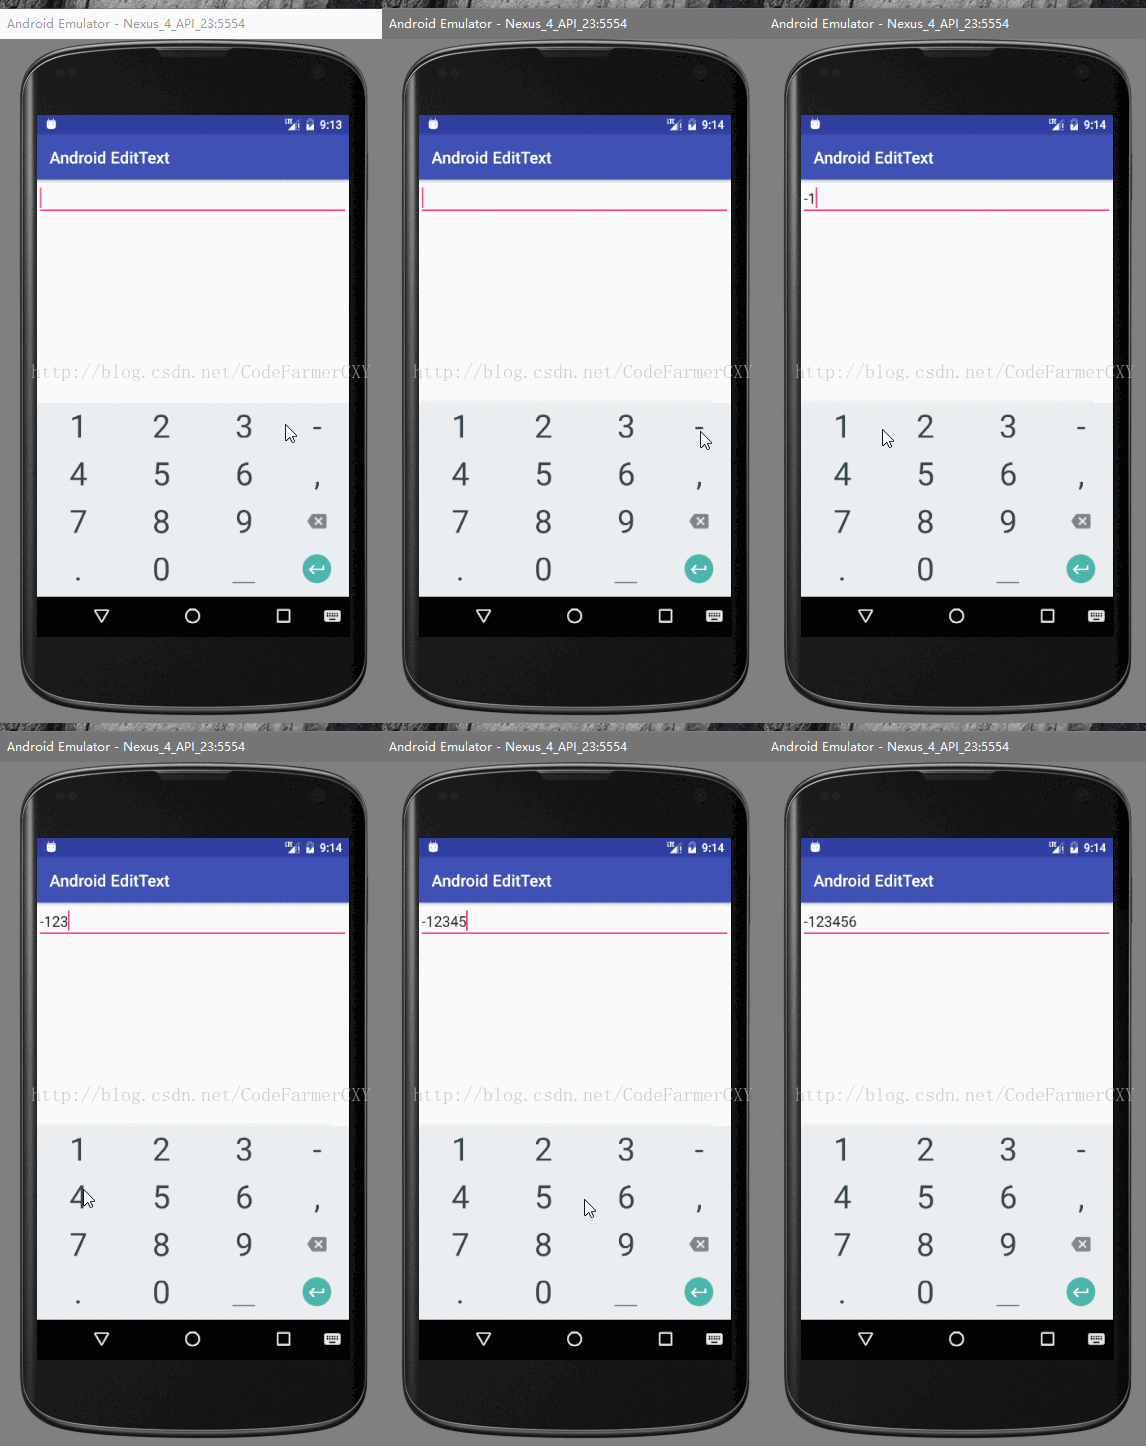
9.android:numeric属性,用来控制输入的数字类型
(如果只想输入数字,不想输入字母,EditText为我们提供了android:numeric来控制输入的数字类型,一共有三种分别为integer(正整数)、signed(带符号整数)和decimal(浮点数)。这里以signed类型的为例)
xml version="1.0" encoding="utf-8"?>
<RelativeLayout
    xmlns:android="http://schemas.android.com/apk/res/android"
    xmlns:tools="http://schemas.android.com/tools"
    android:layout_width="match_parent"
    android:layout_height="match_parent"
    tools:context="com.example.cxy.androidedittext.MainActivity">

    <EditText
        android:numeric="signed"
        android:layout_width="match_parent"
        android:layout_height="wrap_content"
        android:id="@+id/editText"/>
RelativeLayout>
注意这里的软键盘变成“数字键盘”的变化.
10.android:inputType属性,用来使输入法选择合适的软键盘
(上面通过指定为电话号码特定格式,然后键盘类型变成了拨号专用的键盘,这个是自动变的,其实我们也可以通过android:inputType来设置文本的类型,让输入法选择合适的软键盘的。android:inputType有很多类型,这里使用date类型来演示)
xml version="1.0" encoding="utf-8"?>
<RelativeLayout
    xmlns:android="http://schemas.android.com/apk/res/android"
    xmlns:tools="http://schemas.android.com/tools"
    android:layout_width="match_parent"
    android:layout_height="match_parent"
    tools:context="com.example.cxy.androidedittext.MainActivity">

    <EditText
        android:inputType="date"
        android:layout_width="match_parent"
        android:layout_height="wrap_content"
        android:id="@+id/editText"/>
RelativeLayout>
