Spring Cloud 分布式入门 使用 Spring Cloud Eureka 服务治理以及高可用
Spring Cloud Eureka 是 Spring Cloud Netflix 微服务套件中的一部分, 它基于 NetflixEureka 做了二次封装, 主要负责完成微服务架构中的服务治理功能。 Spring Cloud 通过为Eureka 增加了 Spring Boot 风格的自动化配置,我们只需通过简单引入依赖和注解配置就能让 Spring Boot 构建的微服务应用轻松地与 Eureka 服务治理体系进行整合。
Eureka包含
Eureka服务端: 服务注册中心
Eureka客户端: 处理服务的注册和发现
基础架构
服务注册中心: Eureka提供的服务端,提供服务注册与发现功能。
服务提供者: 提供服务的应用,将自己提供的服务注册到Eureka,以供其他应用发现。
服务消费者: 消费者应用从服务注册中心获取服务列表,从而使消费者可以知道去何处调用所需要的服务。
入门代码
Eureka服务端编写
1、新建一个Spring Boot项目,名为eureka-server,引入依赖
      org.springframework.cloud
      spring-cloud-starter-netflix-eureka-server
2、配置文件
spring:
  application:
    name: eureka
eureka:
  client:
    service-url:
      defaultZone: http://localhost:8761/eureka
    register-with-eureka: false # 不向注册中心注册自己
    fetch-registry: false # 不检索服务
server:
  port: 8761
3、在启动类上添加注解 @EnableEurekaServer
@SpringBootApplication
@EnableEurekaServer
public class EurekaServerApplication {

    public static void main(String[] args) {
        SpringApplication.run(EurekaServerApplication.class, args);
    }
}
ok,启动eureka-server
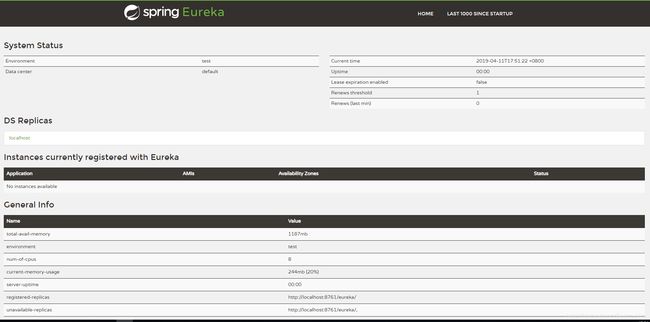
打开浏览器访问 http://localhost:8761/
可以看到Eureka服务端已经完成了。就这么简单
Eureka客户端编写
1、新建一个Spring Boot项目,名为eureka-client,引入依赖
      org.springframework.boot
      spring-boot-starter-web


     org.springframework.cloud
     spring-cloud-starter-netflix-eureka-client
记住一定要引入spring-boot-starter-web依赖,,不然项目启动不起来自动停止。
2、配置文件
spring:
  application:
    name: eureka-client
server:
  port: 8080
eureka:
  client:
    service-url:
      defaultZone: http://localhost:8761/eureka/
3、启动类配置注解 @EnableDiscoveryClient
@SpringBootApplication
@EnableDiscoveryClient
public class EurekaClientApplication {

    public static void main(String[] args) {
        SpringApplication.run(EurekaClientApplication.class, args);
    }
}
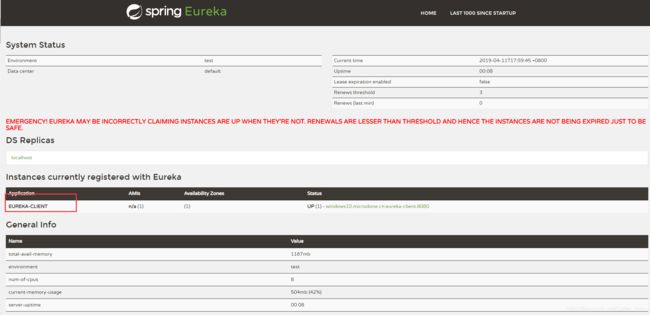
启动eureka-client客户端,刷新eureka服务端页面,已经显出注册的客户端了
ok,客户端也编写完成了。
到此就结束了,
但真的就结束了吗???
有人要问了,Spring Cloud Eureka服务端和客户端都写好了,但是怎么使用呢?
下面就讲各服务间怎么调用。
新建个controller层
@RestController
public class HelloController {

    @RequestMapping(value = "/hello")
    public String index() {
        System.out.println("请求到了");
        return "hello";
    }
}
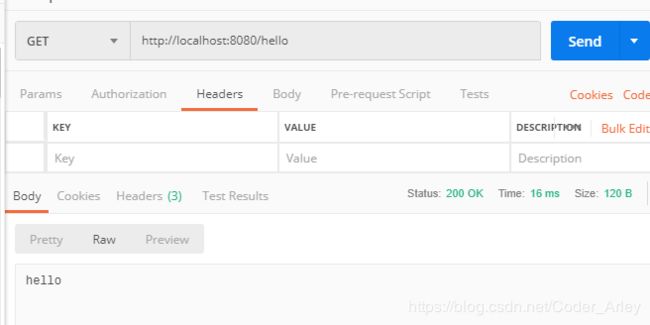
通过访问 http://localhost:8080/hello 可以看到正常返回数据
新建一个Spring Boot项目,名为eureka-consumer 配置和eureka-client类似,端口改一下,这里改为8085,启动项目
再看一下eureka服务端的管理平台,eureka-consumer已经注册了。
微服务间调用这里讲两种方式,一种是通过RestTemplate,一种是使用Spring Cloud Feign
在这之前要说一下Spring Cloud Ribbon
Ribbon是一个基于HTTP和TCP的客户端负载均衡
如果微服务布置多台,就需要Ribbon进行负载均衡了。
eureka-client改下端口再启动一个, 可以看到这里已经有两个实例了。
引入Ribbon依赖
      org.springframework.cloud
      spring-cloud-starter-netflix-ribbon
RestTemplate 方式
RestTemplate实现了对HTTP请求的封装处理
在启动类上加入创建RestTemplate bean
@Bean
@LoadBalanced // 负载均衡注解
public RestTemplate restTemplate() {
    return new RestTemplate();
}
创建ConsumerController,
@RestController
public class ConsumerController {

    @Autowired
    private RestTemplate restTemplate;

    @RequestMapping(value = "/eureka-consumer")
    public String helloConsumer() {
        String result = restTemplate.getForEntity("http://eureka-client/hello", String.class).getBody();
        return result;
    }
}
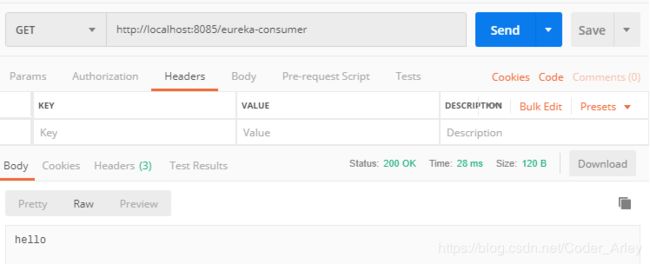
访问 http://localhost:8085/eureka-consumer 正常数据返回
Ribbon既然是负载均衡工具,那当然也要测试一下了。eureka-client改下端口在起一台,然后访问接口多次,通过打印日志可以看出两台eureka-client都有被访问,而且是以线性轮询的方式被访问,Ribbon默认是线性轮询方式负载均衡。
Spring Cloud Feign 方式
Spring Cloud Feign是对RestTemplate进一步封装,由它来帮助我们定义和实现依赖服务接口的定义。在Spring Cloud Feign的实现下,我们只需创建一个接口并用注解的方式来配置它。
快速入门
1、添加依赖
      org.springframework.cloud
      spring-cloud-starter-openfeign
2、启动类添加注解 @EnableFeignClients
@SpringBootApplication
@EnableDiscoveryClient
@EnableFeignClients
public class RibbonConsumerApplication {

    public static void main(String[] args) {
        SpringApplication.run(RibbonConsumerApplication.class, args);
    }
}
3、定义接口ServiceClient 并添加注解@FeignClient("eureka-client") 参数为在Eureka注册的名称
@FeignClient("eureka-client")
public interface ServiceClient {

    @RequestMapping(value = "/hello")
    String index();
}
4、在controller中注入ServiceClient 然后调用方法即可
@RestController
public class ConsumerController {

    @Autowired
    private ServiceClient serviceClient;

    @RequestMapping(value = "/eureka-consumer2")
    public String helloConsumer2() {
        String result = serviceClient.index();
        return result;
    }
}
访问 http://localhost:8085/eureka-consumer2 也能正常返回数据
Eureka的高可用,通过互相注册的方式实现。这里启动三台Eureka服务端信息如下
eureka-server1 8761
eureka-server2 8762
eureka-server3 8763
配置信息入下
// eureka-server1的配置信息
spring:
  application:
    name: eureka-server1
eureka:
  client:
    service-url:
      defaultZone: http://localhost:8762/eureka,http://localhost:8763/eureka
    register-with-eureka: false
    fetch-registry: false # 不检索服务
server:
  port: 8761


// eureka-server2的配置信息
spring:
  application:
    name: eureka-server2
eureka:
  client:
    service-url:
      defaultZone: http://localhost:8761/eureka,http://localhost:8763/eureka
    register-with-eureka: false
    fetch-registry: false # 不检索服务
server:
  port: 8762


// eureka-server3的配置信息
spring:
  application:
    name: eureka-server3
eureka:
  client:
    service-url:
      defaultZone: http://localhost:8761/eureka,http://localhost:8762/eureka
    register-with-eureka: false
    fetch-registry: false # 不检索服务
server:
  port: 8763
eureka-client保持配置不变,依然注册在http://localhost:8761/eureka/ 上
浏览器分别访问 http://localhost:8761/ http://localhost:8762/ http://localhost:8763/,查看到这三台里的服务注册信息都有eureka-client, 那是因为这三台Eureka服务端之间互相注册,所以都有eureka-client的注册信息。
Eureka服务端配置了高可用,下面就是客户端配置了。
修改eureka-client的配置文件
spring:
  application:
    name: eureka-client
server:
  port: 8081
eureka:
  client:
    service-url:
      defaultZone: http://localhost:8761/eureka/,http://localhost:8762/eureka/,http://localhost:8763/eureka/
这样就可以注册三台Eureka服务端了。
到这里是Spring Cloud Eureka入门和高可用讲完了。


