Ext.NET Pro 2.0.0 破解版使用说明
Ext.NET Pro 2.0.0 破解版使用说明
(转载请保留,欢迎光临我的CSDN BLOG: http://blog.csdn.net/coldwind811201)
破解版下载地址:http://download.csdn.net/detail/coldwind811201/4948510
1 本破解版本的来源
本压缩包内提供的Ext.NET Assemblies(.dll)编译版本是由官方(http://www.ext.net/)2012-7-24发布的2.0.0 Pro源代码版本去除了与License有关的代码编译而成,功能上没有任何删减,使用方法和官方提供的编译包一样。
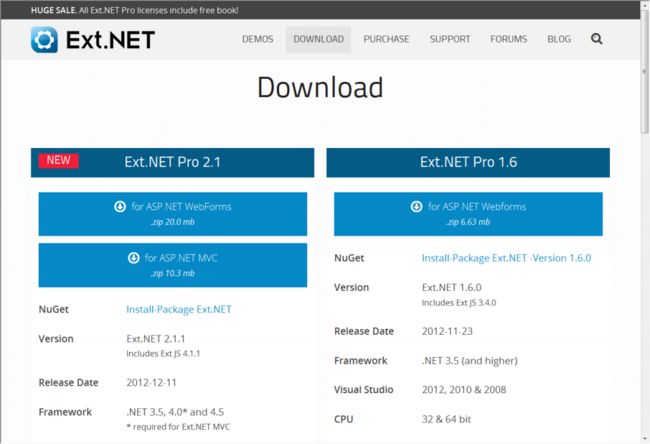
撰写此文时,官方的最新版本为:2.1.1,2012/12/10发布,不使用这个版本的原因是因为有BUG,详见后面的说明。
用于编译的2.0.0 Pro源代码包如图:
![]()
源代码包下载地址:http://download.csdn.net/detail/coldwind811201/4949167
2 安装方法
2.1 首先需要下载并安装ASP.NET MVC3
下载地址:http://www.microsoft.com/zh-cn/download/details.aspx?id=1491
仅需要下载并安装其中的:
![]()
最终发布的服务器上也需要安装。
2.2 在Visual Studio的工具箱中加载本压缩包内的DLL
具体步骤请参看如下官方说明(该说明位于官方提供的编译版本的文件中),很简单的英文不翻译了,仅看红色部分即可:
--------------------------------------------------------------------------
II. ADD TO VISUAL STUDIO TOOLBOX INSTRUCTIONS
--------------------------------------------------------------------------
Getting Started (NuGet)
The easiest and quickest way to install Ext.NET is using NuGet.
Run the following command in Visual Studio Command panel, or seach for "Ext.NET" in NuGet Package Manager.
Install-Package Ext.NET
Getting Started (Manual)
The following steps are required to manually install the controls into
your Visual Studio or Visual Web Developer Express Toolbox.
1. Open Visual Studio 2010 or Visual Web Developer Express 2010.
2. Open an existing web site or create a new web site project.
3. Open or create a new .aspx page.
4. Open the ToolBox panel, typically located on the left side in a
fly-out panel (Ctrl + Alt + x).
5. Create a new "Ext.NET" Tab, by...
a. Right-Click in the ToolBox area.
b. Select "Add Tab".
c. Enter "Ext.NET".
6. Inside the "Ext.NET" tab, Right-Click and select
"Choose Items...".
7. Under the ".NET Framework Components" Tab select the "Browse"
button.
8. Navigate to and select the Ext.Net.dll file, choose open, then
select the "Ext.NET.dll" from the extracted download .zip package.
Ext.NET can always be downloaded from the following location, see
http://www.ext.net/download/
9. The component items should now be added to the list and
pre-checked. You can confirm by sorting the list by "Namespace"
and scrolling to "Ext.Net"
10. Click "OK". The icons should be added to your ToolBox. You should
now be able to drag/drop a Ext.NET component onto your WebForm.
11. Enjoy.
--------------------------------------------------------------------------
3 不使用官方2.1.1版本进行破解的原因
官方目前最新版本为Ext.NET Pro 2.1.1,发布日期为2012-12-10。如图:
这个版本经本人亲测有BUG。该BUG表现为GridPanel中的列无法拖拽移动。调试的时候如果拖拽,会发生找不到Header的错误。官方Demo(http://examples.ext.net/)中GridPanel下任意一个例程,如果进行拖拽,表现为不能移动。而在2.0.0这个版本中没有这个问题。
4 破解了什么
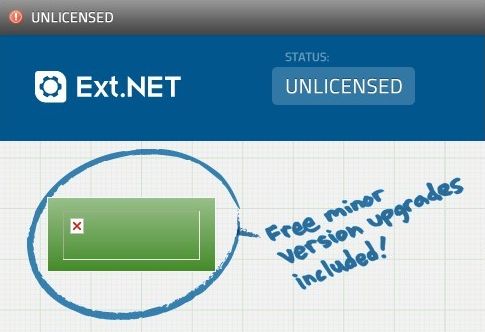
如果直接使用Ext.NET官方提供的Pro的Assemblies(.dll)编译版本只要在非127.0.0.1或者localhost地址下,每个页面在右下角都会有License弹窗出现。即开发调试的时候没问题,发布到服务器上就会在右下角出现License弹窗。如下图:
5 破解方法
其实就是使用官方的原代码自己编译获得DLL,去掉License相关的代码。
步骤如下:
使用Visual Studio打开源代码中的sln文件:
找到并修改ResourceManager.cs文件
注释掉this.CheckLicense();
重新编译生成,生成的文件清单:
默认在Ext.NET\bin\Debug下。


