tensorflow实现一个简单的卷积神经网络实现手写数字识别
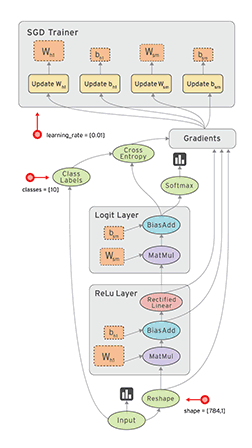
Tensorflow是一个采用数据流图(data flow graphs)用于数值计算的开源软件库。节点(Nodes)在图中表示数学操作,图中的线(edges)则表示在节点间相互联系的多维数据数组,即张量(tensor)。如下图:
借助其灵活的架构,用户可以轻松地将计算工作部署到多种平台(CPU、GPU、TPU)和设备(桌面设备、服务器集群、移动设备、边缘设备等)。TensorFlow™ 最初是由 Google Brain 团队(隶属于 Google 的 AI 部门)中的研究人员和工程师开发的,可为机器学习和深度学习提供强力支持,并且其灵活的数值计算核心广泛应用于许多其他科学领域。
今天去tensorflow官网一看,最新版本已经更新到1.10了,我机子上还是去年装的1.40版本,看来得更新了,哈哈。
平时也一直在用tensorflow平台跑项目当中的基于深度学习的人脸识别项目,今天有空简单的总结一下。
CNN的原理本文就不在阐述了,网上太多的博客和资料已经写的非常详细了,其主要相对NN有两个优点,其一是权值共享,其二是局部连接。
直接贴代码吧…回去睡觉了
# -*- coding: utf-8 -*-

import tensorflow as tf
from tensorflow.examples.tutorials.mnist import input_data
mnist = input_data.read_data_sets("MNIST_data/", one_hot=True)     #下载并加载mnist数据

## 定义数据输入占位符。后面在session开始后用真实数据填充
with tf.name_scope('inputs'):
    x = tf.placeholder(tf.float32, shape=[None, 784])          #输入的数据占位符
    y_actual = tf.placeholder(tf.float32, shape=[None, 10])    #输入的标签占位符

#定义一个函数,用于初始化所有的权值 W
def w_var(shape):
  initial = tf.truncated_normal(shape, stddev=0.1, dtype=tf.float32)
  return tf.Variable(initial)

#定义一个函数,用于初始化所有的偏置项 b
def b_var(shape):
  initial = tf.constant(0.1, shape=shape)
  return tf.Variable(initial)

#定义一个函数,用于构建卷积层
def conv2d(x, W):
  return tf.nn.conv2d(x, W, strides=[1, 1, 1, 1], padding='SAME')

#定义一个函数,用于构建池化层
def max_pool(x):
  return tf.nn.max_pool(x, ksize=[1, 2, 2, 1],strides=[1, 2, 2, 1], padding='SAME')

#构建网络
x_input = tf.reshape(x, [-1,28,28,1])         #转换输入数据shape,以便于用于网络中
with tf.name_scope('conv_1'):
    W_conv1 = w_var([5, 5, 1, 32])
    b_conv1 = b_var([32])
    h_conv1 = tf.nn.relu(conv2d(x_input, W_conv1) + b_conv1)     #第一个卷积层
with tf.name_scope('pool_1'):
    h_pool1 = max_pool(h_conv1)                                  #第一个池化层 14*14

with tf.name_scope('conv_2'):
    W_conv2 = w_var([5, 5, 32, 64])
    b_conv2 = b_var([64])
    h_conv2 = tf.nn.relu(conv2d(h_pool1, W_conv2) + b_conv2)      #第二个卷积层
with tf.name_scope('pool_2'):
    h_pool2 = max_pool(h_conv2)                                   #第二个池化层 7*7

with tf.name_scope('fc_1'):
    W_fc1 = w_var([7 * 7 * 64, 1024])
    b_fc1 = b_var([1024])
    h_pool2_flat = tf.reshape(h_pool2, [-1, 7*7*64])              #reshape成向量
    h_fc1 = tf.nn.relu(tf.matmul(h_pool2_flat, W_fc1) + b_fc1)    #第一个全连接层

with tf.name_scope('dropout'):
    keep_prob = tf.placeholder(tf.float32)
    h_fc1_drop = tf.nn.dropout(h_fc1, keep_prob)                  #dropout层
with tf.name_scope('fc_2'):
    W_fc2 = w_var([1024, 10])
    b_fc2 = b_var([10])
    y_predict=tf.nn.softmax(tf.matmul(h_fc1_drop, W_fc2) + b_fc2)   #softmax层 None*10

## 求真实标签y_actual与预测标签y_predict的交叉熵得到loss值
with tf.name_scope('loss'):
    cross_entropy = tf.reduce_mean(-tf.reduce_sum(y_actual*tf.log(tf.clip_by_value(y_predict,1e-10,1.0)),1))

## 开始训练,设置优化函数最优化loss
with tf.name_scope('train'):
    train_step = tf.train.AdamOptimizer(1e-4).minimize(cross_entropy)    #使用优化函数Adam

## 计算准确度
with tf.name_scope('accuracy'):
    correct_prediction = tf.equal(tf.argmax(y_predict,1), tf.argmax(y_actual,1))
    accuracy = tf.reduce_mean(tf.cast(correct_prediction, tf.float32))          #准确度计算

# 添加用于初始化变量的节点
init = tf.global_variables_initializer()

## 会话开始,以上只是构建好了数据流图,从会话里启动
with tf.Session() as sess:
    sess.run(init)

    ## 迭代20000次停止
    for i in range(20000):
        batch = mnist.train.next_batch(50)
        _,loss = sess.run([train_step, cross_entropy],
                                 feed_dict={x:batch[0],y_actual:batch[1],keep_prob: 0.6})
        if i%100 == 0:                  #训练100次,验证一次
            train_acc = accuracy.eval(feed_dict={x:batch[0], y_actual: batch[1], keep_prob: 1})
            print('step:',i,' training_accuracy = ',train_acc)

    test_acc=accuracy.eval(feed_dict={x: mnist.test.images, y_actual: mnist.test.labels, keep_prob: 1.0})
    print("test_accuracy = ",test_acc)
    ##test_accuracy =  0.9926
参考:
tensorflow官网