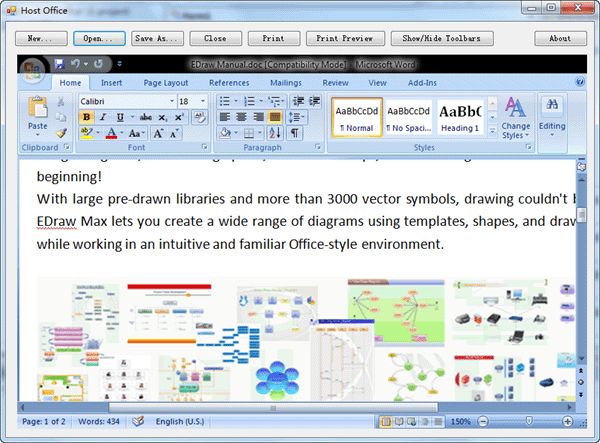
Edraw office viewer component对于开发人员来说是一个将Microsoft Word文档嵌入到vb.net应用程序中的简单可靠的解决方案。
在VB.Net应用程序中嵌入word文档的最佳方法是什么?相信大多数人都记得OLE技术,它可以将Excel图表嵌入到Word文档中。使用Office XP Primary Interpol Assemblies或嵌入WebBrowser控件并导航到相应的Office文档等。但是所有这些技术都不支持完整的Microsoft Word功能。也有很多已知的错误。
本文将逐步介绍如何使用Edraw office viewer component在VB.NET应用程序中嵌入MS Word文件。如果你没有officeviewer.ocx文件,请先安装。
安装地址:https://www.evget.com/product...
打开Visual Studio并创建一个新的VB.NET应用程序。
右键单击HostOffice解决方案。然后单击“Add Reference...”的选项。
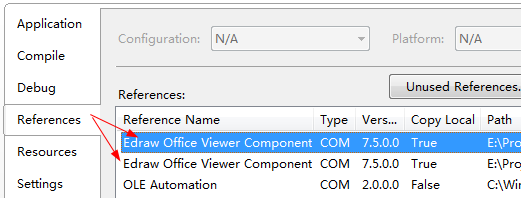
在弹出的对话框中,从浏览选项卡中选择officeviewer.ocx文件。
或从COM选项卡中选择Edraw Office Viewer Component。
单击确定。Edraw Office Viewer Component引用此时已添加到新的vb.net项目中。
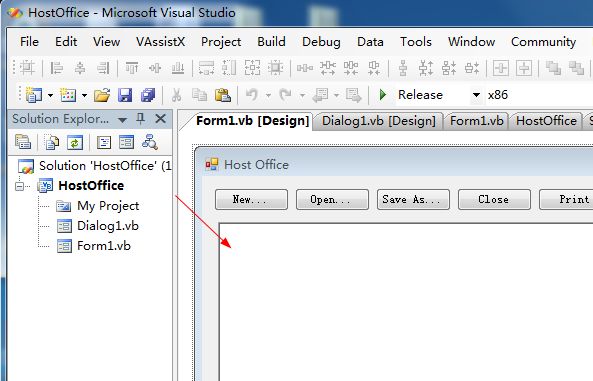
将Edraw Office Viewer Component从“工具箱”面板拖到form1中。
添加以下VB.NET代码来新建、打开、保存、关闭并打印一个word文档,如下所示:
Public Class Form1
Private Sub btnNew_Click(ByVal sender As System.Object, ByVal e As System.EventArgs) Handles btnNew.Click
If Dialog1.ShowDialog() Then
If Dialog1.GetChooseType() = 1 Then
AxEDOffice1.CreateNew("Word.Application")
ElseIf Dialog1.GetChooseType() = 2 Then
AxEDOffice1.CreateNew("Excel.Application")
ElseIf Dialog1.GetChooseType() = 3 Then
AxEDOffice1.CreateNew("PowerPoint.Application")
ElseIf Dialog1.GetChooseType() = 4 Then
AxEDOffice1.CreateNew("Visio.Application")
ElseIf Dialog1.GetChooseType() = 5 Then
AxEDOffice1.CreateNew("MSProject.Application")
End If
End If
End Sub
Private Sub btnOpen_Click(ByVal sender As System.Object, ByVal e As System.EventArgs) Handles btnOpen.Click
AxEDOffice1.OpenFileDialog()
End Sub
Private Sub btnSaveAs_Click(ByVal sender As System.Object, ByVal e As System.EventArgs) Handles btnSaveAs.Click
AxEDOffice1.SaveFileDialog()
End Sub
Private Sub btnClose_Click(ByVal sender As System.Object, ByVal e As System.EventArgs) Handles btnClose.Click
AxEDOffice1.CloseDoc()
End Sub
Private Sub btnPrint_Click(ByVal sender As System.Object, ByVal e As System.EventArgs) Handles btnPrint.Click
AxEDOffice1.PrintDialog()
End Sub
Private Sub btnPreview_Click(ByVal sender As System.Object, ByVal e As System.EventArgs) Handles btnPreview.Click
AxEDOffice1.PrintPreview()
End Sub
Private Sub btnToolbars_Click(ByVal sender As System.Object, ByVal e As System.EventArgs) Handles btnToolbars.Click
If AxEDOffice1.Toolbars = True Then
AxEDOffice1.Toolbars = False
Else
AxEDOffice1.Toolbars = True
End If
End Sub
Private Sub btnAbout_Click(ByVal sender As System.Object, ByVal e As System.EventArgs) Handles btnAbout.Click
AxEDOffice1.AboutBox()
End Sub
End Class
打开配置管理器。将Active解决方案平台更改为x86选项。![]()
The office viewer component支持MS Word 97、Word 2000、Word 2003、Word 2007、Word 2010。它可以在Windows 2000/Xp/Vista/2008/7的32位或64位操作系统上运行。将MS Excel或PowerPoint、Visio、Project嵌入到VB.NET应用程序中,只需要改变Open方法的第二个参数。如下所示:
public void Open()
{
axEDOffice1.Open(sPath,“Excel.Application”);
axEDOffice1.Open(sPath,“PowerPoint.Application”);
axEDOffice1.Open(sPath,“Visio.Application”);
axEDOffice1.Open(sPath,“MSProject.Application”);
}
有了word组件,在Visual Basic应用程序中使用COM实现Word自动化就会变得十分简单。从解决方案资源管理器引用中为Word Object Library 11.0添加引用。在这里我所用Word 2003,所以对象库的版本是11.0。
下面的示例代码显示了如何构建一个最小的文档,插入一个书签,并且在随后用文本更换空书签。
Imports Microsoft.Office.Interop.Word
Private Sub Automating_Click(ByVal sender As System.Object,ByVal e As System.EventArgs)Handle Automating.Click
Dim word = AxEDOffice1.GetApplication()
word.Visible = True
Dim doc As Document = AxEDOffice1.ActiveDocument()
Dim range As Range = doc.Range
range.InsertAfter(“Range1”+ vbCrLf)
range.Collapse(WdCollapseDirection.wdCollapseEnd)
doc.Bookmarks.Add(“MijnBookmark”,range)
range.InsertAfter(“Range2”+ vbCrLf)
Dim bookmark As Bookmark = doc。书签(1)
range = bookmark.Range
range.Text =“Bookmark”+ vbCrLf
range.Font.Color = WdColor.wdColorBlue
End Sub
以上就是本次教程的全部内容,接下来会有更多相关教程,敬请关注!

