Android 使用RadioButton+Fragment构建Tab
最近为公司开发移动app,看到app的主页面就四个选项卡加对应的页面,但是代码写复杂无比,很难维护,鉴于此想用最少的代码实现其功能,废话不多说,先上效果图。
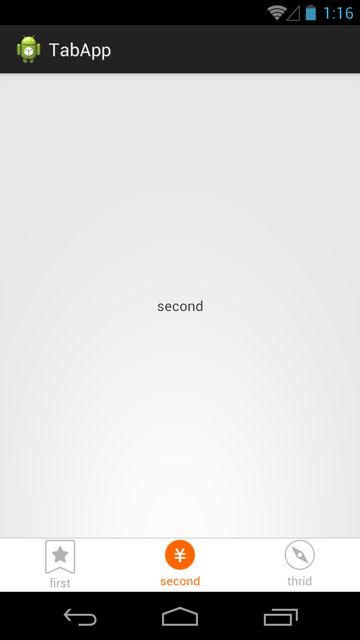
实现思路
从图我们基本猜到基本思路如下
- 底部选项卡可以使用3个RadioButton组成,并绑定相关的监听器以监听tab切换。
- 选项卡的上面的部分为一个容器(FrameLayout)以存取3个fragment,可以在tab绑定的监听器中去控制fragment的显示。
布局文件
先看主页面的布局文件R.layout.activity_main
"1.0" encoding="utf-8"?>
"http://schemas.android.com/apk/res/android"
    android:layout_width="match_parent"
    android:layout_height="match_parent" >

    "@+id/ll_rbtn_contain"
        android:layout_width="match_parent"
        android:layout_height="wrap_content"
        android:layout_alignParentBottom="true"
        android:gravity="center"
        android:orientation="horizontal" >

        "@+id/rb_first"
            style="@style/tab_style"
            android:drawableTop="@drawable/tab_first_background"
            android:text="first"
            android:textColor="@color/radio_colors" />

        "@+id/rb_second"
            style="@style/tab_style"
            android:drawableTop="@drawable/tab_second_background"
            android:text="second"
            android:textColor="@color/radio_colors" />

        "@+id/rb_thrid"
            style="@style/tab_style"
            android:drawableTop="@drawable/tab_third_background"
            android:text="thrid"
            android:textColor="@color/radio_colors" />


    "@+id/fl_contain"
        android:layout_width="match_parent"
        android:layout_height="match_parent"
        android:layout_above="@id/ll_rbtn_contain"
        android:layout_alignParentTop="true" >
根视图为相对布局以控制RadioGroup在底部,FrameLayout在RadioGroup的上面
设置选项卡Style
每个RadioButton都设置了统一的tab_style
设置选项卡icon的背景
每个radioButton都设置了android:drawableTop属性,只要创建三个drawable文件即可 eg :tab_first_background.xml
"1.0" encoding="utf-8"?>
"http://schemas.android.com/apk/res/android">
- "@drawable/first_pressed" android:state_pressed="true"/>
- "@drawable/first_pressed" android:state_checked="true"/>
- "@drawable/first_normal"/>
设置选项卡title的背景
除了选显卡对应的icon要改变外,其对应的title的字体颜色也要随之改变。注意要在res下创建color文件夹并将颜色状态配置文件放在此文件夹下。eg:radio_colors.xml
"http://schemas.android.com/apk/res/android">
- "true" android:color="@color/orange_color"/>
- "true" android:color="@color/orange_color"/>
- "#aaaaaa" />
代码块
package com.example.tabapp;

import android.os.Bundle;
import android.support.v4.app.FragmentActivity;
import android.widget.CompoundButton;
import android.widget.CompoundButton.OnCheckedChangeListener;
import android.widget.FrameLayout;
import android.widget.RadioButton;


public class MainActivity extends FragmentActivity implements OnCheckedChangeListener{
    //三个选项卡
    private RadioButton mRBtnFrist;
    private RadioButton mRBtnSecond;
    private RadioButton mRBtnThrid;

    //存放fragment对应的容器
    private FrameLayout mFragmentContain;

    private TabFragment mFirstFragment;
    private TabFragment mSecondFragment;
    private TabFragment mThirdFragment;

    @Override
    protected void onCreate(Bundle savedInstanceState) {
        super.onCreate(savedInstanceState);

        setContentView(R.layout.activity_main);

        mFragmentContain = (FrameLayout)findViewById(R.id.fl_contain);
        mRBtnFrist = (RadioButton)findViewById(R.id.rb_first);
        mRBtnSecond = (RadioButton)findViewById(R.id.rb_second);
        mRBtnThrid = (RadioButton)findViewById(R.id.rb_thrid);

        mRBtnThrid.setOnCheckedChangeListener(this);
        mRBtnThrid.performClick();//此处设置默认第三个选项卡对应的fragment显示
        mRBtnFrist.setOnCheckedChangeListener(this);
        mRBtnSecond.setOnCheckedChangeListener(this);
    }

    @Override
    public void onCheckedChanged(CompoundButton buttonView, boolean isChecked) {
        if (isChecked) {
            //用户当前浏览的选项卡
            int checkedWidgetId = buttonView.getId();
            mRBtnFrist.setChecked(checkedWidgetId == R.id.rb_first);
            mRBtnSecond.setChecked(checkedWidgetId == R.id.rb_second);
            mRBtnThrid.setChecked(checkedWidgetId == R.id.rb_thrid);
            showFragment(checkedWidgetId);
        }else {
            //此处记录了用户上次浏览的选项卡
            String unCheckFragmentTag = getTagById(buttonView.getId());
            TabFragment unCheckFragment = (TabFragment)getSupportFragmentManager().findFragmentByTag(unCheckFragmentTag);
            if(unCheckFragment != null){
                //隐藏上次显示到fragment,确保fragment不会重叠
                getSupportFragmentManager()
                    .beginTransaction()
                    .hide(unCheckFragment)
                    .commit();
            }
        }
    }

    /**
     * 显示对应的fragment
     * @param checkedRadioBtnId
     */
    private void showFragment(int checkedRadioBtnId){
        String tag = getTagById(checkedRadioBtnId);
        TabFragment mainFragment = (TabFragment) getSupportFragmentManager().findFragmentByTag(tag);
        if(mainFragment == null){
            //如果没有找到对应的fragment则生成一个新的fragment,并添加到容器中
            TabFragment newFragment = new TabFragment(tag);
            getSupportFragmentManager()
                .beginTransaction()
                .add(R.id.fl_contain, newFragment, tag)
                .commit();
        }else {
            //如果找到了fragment则显示它
            getSupportFragmentManager()
                .beginTransaction()
                .show(mainFragment)
                .commit();
        }
    }

    /**
     * 为三个fragment分别取三个不同到tag名
     * @param widgetId
     * @return
     */
    private String getTagById(int widgetId){
        if(widgetId == R.id.rb_first){
            return "first";
        }else if(widgetId == R.id.rb_second){
            return "second";
        }else {
            return "thrid";
        }
    }
}
好了这样我们就基本实现了选显卡功能,代码注释写的很详细了,相信大家肯定明白,我就不加阐述了,good luck!