Kali Linux 安装Nvidia显卡驱动
首先更新KaliLinux:
apt-get update && apt-get upgrade -y && apt-get dist-upgrade -y
Step 1: 安装Linux headers
Install Linux headers as those will be required to build NVIDIADriver modules.
aptitude -r install linux-headers-$(uname -r)
Step 2: 安装 NVIDIA Kernel
apt-get install nvidia-kernel-$(uname -r)
Step 3: 安装NVIDIA Driver Kernel DKMS
aptitude install nvidia-kernel-dkms
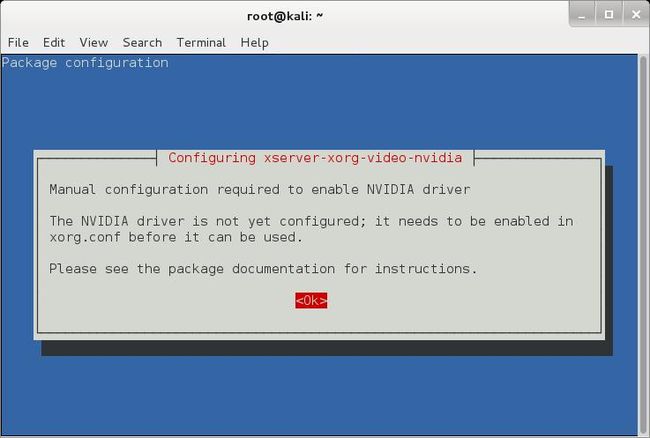
此时显示出2个弹出窗口,第1个关于“你安装完NVIDIA驱动 nvidia-kernel-dkms 后重启时禁用kali原装NVIDIA开源驱动 nouveau ,第2个关于 /etc/X11/文件夹中的xorg.conf文件,OK
Step 4: 安装xconfig NVIDIA driver application
你需要创建一个新的Xorg server 配置文件 xorg.conf或者修改已存在的 xorg.conf 以加载NVIDIADriver module. nvidia-xconfig 安装更快捷些。.
aptitude install nvidia-xconfig
Step 5: Generate Xorg server configuration file
我们已经安装 nvidia-xconfig 执行以下命令 generateXorg server configuration file.
nvidia-xconfig
将会重命名所有已存在的 xorg.conf并创建一个新的文件
reboot
Step 6: 确认你是否安装完成
Step 6.a: 检测GLX Module
首先检测系统是否使用glx module.
glxinfo | grep -i "direct rendering"
首先安装mesa-utils 然后重新输入以上命令检查输出结果:
aptitude install mesa-utils
Step 6.b:检测NVIDIA Driver Module
检测NVIDIA module是否加载 .
lsmod | grep nvidia
Step 6.c: 检测Open source NVIDIA Driver nouveaumodule
确定Open source NVIDIA Driver nouveaumodule没加载, 输入以下命令:
lsmod | grep nouveau
不应该有任何输出结果,否则,就是出问题了。
tep 6.d: 确认是否open source NVIDIA Driver nouveau被屏蔽
一般NVIDIA Driver会默认屏蔽Open source NVIDIADriver nouveau ,当然你也可以确认一下:
cat /etc/modprobe.d/nvidia.conf
cat /etc/modprobe.d/nvidia-blacklists-nouveau.conf
cat /etc/modprobe.d/nvidia-kernel-common.conf
问题解决:
你也许安装完NVIDIA驱动后进入到黑色屏幕中,以下是解决的方法:
Troubleshooting Step A: Fixing black screen with a cursorproblem
Simply press CTRL+ ALT + F1 and login. Type thefollowing
nvidia-xconfig
reboot
You should now be able to log in using the GDM3 GUI.
Troubleshooting Step B: Delete xorg.conf file
Press CTRL+ ALT + F1 and login. Type thefollowing
rm /etc/X11/xorg.conf
reboot
After reboot, you should be able to log in using the GDM3 GUI.
Troubleshooting Step C: remove NVIDIA Driver
Press CTRL+ ALT + F1 and login. Type thefollowing
apt-get remove nvidia-kernel-dkms
reboot
After reboot, you should be able to log in using the GDM3 GUI.


