目录
- 学习《Java和Android开发学习指南(第二版)》第27、28、29、30章——
- 教材学习中的问题和解决过程
- 代码调试中的问题和解决过程
- [代码托管]
- statistics.sh脚本运行结果的截图
- 学习进度条
- 参考资料
学习《Java和Android开发学习指南(第二版)》第27、28、29、30章——
第27章 布局
27.1 概览
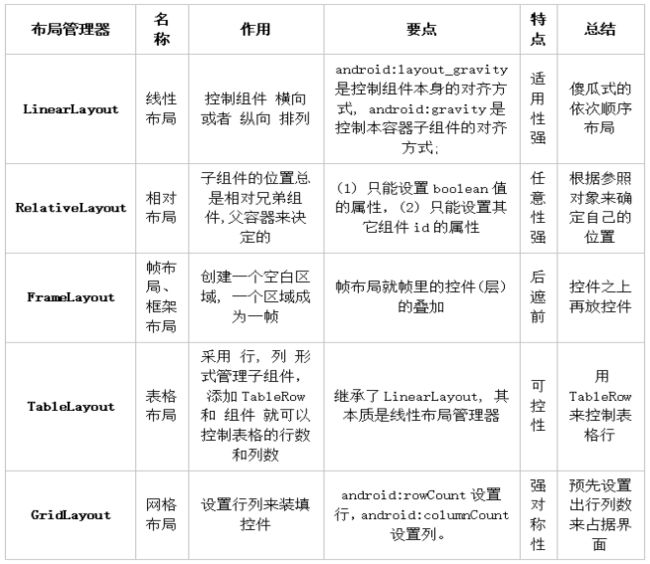
1.Android中的一些布局
LinearLayout。将所有子视图以相同的方向(或者水平地或者垂直地)对齐的一个布局。
RelativeLayout。根据子视图的一个或多个同级视图的位置来排列它的一个布局。
FrameLayout。将每一个子视图放在另一个子视图顶部的一种布局。
TableLayout。将子视图按照行和列来组织的一种布局。
GridLayout。将子视图放置到一个栅格中的一种布局。
27.2 LinearLayout
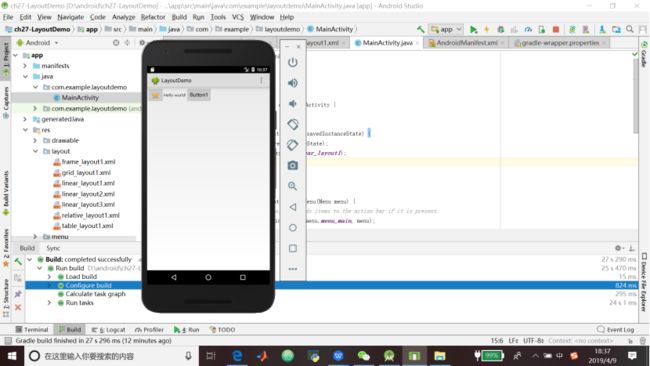
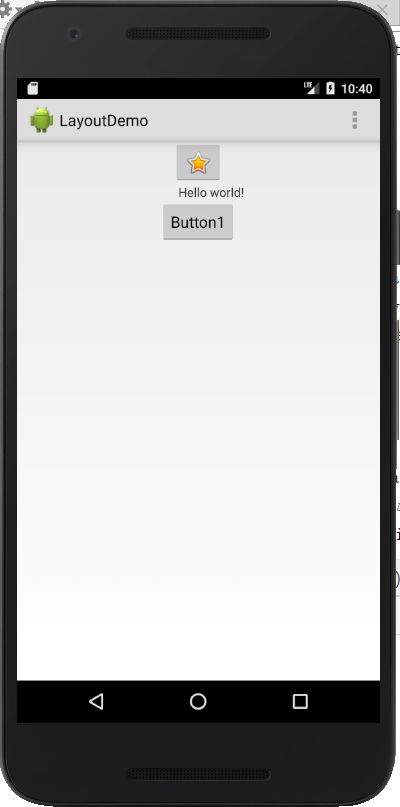
1.代码清单27.1 一个水平的LinearLayout
2.代码清单27.2 垂直的LinearLayout
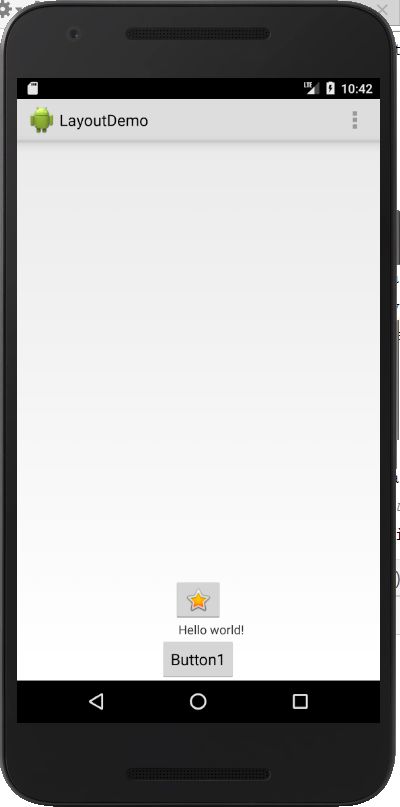
3.代码清单27.3 gravity属性设置为bottom的垂直的LinearLayout
27.3 RelativeLayout
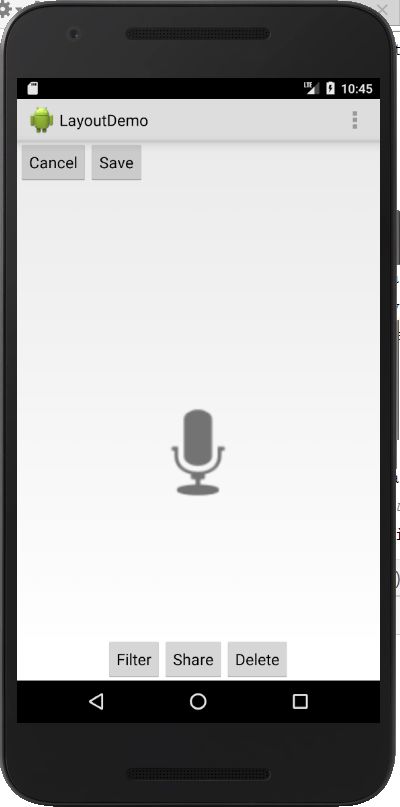
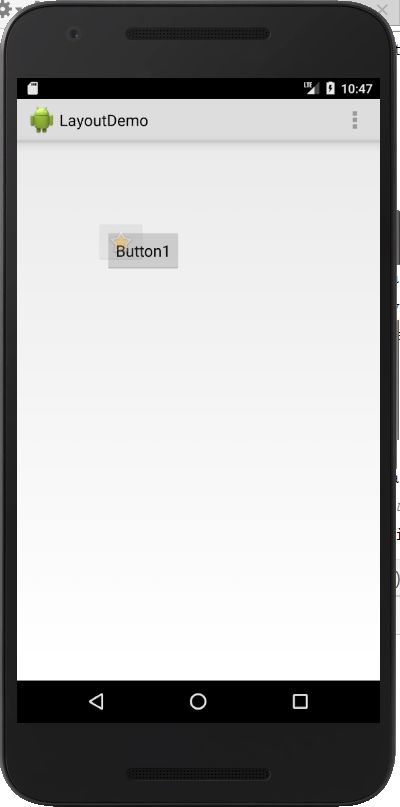
1.代码清单27.4 RelativeLayout
27.4 FrameLayout
1.代码清单27.5 使用一个FrameLayout
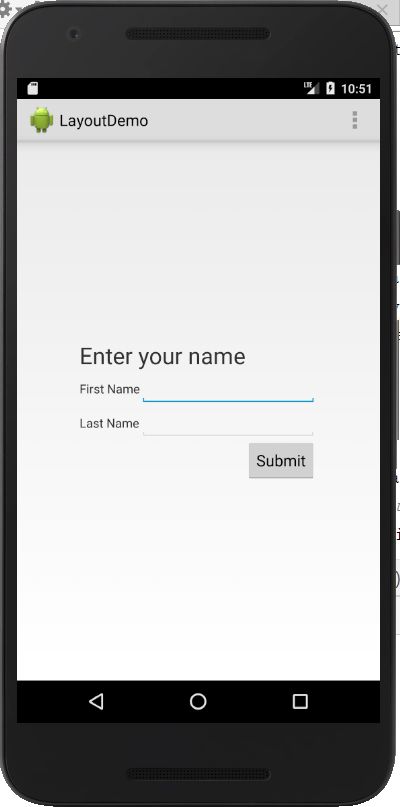
27.5 TableLayout
1.代码清单27.6 使用TableLayout
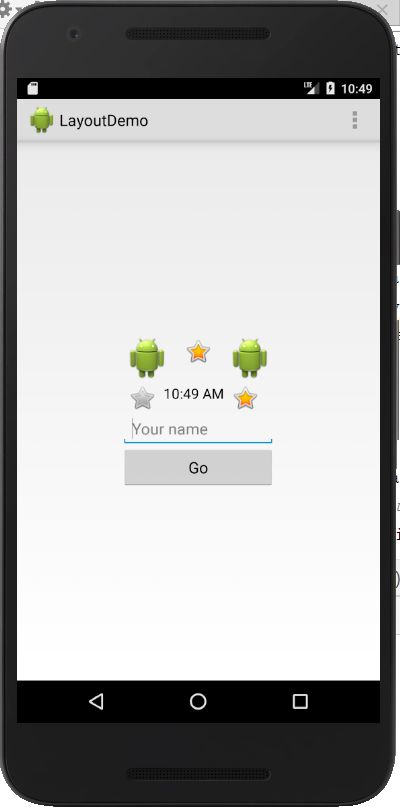
27.6 GridLayout
1.代码清单27.7 GridLayout示例
第28章监听器
和众多的GUI系统一样,Android也是基于事件的。使用活动中的一个视图进行的用户交互,可能会触发一个事件,而且你可以编写当事件发生的时候所执行的代码。包含了响应某一个事件的代码的类,叫作事件监听器。
28.2 使用onClick属性
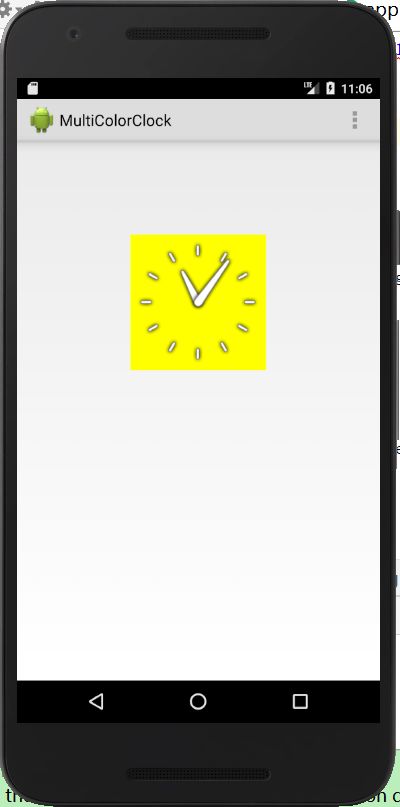
1.代码清单28.1 MulticolorClock的清单
2.代码清单28.2 MulticolorClock中的布局文件
3.代码清单28.3 MulticolorClock中的MainActivity类
package com.example.multicolorclock;
import android.app.Activity;
import android.graphics.Color;
import android.os.Bundle;
import android.view.Menu;
import android.view.View;
import android.widget.AnalogClock;

public class MainActivity extends Activity {

    int counter = 0;
    int[] colors = { Color.BLACK, Color.BLUE, Color.CYAN,
            Color.DKGRAY, Color.GRAY, Color.GREEN, Color.LTGRAY,
            Color.MAGENTA, Color.RED, Color.WHITE, Color.YELLOW };

    @Override
    protected void onCreate(Bundle savedInstanceState) {
        super.onCreate(savedInstanceState);
        setContentView(R.layout.activity_main);
    }

    @Override
    public boolean onCreateOptionsMenu(Menu menu) {
        // Inflate the menu; this adds items to the action bar if it
        // is present.
        getMenuInflater().inflate(R.menu.menu_main, menu);
        return true;
    }

    public void changeColor(View view) {
        if (counter == colors.length) {
            counter = 0;
        }
        view.setBackgroundColor(colors[counter++]);
    }
}
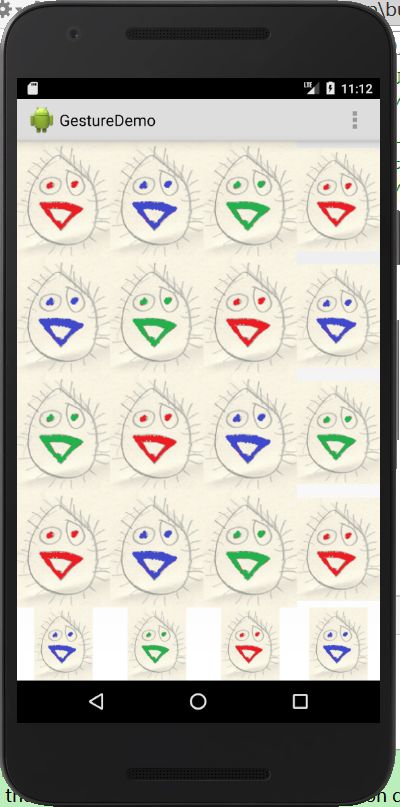
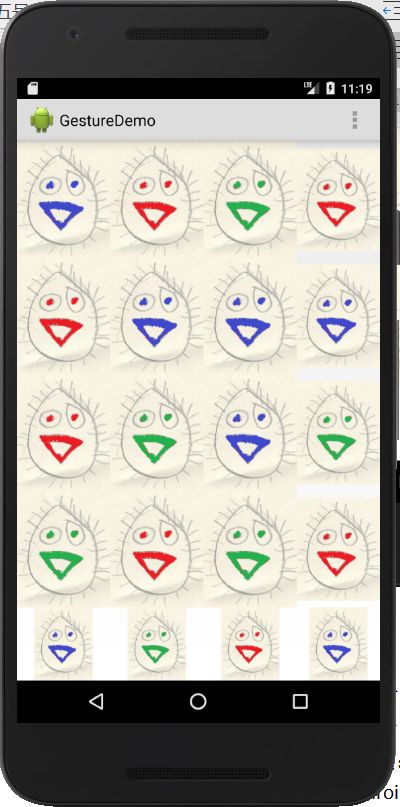
28.3 实现一个监听器
1.代码清单28.4 CellView类
package com.example.gesturedemo;
import android.content.Context;
import android.widget.ImageView;

public class CellView extends ImageView {
    int x;
    int y;

    public CellView(Context context, int x, int y) {
        super(context);
        this.x = x;
        this.y = y;
    }
}
2.代码清单28.5 MainActivity类
package com.example.gesturedemo;
import android.app.Activity;
import android.graphics.drawable.Drawable;
import android.os.Bundle;
import android.view.Gravity;
import android.view.Menu;
import android.view.MotionEvent;
import android.view.View;
import android.view.View.OnTouchListener;
import android.view.ViewGroup;
import android.widget.ImageView;
import android.widget.LinearLayout;

public class MainActivity extends Activity {

    int rowCount = 7;
    int cellCount = 7;
    ImageView imageView1;
    ImageView imageView2;
    CellView[][] cellViews;
    int downX;
    int downY;
    boolean swapping = false;

    @Override
    protected void onCreate(Bundle savedInstanceState) {
        super.onCreate(savedInstanceState);

        LinearLayout root = new LinearLayout(this);
        LinearLayout.LayoutParams matchParent =
                new LinearLayout.LayoutParams(
                        LinearLayout.LayoutParams.MATCH_PARENT,
                        LinearLayout.LayoutParams.MATCH_PARENT);
        root.setOrientation(LinearLayout.VERTICAL);
        root.setGravity(Gravity.CENTER_VERTICAL);

        addContentView(root, matchParent);


        // create row
        cellViews = new CellView[rowCount][cellCount];
        LinearLayout.LayoutParams rowLayoutParams =
                new LinearLayout.LayoutParams(
                        LinearLayout.LayoutParams.MATCH_PARENT,
                        LinearLayout.LayoutParams.WRAP_CONTENT);

        ViewGroup.LayoutParams cellLayoutParams =
                new ViewGroup.LayoutParams(
                        ViewGroup.LayoutParams.WRAP_CONTENT,
                        ViewGroup.LayoutParams.WRAP_CONTENT);

        int count = 0;
        for (int i = 0; i < rowCount; i++) {
            CellView[] cellRow = new CellView[cellCount];
            cellViews[i] = cellRow;

            LinearLayout row = new LinearLayout(this);
            row.setLayoutParams(rowLayoutParams);
            row.setOrientation(LinearLayout.HORIZONTAL);
            row.setGravity(Gravity.CENTER_HORIZONTAL);
            root.addView(row);
            // create cells
            for (int j = 0; j < cellCount; j++) {
                CellView cellView = new CellView(this, j, i);
                cellRow[j] = cellView;
                if (count == 0) {
                    cellView.setImageDrawable(
                            getResources().getDrawable(
                                    R.drawable.image1));
                } else if (count == 1) {
                    cellView.setImageDrawable(
                            getResources().getDrawable(
                                    R.drawable.image2));
                } else {
                    cellView.setImageDrawable(
                            getResources().getDrawable(
                                    R.drawable.image3));
                }
                count++;
                if (count == 3) {
                    count = 0;
                }
                cellView.setLayoutParams(cellLayoutParams);
                cellView.setOnTouchListener(touchListener);
                row.addView(cellView);
            }
        }
    }

    @Override
    public boolean onCreateOptionsMenu(Menu menu) {
        getMenuInflater().inflate(R.menu.menu_main, menu);
        return true;
    }

    private void swapImages(CellView v1, CellView v2) {
        Drawable drawable1 = v1.getDrawable();
        Drawable drawable2 = v2.getDrawable();
        v1.setImageDrawable(drawable2);
        v2.setImageDrawable(drawable1);
    }

    OnTouchListener touchListener = new OnTouchListener() {
        @Override
        public boolean onTouch(View v, MotionEvent event) {
            CellView cellView = (CellView) v;

            int action = event.getAction();
            switch (action) {
                case (MotionEvent.ACTION_DOWN):
                    downX = cellView.x;
                    downY = cellView.y;
                    return true;
                case (MotionEvent.ACTION_MOVE):
                    if (swapping) {
                        return true;
                    }
                    float x = event.getX();
                    float y = event.getY();
                    int w = cellView.getWidth();
                    int h = cellView.getHeight();
                    if (downX < cellCount - 1
                            && x > w && y >= 0 && y <= h) {
                        // swap with right cell
                        swapping = true;
                        swapImages(cellView,
                                cellViews[downY][downX + 1]);
                    } else if (downX > 0 && x < 0
                            && y >=0 && y <= h) {
                        // swap with left cell
                        swapping = true;
                        swapImages(cellView,
                                cellViews[downY][downX - 1]);
                    } else if (downY < rowCount - 1
                            && y > h && x >= 0 && x <= w) {
                        // swap with cell below
                        swapping = true;
                        swapImages(cellView,
                                cellViews[downY + 1][downX]);
                    } else if (downY > 0 && y < 0
                            && x >= 0 && x <= w) {
                        // swap with cell above
                        swapping = true;
                        swapImages(cellView,
                                cellViews[downY - 1][downX]);
                    }
                    return true;
                case (MotionEvent.ACTION_UP):
                    swapping = false;
                    return true;
                default:
                    return true;
            }
        }
    };
}
触碰操作前——
触碰操作后——
第29章操作栏
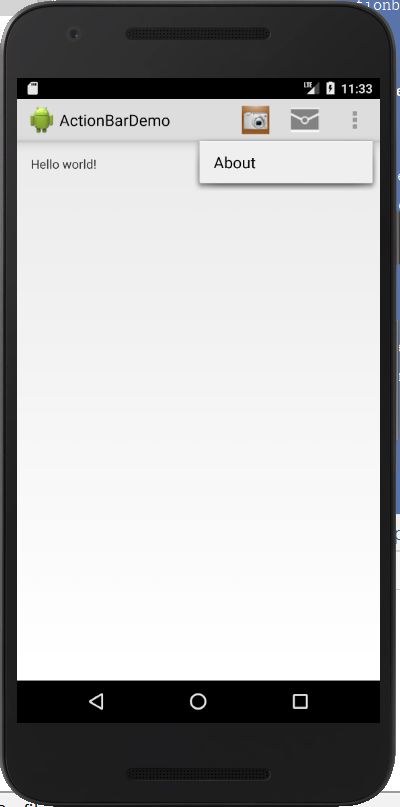
29.2 添加操作项
1.代码清单29.1 ActionBarDemo的清单
2.代码清单29.2 res/values/strings.xml
    MultiColorClock
    Hello world!
    Settings
3.代码清单29.3 res/menu/menu_main.xml
4.代码清单29.4 MainActivity类
package com.example.actionbardemo;
import android.app.Activity;
import android.app.AlertDialog;
import android.os.Bundle;
import android.view.Menu;
import android.view.MenuItem;

public class MainActivity extends Activity {

    @Override
    protected void onCreate(Bundle savedInstanceState) {
        super.onCreate(savedInstanceState);
        setContentView(R.layout.activity_main);
    }

    @Override
    public boolean onCreateOptionsMenu(Menu menu) {
        getMenuInflater().inflate(R.menu.menu_main, menu);
        return true;
    }

    @Override
    public boolean onOptionsItemSelected(MenuItem item) {
        // Handle presses on the action bar items
        switch (item.getItemId()) {
            case R.id.action_profile:
                showAlertDialog("Profile", "You selected Profile");
                return true;
            case R.id.action_capture:
                showAlertDialog("Settings",
                        "You selected Settings");
                return true;
            case R.id.action_about:
                showAlertDialog("About", "You selected About");
                return true;
            default:
                return super.onOptionsItemSelected(item);
        }
    }

    private void showAlertDialog(String title, String message) {
        AlertDialog alertDialog = new
                AlertDialog.Builder(this).create();
        alertDialog.setTitle(title);
        alertDialog.setMessage(message);
        alertDialog.show();
    }
}
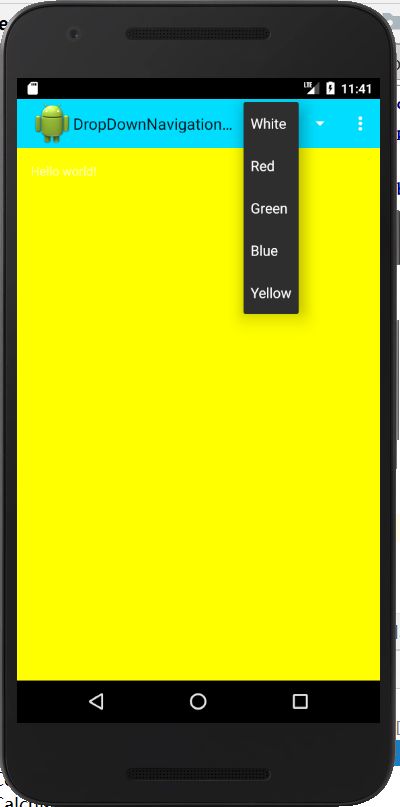
29.3 添加下拉式导航
1.代码清单29.5 DropDownNavigationDemo清单
2.代码清单29.6 res/values/strings.xml文件
DropDownNavigationDemo
Settings
Hello world!
- White
- Red
- Green
- Blue
- Yellow
3.MainActivity类
package com.example.dropdownnavigationdemo;
import android.app.ActionBar;
import android.app.ActionBar.OnNavigationListener;
import android.app.Activity;
import android.graphics.Color;
import android.os.Bundle;
import android.view.Menu;
import android.widget.ArrayAdapter;
import android.widget.SpinnerAdapter;

public class MainActivity extends Activity {

    @Override
    protected void onCreate(Bundle savedInstanceState) {
        super.onCreate(savedInstanceState);
        setContentView(R.layout.activity_main);
        SpinnerAdapter spinnerAdapter =
                ArrayAdapter.createFromResource(this,
                        R.array.colors,
                        android.R.layout.simple_spinner_dropdown_item);
        ActionBar actionBar = getActionBar();
        actionBar.setNavigationMode(
                ActionBar.NAVIGATION_MODE_LIST);
        actionBar.setListNavigationCallbacks(spinnerAdapter,
                onNavigationListener);
    }

    @Override
    public boolean onCreateOptionsMenu(Menu menu) {
        getMenuInflater().inflate(R.menu.menu_main, menu);
        return true;
    }

    OnNavigationListener onNavigationListener = new
            OnNavigationListener() {
                @Override
                public boolean onNavigationItemSelected(
                        int position, long itemId) {
                    String[] colors = getResources().
                            getStringArray(R.array.colors);
                    String selectedColor = colors[position];

                    getWindow().getDecorView().setBackgroundColor(
                            Color.parseColor(selectedColor));
                    return true;
                }
            };
}
4.代码清单29.8 res/values/styles.xml文件
第30章菜单
30.1 概览
1.Android中有3种类型的菜单:选项菜单、上下文菜单、弹出式菜单。
2.使用选项菜单和上下文菜单的时候需要做的3件事情。
(1)在一个XML文件中创建菜单,并将其保存到res/menu目录下。
(2)在活动类中,根据菜单类型,覆盖onCreateOptionsMenu或onCreateContextMenu方法。然后,在覆盖的方法中,调用getMenuInflater().inflate()传入要使用的菜单。
(3)在活动类中,根据菜单类型,覆盖onOptionsItemSelected或onContextItemSelected方法。
3.弹出式菜单:
(1)在XML文件中创建菜单,并将其保存到res/menu目录中。
(2)在活动类中,创建一个PopupMenu对象和一个PupopMenu.OnMenuItemClickListener对象。在监听器类中,定义一个方法,当选择一个弹出式菜单选项的时候,该方法将处理点击事件。
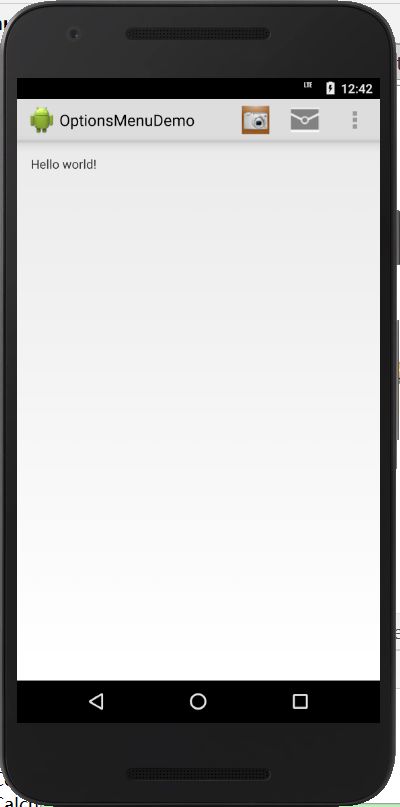
30.3 选项菜单
1.代码清单30.1 OptionsMenuDemo的清单
2.代码清单30.2 options_menu.xml文件
3.代码清单30.3 用于OptionsMenuDemo的strings.xml
    OptionsMenuDemo
    Capture
    Profile
    About
    Hello world!
4.代码清单30.4 OptionsMenuDemo的MainActivity
package com.example.optionsmenudemo;
import android.app.Activity;
import android.app.AlertDialog;
import android.os.Bundle;
import android.view.Menu;
import android.view.MenuItem;

public class MainActivity extends Activity {
    @Override
    protected void onCreate(Bundle savedInstanceState) {
        super.onCreate(savedInstanceState);
        setContentView(R.layout.activity_main);
    }

    @Override
    public boolean onCreateOptionsMenu(Menu menu) {
        getMenuInflater().inflate(R.menu.options_menu, menu);
        return true;
    }

    @Override
    public boolean onOptionsItemSelected(MenuItem item) {
        // Handle click on menu items
        switch (item.getItemId()) {
            case R.id.action_profile:
                showAlertDialog("Profile", "You selected Profile");
                return true;
            case R.id.action_capture:
                showAlertDialog("Settings",
                        "You selected Settings");
                return true;
            case R.id.action_about:
                showAlertDialog("About", "You selected About");
                return true;
            default:
                return super.onOptionsItemSelected(item);
        }
    }

    private void showAlertDialog(String title, String message) {
        AlertDialog alertDialog = new
                AlertDialog.Builder(this).create();
        alertDialog.setTitle(title);
        alertDialog.setMessage(message);
        alertDialog.show();
    }
}
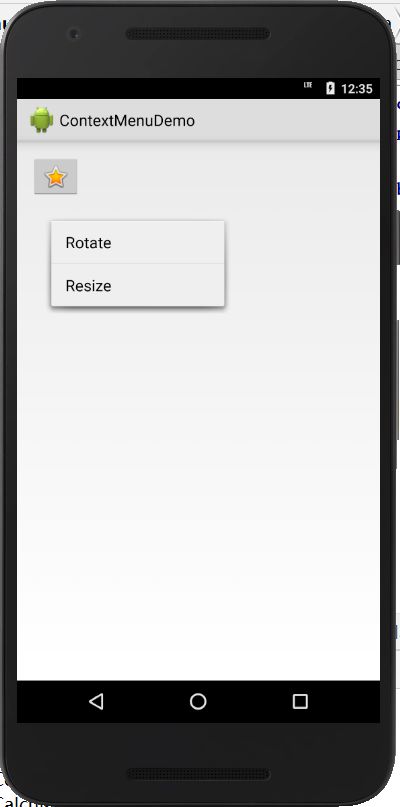
30.4 上下文菜单
1.代码清单30.5 ContextMenuDemo的AndroidMenifest.xml
2.代码清单30.6 ContextMenuDemo的context_menu.xml
3.代码清单30.7 ContextMenuDemo的strings.xml
    ContextMenuDemo
    Settings
    Rotate
    Resize
    Hello world!
4.代码清单30.8 ContextMenuDemo的MainActivity
package com.example.contextmenudemo;
import android.app.Activity;
import android.app.AlertDialog;
import android.os.Bundle;
import android.view.ContextMenu;
import android.view.ContextMenu.ContextMenuInfo;
import android.view.MenuInflater;
import android.view.MenuItem;
import android.view.View;
import android.widget.ImageButton;

public class MainActivity extends Activity {
    @Override
    protected void onCreate(Bundle savedInstanceState) {
        super.onCreate(savedInstanceState);
        setContentView(R.layout.activity_main);
        ImageButton imageButton = (ImageButton)
                findViewById(R.id.button1);
        registerForContextMenu(imageButton);
    }

    @Override
    public void onCreateContextMenu(ContextMenu menu, View v,
                                    ContextMenuInfo menuInfo) {
        super.onCreateContextMenu(menu, v, menuInfo);
        MenuInflater inflater = getMenuInflater();
        inflater.inflate(R.menu.context_menu, menu);
    }
    @Override
    public boolean onContextItemSelected(MenuItem item) {
        switch (item.getItemId()) {
            case R.id.action_rotate:
                showAlertDialog("Rotate", "You selected Rotate ");
                return true;
            case R.id.action_resize:
                showAlertDialog("Resize", "You selected Resize");
                return true;
            default:
                return super.onContextItemSelected(item);
        }
    }

    private void showAlertDialog(String title, String message) {
        AlertDialog alertDialog = new
                AlertDialog.Builder(this).create();
        alertDialog.setTitle(title);
        alertDialog.setMessage(message);
        alertDialog.show();
    }
}
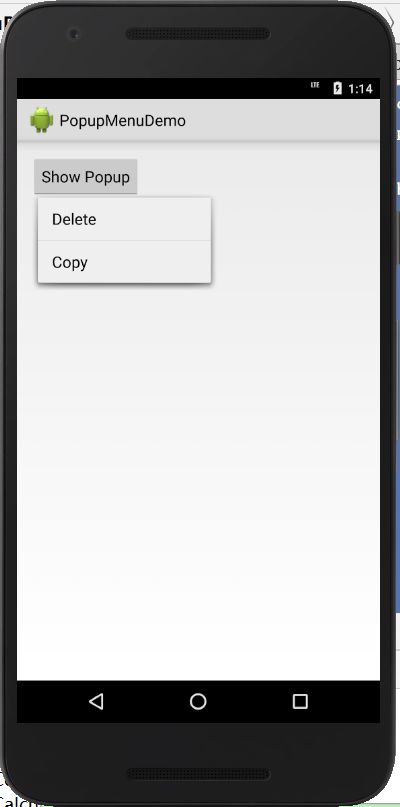
30.5 弹出式菜单
1.代码清单30.9 PopupMenuDemo的AndroidManifest.xml文件
2.代码清单30.10 PopupMenuDemo的popup_menu.xml
3.代码清单30.11 PopupMenuDemo的strings.xml
    PopupMenuDemo
    Settings
    Delete
    Copy
    Show Popup
4.代码清单30.12 PopupMenuDemo的MainActivity
package com.example.popupmenudemo;
import android.app.Activity;
import android.os.Bundle;
import android.util.Log;
import android.view.MenuItem;
import android.view.View;
import android.widget.Button;
import android.widget.PopupMenu;

public class MainActivity extends Activity {

    PopupMenu popupMenu;
    PopupMenu.OnMenuItemClickListener menuItemClickListener;

    @Override
    protected void onCreate(Bundle savedInstanceState) {
        super.onCreate(savedInstanceState);
        setContentView(R.layout.activity_main);
        menuItemClickListener =
                new PopupMenu.OnMenuItemClickListener() {
                    @Override
                    public boolean onMenuItemClick(MenuItem item) {
                        switch (item.getItemId()) {
                            case R.id.action_delete:
                                Log.d("menu", "Delete clicked");
                                return true;
                            case R.id.action_copy:
                                Log.d("menu", "Copy clicked");
                                return true;
                            default:
                                return false;
                        }
                    }
                };
        Button button = (Button) findViewById(R.id.button1);
        popupMenu = new PopupMenu(this, button);
        popupMenu.setOnMenuItemClickListener(menuItemClickListener);
        popupMenu.inflate(R.menu.popup_menu);
    }

    public void showPopupMenu(View view) {
        popupMenu.show();
    }
}
教材学习中的问题和解决过程
代码调试中的问题和解决过程
- 问题1:本周头脑风暴中提到的“命令行参数”不知道怎么操作
- 问题1解决方案:写好TestArgs类后,点击界面右上角这个标识——

选择Edit Configurations——Program Arguments添加命令行参数“4 5 6”
[代码托管]
https://gitee.com/EvelynYang/seventh_weeks
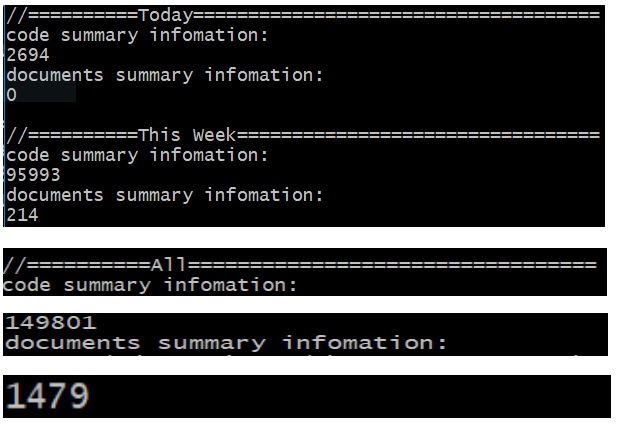
statistics.sh脚本运行结果的截图
在上周新建的AndroidProjects文件夹中运行脚本,之前都是在IdeaProjects文件夹里运行。
学习进度条
| 代码行数(新增/累积) | 博客量(新增/累积) | 学习时间(新增/累积) | 重要成长 | |
|---|---|---|---|---|
| 目标 | 5000行 | 30篇 | 400小时 | |
| 第一周 | 200/200 | 2/2 | 20/20 | |
| 第二周 | 300/500 | 1/3 | 18/38 | |
| 第三周 | 500/1000 | 1/4 | 38/76 | |
| 第四周 | 1000/2000 | 1/5 | 20/96 | |
| 第五周 | 1000/3000 | 1/6 | 25/121 | |
| 第六周 | 1000/4000 | 1/7 | 25/146 | |
| 第七周 | 1000/5000 | 1/8 | 25/171 |
参考资料
- 《Java和Android开发学习指南(第二版)(Java for Android.2nd)》
- Android Studio中文社区
