简介
xhgui基于xhprof,以图形化方式显示结果。简单点就是更加直观。
采用tideways + xhgui组合的原因是我的PHP版本是7,而xhprof不支持,(虽然我安装了一个支持php7的xhprof,但是没有数据,猜测和xhgui不兼容。)
前提
我的PHP版本是PHP7:
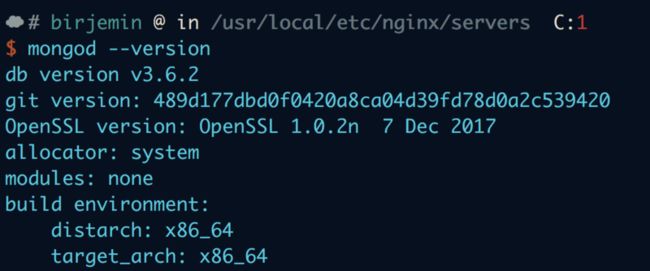
MongoDB的版本是V3.6.2:
安装步骤
1.安装mongodb(mac下面安装mongodb,这个自己google或者baidu吧)
brew install mongodb2.安装php的mongodb的扩展
brew install php70-mongo查看是否安装成功(记得重启php-fpm)
3.安装php的tideways扩展
brew install php70-tideways
cd /usr/local/etc/php/7.0/conf.d
vim ext-tideways_xhprof.ini
添加内容(这个就是编译成功之后的路径)
[tideways_xhprof]
extension="/usr/local/Cellar/php70/7.0.14_7/lib/php/extensions/no-debug-non-zts-20151012/tideways_xhprof.so"
;不需要自动加载,在程序中控制就行
tideways.auto_prepend_library=0
;频率设置为100,在程序调用时能改
tideways.sample_rate=100
查看是否安装成功(记得重启php-fpm)
4.安装 xhgui
cd /Users/birjemin/Developer/Php
git clone https://github.com/laynefyc/xhgui-branch.git
// 我这里把xhgui-branch目录重命名为xhprof_gui
cd xhprof_gui/extension
php install.php
配置xhgui(extension, profiler.enable, db.host, db.db参数)
cd /Users/birjemin/Developer/Php/xhprof_gui/config
cp config.default.php config.php
vim config.php
恭喜安装成功!
使用步骤
1.mongodb需要新建相应的db(上面的第四点confi.php里面的配置)
新建索引优化查询
$ mongo
> use xhprof
> db.results.ensureIndex( { 'meta.SERVER.REQUEST_TIME' : -1 } )
> db.results.ensureIndex( { 'profile.main().wt' : -1 } )
> db.results.ensureIndex( { 'profile.main().mu' : -1 } )
> db.results.ensureIndex( { 'profile.main().cpu' : -1 } )
> db.results.ensureIndex( { 'meta.url' : 1 } )
2.在监听的网站nginx配置加上
- fastcgi_param TIDEWAYS_SAMPLERATE "25";
3.可以在需要监听的接口中代码片段前面引入header.php
include "/Users/birjemin/Developer/Php/xhprof_gui/external/header.php";4.将克隆的xprof_gui配置虚拟主机,这个和你的项目一样的,就把xprof也当做一个项目,配置成浏览器可访问。比如我的配置:
- host: 127.0.0.1 local.xhprof_gui.com
- nginx server conf
server {
    listen   80;
    server_name  local.xhprof-gui.com;

    # root directive should be global
    root   /Users/birjemin/Developer/Php/xhprof_gui/webroot;
    index  index.php;

    location / {
        try_files $uri $uri/ /index.php?$args;
    }

    location ~ \.php$ {
        try_files       $uri =404;
        include         fastcgi_params;
        fastcgi_pass    127.0.0.1:9000;
        fastcgi_index   index.php;
        fastcgi_param SCRIPT_FILENAME $document_root$fastcgi_script_name;
    }
}
5.重启nginx,浏览器访问local.xhprof-gui.com看看能不能访问(没有目录??你是不是浏览器无法访问目录??权限没开。。自己配置一下)
6.在postman或者浏览器访问接口,转啊转,好了之后就可以去http://local.xhprof-gui.com/查看了。(图我就不截了。。)
遇到的问题
1.安装完了,跑起来数据为空
我猜测我安装的xhprof虽然支持PHP7,但是和xhgui不兼容,把config.php里面的 extension 参数改成 tideways_xhprof 而不是 xhprof
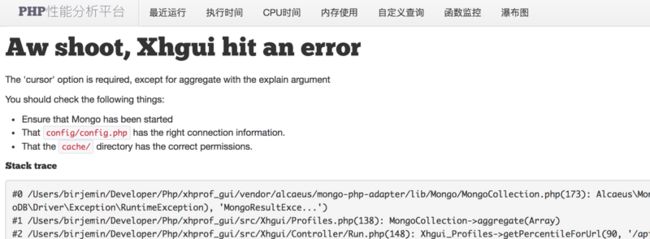
2.mongoDb报错
这是一个bug(issue),请按照这个方法修改相应文件。
3.为啥不在nginx里面配置
fastcgi_param PHP_VALUE "auto_prepend_file=/Users/birjemin/Developer/Php/xhprof_gui/external/header.php";而是
include "/Users/birjemin/Developer/Php/xhprof_gui/external/header.php";因为我这是本地调试,重在分析某一个接口,而不是观测线上的正式环境。还有这个原因issues
备注
重启php-fpm(视个人重启方式而定,我的重启方式是这样的)
cd /usr/local/etc/php/7.0/
sudo killall php-fpm
sudo /usr/local/Cellar/php70/7.0.14_7/sbin/php-fpm -D
参考
- https://github.com/laynefyc/xhgui-branch/issues/10
- https://segmentfault.com/a/1190000007580819
- http://blog.it2048.cn/article_tideways-xhgui.html
- https://github.com/laynefyc/xhgui-branch/issues/13


