Scipy文件输入/输出
Scipy文件输入/输出
- 随机生成数组,使用scipy中的io.savemat()保存
- 文件格式是.mat,标准的二进制文件
导入
import scipy.ioio存储
# moon是读入的图片,moon_result是消除噪声后的图片
scipy.io.savemat('./data.mat',mdict={'moon':moon,'moon_result':moon_result})
使用io.loadmat()读取数据
# mat martix 矩阵
data = scipy.io.loadmat('./data.mat')
data
Out:
{'__header__': b'MATLAB 5.0 MAT-file Platform: nt, Created on: Mon Jul 16 10:27:22 2018',
 '__version__': '1.0',
 '__globals__': [],
 'moon': array([[0.04705882, 0.        , 0.23921569, ..., 0.        , 0.00392157,
         0.53333336],
        [0.        , 0.        , 0.6784314 , ..., 0.10196079, 0.2901961 ,
         0.        ],
        [0.72156864, 0.10980392, 0.6039216 , ..., 0.        , 0.21568628,
         1.        ],
        ...,
音频文件处理
- # 图片数据:黑白的是二维的ndarray,彩色三维ndarray
- # mp4;wav
导包
from scipy.io import wavfile读取音频文件
- # 图片,音乐---------> ndarray
# wav 音乐文件数据二维的ndarray
rate,love_data = wavfile.read('./邓紫棋-喜欢你.wav')
type(love_data)
Out: numpy.ndarray

type(moon)
Out: numpy.ndarray

rate,jueji_data = wavfile.read('./林俊杰-爱不会绝迹.wav')
display(rate,jueji_data)
Out:
44100
array([[0, 0],
       [0, 0],
       [0, 0],
       ...,
查看音频数组长度
2**16-1
Out: 65535

# 数据从-65536 ~ 65535
jueji_data.min()
Out: -32401

jueji_data.max()
Out: 32399


display(jueji_data.shape,love_data.shape)
Out:
(10601648, 2)
(10776444, 2)

10601648/2
Out:5300824.0

10776444/2
Out:5388222.0
组合并存储音乐
# 组合音乐
mix_music = np.concatenate([jueji_data[:5300824],love_data[5388222:]])

mix_music.shape
Out: (10689046, 2)

# 存储音频
wavfile.write('./mix_music.wav',44100,mix_music)


测试拼接:----------------------------
a=np.random.randint(0,100,(4,2))
a
Out:
array([[ 9, 68],
       [41, 37],
       [33, 54],
       [15, 55]])

a[:2]
Out:
array([[ 9, 68],
       [41, 37]])

a[2:]
Out:
array([[33, 54],
       [15, 55]])
pydub读取MP3
- # 大部分音乐文件都是mp3格式,mp3格式压缩格式,大小大大降低
- # scipy 没有提供mp3个文件的读取,所以使用pydub来获取mp3文件中的数据,并且可以多数据进行相应操作
导包
import pydub
'''
pip install pydub
注意: pydub直接支持wav格式音频读取,如果需要处理其它格式音频(如MP3,ogg等)需要安装ffmpeg。
ffmpeg的安装在各平台上略有不同,具体方法自行google
'''
读取mp3文件
jing = pydub.AudioSegment.from_mp3('./难念的经.mp3')
jing
查看格式并转成wav格式存储
data = jing.get_array_of_samples()
# 不要打印
type(data)
Out:
array.array

# 将array.array转换
jing_data = np.array(data.tolist())
jing_data.shape
Out:
(23779584,)

# 将mp3类型文件保存成wav格式的数据,高清无损
jing_data = jing_data.reshape(-1,2)
jing_data
Out:
array([[0, 0],
       [0, 0],
       [0, 0],
       ...,
# wav 数据类型int16
jing_data.dtype
Out: dtype('int32')

# 转化为np.int16
jing_data = jing_data.astype(np.int16)

# 存储jing_data
wavfile.write('./难念的经2.wav',44100,jing_data)
读取love音频
love = pydub.AudioSegment.from_mp3('./Love Story.mp3')
love
查看长度
love.frame_count()
Out: 10342656.0

10342656/44100
Out: 234.5273469387755

10342656/2
Out: 5171328.0

love.duration_seconds*1000
Out: 234527.3469387755
切片
# 切片的时候,对应毫秒
love_part = love[:10000]

love_part.dBFS
Out:
-15.509644764004172

love_part.reverse()
jing.duration_seconds*1000
Out: 269609.79591836734

# 均取值xx.duration_seconds*1000 的一半
music_mix = love[:120000] + jing[-120000:]
music_mix
music_mix.export('music_mix.mp3',format='mp3')
Out:
<_io.BufferedRandom name='music_mix.mp3'>
读写图片使用scipy中misc.imread()/imsave()
导包
from scipy import miscmisc旋转、resize、imfilter
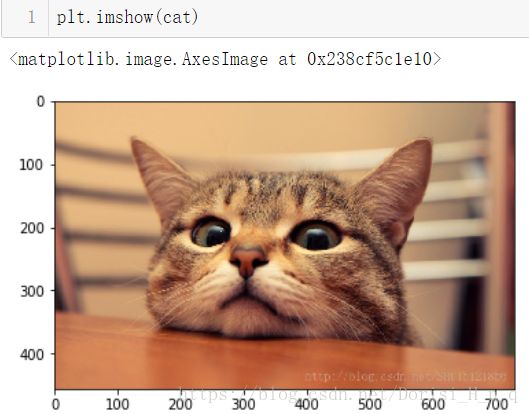
cat = misc.imread('./cat.jpg')
cat
Out:
array([[[231, 186, 131],
        [232, 187, 132],
        [233, 188, 133],
        ...,
# misc显示图片,不能显示,windows系统misc支持欠佳
# ubuntun可以正常
misc.imshow(cat)
---------------------------------------------------------------------------
RuntimeError                              Traceback (most recent call last)
 in ()
      1 # misc显示图片,不能显示,windows系统misc支持欠佳
      2 # ubuntun可以正常
----> 3 misc.imshow(cat)
plt.imshow(cat)
旋转
cat2 = misc.imrotate(cat,60)
plt.imshow(cat2)
Out:
array([[[231, 186, 131],
        [232, 187, 132],
        [233, 188, 133],
        ...,
改size
cat3 = misc.imresize(cat,size = (200,200))
plt.imshow(cat3)
'''ftype : str
The filter that has to be applied. Legal values are:
'blur', 'contour', 'detail', 'edge_enhance', 'edge_enhance_more',
'emboss', 'find_edges', 'smooth', 'smooth_more', 'sharpen'.'''
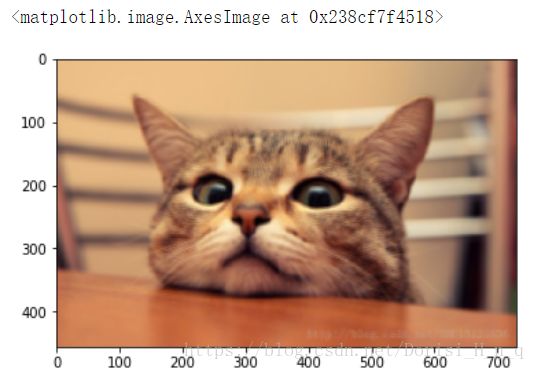
cat4 = misc.imfilter(cat,ftype='blur')
plt.imshow(cat4)'''ftype : str
The filter that has to be applied. Legal values are:
'blur', 'contour', 'detail', 'edge_enhance', 'edge_enhance_more',
'emboss', 'find_edges', 'smooth', 'smooth_more', 'sharpen'.'''
cat4 = misc.imfilter(cat,ftype='contour')
plt.imshow(cat4)
'''ftype : str
        The filter that has to be applied. Legal values are:
        'blur', 'contour', 'detail', 'edge_enhance', 'edge_enhance_more',
        'emboss', 'find_edges', 'smooth', 'smooth_more', 'sharpen'.'''
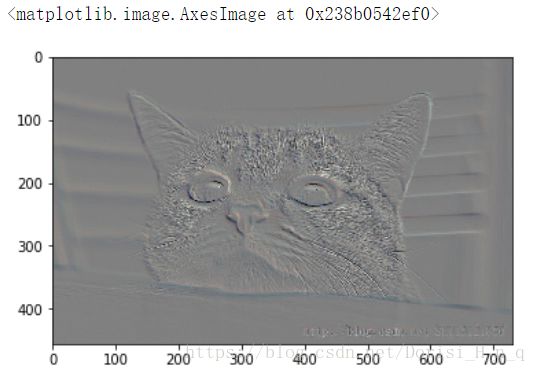
cat4 = misc.imfilter(cat,ftype='emboss')
plt.imshow(cat4)
ffmpeg操作音频/图形/视频
- # ffmpeg 图像、声音、视频(图像和声音的组合)、金融领域、
- # ffmpeg可以将视频格式进行格式转换
从视频中提取音频
# 从视频中提取音频
cmd = 'ffmpeg -i 1.mp4 -f mp3 -vn 2.mp3'


# 可以在代码中执行指令
import subprocess

subprocess.call(cmd)
截取视频
#截取视频
cmd = 'ffmpeg -ss 00:00:07 -i law.mp4 -acodec copy -vcodec copy -t 00:01:30 output.mp4'

subprocess.call(cmd)
只提取视频,过滤声音
# 只提取视频,过滤声音
cmd = 'ffmpeg -i law.mp4 -vcodec copy -an 3.mp4'
subprocess.call(cmd)
无声视频和声音进行合并
# 无声视频和声音进行合并
cmd = 'ffmpeg -i 2.mp3  -i 3.mp4 compine.mp4'

subprocess.call(cmd)
# opencv 打开一个视频
# 展示
# 3.mp4 视频,每一帧  数据获取
import time
import numpy as np
import cv2

# cv2 计算机视觉
cap = cv2.VideoCapture('./3.mp4')
i  =  0
while(cap.isOpened()):
    ret, frame = cap.read()
#     try :
# #         黑白的图片你
#         frame_gray = cv2.cvtColor(frame, cv2.COLOR_BGR2GRAY)
#     except Exception as e:
#         print(e)
#         break
    frame = cv2.resize(frame,(200,150))
    try:
        cv2.imshow('law',frame)
    except Exception as e:
        pass
#     print(type(frame_gray) ,frame_gray.shape)
    i+=1
#     用户输入q,程序退出
    time.sleep(0.04)
    if cv2.waitKey(1) & 0xFF == ord('q'):
        break

# 释放资源你
cap.release()
cv2.destroyAllWindows()


