彻底解决Ubuntu联网问题——网速飞起
文章目录
- 1、`mentohust`锐捷认证客户端
- 2、修改`hosts`并启用`ipv6`
- 2.1 使用`ipv6`的`host`
- 2.2 `hosts`地址
- 3、修改下载源
- 3.1 `apt-get`下载源
- 3.2 更换`pip`源
- 3.3 更换`GitHub`源
- 3.4 更换`npm`源
- 3.5 更换`yarn`源
- 4、与云服务器传输文件
- 4.1 配置密匙验证
- 4.2 传输单个文件
- 4.3 传输文件夹
- 5、修改`DNS`
- 6、`SSR`服务器搭建并配置`ipv6`隧道代理
- 7、搭建`aria2`服务器
- 8、`nginx`多端口不同域名配置
1、mentohust锐捷认证客户端
下载地址:http://c7.gg/aCFu4
sudo apt-get install mentohust
sudo mentohust -k
sudo mentohust -uusername -p123456 -a1 -d2 -b2 -v4.10 -w
2、修改hosts并启用ipv6
本文在
Ubuntu 16.04测试通过,可以访问Google、Facebok、Twitter、维基百科等外网,其他平台hosts文件详见: https://github.com/googlehosts/hosts
- 前提是你的网络环境带有
ipv6.
2.1 使用ipv6的host
- 启动
ipv6
sudo apt-get install miredo
sudo gedit /etc/default/ufw
将IPV6=no改为IPV6=yes
sudo gedit /etc/sysctl.d/10-ipv6-privacy.conf
# 将这两行改为0
net.ipv6.conf.all.use_tempaddr = 2
net.ipv6.conf.default.use_tempaddr = 2
- 测试
ipv6
ping6 ipv6.baidu.com
- 校园网是动态分配的
ipv6地址,需要改成静态的。
sudo geidt /etc/sysctl.d/10-ipv6-privacy.conf
将net.ipv6.conf.default.use_tempaddr改为0
sudo sysctl --system
- 修改
hosts: IPV6 hosts
sudo su
curl https://github.com/lennylxx/ipv6-hosts/raw/master/hosts -L >> /etc/hosts
- 刷新配置
sudo sysctl --system
2.2 hosts地址
- ipv4-hosts
- ipv6-hosts
- 可自行扩展的host
3、修改下载源
3.1 apt-get下载源
-
首先测试适合系统最快的源:
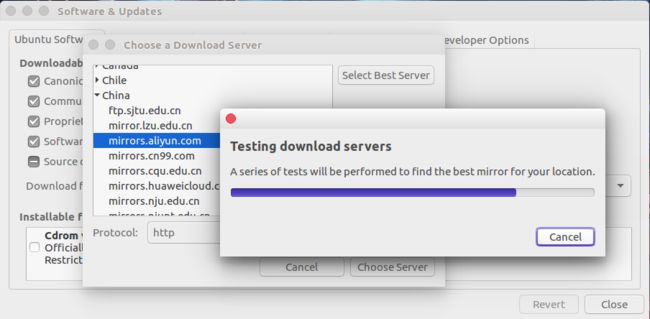
这样它会自动匹配最佳的源,而不是网上大家所说的某某源快就选哪个,适合自己的源就是最快的源。 -
Google搜索该源地址并修改源
sudo gedit /etc/apt/sources.list
3.2 更换pip源
pip国内的一些镜像,换源之后出现python2版本过低的情况导致以前的包下载不了,那就直接将文件夹删除,就能恢复原来的源。
- 阿里云 http://mirrors.aliyun.com/pypi/simple/
- 中国科技大学 https://pypi.mirrors.ustc.edu.cn/simple/
- 豆瓣(douban) http://pypi.douban.com/simple/
- 清华大学 https://pypi.tuna.tsinghua.edu.cn/simple/
- 中国科学技术大学 http://pypi.mirrors.ustc.edu.cn/simple/
linux更换pip源:
cat > ~/.pip/pip.conf
[global]
index-url = https://pypi.tuna.tsinghua.edu.cn/simple
windows更换pip源:
直接在user目录中创建一个pip目录,如:C:\Users\xx\pip,新建文件pip.ini,内容如下
[global]
index-url = https://pypi.tuna.tsinghua.edu.cn/simple
3.3 更换GitHub源
其实改
hosts的时候已经自动改好了,你可以进去查看一下,如果没有就通过下面这种方式加上去.
sudo gedit /etc/hosts
219.76.4.4 github-cloud.s3.amazonaws.com
151.101.72.249 http://global-ssl.fastly.Net
192.30.253.112 http://github.com
3.4 更换npm源
- 临时使用:
npm --registry https://registry.npm.taobao.org install express
- 永久使用
npm install -g cnpm --registry=https://registry.npm.taobao.org
- 验证:
npm config get registry
or
npm info express
3.5 更换yarn源
安装源和原来 npm 是一样的,可以通用
yarn config set registry 'https://registry.npm.taobao.org'
验证:
yarn config get registry
4、与云服务器传输文件
为了避免每次传输文件的时候都要输入公网ip和密码挺麻烦的,所以索性就直接在服务器端配置本地ssh传输公匙,一劳永逸。
4.1 配置密匙验证
ssh-keygen -t rsa -C "[email protected]"
- 在服务器端用户目录创建文件
~/.ssh/authorized_keys,把本地id_rsa.pub公匙添加到这个文件中就可以了。 - 在本地用户目录创建文件
~/.ssh/config,添加如下信息:
host servername
   user username
   hostname pubic-ip
   port 22
   identityfile ~/.ssh/id_rsa
其中servername随便填,与下文中的传输文件对应就行,hostname是公网ip。user填服务器端用户名,该用户需要有对系统文件的读写能力,直接用root 就好啦。
4.2 传输单个文件
1、从服务器上下载文件
scp servername:/path/filename /local_dir_path
2、上传本地文件到服务器
scp /path/filename servername:/path
4.3 传输文件夹
1、从服务器下载整个目录
scp -r servername:/remote_dir /local_dir
2、上传目录到服务器
scp -r /local_dir servername:/remote_dir
5、修改DNS
修改DNS是为了进一步提高浏览器查询ip地址的速度,提高网络流畅度。
sudo gedit /etc/network/interfaces
# 加上
dns-nameservers 8.8.8.8
dns-nameservers 240c::6666
sudo gedit /etc/resolv.conf
# 加上
nameserver 8.8.8.8
nameserver 240c::6666
8.8.8.8是谷歌主DNS服务器,最受欢迎240c::6666是国内首个ipv6 DNS服务器- 当然你也可以选用其他
dns服务器
sudo /etc/init.d/resolvconf restart
此时重启DNS服务发现又没有了,解决办法是:在/etc/resolvconf/resolv.conf.d/目录下创建tail文件,写入
nameserver 8.8.8.8
nameserver 240c::6666
这样再执行sudo /etc/init.d/resolvconf restart就OK了.
6、SSR服务器搭建并配置ipv6隧道代理
- 申请
ipv6的ip: https://www.tunnelbroker.net/register.php
注意几个
ip的区别

- 按照网上教程一键脚本配置搞定.
7、搭建aria2服务器
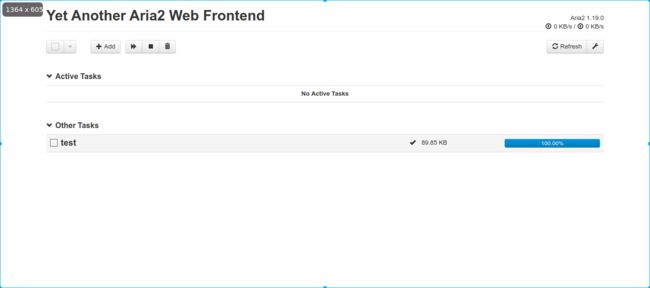
我的服务器地址,https://download.creat.kim , 你们可以上去看看,就是按照作者的教程搭的,我搭建的没有提供公共下载服务。
-
项目地址:[yaaw]https://github.com/binux/yaaw
-
开启服务:
nohup aria2c --enable-rpc --rpc-listen-all=true --rpc-allow-origin-all &
python -m SimpleHTTPServer 端口号 &
8、nginx多端口不同域名配置
直接在配置文件加个
server函数搞定
- 我的配置文件:nginx
- 效果:

好啦,Ubuntu 16.04网络环境就全部配置好啦,最重要的是可以上外网,下载网速比以前快很多倍。
Enjoy it!