回顾下ClientCredentials模式,在ReSourceApi中定义了我们公开服务,第三方网站想要去访问ReSourceApi则需要在身份验证服务中获取toekn,根据token的内容,硬编码去访问公开服务(ResApi),这个还是非常简单的,但!仔细思考下,我们在客户端当中设置了对应的身份验证服务中心的地址,那么也就是可以有多对多的情况,当然我们的第三方网站无需多言去关注这些。
public void ConfigureServices(IServiceCollection services)
        {
            services.AddAuthentication("Bearer")
                .AddIdentityServerAuthentication(options =>
                {
                    options.Authority = "https://localhost:5000";
                    options.RequireHttpsMetadata = false;
                    options.ApiName = "api"; }); services.AddMvc().SetCompatibilityVersion(CompatibilityVersion.Version_2_1); }
下面咱说下密码模式,这个模式安全级别比ClientCredentials高得多,第一步我们需要修改一下我们的Config文件.然后第二步就是添加我们的TestUser对象.
public static IEnumerableGetClients() { return new List { new Client() { ClientId = "client", AllowedGrantTypes = GrantTypes.ClientCredentials,//客户端登陆模式 ClientSecrets ={ new Secret("secret".Sha256()) }, AllowedScopes = {"api"} }, new Client() { ClientId = "pwdClient", AllowedGrantTypes = GrantTypes.ResourceOwnerPassword,//密码授权登陆模式 ClientSecrets ={ new Secret("secret".Sha256()) }, AllowedScopes = {"api"} } }; }
第二部TestUser对象由IdentityServer4.Test 给我们提供了,我们引入就ok,然后添加该方法用于测试.
public static ListGetTestUsers() { return new List { new TestUser() { SubjectId = "1", Username = "zara", Password = "112233" } }; }
当然,你还需要将测试数据注入到core中,我们需要修改下原来的Stratup.cs类.
services.AddIdentityServer()//将Idserer DI到.netcore
                .AddDeveloperSigningCredential()
                .AddInMemoryApiResources(Config.GetResource())//添加公开服务
                .AddInMemoryClients(Config.GetClients())//客户端模拟数据
                .AddTestUsers(Config.GetTestUsers());//用户测试数据
下面我们用postMan来测试一下,先用原来的客户端模式,看,我们对客户端模式不会影响。

现在我们再试一下密码登陆模式,首先获取token!

我们再去ReSourceApi中进行测试,OK,没问题!

现在我们创建一个客户端,用于硬编码的密码登陆。
using IdentityModel.Client;
using System;
using System.Net.Http;
namespace ThirdPartySolucation
{
public static class passWordLogin
{
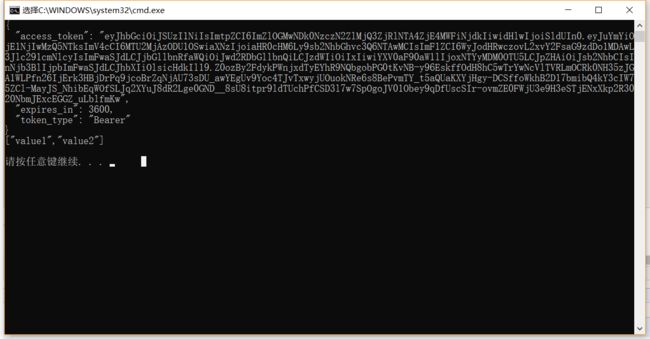
public static void Login() { var diso = DiscoveryClient.GetAsync("https://localhost:5000").Result; if (diso.IsError) { Console.WriteLine(diso.Error); } var tokenClient = new TokenClient(diso.TokenEndpoint, "pwdClient", "secret"); var tokenResponse = tokenClient.RequestResourceOwnerPasswordAsync("zara","112233").Result; if (tokenResponse.IsError) { Console.WriteLine(tokenResponse.Error); } else { Console.WriteLine(tokenResponse.Json); } HttpClient httpClient = new HttpClient(); httpClient.SetBearerToken(tokenResponse.AccessToken); var response = httpClient.GetAsync("http://localhost:5001/api/values").Result; if (response.IsSuccessStatusCode) { Console.WriteLine(response.Content.ReadAsStringAsync().Result); } Console.WriteLine(); } } }
启动,结果如下:
如果需要不做secret验证,在Config中添加该参数:
new Client()
                {
                    ClientId = "pwdClient",
                    AllowedGrantTypes = GrantTypes.ResourceOwnerPassword,
                    ClientSecrets ={
                        new Secret("secret".Sha256())
                    },
                    RequireClientSecret = false, AllowedScopes = {"api"} }

上图是基本的客户端登陆模式,而密码模式呢,则会在获取获取token中Body上下文中加入username,password来加以复杂认证,但是用密码也不太可靠,抽时间我们说下授权码模式,说一说它们的区别与实现。