下载教程文件**
·····密码: ahgt**
选择对应名称的文件夹下载,内包含一个(开始)和一个(已完成)文件;(开始)文件用来和教程同步操作,(已完成)是最终结果。
Create screen flows. 创建屏幕切换流程
Creating screen flows in Origami is easier than you might think, and still allows for some more complex interactions within screens.
在 Origami 中创建屏幕流程比你想的要容易得多,并且仍然允许在屏幕内进行复杂的交互。
We are going to recreate the Instagram Boomerang interface, with scrolling behavior in one of the screens. It even has some of the more advanced iOS behavior such as offset as the screen moves.
本篇教程将搭建 Instagram Boomerang 的界面,其中一个页面还有滚动。甚至有一些高级的 iOS 行为,如屏幕移动时的偏移。
Screen 屏幕
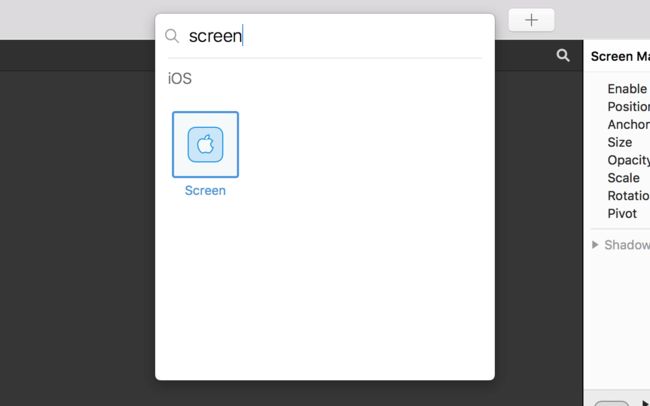
The starting tutorial files have three Screen layers set up already. If you need to add more, click on the New Layer button Shift Cmd N and type to find Screen.
教程文件中已经创建三个屏幕层了。如果需要添加更多屏,按 Shift Cmd N 打开新图层下拉框,在控件类图层中找到 Screen 点击添加。
Screen start state 屏幕的启动状态
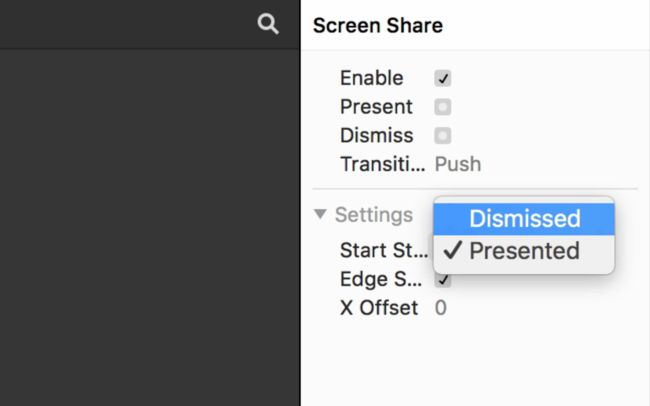
Screens are presented by default, so right now, they are stacked on top of each other. Click Screen Share and change the Start State to Dismissed.
屏幕默认情况下是显示,所有的屏幕都重叠在一起。选中 Screen Share 图层,将属性 Start State 的值改为 Dismissed。
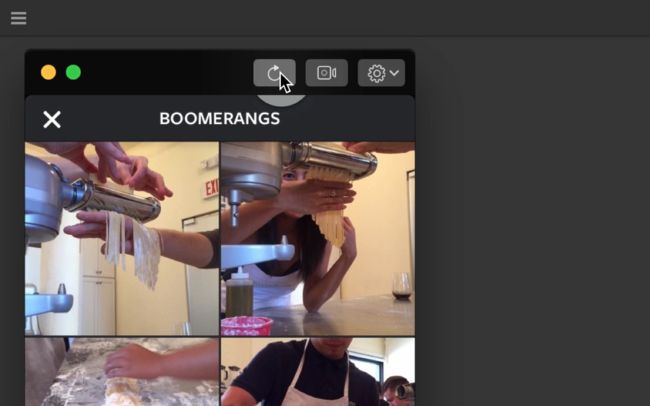
Restart the prototype by clicking on the Restart Prototype button in the Viewer toolbar, and then repeat the process for Screen Boomerangs; click on the Screen Boomerangs layer, change the Start State to Dismissed, and then click the Restart Prototype button.
点击查看器工具栏中的 “重启” 按钮重启原型。
然后将 Screen Boomerangs 图层的属性 Start State 的值也改为 Dismissed。重启原型。
The last screen is Screen Main. It is a regular Group layer since it is not going anywhere.
最后一个屏是 Screen Main。一个常规的组层,因为它不会去任何地方。
Linking screens 连接屏幕
The first screen transition is from Screen Main to Screen Boomerangs. We need a Hit Area to take us there.
第一个跳转是从 Screen Main 跳转到 Screen Boomerangs。我们需要点击一个点击区域来启动跳转。
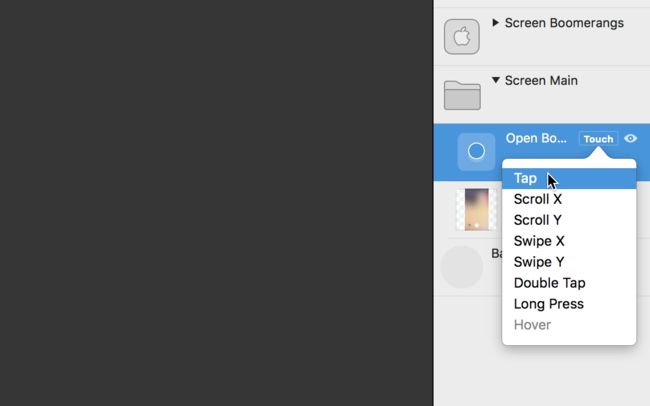
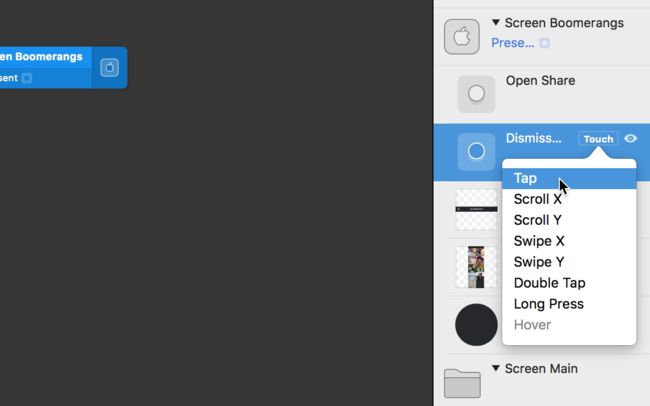
A Hit Area named Open Boomerangs exists within Screen Main, covering the thumbnail in the Viewer. Make it interactive by hovering over Open Boomerangs, clicking on Touch, then clicking on Tap.
Screen Main 组内有一个名为 Open Boomerangs 的热区,覆盖在查看器中的缩略图上。给这个热区加一个 Tap 交互模块。
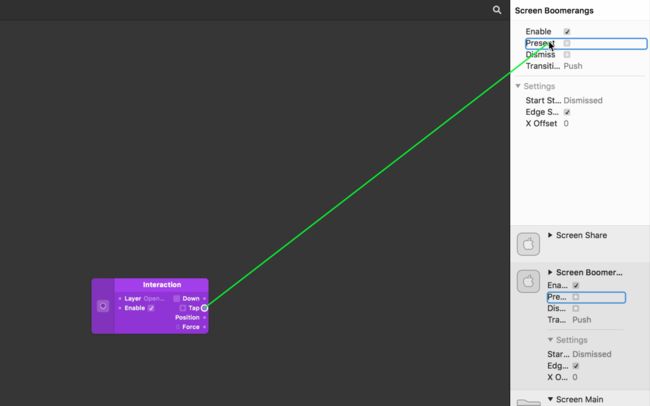
Connect the Tap output of the Open Boomerangs Hit Area to the Present property of Screen Boomerangs. Tapping the thumbnail in Screen Main should now open Screen Boomerangs.
将交互模块的 Tap 输出口连接到 Screen Boomerangs 图层的状态属性 Present 上。
We don't need to add any Switch, Pop Animation, or Transition patches, because Screen handles all of this for us.
不用添加 Switch、Pop animation 和 Transition 模块,因为 Screen 包含了这仨呢。
Linking back 返回的连接
The next thing we need is a way to get back to our Screen Main. A Hit Area named Dismiss Boomerangs has already been created for this purpse, inside of Screen Boomerangs.
下一步还得瞅瞅咋回到 Screen Main 页面。Screen Boomerangs 内部已经创建了一个命名为 Dismiss Boomerangs 的热区。
Like before, make that interactive by hovering over Dismiss Boomerangs, clicking on Touch, and then clicking Tap.
跟上一步一样,给这个热区加一个 Tap 交互。
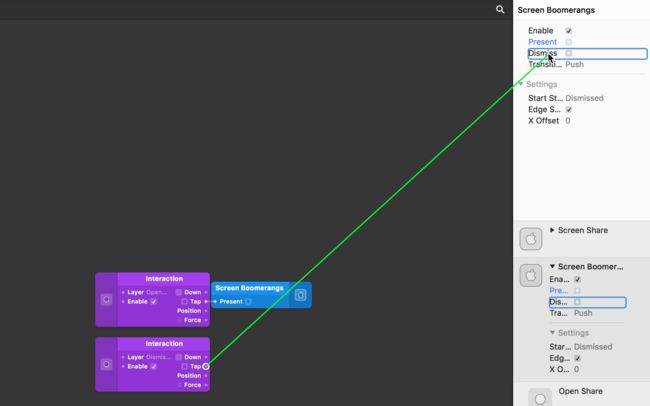
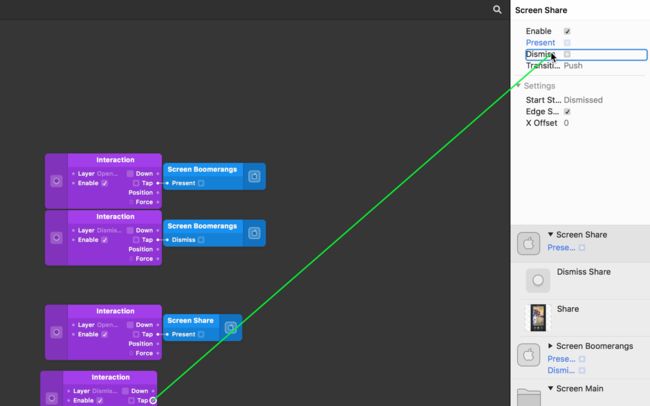
Our new Interaction patch is going to affect Screen Boomerangs. Click and drag on the Tap of the new Interaction patch and connect it to Dismiss Screen Boomerangs.
这个新的 Interaction 模块将会影响 Screen Boomerangs 图层。点击并拖动新 Interaction 模块的 Tap 输出口连接到 Screen Boomerangs 图层的状态属性 Dismiss。
Now tapping on the cross in our prototype should take us back to Screen Main, and clicking on the thumbnail should take us to Screen Boomerangs.
现在点击关闭按钮应该会回到 Screen Main,点击缩略图再次打开 Screen Boomerangs。
Changing transitions types 改变过渡类型
One minor detail is that the Boomerangs actually come out from the side in this prototype, whereas in the real app they come from the bottom. Screens in Origami support both of these transition types.
一个小细节,在这个原型中 Screen Boomerangs 页面是从右像左显示,而在真实的应用中是从下往上显示。Origami 支持这两种切换类型。
Go to the Transition property of our Screen Boomerangs and it from from Push to Modal.
选中 Screen Boomerangs 图层,将属性 Transition 的值从 Push 改为 Modal。
Now clicking on the thumbnail should bring Screen Boomerangs up from the bottom, and tapping on the cross should bring Screen Boomerangs back down.
再试着点击一下,Screen Boomerangs 从下往上显示,从上往下关闭。
Finishing the flow 整理流程
Our last Screen is a closer look at the first thumbnail, called Screen Share. Like before, a Hit Area has already been prepared for this, called Open Share.
最后一个屏幕叫 Screen Share ,是放大列表中的第一个图。跟前面一样,已经有一个叫 Open Share 的热区,在 Screen Boomerangs 下的 Boomerangs 组内。
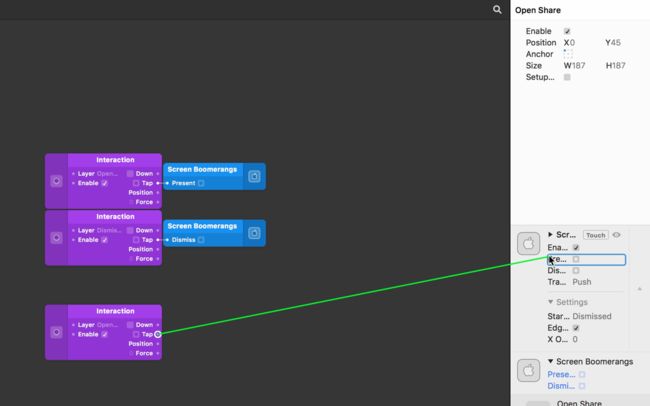
Add this Screen to our flow by hovering over Open Share, clicking on Touch, and then clicking on Tap. Like before, connect the Tap output of this to Present Screen Share.
给热区 Open Share 添加一个 Tap 交互。将 Tap 输出口连接到 Screen Share 图层的 Present 属性。
Tapping on the first thumbnail should now take us to the Share Screen. The last screen transition we want to add is returning back to Screen Boomerangs.
点击第一张图现打开 Screen Share 。最后要在 Screen Share 页面上添加一个返回到 Screen Boomerangs 页面的交互。
Again we've already set up a Hit Area for this under Screen Share called Dismiss Share. Hover over Dismiss Share, click Touch, and then click Tap. Connect the Tap output of this new Interaction to Dismiss Screen Share.
找到 Screen Share 组内名为 Dismiss Share 的热区,给这个热区添加 Tap 交互,连接到 Screen Share 的 Dismiss 属性。
Interaction within screens 屏幕间的交互
We should have our whole screen flow worked out now. Anything we want to do within screens is just as easy.
整个流程就完成了。想在屏幕里添加其他的交互也很简单。
For example, we can make the Boomerangs grid scrollable. The Boomerangs layer itself goes beyond the height of the Viewer, with a few more thumbnails.
例如,让 Boomerangs 页面的列表可以滚动。Boomerangs 组的高度需要超出屏幕。
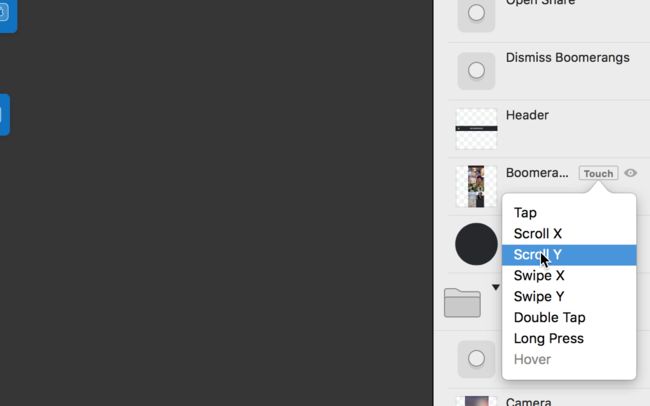
Open Screen Boomerangs in the Layers panel. Hover over the Boomerangs layer, click on Touch, and then click Scroll Y.
展开图层窗口中的 Screen Boomerangs 组。给 Boomerangs 图层添加 Scroll Y 交互。
Offset 偏移
Offset within screen transitions is a standard iOS Push transition behavior, however not crucial to creating screen flows. To create an offset in this prototype we need to first know what the Screen Share offset is.
屏幕切换过程中的偏移是标准的 iOS 转换行为,但对创建屏幕流程没有影响,只是一些细节性的东西。
板栗:那偏移到底是啥呢,先完成下面的操作,最后再对比一下就知道了。
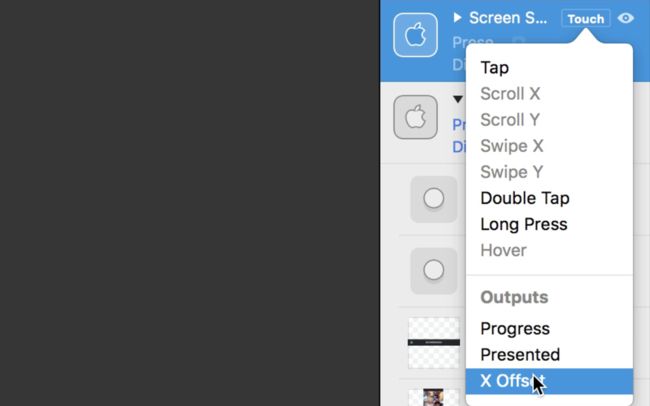
Hover over Screen Share, click on Touch, and then click the X Offset output.
给 Screen Share 图层组添加一个 X Offset 交互。
You might offset change as we go between the two screens. Connect this outputted value to the X Offset property of the Screen Boomerangs by clicking and dragging into the Layers panel.
将 X Offset 模块的输出口连接到 Screen Boomerangs 模块的 X Offset 属性。
Now when we go between screens, the outputted Screen Share Offset affects the Screen Boomerangs Offset input too.
现在,从 Screen Boomerangs 页面打开 Screen Share 页时,除了 Screen Share 页面是从右往左打开,下面的 Screen Boomerangs 页面也会有一个从右往左退出的动画,但是运动幅度要比上面的页面小。
板栗:可以断开两个 X Offset 的连接打开-关闭,再连接上两个 X Offset 打开-关闭,对比一下就知道区别了。
相关教程
5. 滚动 Scrolling Views
滚动页面。
9. 多个状态切换 Multiple States
在两个以上的状态之间切换,如 Tab 栏。
相关案例
18. Instagram Boomerang
屏幕和滚动之间的转换。
相关模块
Interaction Scroll
相关图层
Hit Area Screen
NEXT UP
Timed Animations 延时动画
