1.安装Zabbix
①从官网下载对应版本的zabbixrpm包
[root@localhost src]# wget repo.zabbix.com/zabbix/3.2/rhel/7/x86_64/zabbix-release-3.2-1.el7.noarch.rpm
--2018-02-01 09:52:56--  http://repo.zabbix.com/zabbix/3.2/rhel/7/x86_64/zabbix-release-3.2-1.el7.noarch.rpm
正在解析主机 repo.zabbix.com (repo.zabbix.com)... 162.243.159.138
正在连接 repo.zabbix.com (repo.zabbix.com)|162.243.159.138|:80... 已连接。
已发出 HTTP 请求,正在等待回应... 200 OK
长度:13392 (13K) [application/x-redhat-package-manager]
正在保存至: “zabbix-release-3.2-1.el7.noarch.rpm”

100%[=======================================>] 13,392      --.-K/s 用时 0.02s

2018-02-01 09:52:56 (546 KB/s) - 已保存 “zabbix-release-3.2-1.el7.noarch.rpm” [13392/13392])
②此步骤为rpm安装zabbix的repo源,安装完成后可以在/etc/yum.repos.d文件夹下看到zabbix.repo的库
[root@localhost src]# rpm -ivh zabbix-release-3.2-1.el7.noarch.rpm
警告:zabbix-release-3.2-1.el7.noarch.rpm: 头V4 RSA/SHA512 Signature, 密钥 ID a14fe591: NOKEY
准备中...                          ################################# [100%]
正在升级/安装...
   1:zabbix-release-3.2-1.el7         ################################# [100%]
[root@localhost src]# ls //etc/yum.repos.d
CentOS-Base.repo       CentOS-fasttrack.repo  CentOS-Vault.repo  zabbix.repo
CentOS-CR.repo         CentOS-Media.repo      epel.repo
CentOS-Debuginfo.repo  CentOS-Sources.repo    epel-testing.repo
③安装zabbix服务器、agent、web支持等组件
[root@localhost src]# yum install -y zabbix-agent zabbix-get zabbix-server-mysql zabbix-web zabbix-web-mysql
2.zabbix的初始配置
①编辑mysql配置文件/etc/my.cnf增加如下配置语句
character_set_server = utf8
②进入mysql数据库,新建zabbix数据库,并将字符集设置为utf8
mysql> create database zabbix character set utf8;
Query OK, 1 row affected (0.00 sec)
③新建zabbix使用的用户,并设置密码
mysql> grant all on zabbix.* to 'zabbix'@'127.0.0.1' identified by 'zabbix';
Query OK, 0 rows affected (0.01 sec)
④将zabbix的数据库文件导入新建的数据库中
[root@localhost src]# cd /usr/share/doc/zabbix-server-mysql-3.2.11/
[root@localhost zabbix-server-mysql-3.2.11]# gzip -d create.sql.gz
[root@localhost zabbix-server-mysql-3.2.11]# mysql -uroot zabbix < create.sql
⑤启动httpd服务(yum安装zabbix的时候会自动安装上httpd与php)
[root@localhost zabbix-server-mysql-3.2.11]# systemctl start httpd; systemctl enable httpd
Created symlink from /etc/systemd/system/multi-user.target.wants/httpd.service to /usr/lib/systemd/system/httpd.service.
⑥编辑配置文件/etc/zabbix/zabbix_server.conf,加入如下内容
DBHost=127.0.0.1
DBPassword=zabbix
⑦启动zabbix服务,并将zabbix服务加入启动列表
[root@localhost zabbix-server-mysql-3.2.11]# systemctl start zabbix-server
[root@localhost zabbix-server-mysql-3.2.11]# systemctl enable zabbix-server
Created symlink from /etc/systemd/system/multi-user.target.wants/zabbix-server.service to /usr/lib/systemd/system/zabbix-server.service.
[root@localhost zabbix-server-mysql-3.2.11]# netstat -lnpt
Active Internet connections (only servers)
Proto Recv-Q Send-Q Local Address           Foreign Address         State       PID/Program name
tcp        0      0 0.0.0.0:111             0.0.0.0:*               LISTEN      1/systemd
tcp        0      0 0.0.0.0:22              0.0.0.0:*               LISTEN      914/sshd
tcp        0      0 127.0.0.1:631           0.0.0.0:*               LISTEN      917/cupsd
tcp        0      0 127.0.0.1:25            0.0.0.0:*               LISTEN      1206/master
tcp        0      0 0.0.0.0:10051           0.0.0.0:*               LISTEN      11734/zabbix_server
tcp6       0      0 :::111                  :::*                    LISTEN      1/systemd
tcp6       0      0 :::80                   :::*                    LISTEN      11641/httpd
tcp6       0      0 :::22                   :::*                    LISTEN      914/sshd
tcp6       0      0 ::1:631                 :::*                    LISTEN      917/cupsd
tcp6       0      0 ::1:25                  :::*                    LISTEN      1206/master
tcp6       0      0 :::10051                :::*                    LISTEN      11734/zabbix_server
tcp6       0      0 :::3306                 :::*                    LISTEN      10419/mysqld
⑧编辑php的配置文件/etc/php.ini修改时区,将date.timezone的值修改为Asia/Shanghai。
修改完成后重新启动httpd服务
[Date]
; Defines the default timezone used by the date functions
; http://php.net/date.timezone
date.timezone = Asia/Shanghai
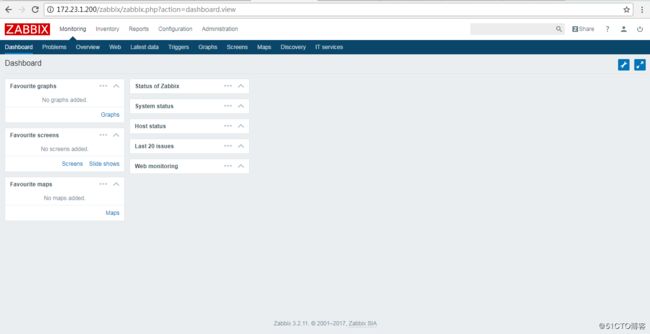
⑨安装完成后在浏览器访问http://ip/zabbix完成web端的初始化配置后即可登录管理,默认账户admin,密码zabbix
3.Zabbix客户端安装(Linux客户端)
①与zabbix服务器一样,显配置好repos源后,yum安装zabbix-agent
[root@test03 ~]# yum install -y zabbix-agent
②编辑客户端的配置文件/etc/zabbix/zabbix_agentd.conf 修改指定的服务器信息
Server=172.23.1.200              //指定服务器地址(被动模式)
ServerActive=172.23.1.200        //指定服务器地址(主动模式)
Hostname=Zabbix-agent-test03     //指定主机名(需要同web设置一致)
③启动zabbix-agent服务
[root@test03 ~]# systemctl start zabbix-agent
[root@test03 ~]# systemctl enable zabbix-agent
Created symlink from /etc/systemd/system/multi-user.target.wants/zabbix-agent.service to /usr/lib/systemd/system/zabbix-agent.service.
4.Zabbix客户端安装(Windows客户端安装)
①在C盘新建zabbix文件夹,从官网下载对应版本的zabbix_agent
②将zabbix_agents_3.2.7.win\conf\zabbix_agentd.win.conf以及
zabbix_agents_3.2.7.win\bin\win64文件夹内的zabbix_agentd.exe、zabbix_get.exe、zabbix_sender.exe拷贝至c:\zabbix下
③修改conf文件内容如下
Server=172.23.1.200              //指定服务器地址(被动模式)
ServerActive=172.23.1.200        //指定服务器地址(主动模式)
Hostname=zhou-PC                 //指定主机名(需要同web设置一致)
④以管理员权限运行cmd,切换至C:\目录下之后执行如下命令。显示successfully则表示zabbix-agent服务安装启动完成。
c:\zabbix>zabbix_agentd.exe -c c:\zabbix\zabbix_agentd.win.conf -i
zabbix_agentd.exe [7420]: service [Zabbix Agent] installed successfully
zabbix_agentd.exe [7420]: event source [Zabbix Agent] installed successfully

c:\zabbix>zabbix_agentd.exe -c c:\zabbix\zabbix_agentd.win.conf -s
zabbix_agentd.exe [6164]: service [Zabbix Agent] started successfully
